Sending pots out into the world!
Here are a few places that you can find my pots!
My brother, Jeff, and his wife, Eliza own an awesome coffee shop/ cafe on Main Street in Keene, New Hampshire (our hometown), Brewbakers. They roast their own coffee, have amazing soups, sandwiches and baked goods. They have live music, art exhibits and a great vibe. And now they have mugs for sale that I made! One side has the Brewbakers logo, and the other side has a word such as: percolate, energize, caffeine... No two are the same!

For the next month, my father, Jim Murphy, and I will be featured artists at Vermont Artisan Designs on Main Street in Brattleboro, Vermont. It's a really wonderful gallery that I have frequented over the years and I am so happy to be part of. Tonight, Friday, Dec 7th, is their gallery walk.

Iam really excited to be part of Lillstreet Art Center's holiday show, Let There be Light, once again this year! Lillstreet was where my studio and where I taught for 10 years. I always feel like I'm sending my pots home when I ship them to Lillstreet. It's always a wonderful place to shop during the holidays- in the artists' studios on the 2nd and 3rd floors and in the gallery!

Last weekend's studio sale was a great success! I really do love opening up my studio and spending the weekend seeing old friends and meeting new ones. I even got to meet quite a few folks who read my blog- but I hadn't met before. That was such a treat! I will definitely be having a spring studio sale!
If you're not in one of the places I listed above, you can get some great pots! Below are just a few of the pots that you'll find in my Etsy shop! I'm having a $5 shipping sale right now! I'm stocked up with boxes and bubble wrap and ready to ship!

In between shipping pots this weekend and playing in the snow that is forecasted... I'm hoping to get my hands back in wet clay! Enjoy your weekend too!
Emily Murphy Pottery Etsy Sale!

Mugs, plates, bowls, soap dispensers, little dishes... Everything is ready to be shipped! At the moment, I'm only shipping in the US, but if you're somewhere else, send me a note and I can see if we can figure something out!
Happy holidays!
Even though I am perhaps a week later for this
Even though I am perhaps a week later for this... I just felt the need to express how thankful I am feeling. For so many things... I really want to thank you for the outpouring of support that I felt after mylast post about my nephew Ayrie. It can be so hard to put yourself out there so fully. But it was so wonderful to be received with warm, open arms by so many people. I am now getting several emails a day with folks sharing their stories of their journeys through their grief. So thank you. It's so wonderful to be able to connect with folks all around the globe.
________________________________
This weekend (Nov 30 & Dec 1) will be the first time that I have opened up the door of my Minneapolis studio for a sale. You can get more info on my holiday sale hereand you can view the Facebook event here. It has really been fun and energizing to share the images of my new work, and setting up my studio (like this photo I posted of my wrapping/packing station that I posted on my FB business page - something that maybe only other potters would be excited about!). Before moving to Minneapolis, I had a studio at Lillstreet Art Center in Chicago where I had a whole community of potters and other artists right in the same building. It is so different having a studio at home. But having such a great community online through this blog and Facebook makes me feel like I'm still in a big building full of artists! So in honor of your support and encouragement, I'm sharing this coupon for 20% off all full priced items this Friday and Saturday *in* studio only.Just mention it when you're checking out (no need to print it out).

If you're trying to figure out how to balance holiday shopping with the kids this weekend... We have a play room in our basement next to my studio. We'll have holiday movies on and lots of toys to play with where they can hang out. And kid-friendly snacks and drinks (as well as grown-up drinks and snacks too!). And there is a good chance that Shiya and/or Ada will be there hoping to play with some friends!
Here are some little dishes that I made just for this sale. (And had so much fun making!) They are small (4.5" - 5+" in diameter). Perfect for a small snack, a spoon rest, a place to put your tea bag or ball. Just the right size (and sturdy weight) for a kid. Or maybe you could toss the change in your pocket or your jewelry at the end of the day. An infinite number of uses...

And below is what the bottom looks like. I cut them off with a stretched out spring when I took them off the wheel. A nice, simple surprise on the bottom of the pots. By the way... I am dabbling in Instagram as you can see. Here's my page- a mix of pottery and family.

One more note about the sale... My sister, Nora, is organizing a great project this holiday season - Gift Bags for Homeless Youth. We're going to put together (at least!) 30 gift bags that we'll give to the organizationFace2Faceto distribute to local homeless youth. I will have a box at the sale to collect items for donations- toiletries, gifts cards, etc... If you have anything you would like to donate, we'd love to have you be a part of this! More information can be found at theevent pageon FB.
______________________________
I hope you have a wonderful weekend. Hopefully you can make it to a pottery sale or art fair this weekend no matter where you are. Or if you're having one, best of luck! I think I am missing about a dozen here in the twin cities since I'll be busy with mine! 'Tis the season!
This is a post I have literally written a half dozen times over the past two years

Two years ago on September 29, 2010, my nephew, Ayrie, pass away unexpectedly at the age of four and a half. You might have read the post I wrote in March 2010, A New Sense of Normalwhere I shared his story.I cannot even begin to tell you how terrible that day was. And there were so many days, weeks and months that followed it that hurt even more than I ever thought was possible.
I have tried so many times over the past 2 years to write this post. There is something about putting your thoughts into writing that makes it real in a totally different way. When I've tried to write this before I've always been stuck on describing the days before, of, and after Ayrie's death – those are important days, important to me, but I don't know how to talk about them yet. They are too important to start with. But I do want to talk about the years since.
You may or may not know me. This might be the first time that you're reading my blog. I usually keep things pottery focused, but are things in my personal life that are too intertwined to separate out – they are too much a part of me and a part of my work.I needed to write this for me. I needed to put this into words for Ayrie. No matter how hard or how imperfect it would be. This experience is part of who I am and shapes every aspect of my life.My journey over the past two years has been long and will continue on for the rest of my life. I have never experienced grief like this before. A loss like this is not something that you get over. I don't want to get over it. That would feel like forgetting. But I have tried to figure out how to get up each day and try to live them in a way that honors the spirit of Ayrie. I thought I would share some of what I have learned through my grieving process.
You will never regret the time that you spend with the people you love. During the darkest moments after Ayrie's passing, I was able to hold onto the knowledge that I had made Ayrie a priority in my life. I spent so much time with him. Sharing a bowl of cereal in the morning, going out to eat at the “meatball store (aka Ikea) or sitting together in my studio each of us with our own piece of clay. It doesn't have to be a big deal. Just time together. I wish with all of my heart that we had more time together. But I am so grateful that I had as much time with him as I did. And I try to continue to live my life in this manner. Being with the ones that I love.
Grief and joy can coexist. This was a hard one for me. But I knew that it was something that I had to come to terms with quickly. I had to be present and in the moment for my nephew Shiya, Ayrie's little brother. He needed to both learn how to cope with this loss of his brother – his idol – and also have a childhood that was as carefree and happy as it possibly could be. And I also knew that I was going be having a baby in 6 months – something that is a joyous, emotional rollercoaster anyway, and I had to figure out how to be happy and also be ok with being sad. I found that once I really embraced that grief and joy could coexist, I would find myself sharing a story, in tears... and then end up, by the end, laughing and remembering something silly that Ayrie had done. I had to really give myself permission to let these two seemingly opposite emotions coexist.
Every person grieves in a different way. No one way is better or worse than another. It's just different and personal. If you don't embrace this, it can push you apart from the people that you need most. My husband, Ian, and I have a duplex. We live on the upper floor and my sister and her boys lived on the 1st floor. (My sister has since bought the house next door to us.) Ayrie would refer to all of us as his “whole house family. We all have grieved in our own way. And I think we have all done a really good job at honoring one another's process of grieving. I have learned through grief counseling (which I'll talk more about later) that often the conflict that arises within families about their differing ways of dealing with a loss can be what really pushes people apart. But we have consciously tried to respect each other's journey. My sister has written a lot. She says that it really has flowed out of her, sometimes she just starts to write and release... rarely going back over what she has written because she is writing what she feels compelled to write. I found it harder than ever to write. But she found it easier than ever. I encourage you to read through her posts on her family blog.
You will discover a community of people to support you. But you have to be open to accepting it. This was an unexpected, wonderful thing. In the days after Ayrie passed, moms from Ayrie's school show up to clean our house and comfort us. For many months, we had meals and groceries provided to us by friends and family. It was hard to function at any level, so it was truly wonderful to have such nourishment show up at our door. Flowers left at on the front steps. And so many cards, notes, texts and phone calls from friends, family and acquaintances and total strangers. I never thought that I would actually make friends during such a hard time.
It's ok to ask for help. There is a point after a loss where the daily activities have to return to some sort of normal. Bills have to be paid, groceries have to be bought. Work needs to resume. But it was hard to do this. Ian and I started going to grief counseling at the Center for Grief, Loss and Transition. It became really important for me to have a time set aside to focus on Ayrie each week, no matter what. There was a moment where I just felt like I didn't know what to do. I needed help. For me, it helped to go to counseling, but for others it could be something completely different. It took me quite awhile after I told myself that I needed help to say it out loud and ask for help when I felt like I just didn't know what to do anymore. We have also gone to a couple of events at the Center. One was about dealing with loss during the holidays. We did a really wonderful activity that we have since shared with family and friends. We decoupaged tissue paper and rice papers onto glass candle holders, vases and votives. Of course I like something that involves making... it's a really wonderful project because almost anyone can do it regardless of age or artistic ability. During the process of making, memories are shared while a new one is being created. And then at the end, candles can be lit while stories are shared. And then there you have a beautiful candle holder to bring home that will remind you of your loved one.

Reclaim the day for celebration and reflection. For two years now, on the anniversary of Ayrie's passing, we have traveled to somewhere beautiful and far from home. Last year we traveled to Gold Hill, high up in the mountains above Boulder, Colorado. This year we went to Tucson, Arizona. We all knew that we wanted to be away from home. Away from the distractions, somewhere beautiful where we could give ourselves space to reflect and honor Ayrie. It's become a really wonderful tradition. We found ourselves actually looking forward to the anniversary of his passing instead of dreading it. There was a point in time, not very long ago, that this was inconceivable. I know that Ayrie would love that we are having adventures and time together as an extended family. This is a tradition that we plan on doing every year.

_____________________________
Ayrie was my buddy in my studio. He spent more time with me in my studio than anyone else. It was really hard to go back in there and work after he died. It was so empty. So lonely. I would go down there and just cry. Ian started going down there and sit with me to help me ease back in. It really helped. When I was finally ready to get my hands in clay again, I decided that I wanted to work on a project with Ayrie. He had just finished up a book of dinosaur drawings with his class and was really into drawing Ankylosaurus. His teachers gave us the book they made. I decided that I wanted to put his drawing on a series of cups. The cups were the first things I threw. But when it came to getting the images on the pots, I didn't know how to actually do that. Well, I knew of the possible ways to do image transfer, but I didn't technically know how to do them. So I set out on a mission to figure out the best way to do what I wanted to do, and learn that technique. That is how I started working with laser printed decals. 2 years after I first threw these cups inscribed on the bottom "for Ayrie with love," I finally finished them. I loved working with his drawings. It felt like we got to spend a little more time together.

I wanted to share with you the artist statement that I wrote about this new body of work I have been making.
Emily Murphy
September 2012
Over the past three years, my life has turned upside down. I moved from Chicago, my home for 10 years to Minneapolis. Bought a condemned, abandoned duplex and completely renovated it, inside and out. Married my partner, Ian, after 14 years together. Built a studio in our new home. Switched from soda fired stoneware to cone 10 oxidized porcelain. Then two years ago this month my deepest fear happened. We lost our nephew, Ayrie, at the age of four and a half. A loss that has left me forever heartbroken. At the time I was 3 months pregnant. I had to learn how to navigate through my grief and my joy. In April of 2011, we welcomed our daughter Ada into our world.
For the 10 years before moving to Minneapolis, I honed my skills and aesthetic in soda firing, developing a strong body of work. I felt very comfortable making the pots I was making, yet still felt like I was always pushing myself to the next level. Then suddenly, everything was different. I was faced with pristine studio, a pallet of porcelain and a shiny new kiln. And I didn't know where to start. So I went back to the beginning. First thing that I did was remove any deadline for my work. I temporarily withdrew from galleries; turned down any orders and turned inward. For many reasons, I cut myself off from the outside world and I started throwing. Strong, simple forms that will stand on their own, no matter what the surface treatment, glaze or firing is. It's important to me to be true to the material. My soda work was all about the clay, form and firing working together. Doing high fire porcelain I want to be as true to the material as possible. I didn't want to try to mimic soda firing in an electric kiln. I wanted to take advantage of everything that porcelain has to offer. I started by making a couple hundred tea bowls. I kept away from the influence of “the market by giving them all away. Slowly, as I've gotten to an exciting and comfortable place with my new body of work, I'm creeping back into the world of clay outside of my studio.
The changes in my life have spanned the range from the best things that have happened to me, to the unimaginable. It would have been easy to fall back into the routine of pots that I had been making over the previous decade. It would have been comfortable and comforting. But I'm not the same person that I was three years ago. And if I am being true to myself with my work, the pots can't be the same. This new body of work reflects where I am in my life now. And it will continue to evolve and change as I do.
Thank you so much for reading. It means a lot to me.
how-to: make your own set-up for photographing pottery

One of the things I really wanted to prioritize when I started building my studio was that I needed a place that was easy to take photos. So I set about designing a photo booth that could be mounted to the wall and be opened up easily when it was time to take photos.
I keep tweaking the set-up, but here is where it is at right now:

Here is what the framework looks like:

A couple of things to note:
- There is a power strip mounted on the side for easy plugging in of lights- and the ability to turn them all on and off in one place.
- The "walls" that fold out have plexi-glass on them. This helps give the frame structure without cross braces. I added a frosted coating to the plexi. It isn't enough of a diffuser. I went to a photographing pottery workshop and it was suggested to use a shower curtain liner- the fabric ones that are 100% polyester. Different fabrics can cast a yellow or bluish tone when light shines through it. Using this type of fabric means the light will be white. I bought mine at Target. It seems to do the trick quite well.
- The swing arm lamps are from Ikea. You can clamp them onto a table or screw the bracket onto the wall. I love having the lights on swing arms. It means I can move them around quickly and easily to adjust to the pot I am photographing at the time.
- The slats on the back are not actually against the wall. There is a space behind them. They are there so I can clip a backdrop with binder clips are different heights.
- I always take my photos at night. I have 3 windows in my studio and I don't have blackout shades on them so in order to control the lighting on the pots- I have all the lights off except for the photo booth lights and only photograph at night.

Thediffuserfor the top lights is built out of pvc. And then nylon string is used as a pulley system. In the below photo it shows a frosted plastic- but I am not using that anymore. I am actually using the nylon shower curtain liner instead. But this photo makes it easier to see how the diffuser is designed so I used it instead of a newer photo of the set-up.

When I need prop up a plate, platter, etc..., I find something that is pretty heavy around and then use a piece of clay where the prop comes into contact with the piece for a little extra friction. The backdrop is very easily scratched and marked so it is important to put something protective down under it. Like this piece of clean packing foam. A hard brick works well, but I didn't have one handy. During this photo shoot I used a new can of stain. I momentarily put down the brand new, perfectly clean can without the foam at first and it left a ring. I didn't even notice until later. Arg. I posted this on Facebook and it was funny to hear what other people used to prop up when photographing pots!

Here is an example:

These are the bulbs that I use. I think I got them after doing a photography workshop- but I can't actually remember. Either way, they do the job. They seem to have a nice white color to them.

I use a graduated background to photograph my pots on. It's really a way to get the look of using a grey backdrop with the lighting set-up in a particular way but in kind of a short-cut way. (see the link to Michael Coffee's set-up below for the real deal.) The material of the background is vinyl and there is a seamless non-glare coating sprayed onto it. It is very easily scratched and marked up. No matter how careful you are. They aren't cheap and need to be replacedoccasionally. But I think it is worth it, still.This is what I am using:Veritone graduated background - O9: white to black size: 42" x 62". You can get away with the smaller size if you are just photographing small pieces (like mugs). But if you want to photograph something larger like a platter, or a row of mugs, it is just too small. There is another brand, Adorama, that you can get through Amazon. It looks the same as the Veritone, but I have not tried it yet. I also take some photos using either white poster board or illustration board and some reclaimed wood. I really love the way it turns out.

To actually do the photographing, I use a tripod. And I really love my camera,a Canon s95. It's a sophisticated point and shoot camera. It has a large image stabilizer like a dslr camera. There is a newer version of this camera, the Canon s100, Canon s110. But the version that I have seems to have the highest ratings, by far.
One little gaget that I have that I suggest for anyone with a digital camera and a wi-fi connection: the Eye-Fi memory card. It's a memory card (comes in a variety of formats and sizes to fit most cameras) that will send your images wirelessly to anywhere that you have set up: your computer, an online backup, etc... Mine is set-up to go to Picasa Web Albums for an online backup and also to my laptop. And then I get an email and text whenever photos have been uploaded. When I first started using it, it was like "finally! my photos are liberated from my camera!" Between the Eye-fi card and the camera on my phone, it has really made it super easy to give regular updates to my Emily Murphy Pottery Facebook Page. (note: some of the newer digital cameras actually come with wi-fi now like the s100/s110, so this isn't needed.)
When it comes to doing simple photo editing, I use Picasa. It is super simple to use. It is free. A couple of my favorite features from Picasa are:
- If you have a slightly crooked photo, you can correct it with the straighten tool.
- the "I'm feeling lucky" button does a great job of correcting the contrast and color. I use this with most photos.
- The crop feature allows you to set the ratio of your crop so you can do things like make an Etsy banner.
- You can create collages simply on it.
- You can add text to an image. Collage plus text = an easy flier for a sale!
I did some searching and asking around and came up with a list of other blog posts and articles about photographing your pottery that you might find helpful:
- Jeff Campana: Turning Pots into JPegs, Part One
- Michael Coffee: Shots of Pots on the Cheap and LowTech
- Warren Fredrick:A Natural Light Studio Setup
- June Perry: My Photo Setup
- Handmadeology: Taking Photos of Your Ceramic Pottery
- John Hesselberth:Taking High-Quality Photos of Your Work
- Joy Tanner: Photographing Your Own Work
- GlazeFixer.com: How to Photograph Your Pottery
- In Words and Pictures: Crafting Better Photos With an Easy DIY Light Box
- John Tilton: John's Photography Setup
- Cynthia Guajardo: Photographing Ceramic Jewelry, A Photoshop Tutorial
- Making it Lovely: Product Photography (part two)
If there is a link that you think I should add, or anything else that would be helpful/ clarifying, just let me know!

Holiday Studio Sale! November 30 and December 1
When::
Friday, November 30 ::: 4pm - 7pm
Saturday, December 1 ::: 10am - 5pm
*For more information, updates and reminders- you can rsvp on Facebook. There is a chance I will extend the hours- and this is where I will update it!
Why::
Stop by my pottery studio for some (discounted!) handmade holiday shopping! I have lots of new work to share. A few of my favorite soda fired pieces are available too.
Don't miss out on a studio sale exclusive: Seconds Sale!I've been doing a ton of experimenting this year - which means lots of 'flawed yet functional' work marked down 50% (or more!).
Porcelain mugs, platters, bowls, plates, platters, serving dishes, soap dispensers and more! Just about everything will be on sale! Cash, checks and credit cards are accepted.
Where::
My pottery studio: 3015 10th Ave South, Minneapolis, MN - please enter through the orange back door and head to the basement where my studio is. Follow "Pottery" signs (like you see in the first picture). We're located basically a half block away from the Midtown Global Market on Lake Street.
Parking::
- There is street parking on 10th Ave if you enter from 31st street.
- Or there is a parking lot in the alley directly across from our driveway that you can park in! You can enter the alley from 31st St between 10th and 11th or from 11th Ave between Lake St. and 31st St. (our alley makes a right angle)
*If you cannot make it at these times, let me know and we can try to figure out another time that would work for both of us!*
And here is just a little sneak peek at some of the pots that I will have for sale:
I am planning on having some work for sale online in early December and will be sharing that info on myFacebook Pottery Page. I'm trying hard to make sure I don't take on too much at once this holiday season. I'm not able to do as much as I once could with a one and a half year old at home!
yummy bowls

Now that I am working during my daughter's nap-time and after she goes to bed at night - I find that I don't have nearly as much time for cooking as I'd like (need, actually). So I have been in search of some recipes that we can eat for a few meals in a row without getting sick of it. Something that can be heavily prepped the night before (when Ian, my husband is around to help cook). And perhaps unusual for many, we have friends and/or family joining us for dinner on most nights. There are a bunch of different dietary considerations (vegetarian, lactose intolerant, etc...) that I need to be able to deal all of those with in one meal. So that means a meal with options that each person can customize to their dinner to suit their needs.
For some new ideas to throw into our regular meal rotation, I asked my friends on Facebook for ideas. My friend Rachel, who lives in Portland, Oregon shared an idea for something called a yummy bowl inspired by an Oregon restaurant called Café Yumm!It was just what I had been looking for! We've been making and devouring yummy bowls regularly for months now.
There is a special sauce that can be made up ahead of time and stored in the fridge for weeks. The base of each dish is usually brown rice. Then each person's bowl of rice can be topped with veggies, protein and whatever else would be good in the mix. You could do a southwest theme, an Japanese theme... but so far we tend to go with the "whatever is in the fridge" as a theme.
We (me and Ian) will chop veggies the night before. Usually while watching The Daily Show and Colbert Report. We have these great glass storage containers (Glasslock) with lids that snap on super tight. These things are the key to the veggies staying fresh forever. Seriously, I can keep chopped up cucumbers in these for almost 2 weeks. And if I put chopped onions in them, they will not stink up the fridge!

Here is the recipe for the yummy sauce:
Yummy Sauce Recipe
(via Your Home Based Mominspired by a recipe from Food.comand additional notes and tweaks by me.)
1/2 C canola oil
1/2 C almond flour/ ground almonds
- Can be found in most grocery stores in the baking aisle.
1/3 C nutritional yeast
- can be found at: Whole Foods - bulk and in cans, Amazon, any co-op, etc...
1/2 C canned chickpeas/garbanzo beans - drained and rinsed
1/4 C canned white soybeans- drained and rinsed
- These are hard to find. My co-op does not have them. 1 nearby Whole Foods had them, another did not. I have heard people substituting silken tofu for them or additional garbanzo beans when they couldn't find them. Amazon sells a case of them.
1/2 C water
1/2 C lemon juice
1/2 tsp salt
1 1/2 tsp curry powder
1 tsp. dried organo
1 tsp dried cilantro
*some other versions of this recipe add 1-2 cloves of garlic. It's good with or without it!
Directions:
Combine almond meal, beans & oil in blender or food processor and blend together. Add the rest of the ingredients and puree until creamy smooth. Cover and let refrigerate for one hour. Keep refrigerated between uses.
** I triple this recipe every time I make it. It just barely fits in my blender, but it works! Would fit easily in a larger food processor. Tripling the recipe means that you use almost the entire can of garbanzo beans and entire can of soy beans. I'm not sure what else I would do with the extra canned white soy beans. The sauce lasts for quite a while in the fridge. I just put the extra yummy sauce in a couple of mason jars for future lunches and dinners.
*** I have heard this is a great sauce for topping a veggie burger too. I haven't tried it that way yet, but I will soon!

When everything is chopped, diced, grated or blended, we set out all the options for everyone to make up their own meals.
To make your yummy bowl, you should start off with a nice handmade bowl. It'll make it taste even better. Our assorted collection of "bowl-plates" are by Bob Briscoe and Jo Severson. Then start building:
base layer: brown rice (our favorite!), white rice, jasmine or basmati rice, sauteed rice noodles (a new addition brought by friends)
next layer: yummy sauce
next layer:shredded cheese (sharp cheddar is my favorite!)
next layer: veggies! shredded carrots, shredded purple cabbage, diced bell peppers, slices of avocado, diced cucumbers, green onions, broccoli slaw, chopped tomatoes, peas, lightly steamed broccoli or sauteed greens. Whatever you have around.
next layer: - protein: we usually use chopped uprotisserie chicken and/ or sauteed tofu. black beans would be delicious... tempeh would be great... there are so many options!
top layer: ground peanuts (our favorite), sliced almonds... wasabi peas? something with crunch is a nice addition.
top top layer:salsa, teriyaki sauce. My sister just used the Spicy Peanut Vinegarette from Trader Joe's on a yummy bowl and loved it. But we usually don't add anything else. The yummy sauce is great by itself.

After everyone served up their bowls, I passed the camera around to capture what everyone dished up! I am getting hungry just looking at these photos... luckily I have 2 more jars of yum sauce in the fridge!

Enjoy!
inspired!
One of the highlights for me was (finally!) meeting Michael Kline in person. We've been communicating through our blogs, email, Facebook, and even a phone call from back in 2006 (yes- both our blogs go back that far and then some!). So it really was about time to connect in person.

I had intended to photograph much more of the show than I did, but I was too caught up the the moment didn't end up taking very many photos. There is really nothing like seeing pots in person! Here is one that I did take ofMichael Hunt and Naomi Dalglish of Bandana Pottery's work. They weren't up for the festival this weekend, but they were in town in May for theUpper Saint Croix River Valley Studio Tour.

I wish I had taken some photos ofBirdie Boone's work orKip O'KrongleyorSunshine Cobbto name a few. You should check out their pots!
The Northern Clay Center did a great job at getting the demos from the weekend online quickly. This video of Michael Kline and Steven Colbydemonstratingtheir surface decoration techniques was up by the time I got home! It's great to see Michael do his brushwork. And I have never seen anyone approach glazing the way that Steven does!
Another APF artist that demonstrated was Chandra DeBuse. I wasn't familiar with her work before- but now I'm a huge fan! If you watch this video of her showing her handbuilding techniques- I guarantee that you'll learn something new!
I don't think there is a video of Kathy King- but if you ever have a chance to see her, go! She showed a variety printmaking and image transfer techniques. I have so many things that I need to try now.

A bonus to the clay filled weekend was a visit to my home and studio on Monday by Michael. It was fun totally geeking out - talking about blogging, pots, family and trying to balance all of them. We traded pots too. The chunky dish on the right is now lives in Minneapolis and the mug on the left is headed back to North Carolina with Michael.

I'm now overflowing with inspiration now. I have so many things that I want to work on right now. I'm back into the studio and I've started filling all the horizontal surfaces up with pots again!

___________________________________
I just had to share this photo that I took photo of my *fabulous* daughter this morning. She's quite a character and definitely an inspiration!

What is Pinterest?
I think this sums it up best:

Ok, it's really more than that. But it definitely helpsfulfill my desire (need?) to hoard things. But the reason why I really love it is because it allows me to organize things that I find online. If you saw my recent post about my studio, you'll understand my love of organizing. The way Pinterest works and the way my brain works definitely seem to go together. I have always had a problem with having a few dozen tabs open in my browser. Lots of cool photos, projects and articles that I wanted to do *something* with, but didn't know what quite yet. When I finally started using Pinterest, it was a bit of an aha moment- this is what I had been waiting for!
But this still doesn't tell you what Pinterest is. Pinterest is a visual pinboard. It's a way to visually organize photos, links, articles, tutorials, etc... You make up your own categories and when you come across something online that you want to save for future reference, you can "pin" it to one of your boards. Or you can look thought Pinterest's website (or app) to discover things that other people have been pinning.
So here is a photo of what my "boards" look like (just a few of them, really). If you click on any of these screen shots, it'll take you to the page that you see. I have lots of pots pinned, as well as recipes, organizing tips and projects to do with kids.

One of the fun things that I've enjoyed is categorizing different types of pots that I'm interested in at the moment. It's a little like putting together your own "500 mugs" book. And besides forms, decoration, etc..., I'm also thinking about the way pieces are photographed- what was it about it that grabbed me?

I also use it as a way to organize my thoughts for a project. I've been wanting to get some images on clay so I started collecting some different links to tutorials. I am such a visual person- this is the ideal way for me to save links.

I have also discovered through the Google Analytics of my website that about a third of the traffic to my blog actually come to my site from Pinterest! Whoa! I didn't even realize that was happening. But since I write a lot of tutorials, it makes sense that a lot of my posts are pin-worthy. The one that you see pinned repeatedly below is from a blog post from 2007- How to: make a texture roller for clay. You can see why people are pinning things and from this pin I've noticed that in addition to clay folks liking the tutorial, also cake decorators using fondant, teachers using playdough, etc... are pinning it and sharing it on their blogs. It's fun to be able to connect with people in other fields.

People also pin lots of photos of my pots from my website- but it just reminds me that I need to update my website in a big way and get my new work up there!
If you want to see if photos from your site have been pinned, copy and paste this into your browser and fill in your website here (no www or http):http://pinterest.com/source/yourwebsite.com/ . You might be surprised what pops up!

I do not have ads on my website so increased traffic does not equal anything directly financial. But I really like connecting with other makers out there. I know that people have found me via Pinterest and followed me to my Facebook page or my blog. And various websites have added links to my site and posts and that is really helpful for page rank on Google. Many people pin their own Etsy listings. I know that Pinterest used to frown upon that- but when I was looking through their Pin Etiquette, I couldn't find mention of that anymore. My Etsy shop does not currently have any listings, so it hasn't really been anything that I've have to think about one way or the other.
A couple of thoughts to make your photos/ pages more pinnable: name your photos well. It's hard to do this retroactively, but you could start doing it from now on. A lot of times people will not edit the text that automatically pops up when they pin a photo. So think about what you want listed under a pin and make it descriptive. Use your name and/or website, and a description of what the photograph or the post/page is actually about. It's a good idea in general because it'll help people find you via Google.
The other thing that I have started to do recently because of Pinterest is write some text on the photo:

That way when someone pins a photo- my blog is given credit easily and when someone is looking back at their pins and trying to remember why they saved something, it is clear.
If you're ready to get started, this page has some helpful info for you. I'd suggest you to install a "pin it" button on your bookmark bar. And if you have a blog or website, you can follow the previous link and get the details on how to add a Pin button to your site. When you do start pinning, make sure that you give credit to the original source. If you're pinning a specific blog post, don't just pin the entire website. Or a Google image search or a Tumblr blog. If might take an extra minute to track down the original source, but I think it makes the entire user experience better. I try to check out the original sources when I repin something.
Pinterest also has a social aspect to it. You can 'follow' friends and see what they are pinning. Or if you like a board that you stumble across, you might want to follow them to see future interesting pins that they come across. Everyone seems to use Pinterest a little bit differently. I love the way that my sister, Nora uses it to explore color or the imagery that my dad, Jim is drawn to.
So that is Pinterest summed up for you. Be warned - it can be a big time sink! But I think it's a pretty fun and useful one. Enjoy!
a pottery studio tour: my sunny basement studio
And so our tour begins...
My studio is in our basement. But it really doesn't feel like it, it has lots of light and plenty of space. We bought our house 3 and a half years ago. It was a condemned duplex that was a foreclosure that had been empty for years – but the reason why we fell in love with it was the space... and also that it is a brick house. How could I resist a house made of clay. Even though we saw the house in the middle of a bitter Minnesota winter without any heat or lights, we somehow we saw the potential in it. And long story (very) short: we renovated the whole house and built my dream studio. Every pipe is new and 51 of the 54 windows (yes, you read that right!) were replaced. There was no surface untouched. The studio was the last space that was built out. And I'm still making changes here and there. After renting studio space for so many years, I had been planning my dream space in my head. And it is such a joy to be able to work in this space that is actually mine.
That was a slight side-track. Back to the tour. You have to walk past the laundry room and our pantry and then you'll find my studio door. Right inside of it is a wide hallway that I turned into a display area. As you might have seen in a recent post, my display just got a make-over. I still have some more to do on it, but you can get the idea. This hallway leads into what I call my "clean room."

The clean room has my display, my kiln, my desk, my photography set-up and packing/ shipping area as well as a sink.

The kiln (an L&L which you can read more about here) came with 1 more ring on it, but when I was pregnant I couldn't load it so I took off a ring to make it a little shorter. It's still quite large. And now that I am working fewer hours than before (life with a 1 year old!), the slightly smaller kiln is great.

This weekend my husband helped me put up some new shelves in a couple of places in my studio, including above my desk. It's awesome to have this additional space. I recently got a laser printer to start printing some decals that will go on my pots (more on that in a future post!) and I finally got it out of the box this weekend so I can start printing!

I usually refer to these shelves as "mug shelves." My glaze test tiles/ samples are on the top shelves. The rest are filled up with pots fresh out of this weekend's kiln!

And this area is my photography area, packing and shipping area and, of course, the sink. The photography set-up folds flat against the wall and then opens up when I use it. The next photo shows it opened up. I'll write a more detailed post on the set-up soon. It's pretty great being able take photos so easily. When I was building the space the 2 things that I knew were easy to overlook or cut for lack of space was photography and packing and shipping. I tried really hard to incorporate good set-ups for this. I wish I had even more space for boxes and packing materials- but there were limits. I'm still trying to figure out ways to stash extra bags of peanuts and bubble wrap.

This is the photo set-up opened up. There are lots of adjustments that can be made depending on what's being photographed.
The next room (just past my desk) is the glaze room. It's where I store dry materials, mixed glazes and my homemade spray booth.

The countertop is nice and easy to clean when I make a mess when glazing or mixing up glazes. It was just stock countertop from Home Depot. I got it during a 20% off sale. All the shelves were built to fit my buckets. The buckets on the right usually are under the counter, but I'm in the middle of replenishing my glaze inventory after the last 2 firings.

This is my homemade spray booth. There is usually a filter over that opening, but I threw out the last one that was clogged up with glaze. I'm hoping that I can remember the details of things like the exhaust fan enough to share with you a bit of a tutorial on a DIY spray booth – it's been 2 years since it was built! It's not fancy – but I like it so much better than the commercial booth that I used to use (which had such a weak exhaust fan). And it was way cheaper to build than to buy!

There used to be a wall that split this space into two separate rooms, but it's so much better opened up. Lots of light and great cross-ventilation. The other room is where I make pots. Throw, trim, decorate, hand-build...

If you look up on the left, that's the top ring for my kiln! It has a nice place to, literally, hang out until I decide that I want to go back to the bigger kiln. Below it is a ware cart. The canvas covered countertop is 14 feet long, if I remember correctly.

And this last space also got some sweet new shelves this weekend! On the left is my throwing wheel and on the right is my trimming wheel. It's great having separate spaces so I don't have to clean up when switching back and forth between throwing and trimming. I ended up being offered to buy a used Brent C from another potter for next to nothing. At the time I didn't even have space to use it, but I knew it was a deal that I couldn't pass up. So I bought it and stored it until I had space to have 2 wheels.
You can see the bat storage under the wedging table- I love how organized and accessible they are. And I just put up some hooks on the wall to store my foam trimming bats.
If you want to see how to make a foam bat, I have a tutorial on how-to make a foam bat here. And here I wrote about makingthe splash pan for my trimming wheel.
And that's my studio. Thanks for joining me on the tour! I feel so lucky to have this space. It's really a joy to work in. Having a studio at home has made it possible for me to work while I have a little one at home.
rejuvenated
I've been out of the blogging loop for a few weeks now. We were on vacation visiting lots of family out east (photo at the bottom of this post). Even though I haven't been blogging, I have a long list of posts in my head waiting to come out: review of the RZ respirator mask; my homemade spray booth; my photography set-up; follow-up on my sink trap, using Pinterest, venturing into decals... just to name a few.
____________________
My mind feels a bit scattered with all the different things I've been working on- but in a good way ;). I'm almost done with the revamping of my studio display. My shelves have been refinished to better go with my new body of work. Originally I had stained the Ikea Ivar shelves a warm reddish-brown. It was a nice and warm stain that went with my soda-fired stoneware. It just didn't really work with the porcelain. I wanted to really make the work pop. Plus, it had been 10 years since I had originally stained them so it was time for a change. And I love how they turned out!

I don't have a ton of space for "permanent" display, but I've taken advantage of an extra wide hall leading into my studio. I still have some more work do do to finish it up and add some more display space, but I'm off to a good start. I am hoping to have people stop by to shop and visit more often than I have previously in this space. At my studio in Chicago at Lillstreet, there was a constant stream of people so it's a been an adjustment to having a home studio! I'm glad that I stopped neglecting my studio display. It makes me extra happy when I go down to my studio now.

_____________________
I finally started glazing yesterday. I'd let the bisque build up for a while. Now my studio is transitioned into glazing mode. I'm already giddy to see the results. It's been so long since I have fired a glaze kiln- I'm really excited to have some fresh work! I have a couple of shows coming up, as well as some orders. And I am starting to work with some decals (more on that in a future post!). I was reminded yesterday how much I love my homemade spray booth - and I realized that I haven't actually shared it on my blog yet. Again, that'll be another post. (I told you I was scattered... didn't I?)

This next part will *also* eventually be its own post. But I just wanted to mention another project that I am working on. I am hoping to start a parent group/ play group for moms and dads who are potters (or other makers) and have young kids. It'll be in the Minneapolis area, of course. I'm lucky enough to live in a clay/pottery/ceramics rich area that we can form a group like this! I'll get more into it later and share the MeetUp group when I actually create it. But I just wanted to start putting out the word and see if anyone else is interested. I have a couple of moms who have expressed interest with kids ranging from 3 months - 4 years old. I'd love to have some dads join in too. I'm envisioning meeting up during the day and doing the usual playgroup stuff like meeting up at a park. But I hope that the group with grow and evolve. Also- I need a name for the group! Pots and tots? Wheels and squeals? Other ideas? It needs to be descriptive and catchy since it'll be listed with all of the other "mom group" type listings on meet-up. And if you have any other thoughts, ideas or experiences you'd like to share, I'd love to hear them!
(Note: my daughter Ada is not a pottery prodigy.... yet. Just playing around on the wheel with a piece I threw for her amusement.)

I will end this post with this family photo taken earlier this month in the Shawangunk Mountains in New York. We had a great time visiting both sides of our family. Spent time at the ocean, hiking in the mountains, going to a island wedding in Maine and lots of time relaxing, reading and exploring. It definitely left me feeling rejuvenated and excited to jump back in!
I hope you got some time out of the studio, office or house this summer too! Now it's back to the studio for me!

____________________
How to make a new top for a storage ottoman
_____________________
I have realized that I love to plan out projects even more than I like doing them. (I know I am not the only one...) Designing, problem solving, figuring out materials, buying the supplies... that is the really fun part for me. It's much different from the way I approach clay. But with both clay and non-clay projects, the final results are really the best part.
Here is a recent project I did:

We bought an inexpensive storage ottoman off of Amazon. It was the right dimensions for where we wanted it to go and the price was right. But as I had worried, the price was too low. It was cheaply made.

The top pieces were crappy particle board and 2 of them broke within the first week. But the cost of return shipping made it not worth returning. People were always wanting to sit on it, but I'd have to quickly stop them from sitting on it and falling in.

Ian (my husband) was doing some building projects anyway, so he cut me a piece of plywood to fit the top of the ottoman. It was just some scrap that we had out in the barn. I think it's 3/8" thick. I like that it wasn't too thick because I'd be afraid of tiny fingers getting smooshed if it was too heavy. He sanded all of the edges and corners on the board too.

He added on these other supports in part because of how thin the plywood was. But also because it kept the lid from shifting front to back or side to side when sitting on top. You might wonder why the spacing of the slats is odd. This was a case of measure, cut some of the wood, then get distracted for 2 weeks, finish the cutting/gluing/screwing and then realize that you missed one of the cuts and had to undo/cut/redo some stuff. Hence the weird spacing of the wood slats. The slats were also scrap wood that Ian very nicely sanded down. He used some wood glue on the bottom, and then screw them in from the top. That was there were any rough edges for the kids to get caught on.

The next step is to get some high density foam. I always get mine from Joann Fabrics. It come in a variety of thicknesses (1/2 inch up to 4 inches). And you can get the length cut for you there, but not the width. It's pricey, but they always have 50% off coupons online, in the newspaper or in the mail. I used 3" foam for this. And then you'll need some spray adhesive. Craft stores, art stores or hardware stores all usually carry it. Spray both sides that are going to be stuck together. It'll be very tacky and when the two sides touch, it'll bond together quite nicely.

Then you want to cut the foam down to size. I use an electric carving knife. It cuts through it like butter... You can also use a serrated knife. I actually own an electric carving knife solely for the purpose of cutting foam. I'm surprised by how often I use it- like for projects likethis.

Then you'll want to let the glue dry/set for a while. I flipped it upside down with the wood on top so there was a little weight sitting on top.

Then I wrapped the foam in two layers of batting (also from a sewing shop). And stapled it to the wood with a staple gun. If any of the staples didn't go in deep enough, I just tapped them all of the way in with a hammer.

And then follow the layer of foam with the cloth. This cool fabric was also found at Joann's in the "home decor" fabric section. They were having a big sale so it was half price.The key to making sure the fabric stretched evenly (but not tightly!) is to staple from the middle top to the middle bottom. Then middle side to the other middle side. Then work your way out to the edges.

When you get to the corner, fold them like the corner of a present that you're wrapping. You can snip out a little extra fabric too so it isn't too bulky if you need to. And make sure all the staples are in all the way with a hammer.

And there you have it. The ottoman has a new life. And I like it *way* more than the original.

Ada likes the birds on the fabric, and the legos inside. She has also discovered how fun it is to climb over the back of the couch and land on top of the bench. She is quite the climber.
_____________________
When I'm not doing projects around the house, I'm working in my studio. With temperatures hovering around 100 for the past week and a half (not the usual weather in Minnesota!), my studio has been a giant damp box. The large serving bowls I threw were able to stay out uncovered for almost a week before I could trim them. Until the humidity level goes down in my studio, I am going back to some smaller pieces! So I threw a bunch of mugs. I'm working on using decals on some of my pieces, so these mugs will be canvases awaiting some imagery.

Thanks, as always, for reading. I've been having so much fun being back in the blogging world and loving the conversations that continue after the posts through blog comments and on Facebook.
Tutorial: How to make a square plate on the wheel
Before I delve too deeply into this post, I want to thank everyone for the warm "welcome back" that I received after my last post; comments on the post, comments on Facebook and some really wonderful emails. Thanks for all the warm fuzzies and cheering on! I'm happy to be blogging again!
And now for the fun stuff! How to make a square plate on the wheel. Or at least my version of a squared off plate.

First you have to start by throwing a deep plate/ shallow bowl. I want to have a nice curve to the piece, even after I cut off the sides of the plate. So I have found that making a deep plate or shallow bowl (however you want to look at it) is the best form to start with. I am working in porcelain and want my end result to be a small plate. Something just right to hold a sandwich. I start off with 3.5 pounds of clay. Because of the way the foot is cut, it's good to leave a thick bottom to trim. I also really seem to like these to have sort of a chunky feel. When I make them thinner, they just feel like there isn't enough clay there. But really, that's up to you.

It is important to make sure that your plate is in just the right stage of leather hard for trimming and altering. If it's too soft it'll warp too much from all of the handling. And if it's too dry, you'll just struggle and it won't have that "fresh" look. I like a look where you can tell something was made without too much fuss. Marks that have made with a single bold movement. It takes good timing, lots of practice (aka mistakes) and self restraint to not overwork something.
I trim a foot that flows easily into the form. Yes, I love my Giffin Grip. And my Bison trimming tool.

Then I flip the plate back over onto a bat. I use a sharp, thin cutting tool to mark my lines. An Xacto is perfect for this, or there is a similar type tool that I think Kemper makes. I enjoy the not perfectly square shape so I just kind of go with it.

I'm sorry that with all of these photos I do not have one of the actual cutting of the pot. It's too hard to make the cut and take a photo at the same time. I hold the knife at an angle so you can see the thickness of the pot from the top - which is your typical view when eating off of one. And then I cut. I might hold my breath. I'm not sure. But I do know that I don't stop or hesitate. Just go in and make a bold cut.

And then repeat on all 4 sides. There are times when maybe the line isn't quite as fluid as I'd like, so I will use a Surform tool (or a Mudtool Shredder) to clean it up, and then smooth it back out again with a soft little red rib. But again, show some restraint here. Or at least I have to do so myself!

Then I flip the newly squared plate upside down onto a piece of foam. This is important. If you don't put it on something that is cushiony, then you're either warp it or mark up the corners of the plate. I use high density foam that I get from Joann Fabrics. It's the same stuff I used on this post: How to make a foam bat. You can use one of those egg crate mattress toppers or whatever else you might have hanging around.

Then I use my Mudtool Mudcutter. This is on my top 5 list for favorite tools. The wire is very thin and tight. I use it for so many things. For me, it's the only thing that really works for cutting the feet on these pieces. I tape the wire onto the foot ring to mark where I am going to cut. Then I cut down, over and then up again. And it's just like cutting the sides of the piece. Make bold, confident cuts!

I think it gives the piece some much needed lift. I just love the movement and individuality of each piece. It's fun to embrace that aspect of the pots.

And there you go ... that's how I make square plates on the wheel. Although technically much of it is done off of the wheel. It's quite liberating to cut into a piece. I hope you'll give it a try and put your own spin and unique character.
_____________________________
And just a little parting story... The other day I set up a plate for Ada with a fruit snack.Cantaloupe, watermelon and bananas arranged on plastic plate. I put it on her little table. She sat down, ready to eat. Then got right up, went into the next room. And then emerged back at her table with a porcelain bowl. She put it down on her table and started transferring her fruit into the porcelain bowl, off of the plastic frog plate and then started eating. This potter mama was quite proud.

Bowl byBrian Boyer.
_____________________________
Thanks for reading!
the not so long lost blogger
______________________
My time in my studio has been quite regular lately. I haven't been the most prolific potter (more on that later). I still feel like I'm finding my way in a new world (porcelain...oxidation...electric kiln...new glazes...). But I am also lovingthe feeling like everything I do is a choice. There are no default answers. I'm trying to really let myself be in that moment for a while.
Mostly I have been on the wheel, but I have been venturing off a bit lately to do some handbuilding. I've been trying to keep the timing of things pretty reasonable, not throwing more than I can trim/handle/decorate in a timely manner. Sometimes the pace of handbuilding fits right into that schedule.

I can't seem to make too many mugs. I can make mugs for months and stillmanageto not have any in stock. So I make more.... I am not complaining at all. I absolutely love mugs. Making them and using them.

I seem to be stockpiling bisque right now. When it's time to glaze, I really take over my whole studio (who doesn't?). So I decided that for this round I will have enough for 2-3 glaze kilns full of work. I am also working on some decals for some of my pieces. So when the time comes for that, I can focus my energy there.
______________________
I know that one of the reasons why I still feel like a blogger is because of Facebook. I have been keeping up my Emily Murphy Facebook page pretty regularly with updates, photos and sharing things that I think you might find interesting. And it's been a great way to have a dialog with other potters, bloggers and lovers of clay. I have really appreciated this outlet over the past few years. Facebook has been making changes lately to try to get people with professional pages like this to pay to have our content reach more than a handful of people. I know that I can't see myself being able to pay for that, so I'm hoping that you'll try to work around the system a bit. There are a couple of ways that you can make sure that you're getting updates from pages like mine. One is that when you "like" a page, you have to make sure that it also has the "show in News Feed" setting (see image below)

The other way is to interact with the page. The more you "like" or comment on something, the more likely it is going to show up in your newsfeed. And a bonus is that it makes things more fun for everyone! Part of what prompted me to resume blogging is because this reminded me that blogging is a better way to make sure you're reaching people who want to be reached. And for having content that is archived and searchable. For me... for now... there isn't going to be one outlet or the other. I'm going to keep blogging and keep updating things on Facebook. And I hope that you'll come with!
______________________
And on a personal note...

This is my daughter, Ada. She was born on April 9, 2011 and has been the most amazing distraction from writing, making pots... sleeping. (although now she is a champion sleeper, hence the time back in the studio and on the computer...)
Is it ok if I add one more?

a successful first bisque
___________________________________
I'm declaring my first bisque firing a success.
I have never been so excited to fire a bisque before. But after more than a year of producing nothing but green-ware, it's a big milestone to fire this bisque.
The process of getting to this point has been long. The house renovations, the studio building, etc... all took a long time. But it was the end part- of getting all the electric service upgraded and everything hooked up and running really seemed to take forever! It really did take a long time, but I do know that my anxiousness about it made it feel like it dragged out even longer.
After many phone calls to the electric company to finish the hook-up of the upgraded service, it took the crew 3 tries to get the work done. First time they got to our house, rang our bell and said "we can't stay, we have another appointment." Next day: "We only have one tall ladder and we don't have it with us today." Then a few days later, they finally came with all the right equipment.

View from our 2nd floor balcony.
A huge thanks to Paul Randall from The Pottery @ Raccoon Highway. He did a lot of things to help get me to the point of firing including chiseling a hole through our foundation to install the kiln vent. That was not an easy thing to do! Thank you Paul!
I took my time loading the kiln. For the past 10 years, when firing at Lillstreet, I had to sign up for a time to load the kiln whether it was electric, soda or straight reduction. More often than not, you'd be loading a warm kiln that had just been unloaded by a class or another studio member. And then there was usually a time deadline that the kiln had to be unloaded so the next person renting the kiln could load and start up their firing. So I decided to luxuriously load my kiln. (yes, that's what I consider a luxury!). So when I knew the first firing was in sight, I started loading her up. I ended up making more pieces to ensure a nicely loaded kiln. I hate wasting space!

After all the electric was done, and the venting was hooked up, I wanted to do a few things to ensure that the ceiling and kiln room didn't get too hot.
While we were building out the space, we did put up cement board on the walls near the kiln. It is spaced off the wall so there is both a heat resistant barrier, and also the air space helps with insulation. Luckily there are 4 windows in the room, so I wasn't worried about air intake and exhaust. And of course there is the Envirovent exhaust fan that is installed on my kiln.
Two things that I did need to figure out- A heat deflector and a fan that could keep the air moving in the room.
I knew from previous experience how important a heat deflector above a kiln is. It's summer, and the room above the kiln room is my sister's dining room. The floor above is wood (obvious concerns) and I also didn't want to make their living space too uncomfortable to be in. So I took a piece of thick pink foam insulation, high heat spray adhesive and some wide aluminum foil and attached the foil to one side of the foam (side facing the kiln). The foam and the adhesive were left over from our previous construction and the foil was leftover from Thanksgiving. There are radiator pipes above the kiln (a bonus is that they don't mind getting hot!). I used the pipes to suspend the foam over the kiln and have a nice air space between the foam/deflector and the ceiling/floor above.

I don't know if you can tell, but the foam is a full 4' x 8' sheet. If you don't happen to have a piece of pink foam insulation around, you can buy a sheet that has foil on 1 side. But since I already had some, I didn't want to have to buy a new sheet.
The next thing was air movement. I wanted a really good fan that could keep air constantly flowing over the kiln (by the ceiling). I ended up getting a Vornado fan. I had it next to a similar size/design Honeywell fan and the difference was pretty shocking. The Vornado fan is many many many times stronger than the Honeywell (both were from Target). So we aimed the fan from across the room, angled up at the ceiling, and towards the windows. Sure enough, at the height of the firing, the air space above the heat deflector was *cool.* It was actually the coolest spot in the room. And I kept checking in the dining room by walking on the floor with my bare feet and I didn't feel like it was a single degree warmer than anywhere else. Amazing! Of course this is just a bisque. The c.10 firing is next. But I feel like this was a really successful test run. (spoiler alert: I've since fired the kiln to c.5 and c.10 and both were successful, and the heat deflector/fan combo worked like a charm.)

This photo is a little funny, but it gives you an idea of the set up. The way the Vornado fans work is that there is a very directed column of air. So by aiming it up at the ceiling, it gave a constant flow of air over the heat deflector for the whole firing. Super simple and low tech- but it worked.
Next step is mixing up some glazes, finishing building the spray booth and finally firing a glaze firing. Yay!
In non-clay news, I've been spending a lot of time gardening. At the beginning of the spring, we didn't have a single plant growing in the yard, and no grass. It's so satisfying to have a lush green space now. Last summer we were so deep into the construction, our yard was a total mess- nails, scraps of wood and broken glass was scattered about. We didn't spend any more time in our yard than it took to walk from the driveway to the house.
I planted a vegetable garden in our front yard. I've always wanted to have a veggie garden in the front yard- frees up the back yard for play space and it's a nice way to get to know the neighbors. Plus, it's quite sunny. I started off kind of small this year, but it's been a great success, so I'm planning on expanding it quite a bit next summer.

My new L&L kiln

After being without a kiln for the last 11 month, I finally got my kiln! It's an L&L Davinci x3236-D Automatic. I have been asked many times how I chose my kiln. It is a huge decision to make, so I wanted to share my thought process and maybe it'll help someone out there make their choice a little easier.
First decision: What kiln manufacturer did I want to go with? This was the easiest part of my decision. I've long coveted an L&L. They have a number of design features that strike me as both brilliant and completely logical. The big ones are:
- The element holders are hard brick. Makes sense, right?
- The electric controls are separate from the kiln. Sensitive computer parts are kept far away from the heat. Again, very logical.
The other thoughts I had about what manufacturers to go with.
- I have had a lot of experience with Skutt kilns. Lillstreet had a ton of them. The 2nd floor set of kilns didn't get particularly high usage, but it seems like there was always one down for one reason or another. More often than it seems like they should have. I'm sure there are lots of people who swear by their Skutts, but based on this experience, I didn't want to go in that direction if I didn't have to.
- Any kiln is going to run into a problem at some point. So the question is- how are you going to fix it? If you're super handy, it might be something that you can tackle yourself. If not, then who? A friend of mine, Donovan Palmquist of Master Kiln Builders is a dealer and repair person for L&L so I knew I had that covered. Plus I was able to order my kiln through him. You can also contact your local ceramics supply place and ask them if they have a repair person for a particular manufacturer. If you don't have a supplier nearby, ask other potters in your area. Or you can also call a company directly and ask them to give you the name and contact information of a dealer/repair person in your area. Hopefully it's not something that you'll need for a while, but it's good to know ahead of time so when the kiln breaks right before your last firing before a show, you'll know what you need to do in the midst of your state of panic. Also, L&L has a 3 year warranty.

Second part of the decision: Size and shape.
My long term plan: Sometime next year, I am planning/hoping to build a soda kiln in my back yard. But I want to progress with making work right now, and not just wait until the soda kiln to happen. So I wanted a kiln that I can take up to cone 10. Even after I build the soda kiln, I want to be able to high fire non-soda pieces. A couple of years ago, I started making a lot of c.10 (reduction) dinnerware, or sometimes designed place setting that were a mix of soda and straight reduction (specifically tried to avoid dinner plates in soda). I wanted to build that option into the kiln I got. For the interim, I want to be ready to fire work in friend's kilns- soda, wood, salt, etc... and not worry about clay bodies, etc... And hopefully there will be some glaze overlap too.
The other part is that I didn't want to outgrow the kiln in 6 months. I want to make larger work- wide platters and tall bottles. Especially once I have the soda kiln- so I need to be able to bisque larger pieces. At this moment, I plan on having the footprint of the soda kiln be two 14"by 28" shelves. The interior of my new L&L is 30.5" square and the height is 36" which will allow me to make the size pieces that I want to. I ended up getting a larger, more expensive electric kiln than I had originally planned, but it would ultimately be more expensive for me to buy a 2nd kiln in a year or two. So I had to wait a little longer to get the kiln that I knew would fit my needs now, and in the long term.
Shape. The square makes sense to me. Whenever I load octagonal kilns, I often get frustrated. Do I need to say more than that?
Below I've included the specs of the kiln (from L&L):
Specifications
- Internal Size: 30 1/2" square x 36" high
- Number of Sections: Four
- Brick: 3" of premium select K23
- Max Temp: 2350F, 1287C, Cone 10
- Control Panel Mount: Floor Standing, Plug-in, separate from kiln
- Control: Handheld DynaTrol with Dynamic Zone Control, 4 preset programs, 6 user defined programs
- Industrial Thermocouples
- Hinge: Spring Loaded Counterbalance
- Stand: Heavy-Duty Welded Angle Iron
- Power Hook Up: Direct Hook-Up
- Heavy Duty Elements
- Three Year Warranty
- Listed to UL499 Standards
And this is the vent system for the L&L kiln:
VENT-SURE KILN VENT SYSTEM

- WALL MOUNTED VENT BLOWER
The vent blower motor is mounted on the wall. This keeps the heat of the kiln away from the motor (for long motor life) and keeps the motor vibration away from the kiln (which can cause ware to move, damage to the kiln, and misfiring of cones on a Kiln Sitter).
- VACUUM IS SAFER THAN PRESSURE
The vent tubing is kept under vacuum instead of pressure (unlike competitive brands). This insures that any leak in the tubing does not blow noxious fumes into your room.
- EXTERNAL VENTING IS BETTER
External venting is safer and surer than venting to the inside of your kiln room with a filter.
- LARGE CAPACITY
The blower vents up to 130 CFM (cubic feet per minute). This will handle up to a 20 cubic foot kiln (and usually larger). More than one vent can be attached to a kiln. Only 1.37 amps.
- SIX FOOT POWER CORD WITH ON/OFF SWITCH
The blower motor features a 6 foot long 120 volt 15 amp power cord. An On/Off switch is located on the cord.
- ADJUSTABLE VENT CONTROL
A vacuum bypass on the kiln bypass/collection box adjusts the amount of venting from the system. Don't waste heat and energy by venting more than you need. Adjust vent to kiln size.
- 15 FEET OF FLEXIBLE ALUMINUM DUCT
15 feet of flexible expandable aluminum 3" diameter duct is included along with necessary hose clamps. Longer lengths or lengths of 3" stove pipe can be used as well. Length can be as great as 60 feet horizontal or vertical with up to four 90 degree bends.
So there is still some work to be done. We had our electric service upgraded so it can handle the kiln. Every kiln manufacturer website has these specs listed.
_____________________________________
I have taken a lot of safety precautions since my kiln is in the basement of my home, and I have a couple more that I'm going to add in before I do my initial firing. I know all about being overly cautious of the out-gassing, etc... But if you have any specific safety features that you have taken in your space, I'd love to hear about them. I will do a future post on that part of the kiln installation since I think it deserves it's own post.
I'm going to spend some serious time reading the manual now. It is a very full 3 ring binder. One caution that's in the book is not to plug it into an extension cord. That totally cracked me up. Seriously, though, there is a little more electric work that has to be done before I can fire. We just did a major service upgrade to accommodate the power draw of the kiln. Before you actually purchase your kiln, look up the kiln on the manufacturer's website and look up the electrical specs. Print out the info sheet and have it when you have an electrician come do a bid. And get at least 3 bids. Really.
Studio Potter Newsletter: A New Community of Potters
____________________________________
From the newStudio Potter Newsletter:
This month we are excited to include a mini article from potter bloggerEmily Murphy. Emily chose to write about her experience as a blogger which is a great preview to the ucoming isse:BOUNDARIES & The Digital World We encourage you to write in with your own thoughts on past or current themes from issues of SP. We would really like to hear whatYOU are thinking!

A New Community of Potters
By Emily Murphy
In the past year, I have gone through a lot of life changes. Exciting but disruptive. After 10 years of living in Chicago and being part of the large, vibrant community of artists at Lillstreet Art Center, I moved to a new city, Minneapolis, bought a house and did a top to bottom renovation, built a studio, got married. One of the scariest parts of moving was leaving an incredible community of artists that I worked with on a daily basis. Lillstreet was the place where I taught classes, it was my social outlet, and it was a huge part of my professional identity. It was also how I sold the majority of my work.
Now I have a studio in my basement. A really wonderful studio, but there are no studio mates outside my door to ask for help when a kiln is acting up, borrow a pound of feldspar from or to have a coffee break with. And I definitely don't have customers wandering through.
But, surprisingly, I don't feel alone, I'm still in the presence of a large community of potters. When I needed help figuring out what kind of exhaust fan to get for my the spray booth I'm building, I have people to ask. When I'm asked to be in a show or had an image that was accepted to be published in a book, I have colleagues to share in my excitement. While I'm still without a kiln, I have people offering up space in their kilns so I can fire my work.
This is all because of the online community of potters that I have gotten to know over the years. I have been writing my Pottery Blog for nearly 7 years. More recently, I started a Facebook Fan Page to share more of the day to day thoughts, questions, events and interesting links. When I write, I try to put my truest self out there. Successes along with failures. Lots of technical information with a more personal side mixed throughout. The community of potters that I have come to think of as "my community" has grown and evolved over the years. We have daily interactions. Advice is shared and critiques are given back and forth. I recently posted a question on my page asking people what they think "success" means in the pottery world, and within a couple of hours got a dozen thought provoking responses. I had my afternoon coffee break while reading what others wrote, and sharing my own thoughts. When I don't post to my blog for a while, I usually get some emails or even a phone call from people who I've never met before just checking in to make sure that I'm still out there.
But it's not confined to the virtual world, it's has spilled over into daily life too. I've been visiting studios, having coffee and firing kilns with new pottery blog writing and reading friends. Many times when I meet someone in person that I've been writing with back and forth for years, the meeting starts with a hug and it feels like I'm spending time with an old friend.
It's easy online to present just one facet of yourself: to look like a professional, an artist, to use fancy language and to edit everything so it's just right. But if you do you won't find a community, you'll just have a "presence". Everyone talks about going overboard in putting yourself out there (the cliche "In line to get coffee" update) but the opposite is also true -- you need to also get personal, to be off-topic sometimes, and if you don't make mistakes sometimes then you aren't doing it right. If you over share, or put out boring updates, or use language that is so casual as to be confusing, then be reflective and recognize and adjust; but don't worry too much about exploring those boundaries. When you put yourself out there, you're more likely to find a community.
Emily Murphy is a potter and blogger living in Minneapolis, MN. You can see more of her work on her website: http://emilymurphy.com/ or read more of her writing on her blog: https://potteryblog.com/
____________________________________
Here's a peak at Molly's work. You can see why I covet thee...
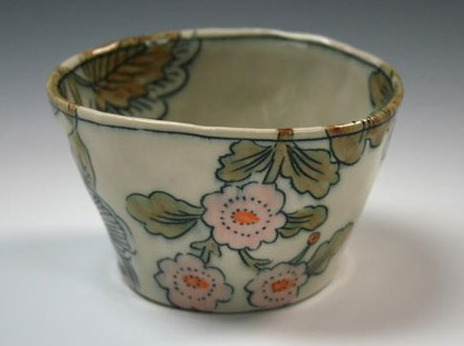


A New Sense of Normal

It's not the kind of good day that you expect to be excited about, but it's a day that we've resisted getting our hopes up for. Today marks 9 weeks since my four year old nephew, Ayrie, last had surgery. This is the longest that he's gone without surgery in more than 2 years. He's had 19 surgeries in 2 years. Today can be celebrated because of my sister, Nora, fights tirelessly for her son, and thanks to Ayrie's amazing surgeon, Dr. Hartnick at Mass Ear and Eye (MEEI) in Boston. And it's thanks to all the friends, family and supporters who have helped emotionally, physically and financially to help Ayrie get the treatment he needs.
Just over two years ago, we received news that totally changed our lives. My nephew, Ayrie, just before his 2nd birthday, was diagnosed withRRP: Recurrent Respiratory Papilomatosis. It's a rare disease that is caused by the HPV virus. It causes tumors/growths on the vocal cords, which if gone untreated can block the airway and cause suffocation. It is something that is often misdiagnosed as croup, asthma or pneumonia. In fact, 2 months before he got this diagnosis, he was diagnosed with Croup, and it didn't respond to treatment. We can't know if he had Croup or not, but we suspect that he didn't. The diagnosis of RRP was stunning to us, but we're lucky that he was properly diagnosed when it was. He was diagnosed after he and my sister had moved to Chicago to be near me and my husband Ian. If they had lived in a different place, it is possible that the physicians wouldn't have known what RRP was. We had never heard of this and most of what we learned about RRP in the beginning wasn't very accurate. When something is so rare, there are lots of individual cases, stories, treatments, but that doesn't add up to the whole story. We've been blindly swimming through the world for the last 2 years. Our lives over taken by this disease. Struggling to get through each day, fighting for health insurance, fighting for Ayrie's health.

Ayrie has had surgery every 4 to 6 weeks since his diagnosis, and occasionally more frequently. Surgery isthe treatment for RRP. Mostly, it's "on-going maintenance," removing the growths to clear his airway, but the growths return until his body figures out how to fight the virus on its own. There are different kinds of lasers that can be used, some surgeons use a mechanical device. There are a few kind of drugs that can be used during surgery but they almost all have major drawbacks (an understatement), such as being toxic or carcinogenic. After maintaining his condition over a year and a half, without it getting any better, my sister reached out to a surgeon in Boston. Dr. Hartnick is the top physician treating Juvenile RRP. When he first saw Ayrie, he told us it was one of the most severe cases that he had seen. That is a heavy statement. He skillfully removed a huge amount of growths, and used a new experimental drug in conjunction with the surgery. Interestingly, it was the same drug that Ian's grandmother has injected into her eyes to fight Macular Degeneration with success, which is also experimental. The standard use is to fight Colon Cancer.
The first surgery with Dr. Hartnick happened just a week after we moved to Minneapolis last July. Nora and Ayrie flew to Boston while his little brother Shiya stayed home with me and Ian. My mom met them at the hospital in Boston which is 2 hours from my hometown in New Hampshire.
A few weeks after that surgery, Ian and I were away at a family reunion in the mountains of upstate New York with most of Ian's family. We had moved to Minneapolis, where Ian's family is, in large part to expand our support network. But it was the one time of the year that almost everyone that we knew in our new city was away at the same time, leaving Nora home in a new place without her support net. While we were gone Ayrie was having severe breathing problems and Nora had to take him to the emergency room. She didn't want to "bother" us while we were on vacation, so we didn't find out that there were any problems until Ayrie had already been admitted. It broke my heart that we weren't there. Actually, that doesn't even begin to describe what I felt. I was crushed. I couldn't breathe. The image of Nora in the emergency room, completely freaked out with a 3 year old with severe breathing problems and his 1 year old brother (being a typical one year old), was an image that I couldn't shake. If I was feeling this way, half way across the country, I was afraid to even imagine what was happening in the emergency room. No one was there with her. The first thing I did was make some phone calls while driving down winding country roads. Some amazing friends (that I knew, but barely knew Nora at that time), picked up Ayrie's brother Shiya so Nora could focus on Ayrie's care.
What happened over the next days was the hardest week of our lives.
The surgeon here in Minneapolis that specializes in RRP told Nora that he believed that Ayrie's air passage was severely narrowed by scar tissue from all of his surgeries. To correct this he would have to undergo a surgery to open his air passage up. The tissue would have to be held apart while it healed, using an intubation tube. This would meant that he would be put into a drug induced coma for at least a week. When he was brought out of it he would be addicted to opiates and would need to be weaned off of them with Methadone. All this to a 3 year old. After that he would be "out of it" for several months. He would also permanently lose his voice. And the surgeons thought there would be a 50% chance that he would need a tracheotomy. For someone with RRP a tracheotomy means cutting through healthy tissue and giving the virus a path to spread, possibly moving down his into his lungs, which would ultimately be fatal.
At the time that Nora was getting this information Ian and I were heading to the airport to catch the first flight back to Minneapolis. 24 hours had passed since we had first gotten the news, it was the fastest that we get a flight. While we were at the airport, we heard more of the story of what was going on. My sister and mom tried to not tell us the extent of the bad news until we were back in Minneapolis, but I knew that the news was bad, and they finally told us what was going on while we were on a layover in Chicago. On the plane, Ian and I were doing everything we could to keep from sobbing. An incredible flight attendant sat down on the edge of the 3rd seat in our row, greeting people, and making sure that we had the row to ourselves. It made me realize the impact that such a simple, unspoken gesture could have on someone. The rest of Ian's family followed the next day, knowing that they couldn't be on vacation while this was going on.
When Ian and I got back to Minneapolis and rushed to the hospital it was an odd experience. At first we came in to the hospital room, Ayrie looked zoned out lying on the bed with his gown on and with a variety of tubes and monitors attached to him. He gave us a big smile, and with all these accouterments and with all our fears having built up on our way home it seemed terribly sad. But then five minutes later he was playing on the floor with us and everything seemed like it always was, except we're dragging around an awkward IV drip. These stories, what we heard from the surgeons and what we saw in person, just didn't add up. It was impossible to imagine him laying in a hospital room for weeks on a ventilator. And it was too painful to imagine him not being able to speak. Not even in a whisper, ever again. And we couldn't bring ourselves to even imagine the worst.

When you get a prognosis and treatment plan like that, there is no question than to get a 2nd opinion, right? But the only pediatric ENT's (Ear Nose and Throat surgeons) in the area who treat RRP are part of the same surgical team who devised the drastic treatment plan. When Nora spoke to the other members of the team they just agreed with the head of the practice. Not really a 2nd opinion. There is a surgeon at the Mayo clinic that Nora wanted to consult but she was away on vacation for 2 weeks and unreachable. Dr. Hartnick wasalso on vacation for 2 weeks, but we were able to get touch with him and he agreed to speak with the surgeon in Minneapolis. But the Minneapolis surgeon had no interest in talking or discussing the options. He actually refused to consult with Dr. Hartnick on Ayrie's case. It was clear that his ego was getting in the way. We had to take the scans of Ayrie's throat, bring them home, scan them and send them to his office in Boston. And relay the information ourselves, knowing the what possible consequences of a misstatement could be.
Dr. Hartnick, while on an out of state family vacation, wanted to hear about what was happening with Ayrie. His office forwarded the scan of Ayrie's throat to his cell phone. He diplomatically said that he couldn't tell much, but he didn't think it looked like scar tissue. On top of that, he said that he couldn't remember the last time he had to do a tracheotomy on an RRP patient and he offered to leave his family vacation for a day to perform Ayrie's surgery. That was more than enough hope to go on. That was actually more than we'd even consider hoping for at the time. The hard part now was at the hospital in Minneapolis. They didn't even want to let Ayrie travel 5 blocks home, much less fly all the way to Boston. And the surgeon told us that if Nora took Ayrie out of the hospital against his recommendation she would have to do it AMA (against medical advice) and that he would not ever see Ayrie again. Even if they came to the ER (which really is only 5 blocks from our house) and he was on duty. Is that legal? It's definitely not ethical. What do you do in that situation? Everything in your gut, your heart, and your brain is telling you that the best thing to do for this child is to bring him to Boston. But we're in the hospital in Minneapolis and the surgeons there are telling us that they can either be Ayrie's primary physicians or they won't see him at all. My sister made one of the hardest and most brave decisions that she could have. What's the point of having the ability to come back and see these doctors when they don't allow you to get a second opinion, even with the severity of what they wanted to do? Over the past year, we have renovated our entire home, top to bottom, inside to out. And for each thing that we needed to do whether it was work on the plumbing, having the yard graded or having flooring installed, we got a minimum of 3 bids. It wasn't just about the price, it was about getting 2nd, 3rd and 4th opinions on what the diagnosis of the problem was, the scope of the work and the suggested fix. Why are we intimidated to get 2nd opinions when it comes to our health? So much more is at stake.
With the decision made, we quickly packed up everything in the room and headed home. Three plane tickets were bought for a flight that was leaving in just hours. Ian went with Nora and Ayrie as support for them. Ian described the arrival in Boston as surreal, a late flight arriving to a mostly empty airport, the tension he and Nora were feeling about what they'd learn tomorrow... but a big airport with no one around is too irresistible and Ayrie just ran back and forth, giddy after being stuck in a hospital room for a week, and even though the two of them felt like they shouldn't let him get out of breath, it seemed too wrong to stop a kid from being a kid.

Ayrie was admitted to the ER and brought up the the adult floor in the hospital because the pediatric floor was closed. A pediatric nurse was called in just to be with Ayrie that night and was both a nurse and a comfort to Nora, Ayrie and Ian. My mom met them at the hospital first thing in the morning. Dr. Hartnick left his family vacation and his fellow assembled a top notch surgical team on a Sunday (a non-surgery day at their hospital). After 5 minutes in the OR with Ayrie he called Nora on the phone in the waiting room to let her know that everything looked fine. That there definitely wasnot any extensive scarring and that nothing drastic had to be done. This still amazes me that he did that. He knew what we had been through over the past week and didn't want to prolong the agony any more. Instead of waiting for the surgery to be over, he took the time to reassure the mom that everything was okay.

Dr. Hartnick also suggested a new treatment that had never been used on an RRP patient before. Because RRP is such a rare disease, experimental is our only hope that things will improve, as opposed to just maintain. He had read an article about young babies on a blood pressure medicine due to heart problems. Coicidentally some of the babies also had tumors from a different cause. The blood pressure medicine miraculously shrunk the tumors in these babies as an unexpected side effect. The drug is Propranonal. It's been around for a long time, and it has few side effects. Dr. Hartnick made the connection between these other tumors and RRP and started Ayrie on the medication. Ayrie takes it twice a day by mouth. This is thefirst time a non-surgical treatment has been used for RRP: there have been other drugs used, but they are always injected at the site of surgery. No one knew if this was something that was going to work, but it was definitely worth a try. There was nothing to lose.
Thanks to this new drug, which Ayrie calls his"magic medicine," and his surgeon, the time has stretched out times between his surgeries over the past 9 months. Theoretically (and hopefully), this could continue to happen. We're now at 9 weeks since the last surgery. A marking point that we were not sure we'd ever see. We're now hoping for at least another 3 week to make it to 12 weeks until the next surgery. We have hope because over the past couple of weeks Ayrie has begun to speak slightly above a whisper for the first time in 9 months. He is over the top excited about this, and we well up with happy tears when we hear him projecting his quiet voice. This development is something that gives us the ability to hope for 12 weeks. The longer he can go between surgeries, the longer his voice can rest and have some recovery. He will never have a 'normal' voice, but the fewer surgeries he has, the less damage will be done and the more strength his voice will have.
Last year, when we decided to move to Minneapolis from Chicago, a big part of the decision was to be able to have a home that we all could live in. Both Ayrie, Nora and Shiya need a huge amount of support. So Ian and I bought a duplex and made it into a space where we all could live. We live within 2 miles of Ian's mom, dad, sister, and her spouse who are a constant presence in his life. We didn't really know at that time we moved what the next step for Ayrie's treatment would be. The care Ayrie received in Chicago was competent, but despite that, his health seemed to be getting worse, not better. We didn't know what the next step was: Boston, Denver, Seattle, Mayo? We were lucky that Nora was able to find a great doctor and hospital in Boston; it would have been serendipitous had it been near Minneapolis, but it wasn't, and we always knew we'd send Ayrie wherever we had to to get the treatment he needs. But it means a lot of traveling for Ayrie and Nora.
Weirdly Ayrie doesn't mind the surgeries. He actually gets excited about going to Boston for a surgery. He goes to new places and he gets his mom's and grammy's undivided attention, and though he's uncomfortable immediately after surgery it doesn't seem to last much beyond that. He was starting to develop strong fears about anesthesia -- a fear of masks and of the sound of gas, apparently common things for children to fixate on. He was having panic attacks when the defrost was on in the car because of the noise, or if he saw steam, it would trigger the fear. But since he's been going to Boston even that has gone away (the anesthesiologists at MEEI are also some of the best). The thing that affects him most is that he can't speak above a whisper. We haven't given up hope on that improving, and he's learning ways to cope, and his language skills haven't suffered at all. All of the people close to Ayrie are especially tuned into his whisper. But it is a hardship at school, in large groups, out in public. Ayrie deals with this remarkably well, but it's something that we all have to work on. Nora is in constant dialog with Ayrie's preschool teachers about how to handle this in school. We are constantly trying to figure out ways to help him communicate. He's worn a whistle so he can get attention if he's in trouble, he knows quite a bit of baby sign language, but it only helps if someone else knows it too. One on one play dates are important for him to develop relationships with classmates so they will more easily be able to tune into his quiet voice. He's learning exercises to help the strength of his voice. There is a Pediatric Voice Specialist in Boston that he's begun to see. Part of the exercises include playing the kazoo.
This disease has changed all our lives. I'm not sure that Ayrie remembers life before he was diagnosed. The rest of us do, but we have also settled into a new sense of normal. We cheer when we can hear Ayrie call loudly up the back stairs "C'mon Emmy, c'mon Ian, me, mommy and Shiya are going outside. Wanna come play?" We cheer up when we go nine weeks without surgery. We sleep more easily at night after Dr. Hartnick tells us that Ayrie will, indeed, regain volume in his voice. Not full strength, but much better than it's been. Better than we had dared hope for. We are grateful that this is our new sense of normal. That the battles have lead to successes. We know we are lucky.
For Nora, everything has changed. Like many parents of kids with a chronic disease, she is not able to have a regular 9-5 job. It wasn't long after Ayrie's diagnosis that she had to leave her job in Chicago having exhausted her vacation days, and knowing that she would have to take off work at any time for the next surgery. Having to travel for surgeries every month or so and the constant and endless phone battles with the insurance company make standard work schedules impossible. She's now in a PhD program at the university of Minnesota, studying the effect of rare diseases on families and how support networks can help. She has been writing a blog, Rare Disease Support. She constantly trying to figure out ways to turn this difficult situation into something that can help someone else.

I am lucky that, as a potter, I do something that is completely flexible. I can jump in to help wherever I'm needed, and take care of Shiya when his mom's away. And I'm so grateful that our nephews live just a flight of stairs away from us so we can be there to help provide stability in such uncertain times. This has definitely helped me put things in perspective. It has also made me think that you never know what is going on in someone's life, what they might be struggling with.
As I write this, I have to wipe away tears. It's exhausting to always have to fight these battles, but the stakes are too high not to. We're lucky that we have some hope. It's not anybody's fault that Ayrie has this disease. I don't even blame the surgeons in Minneapolis for proposing a bad treatment, no one has found the "right" treatment yet, and I'm sure they were proposing what they thought was best. I am not, however, so forgiving about the lack of openness and thoughtfulness I saw from them after the treatment was proposed. The lack of ability to consider that a second opinion would be worth 5 minutes of time on the phone. A few weeks after we left the hospital in Minneapolis, Nora received a certified letter from the surgical practice notifying her that they would not see Ayrie, even if he came into the ER. They followed through in their threat. This still baffles me.
I often think back to the prognosis that we received last September and what would have happened if we didn't have anywhere else to turn. And if we didn't find the courage to stand up and seek the treatment that was best for Ayrie. It's beyond difficult to have every authority figure telling you one thing, and to believe that it is not the truth and to actually walk away from the situation. When you're in the hospital, with a young child with all sorts of wires and tubes coming out of him, you're in an incredibly vulnerable state. Every morning and every evening, when Ayrie takes his "magic medicine" and each week that passes without surgery, we thank Dr. Hartnick for what he has given us. Hope, life, and the sweet voice of a sweet little boy. We need to do whatever we can do to keep Ayrie in his care.
The health care system at times helps, and at times makes it very difficult. MEEI personnel have been very helpful, and they've been providing quality, consistent care even as insurance jerks us (and them) around. There was a state health insurance program in Illinois, and one here in Minnesota, that provide Ayrie with the coverage he needs. But the administrators of these programs (particularly in Hennepin County) are terrible: disinterested, lacking in compassion, and simply incompetent. But despite those problems there are always good people who really want to help, and though the system has been challenging to say the least, it has not failed us yet. And we are extraordinarily grateful for the changes that happened this week in healthcare. Ayrie will never be turned down for insurance, he will never be dropped because of his condition (although it can still happen due to bureaucracy), and his rates will not go up because of it. This will be a positive effect for the rest of his life. He is currently on state health care that covers the 'uninsurable' -- to think, that classification will simply disappear! That's worth celebrating. Under the current regime the insurance company has limited the number of surgeries that he can have. Of course if he doesn't have them when he needs them he will not be able to breathe, but that doesn't seem to concern them. One of the reasons that we're so happy that the length of time between surgeries is getting longer is because it means there is a chance we can fit into their parameters and maybe have one less battle to fight. I just try to imagine what it could be like if we could focus all the energy that is spent fighting the insurance company and focus it on Ayrie's well being. Every hospital visit is followed by a flood of letters rejecting this and rejecting that. Always vague, always requiring lengthy follow up with the bureaucracy of the insurance. Despite all of this I'm feeling hopeful we'll get there. Closer to a point where we can put more energy into fighting for Ayrie, and less of it fighting against the system.

Please keep Ayrie in your thoughts. He's an an incredible kid with a spunky sense of humor and a deep well of curiosity. He's a typical four year old, who has gone through so much in his life that he has a wisdom beyond his years. People often remark that he has an "old soul." If you're interested in supporting his on going treatment, we have a travel fund to help him get to his surgeon in Boston. Because we never know when he's going to need surgery next, we usually have to buy the plane tickets with short notice, which means high prices. There is no discount from the major airlines. And although we've tried to take advantage of differentmedical travel programs, they usually require 2 months notice, something that we cannot do. So we rely on private donations to Ayrie's Medical Fund**. Five and ten dollar donations can add up quickly to a plane ticket to Boston. Thank you for taking the time to read this deeply personal story. It's the story of a shared experience of all the people who love Ayrie. I'm glad to be able to share it with you on a good day. A day to celebrate. It's an important part of who I am, as a sister, aunt and artist and I appreciate the opportunity to share this part of my life with you.
Updated:
It is with the heaviest of hearts that write this update. Ayrie passed away on September 29, 2010 from complications to RRP. We are heartbroken but uplifted by the love and support of family, friends and strangers.
NCECA Pre-Conference: Making Through Living—Living Through Making: Studio Pottery in 2010

A few months ago, when I heard about the pre-conference happening before NCECA, Making Through Living—Living Through Making: Studio Pottery in 2010, my thought was- 'I have to be there'. Then I read the list of presenters and once again thought- 'I really need to be there!' But, the reality is that I can't make it to NCECA this year or pre-conference. I had to make the decision between getting a kiln now, or going the Philly. The decision really wasn't very hard to make- I want to produce more than just greenware! But I was incredibly excited to find out that pre-conference is going to be streamed live, on-line for the 2 days that it's happening. If you want to get easy updates on the conference, check out their Facebook Fan Page.
Tune in:
- Monday, March 29, 2010, 9am-5pm EST
- Tuesday, March 30, 2010, 9am - 5pm EST
Here's some info on the conference:
Simultaneous Demonstrators
Christa Assad
Ron Meyers
Andy Brayman
Ellen Shankin
Panel Discussion: "Making through living, Living Through Making"
Moderator:
Panelists:
Ayumi Horie
Alleghany Meadows
Julia Galloway
Panel Discussion: Sustainability in Ceramics
Moderator:
Panelists:
Andy Brayman
Steve Lee
Alleghany Meadows
I hope you can tune in this week and catch some of the presenters. I have heard that highlights will be posted online after the conference. I'll let you know as soon as I get a link to that! Enjoy! And to all of you who are going to NCECA and pre-conference, have a fantastic time. I look forward to hearing about it through everyone's blogs and Facebook Pages. Next year...
New cups, and updates in the clay blogging world

This is just a little peak at what I've been working on. I am making a bunch of tea bowls that will be given as gifts/favors at our wedding celebration this summer. It's fun to think about these pieces going out to our families and friends all toasting out of these cups, then bringing them home as reminders of the celebration. Ian's been having fun decorating some of the cups too. If I could just give away all the pieces that I make, I would be a very happy potter! But it's not such a great business model... But I'm so happy to have the excuse to give a slew of pots away this summer!
___________________________________________
Here are some more updates, and things that I've been thinking about lately...
I was lucky enough to be invited to join in on the first firing of Donovan Palmquist and Colleen Riley's new wood kiln this weekend. Below are some of the pots that I had in the firing. I'll share with you the finished pieces when they're out of the kiln! It's really amazing to be in Minnesota. There are so many amazing potters here- and I'm having so much fun meeting new clay folks every week!


___________________________________________
There's a new blogger around. Actually, there are quite a few! But I wanted to share with you Marcia Tani Paul's new blog, Ceramic Arts: Clay, Food and More... Marcia is one of the many Minnesota potters that I've been lucky to meet. Take a look, and be prepared to be hungry!

___________________________________________
Congratulations to Michael Kline and his1000th post on his blog, Sawdust and Dirt! Talk about prolific! Michael's been such a greatcontributorto the clay blogging community- I'm looking forward to the next 1000 posts!

___________________________________________
I've been making a ton of cups in my studio over the past couple of months. You might have seen some of them in my last blog post. In the middle of cup making expedition, this Sequoia Miller wrote this great blog post about cups. It was a very timely read. This sweet jar of Sequoia's is a cousin to one of his jars that I'm lucky to have in my collection.

___________________________________________
Since I'm talking about blogs...
As you know, I have a big list of clay blogs that I subscribe to and enjoy reading while eating my steel cut oats every morning. I want to ask for a bit of help from you guys out there. Let me know if there are any blogs missing, and also if there are any that are defunct on my list. It's time for an update! Just leave a comment below, or a note on my Facebook Fan Page, or send me an email. If you're interested in setting up a blog reader with clay blogs to read over your morning coffee, I have directions on how to do it on my blogroll.
A couple of reminder notes about my list. I have to keep the list limited in some way- so I only include clay blogs, and mostly pottery blogs at that. And I try to limit them to ones that have mostly clay content. And it needs to have original content- not only Etsy listings or sale updates.
If you want a really complete list of blogs, check out the really complete list over at Slipcast, The Ceramics Blog. It's impressive!
____________________________________________
I have some more things I've been wanted to share with all of you, but I think I'll call it tonight and write another post tomorrow. Until then...