Spin Me Round - Thorne-Sagendorph Art Gallery
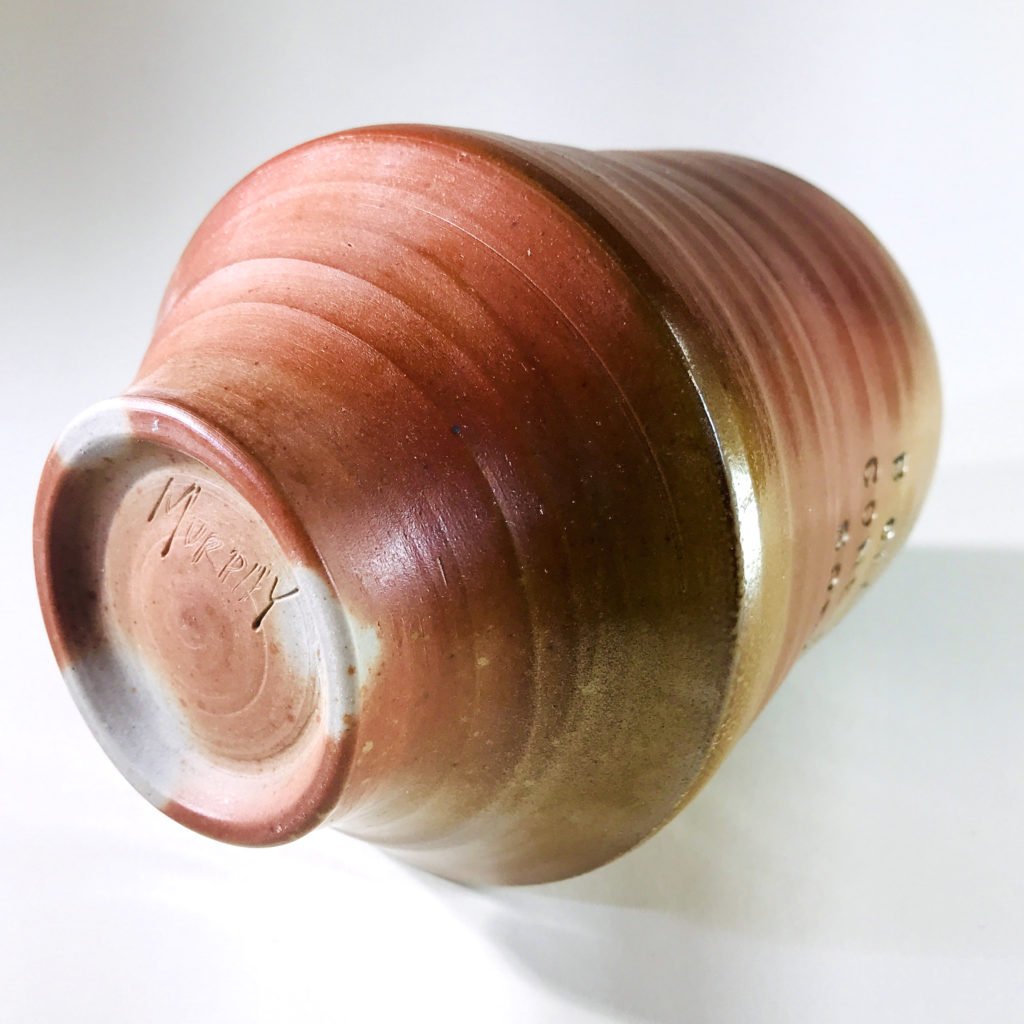
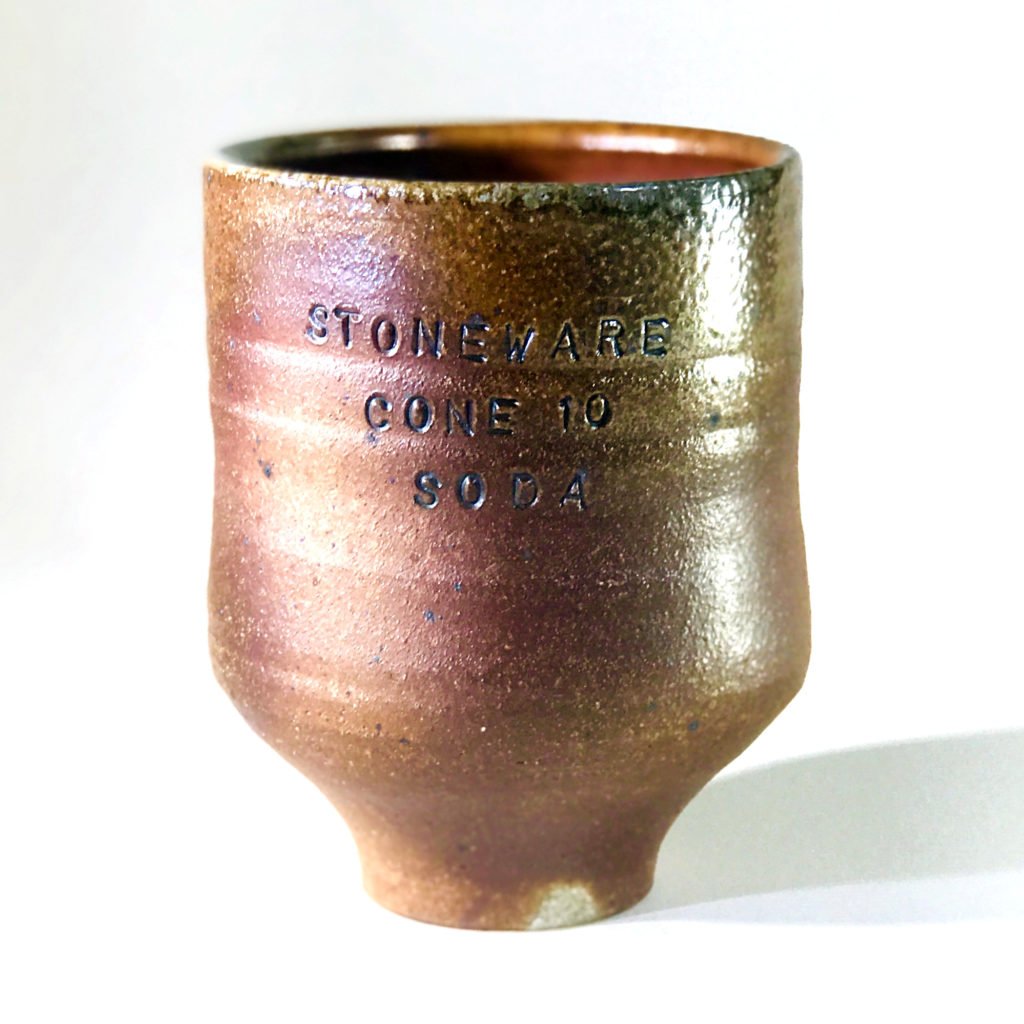
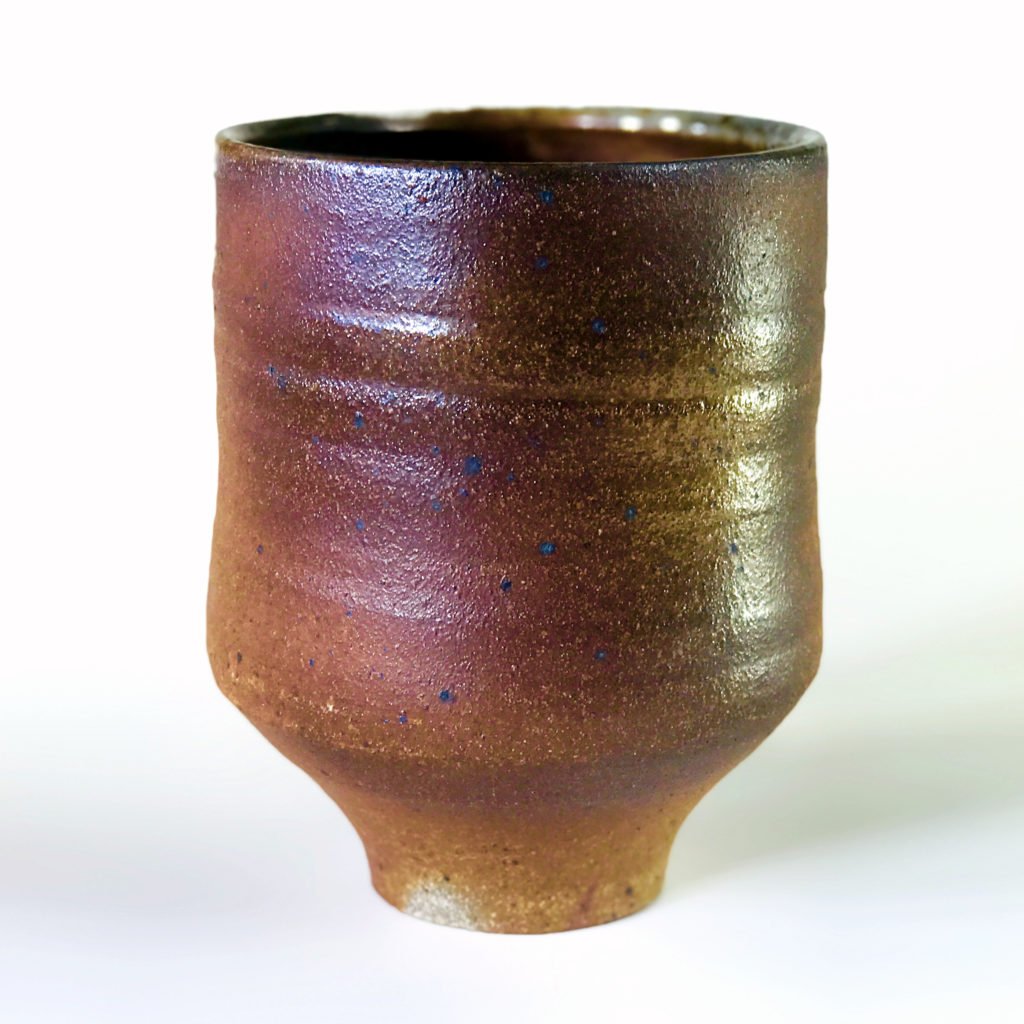
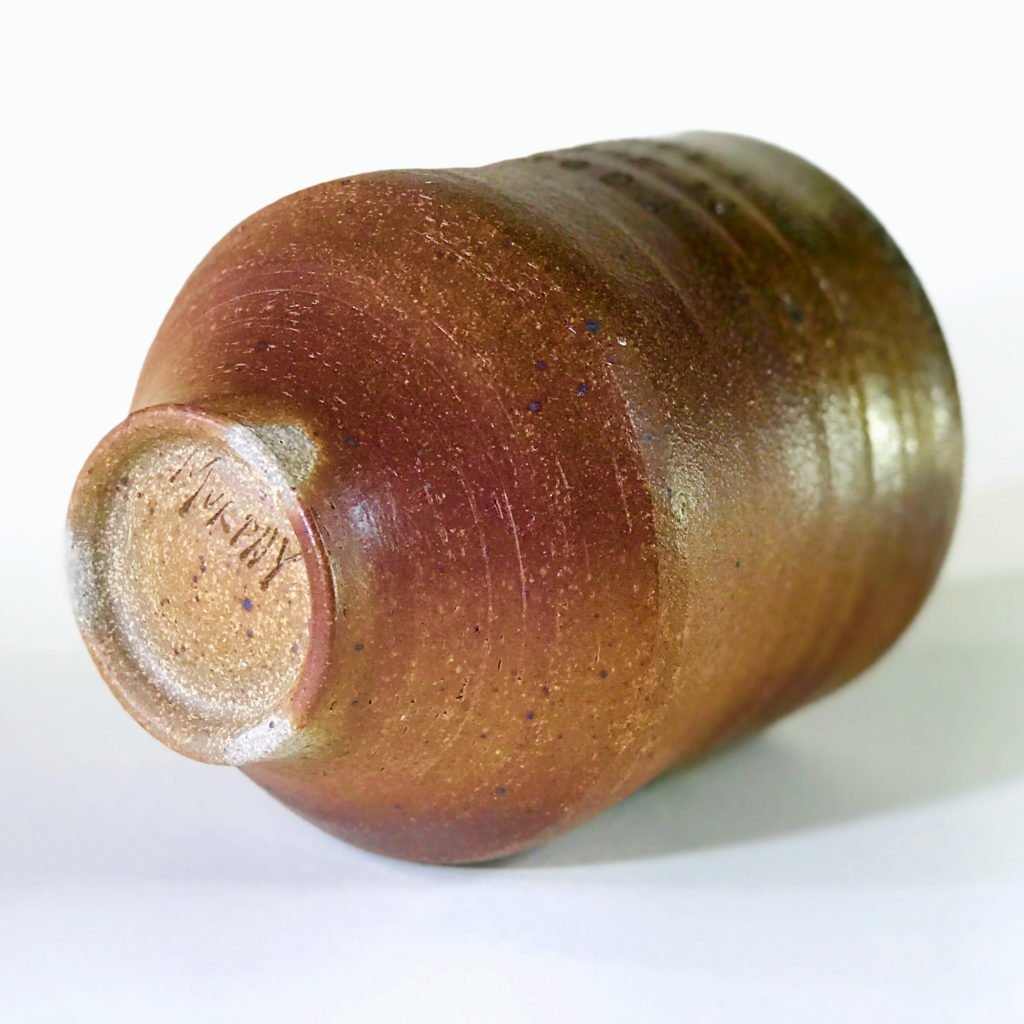
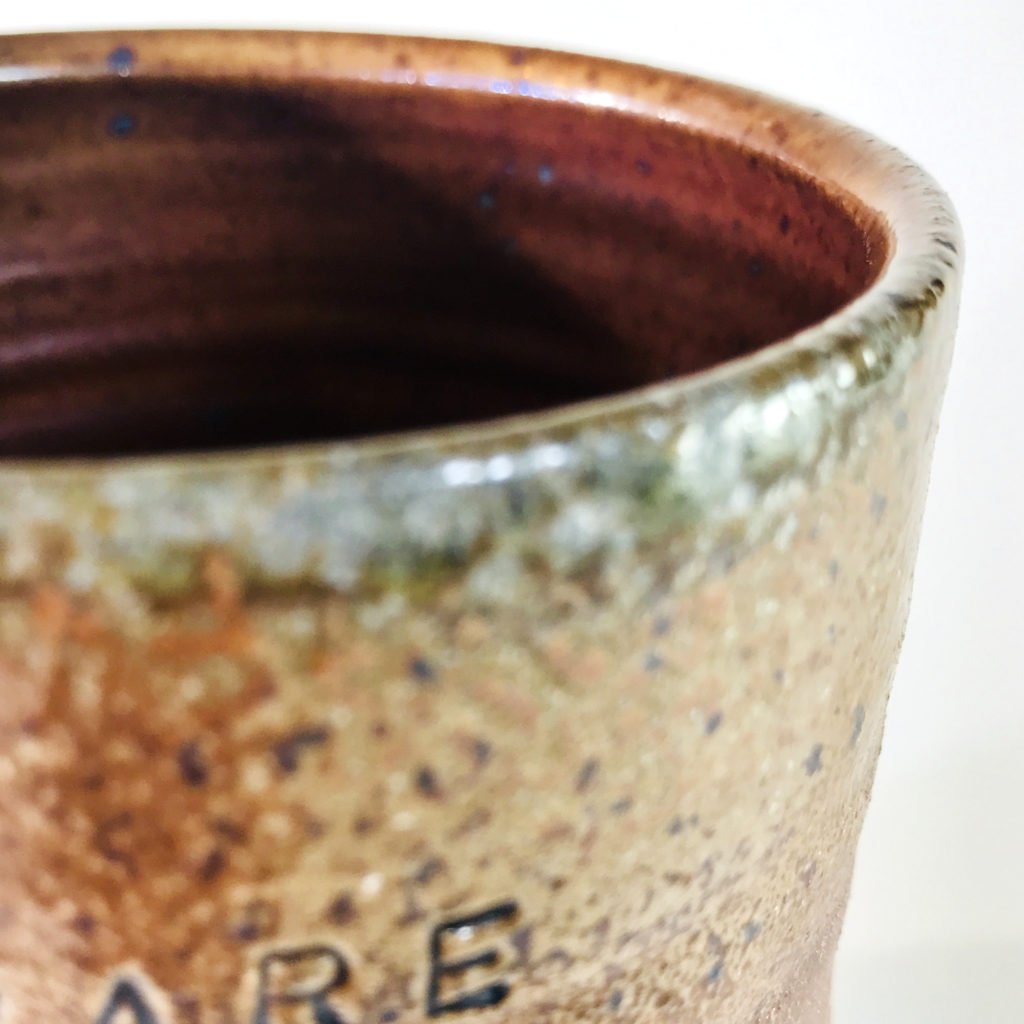
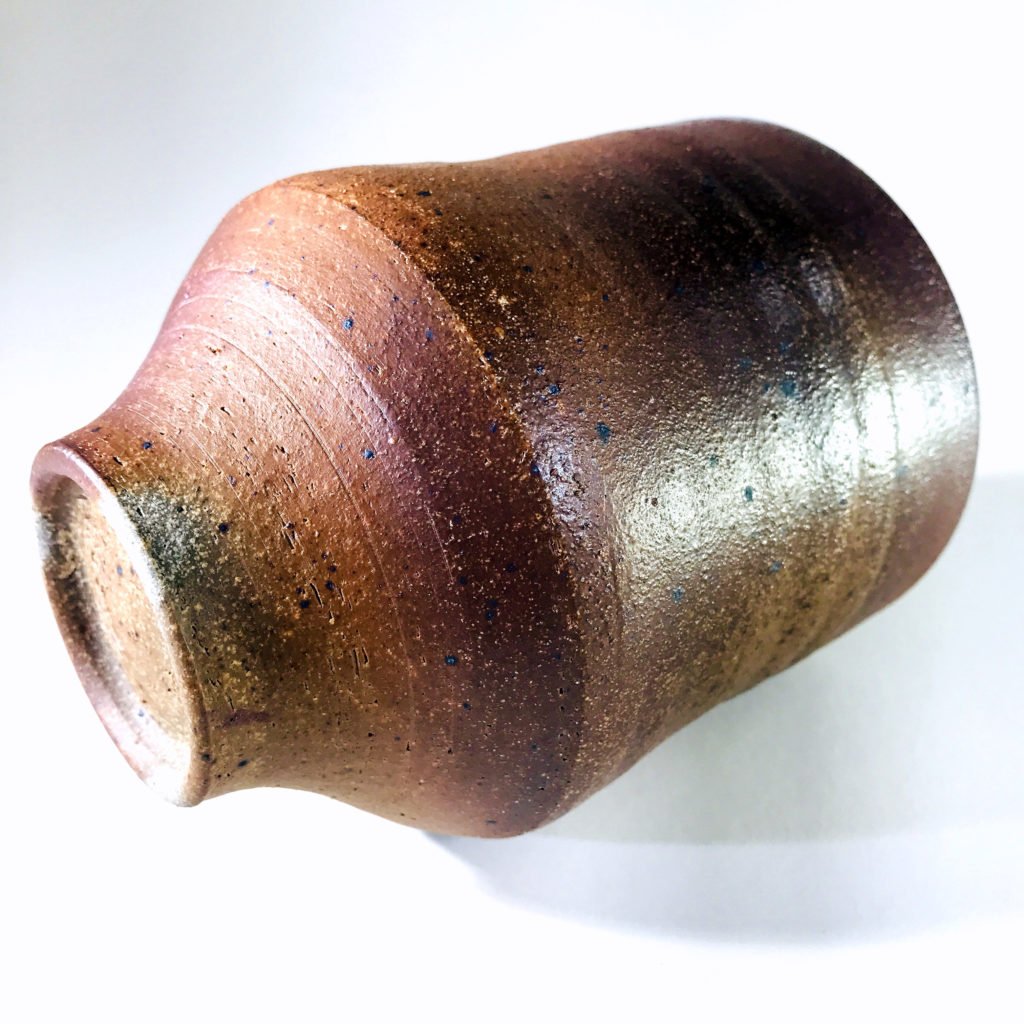
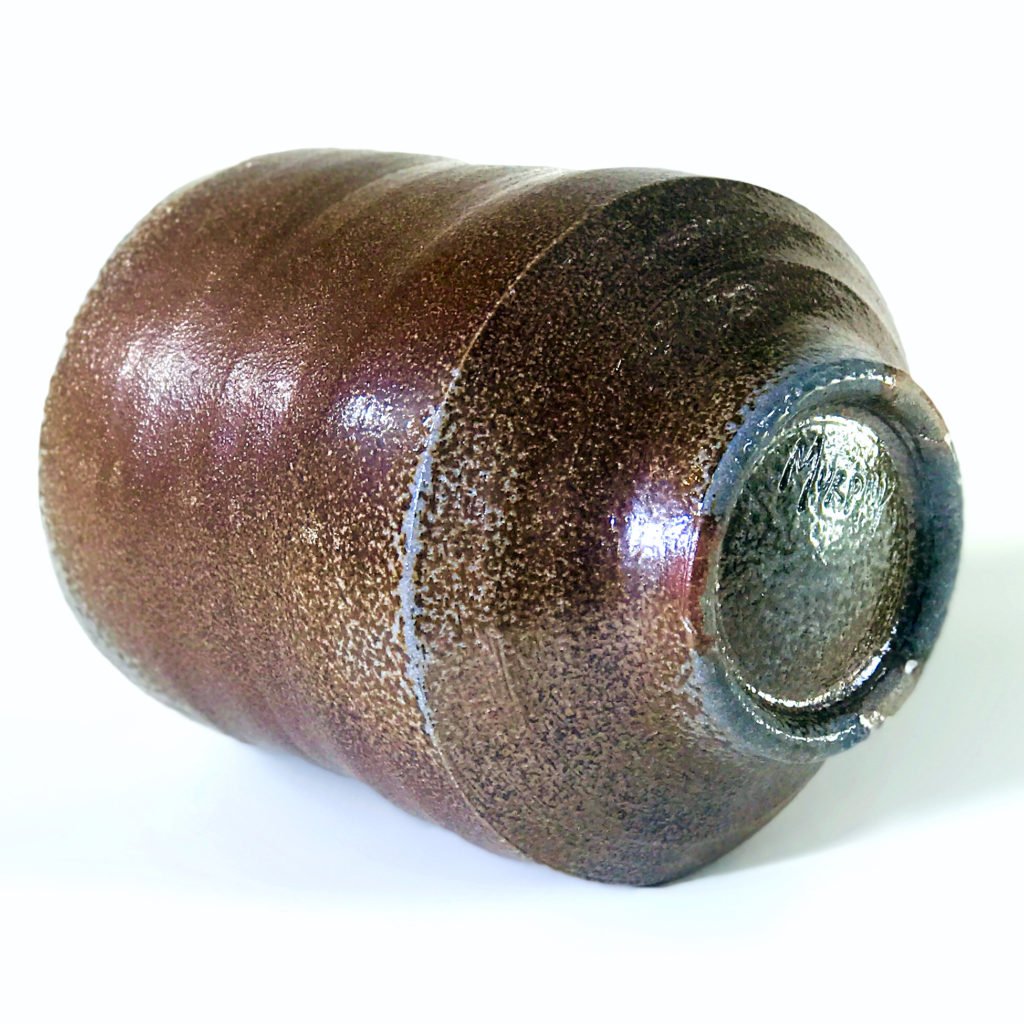
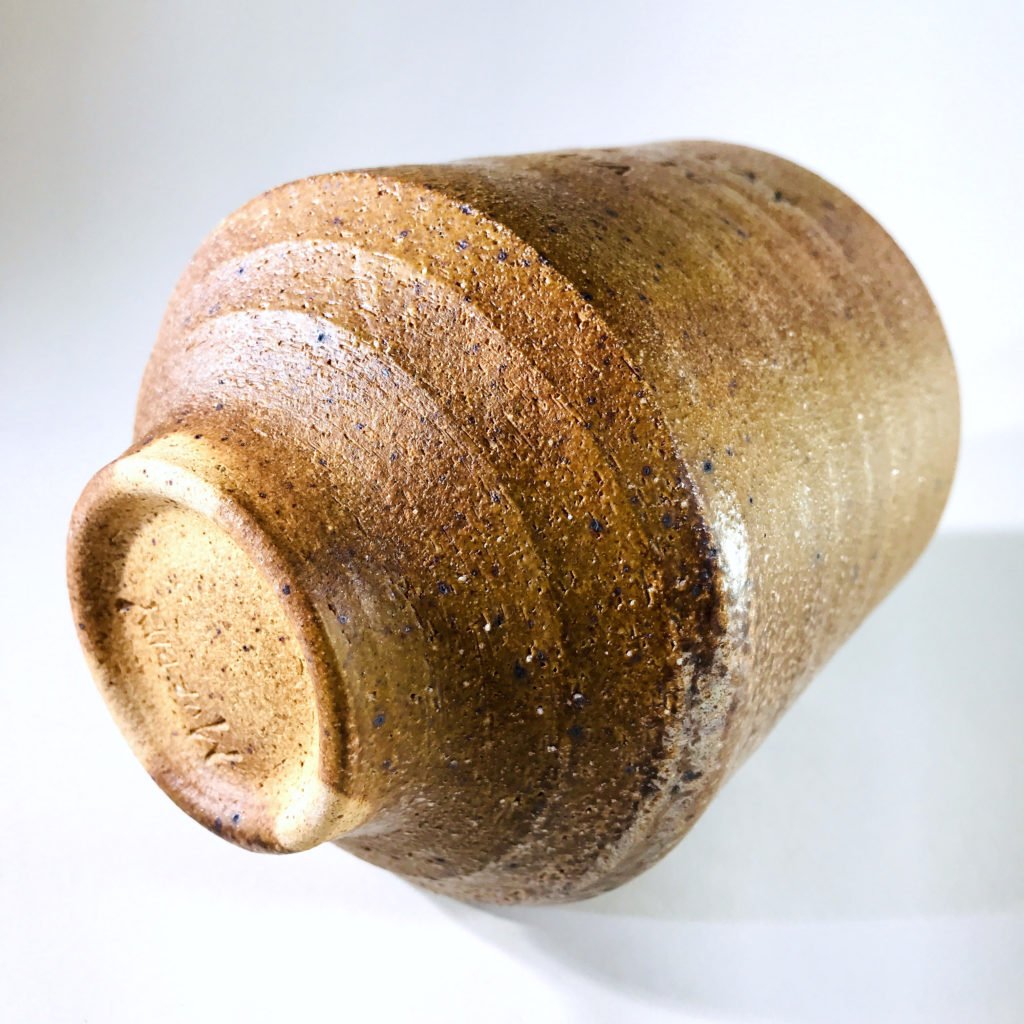
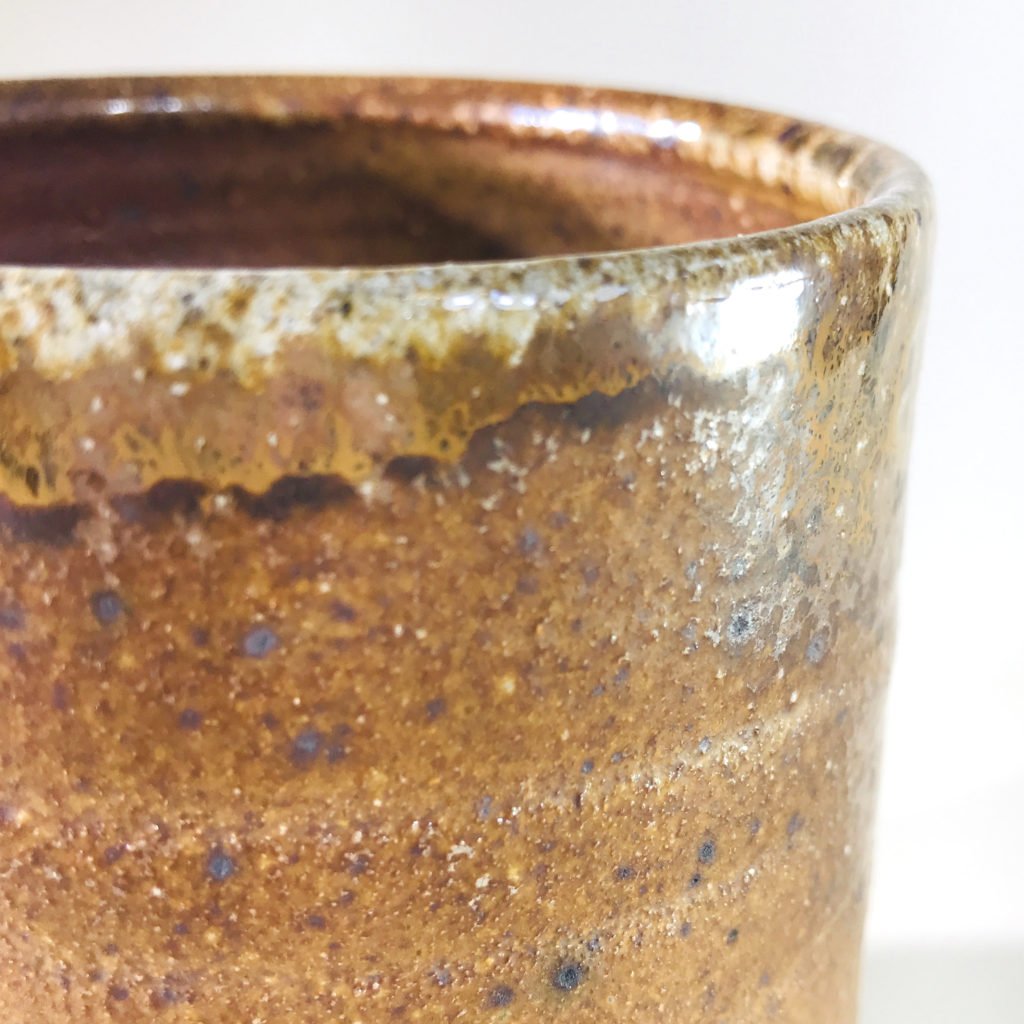
Emily Murphy Pottery in Spin me Round Exhibition at Thorne Sagendorph Gallery at Keene State College in Keene, NH
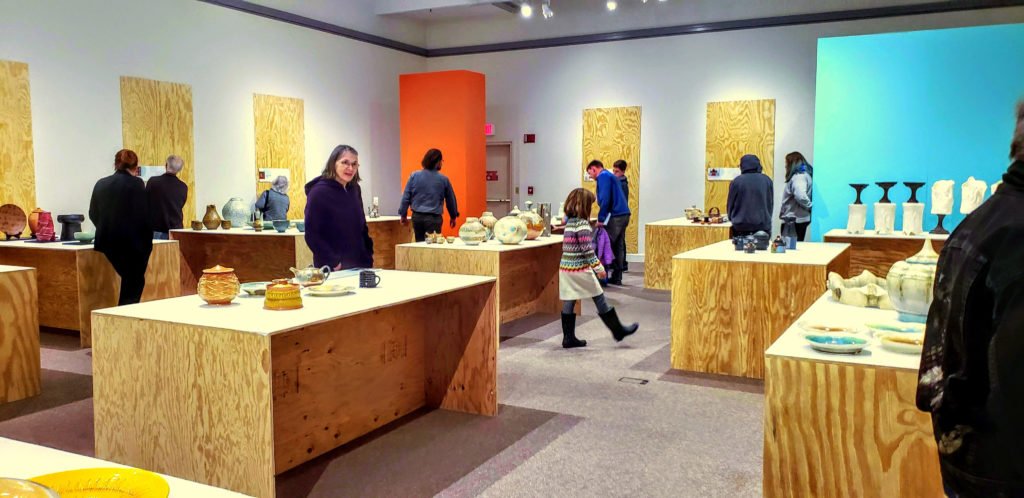
On display from October 17, 2019 - December 11, 2019. Curated by Paul McMullan.
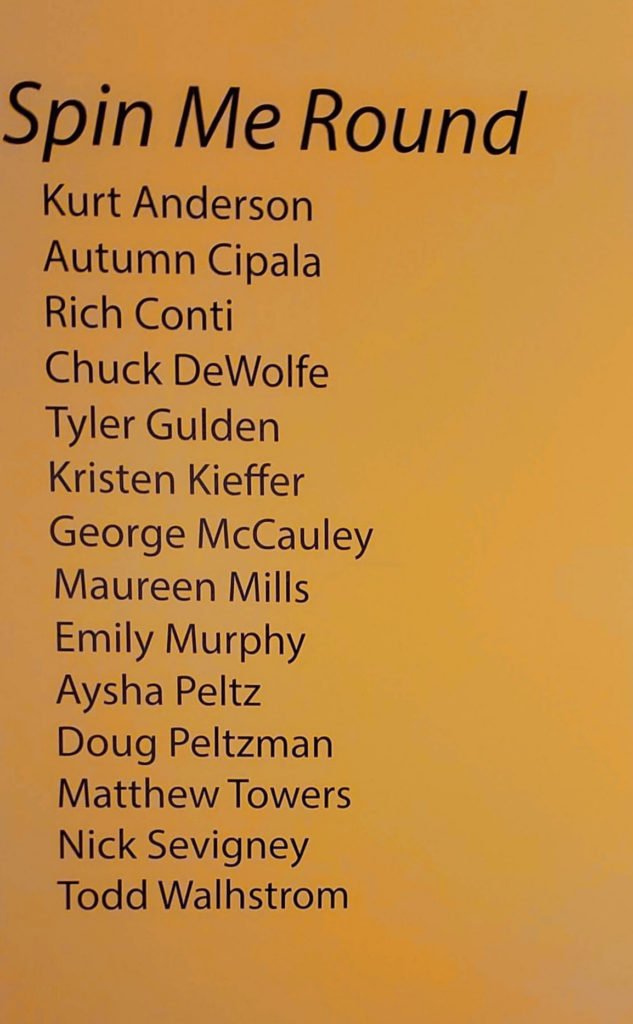
I am honored to be included in the fantastic exhibition, Spin Me Round, curated by Paul McMullan, at the Thorne-Sagendorph Art Gallery, Keene State College in Keene, NH. It is a joy to have my work in such great company (see the list to the left?!).
It is a bit of a homecoming for my work. I was was born and raised in Keene, NH. My folks, my brother Jeff, and his family still live there today. My art-filled upbringing included taking summer camps at the Keene State College Ceramics Department.
Although I have not been able to travel to see the exhibition in person, thanks to my family in the area, I have a virtual tour of the show that I will share with you! All photos of the exhibition are by my dad, Jim Murphy.
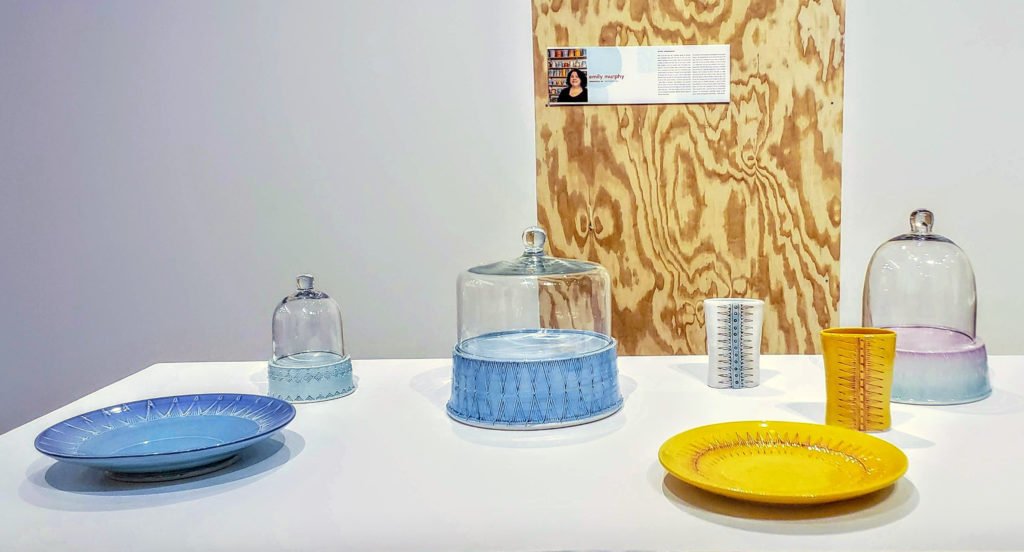
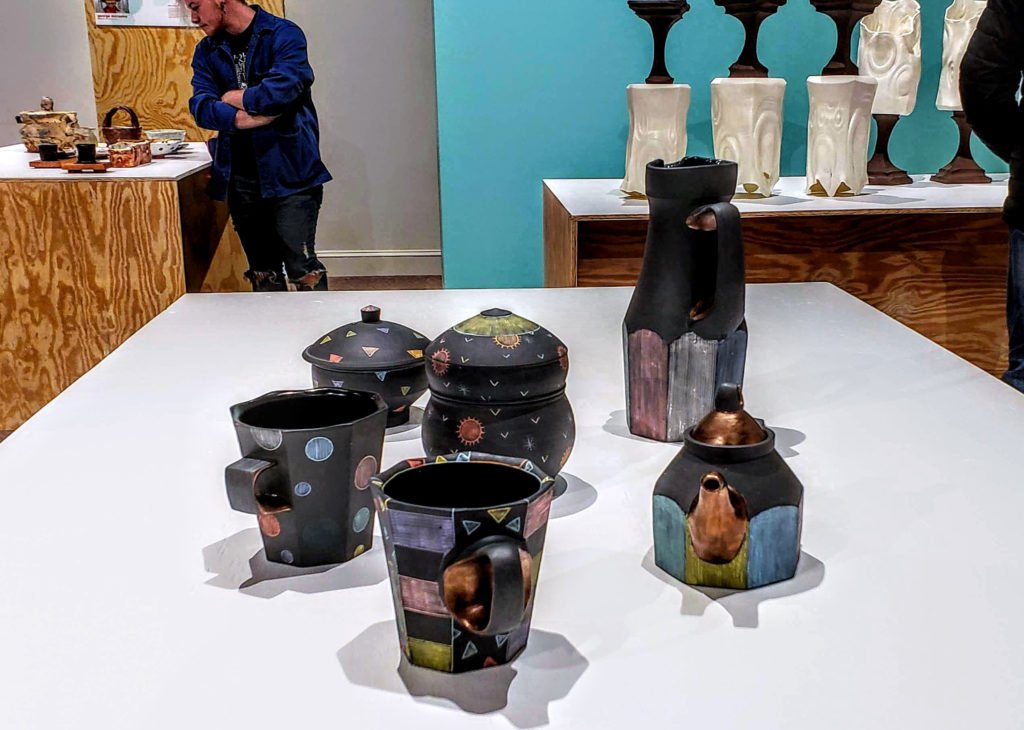
Doug Peltzman 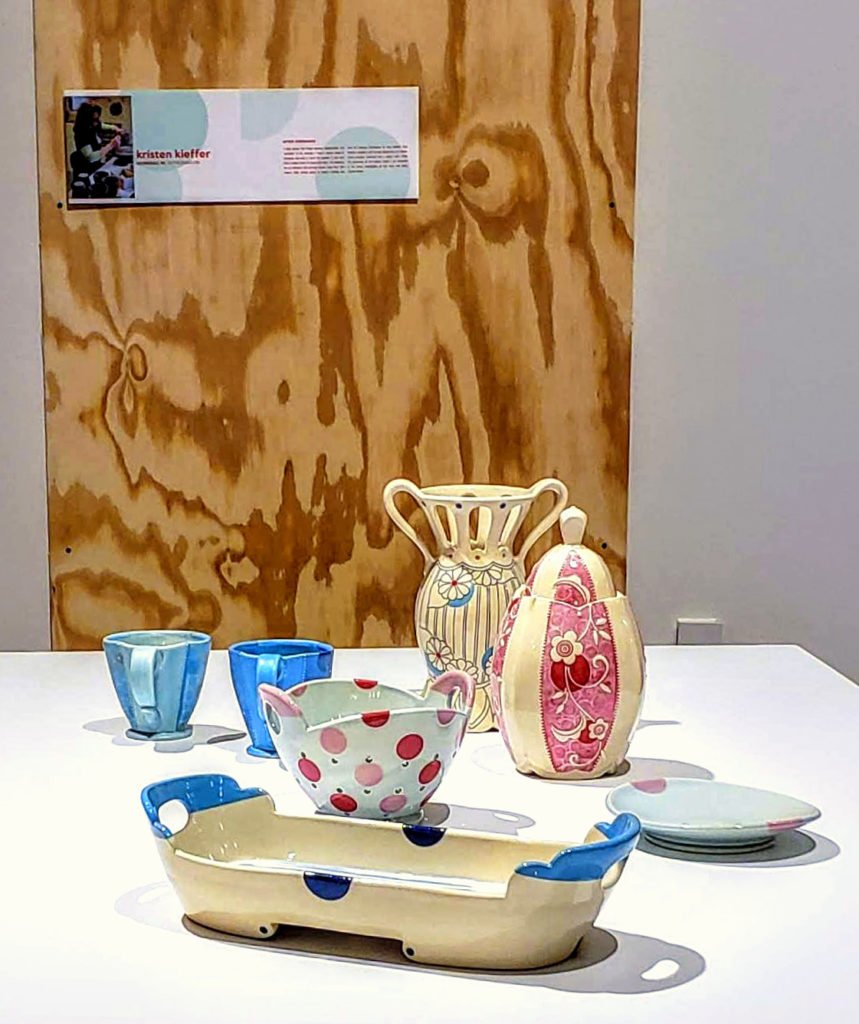
Kristen Kieffer 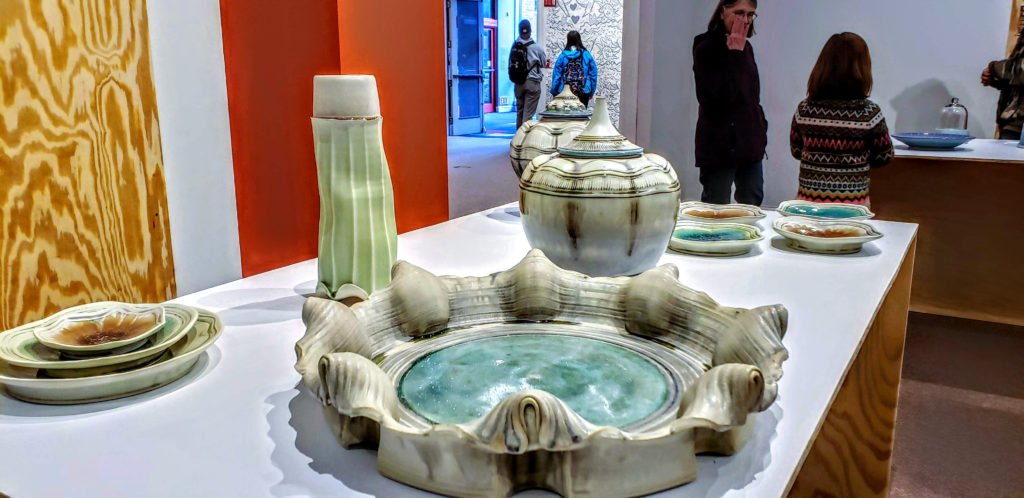
Aysha Peltz 
Matthew Towers 
Aysha Peltz 
Autumn Cipala 
Chuck DeWolfe 
Kurt Anderson
I don't have photos of the individual displays of all of the artists in the show, but I hope you take some time to visit their websites!
- Todd Wahlstrom
- Maureen Mills
- George McCauley
- Tyler Gulden
- Nick Sevigney
Emily Murphy
Artist Statement
September 2019
What if our lives were full of beautiful objects for everyday use? Handmade pieces that took time to make and were durable, functional and full of beauty. Most of our lives are full of single use plastic and items that are not meant to outlast their trendiness. They are machine made and shipped from one side of the world to another. Never meant to have a lasting use or impression on the user, much less a connection to any person involved in the process of making. Our lives can be fuller by reversing this. One mug at a time. I strive to make pieces that will fit into your daily life and elevate your everyday tasks. As well as those special moments.
I get lost in each piece that I make. When I'm throwing a piece nothing is more important than the gesture of the form. When I'm decorating the piece, the mark of the brush carries the weight of the world. While the world fades away, I think about someone using the piece over time and continuously discovering different nuanced aspects of the form and surface. The movement of the throwing line, the boldness of an impressed texture or the juxtaposition of the raw clay and the gloss of the glaze. When a kiln is unloaded and rows of pots are lined up, it might look like they are simply multiples of a form. But when I am making them, the curve and movement of each piece is obsessed over. And after they are fired, each piece is completely one of a kind to me.
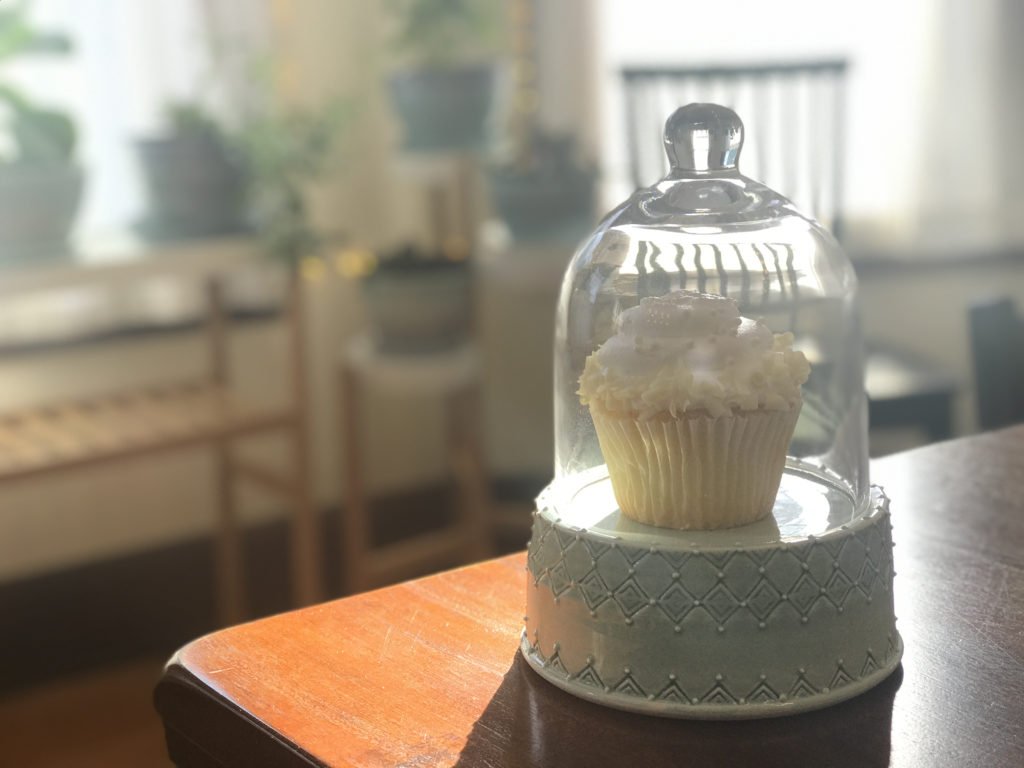
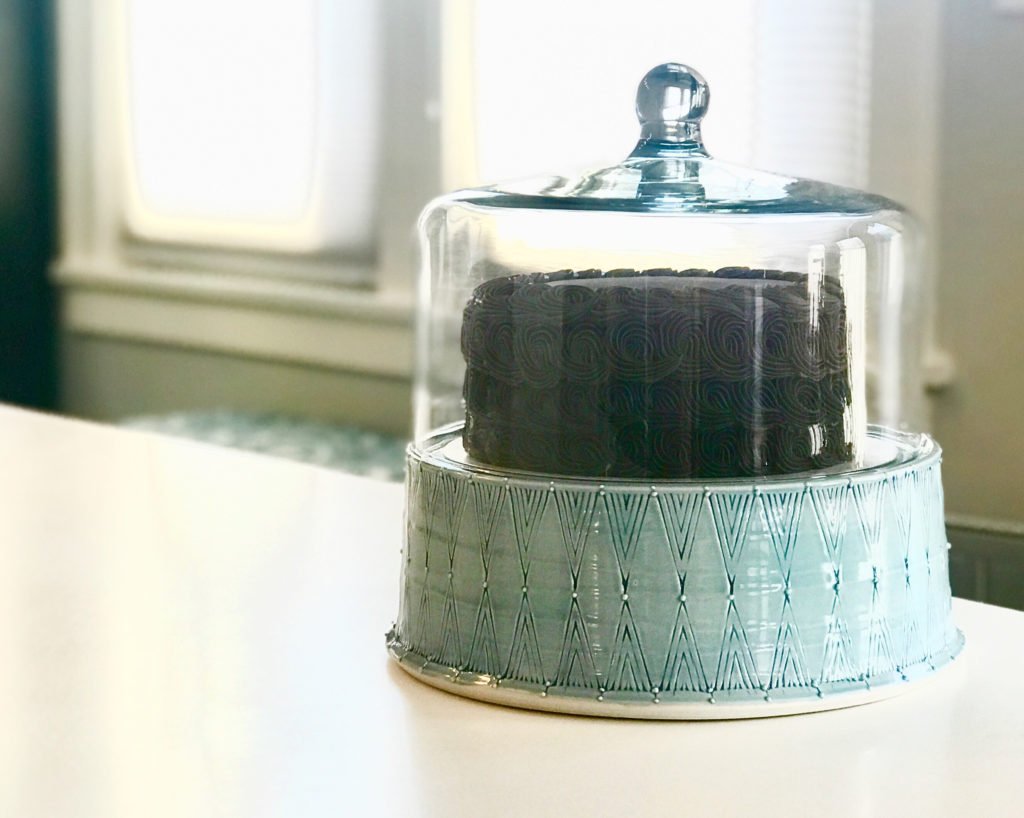
I want these objects that I make to function flawlessly. And to replace the plastic and single use paper and other items that aren't meant to make it past the season before they break or become obsolete. I want my mugs to be the one that someone grabs for each morning, my cake stand to become part of a birthday celebration, a vase to be filled with wildflowers from your community garden. These pieces of pottery will outlast their counterparts that are manufactured with an expiration date. I hope that they will become full of memories and sentimentality, appreciated because of their beauty, design and thoughtful craftsmanship.
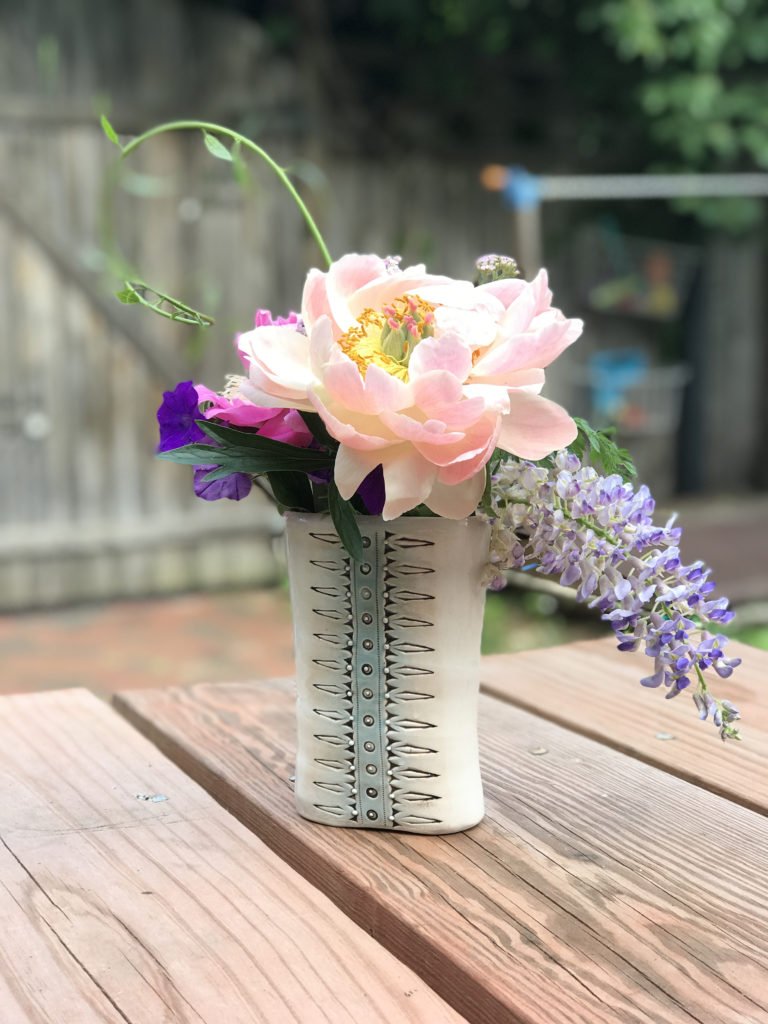
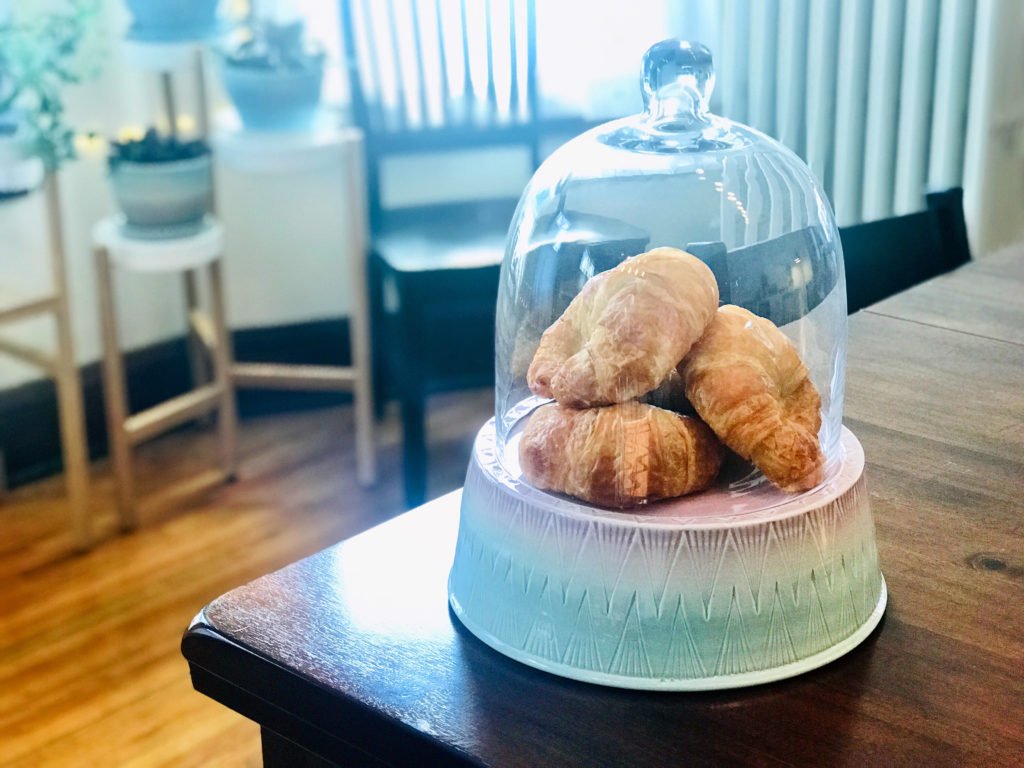
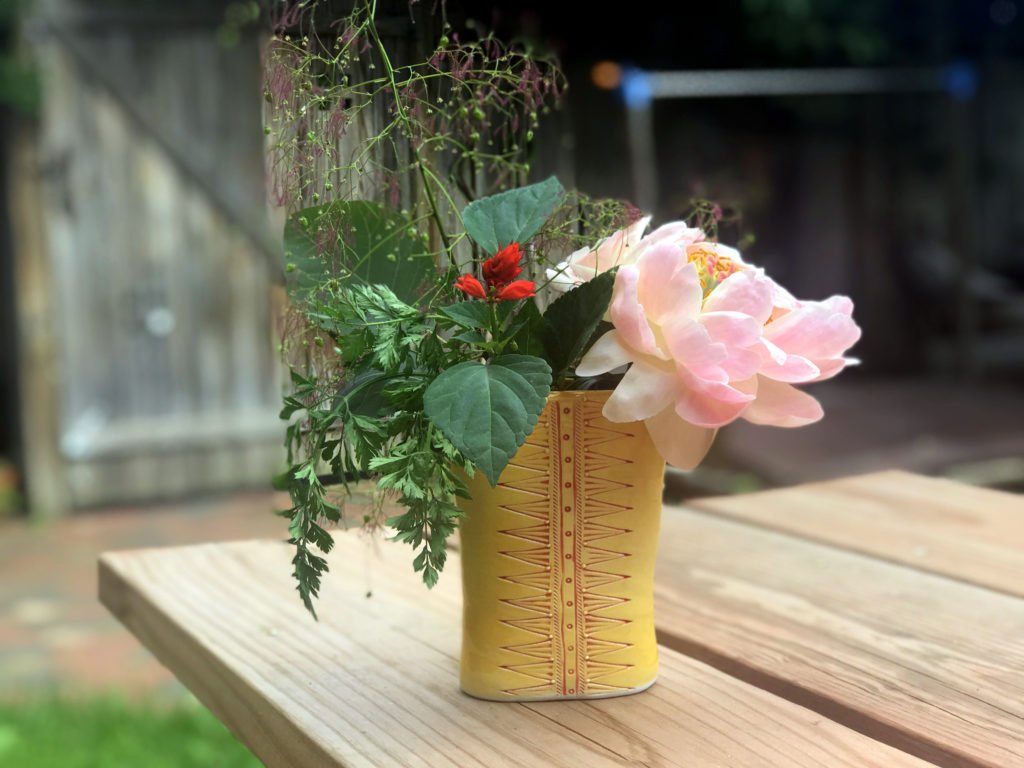
Here are some photos I took of my pieces, in use:
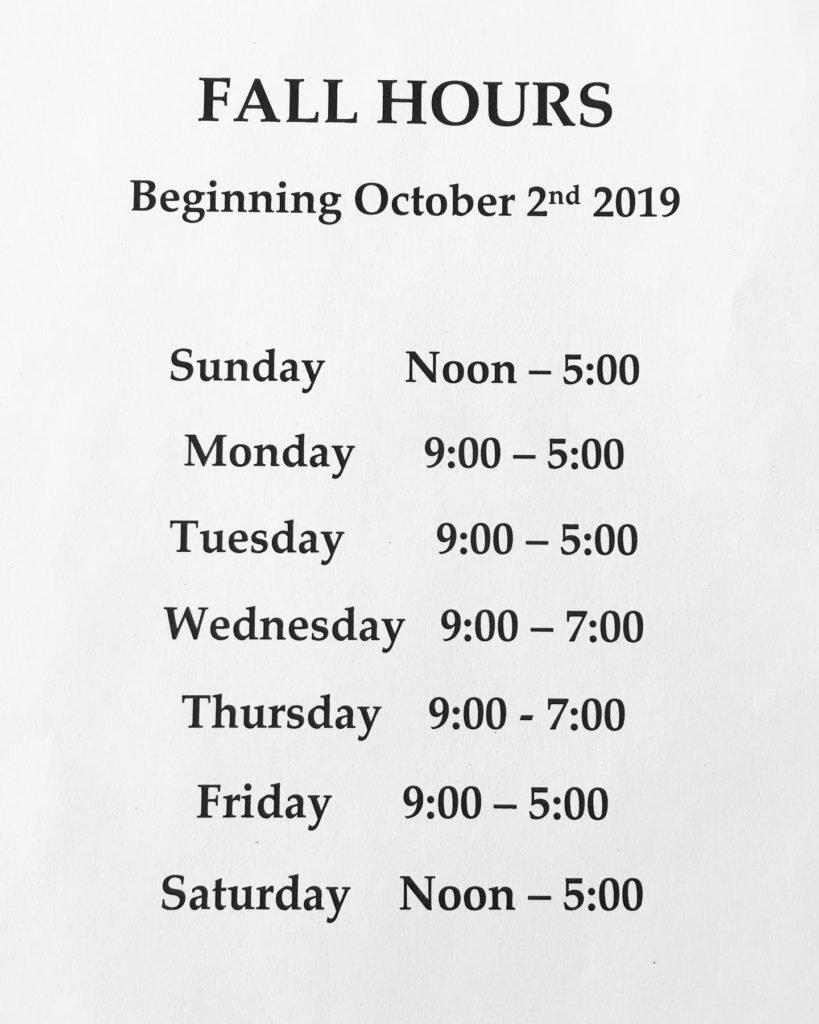
The exhibition is open through December 11th, 2019. Here are their current hours:
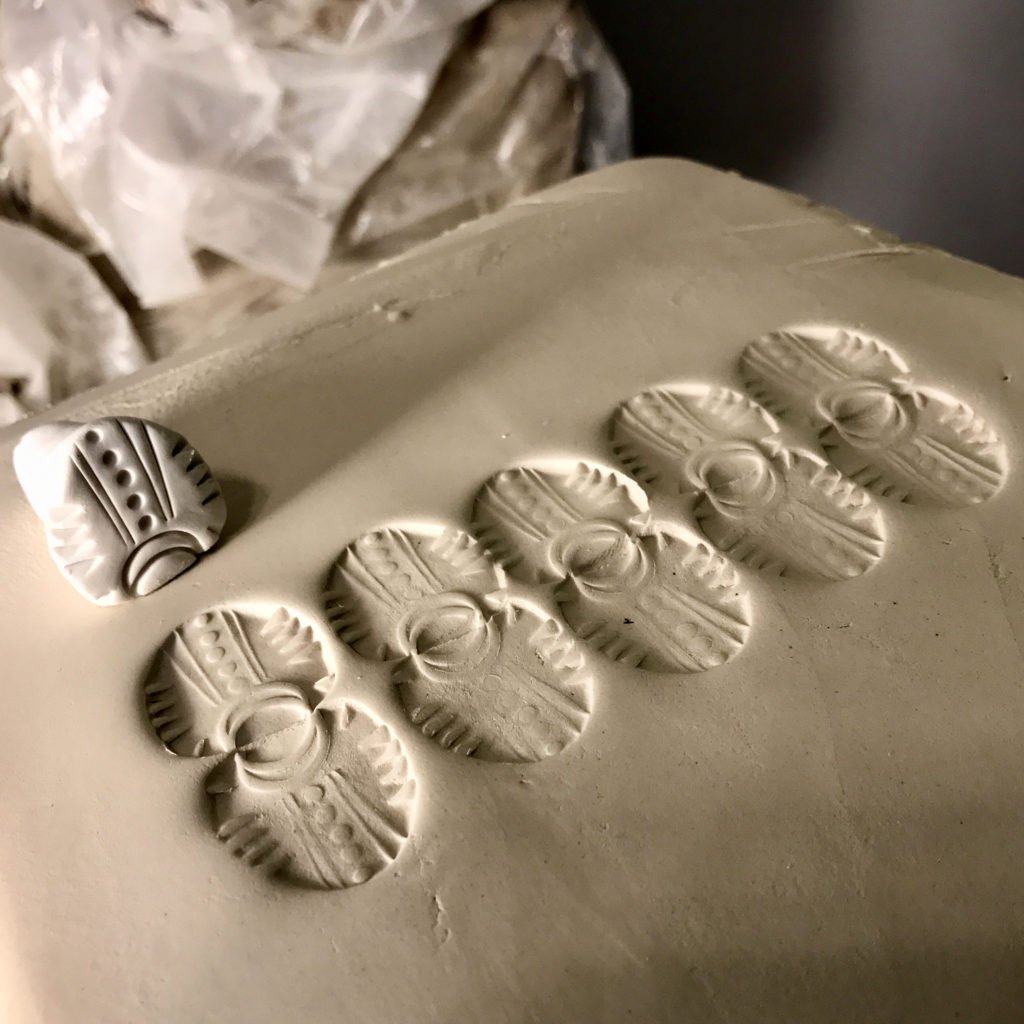
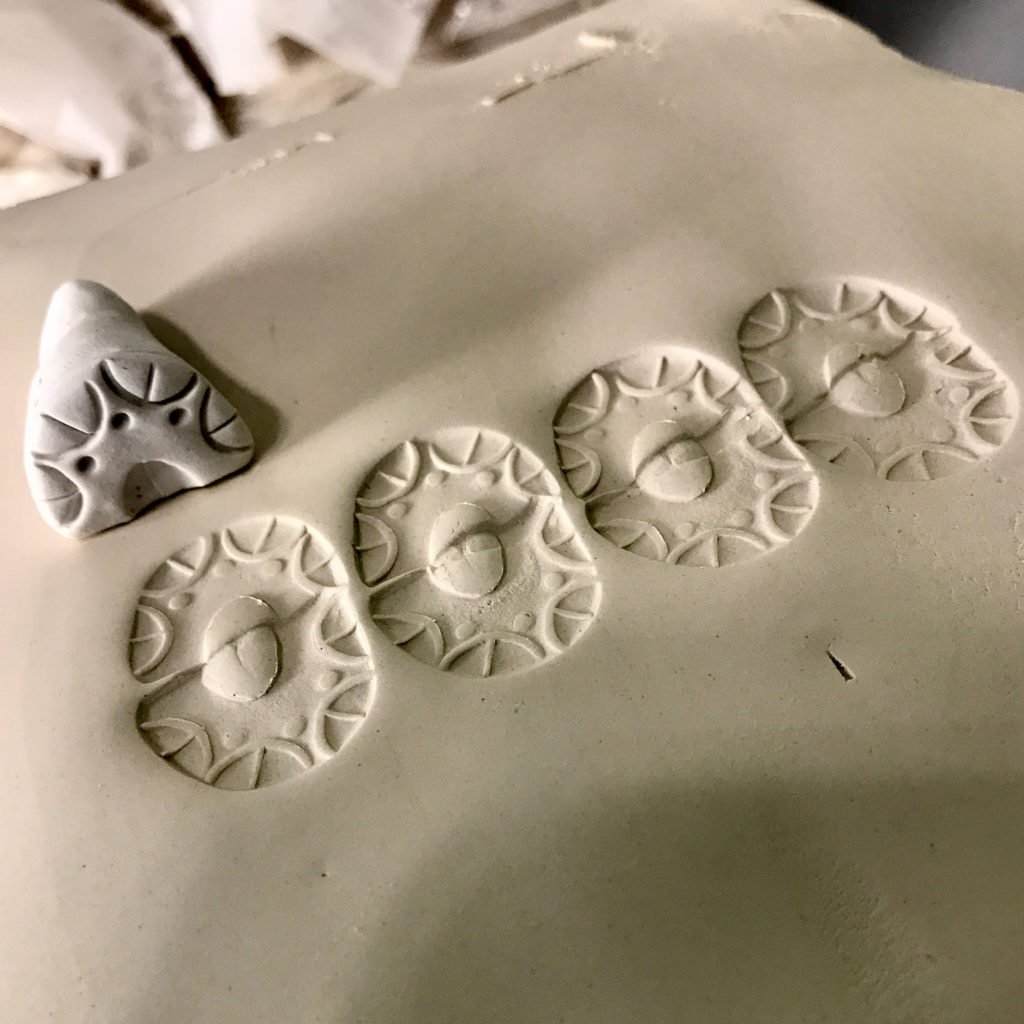
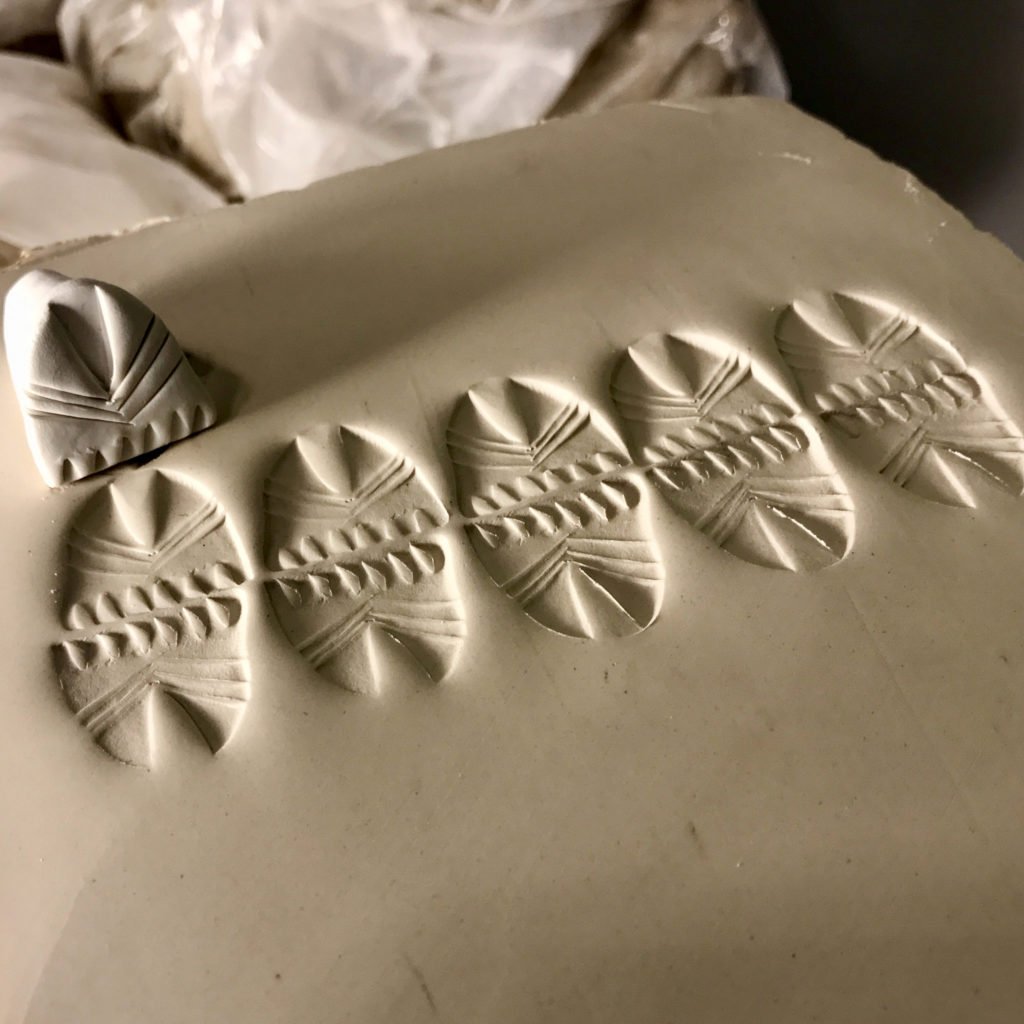
handmade stamps for clay

As you might have noticed, I love adding texture to my pieces. The glazes I have formulated for my pots break over high points and pool in recessed areas. Accentuating textured areas such as stamped patterns and slip trailing. I have a large collection of stamps from MKM Tools, one-off stamps that I've picked up at NCECA and a plethora of other sources. Including ones that I have made out of a variety of materials.
I had been working on some Sculpey modeling with my kids and found myself making stamps for my pots as they were making animals and figurines. I've always enjoyed making stamps out of clay and then bisque them. But I sometimes can be a bit impatient. This gave me the ability to make the stamps I had in my head, bake them in the oven and then press into clay within a few hours! You can pick up Sculpey at any craft store and lots of places online. I opted to use the bulk white instead of colors because it's a bit less expensive when buying a larger quantity. And the tools can be just about anything found in your studio, toolbox or kitchen!
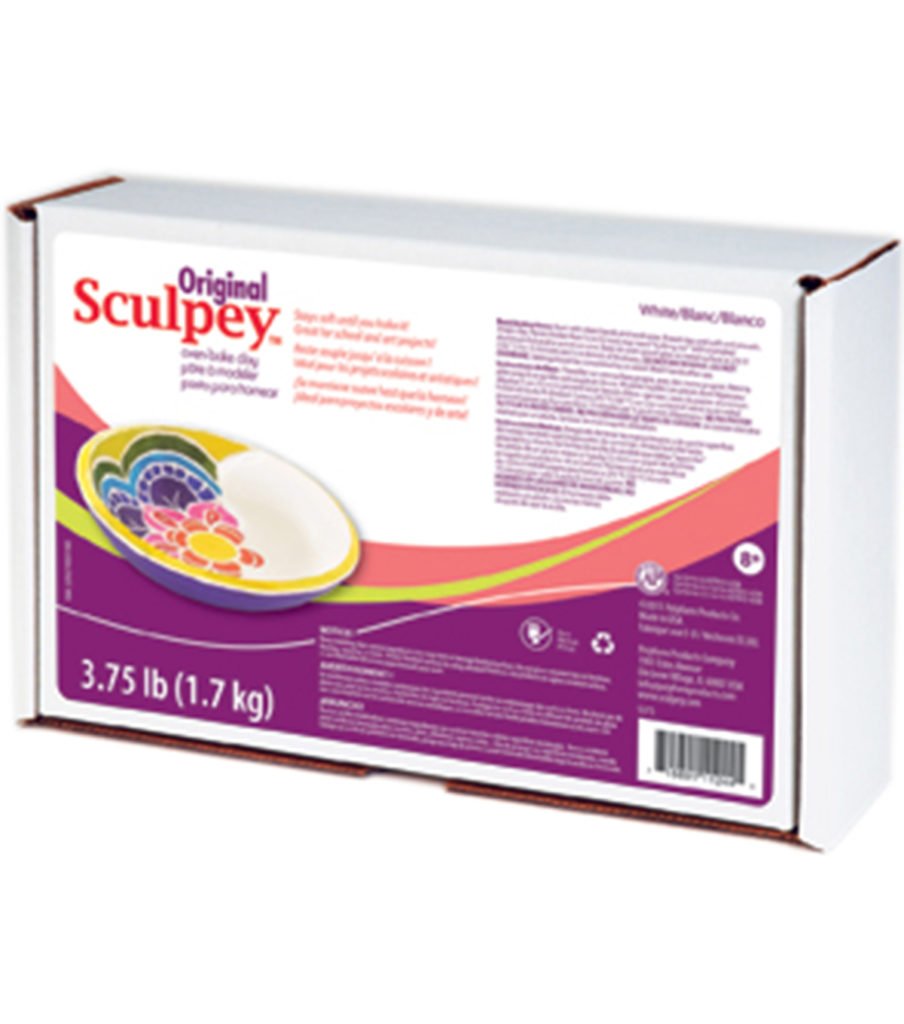
Sculpey for making stamps without waiting for a kiln to fire. 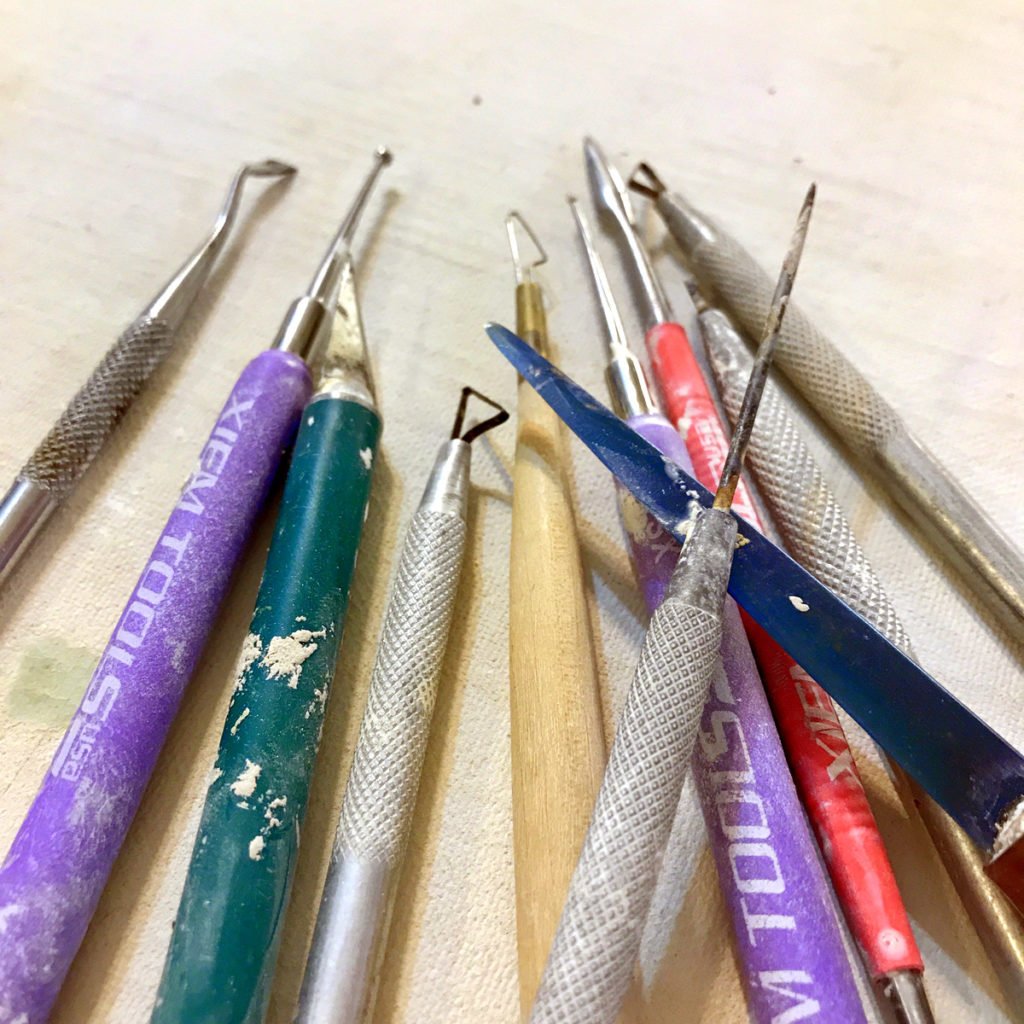
A selection of pottery tools for making quick Sculpey stamps.
The directions that Sculpey gives for baking thicker pieces:
"Preheat to 275 degrees F (135 C). Bake for 30 minutes per quarter inch of thickness. It is suggested that thicker pieces be initially baked for 15 minutes, then another 5 minutes, another 5 minutes, etc. The clay needs at least 15 minutes to cure properly." The thicker the piece, the longer it should bake.
I have also used this technique with elementary school art classes. It was really empowering for them to make their own tools and then make pieces with the tools they made! Unfortunately, I don't have any photos of their awesome pieces. But hopefully these photos of my stamps will do.
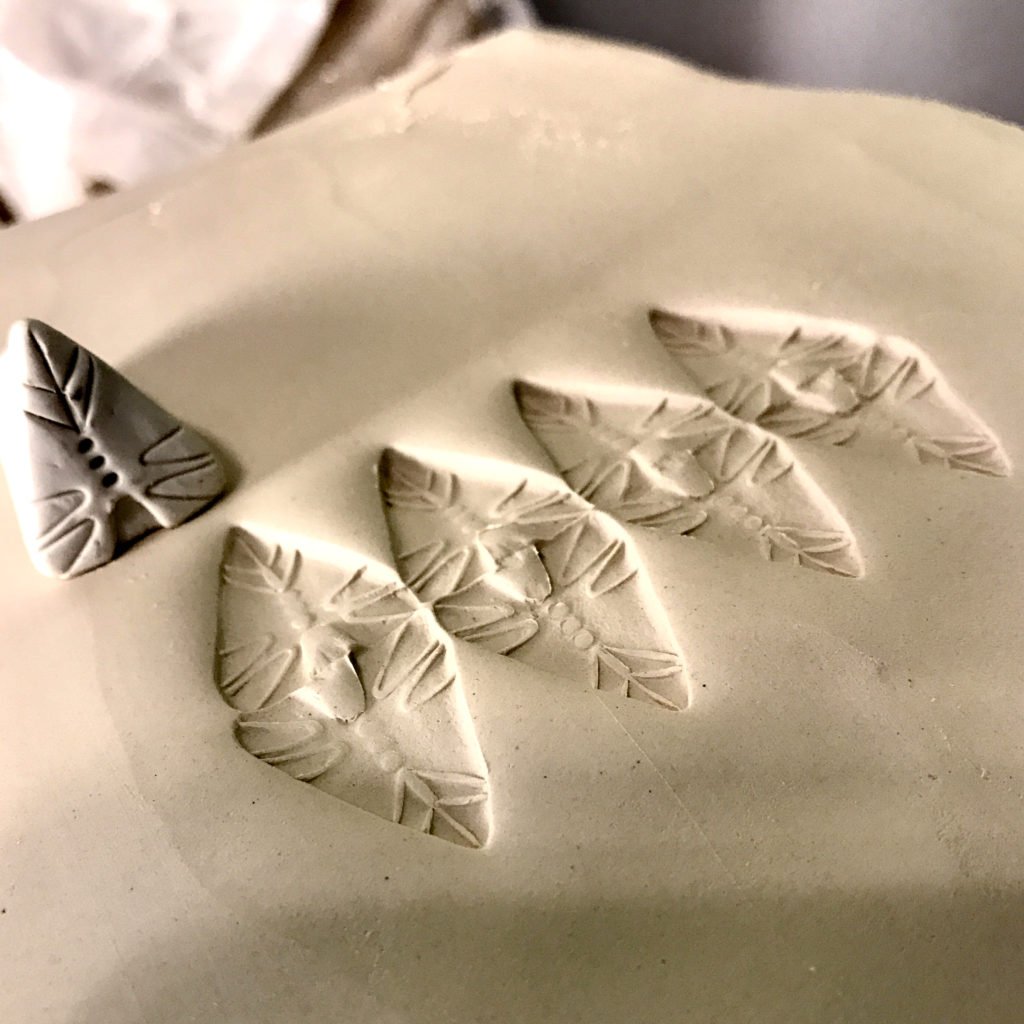
examples of geometric stamps
examples with rounded lines
As you can see, I do some slip trailing and other tools for imprinting to further pattern the piece and add dimension.


Have fun making some tools! If you want to see some previous tool-making posts of mine, here are a few oldies but goodies:
And for today's moment of meditation... here is a little video of me adding slip trailed dots to a mug. But 10 times faster than in real life.
a (follow-up) study of clay bodies from Continental Clay fired in a soda firing
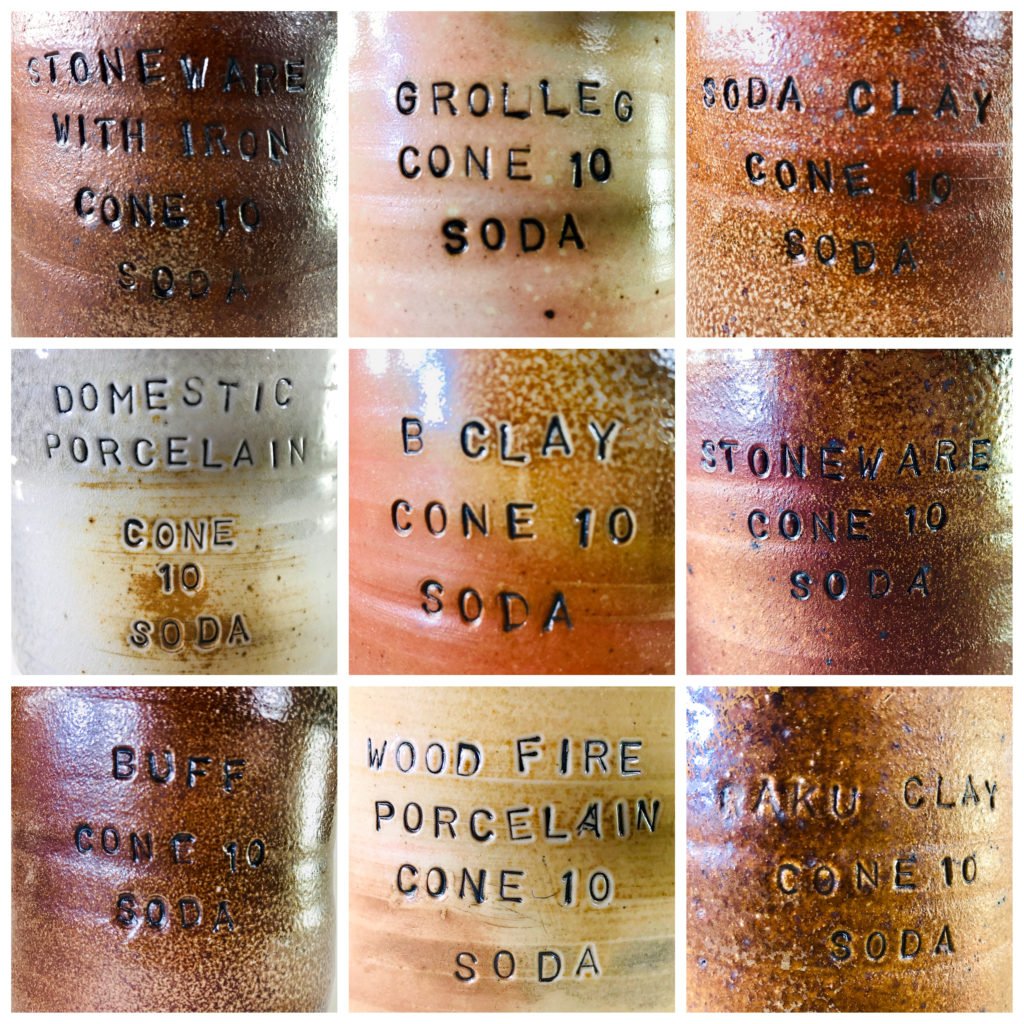
Over the years, you may have come across some tea bowls that I made of the clay bodies at Continental Clay in their shop in Minneapolis and also shared in a previous blog post as well as. The blog post still gets a ton of visits, but it felt like time to update them... it has been 13 years! New examples! Better photos! More clay bodies!
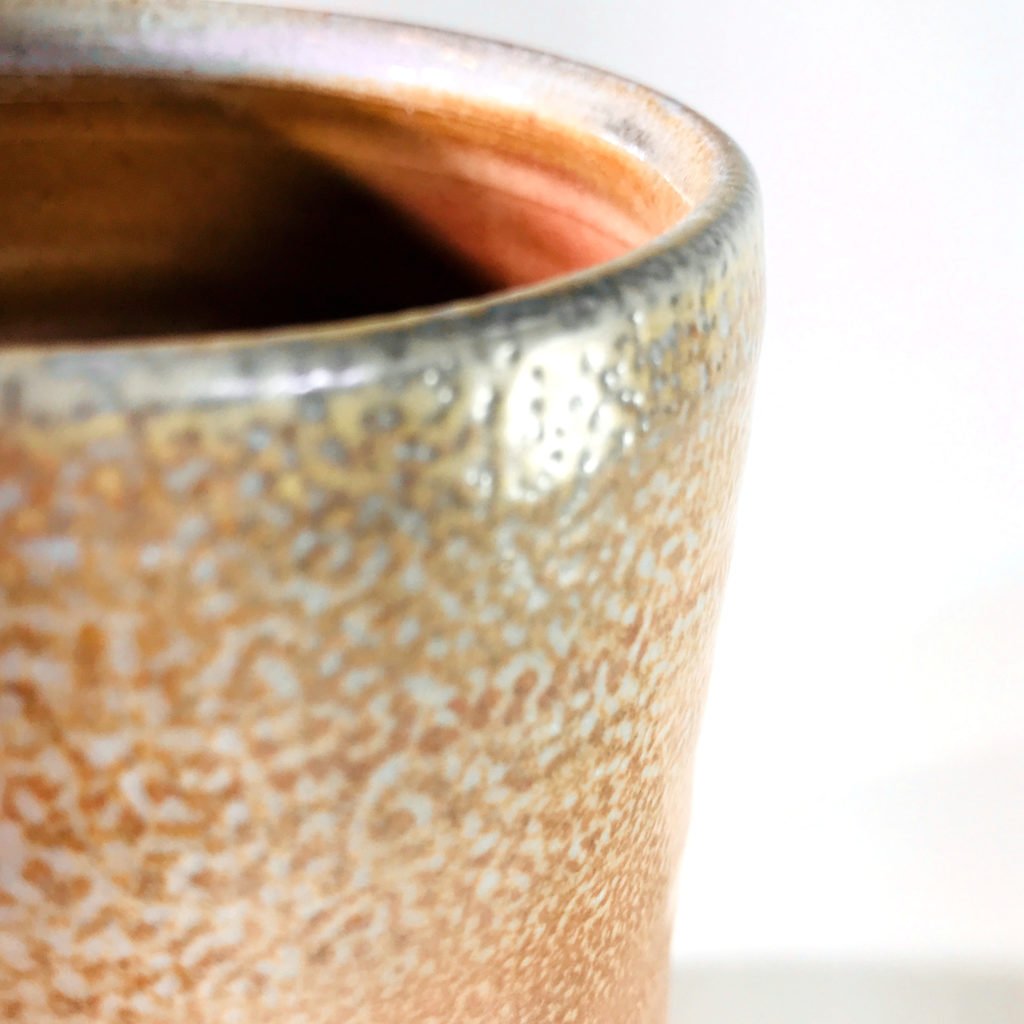
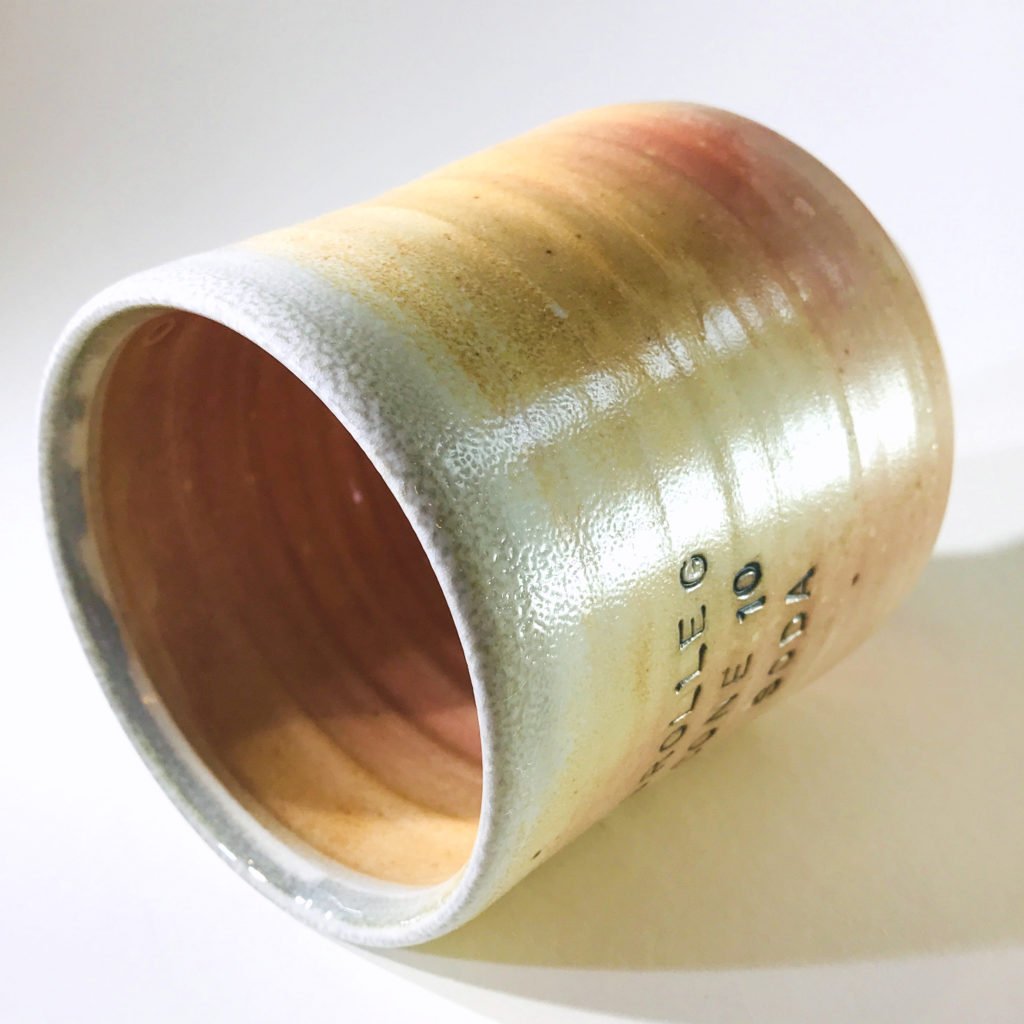
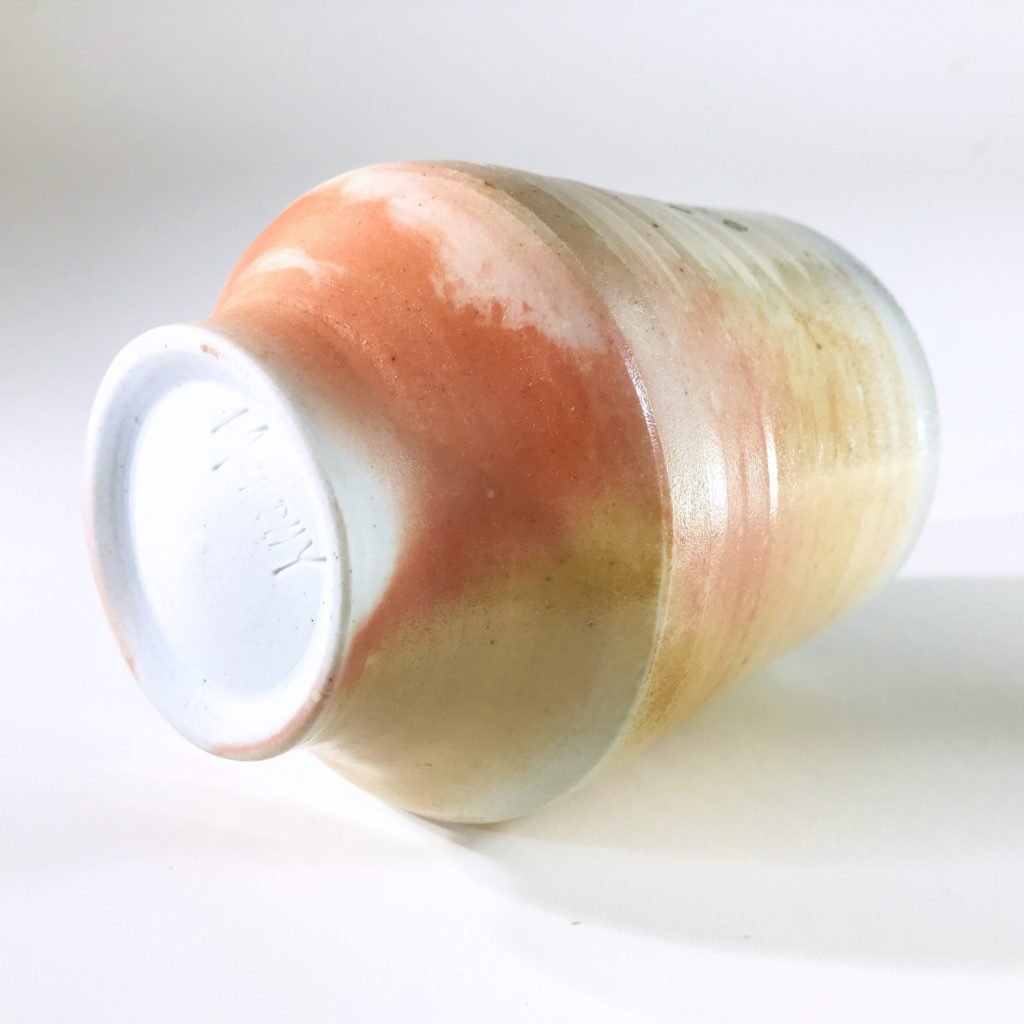
I use these examples to help my students at the Northern Clay Center choose what they want clay body they to use (minus soda and woodfire clays). I hope these photos capture the range of finishes these clay bodies give and can help some of you decide what you want to use, too! Each piece is glazed in a thin shino, just on the interior. The soda ash in the shino comes through the wall of the bisqued clay and adds another level of flashing to the piece! All pieces were fired to cone 10 in reduction with soda sprayed in around cone 9. I've added some thoughts on each of the clays. I highly encourage you to play around with different clay bodies in soda - whether it is from Continental or another supplier. You can change the surface of your piece with flashing slips - or by switching up the clay!
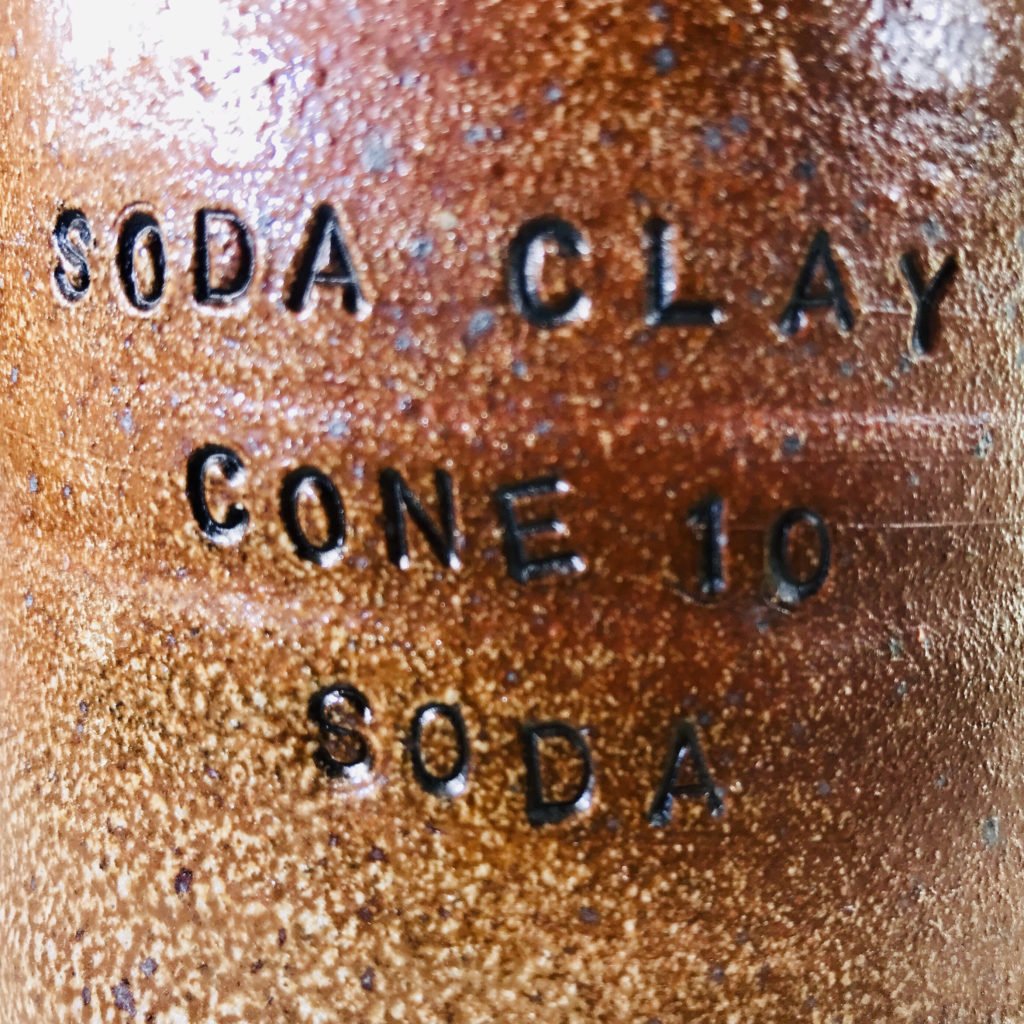
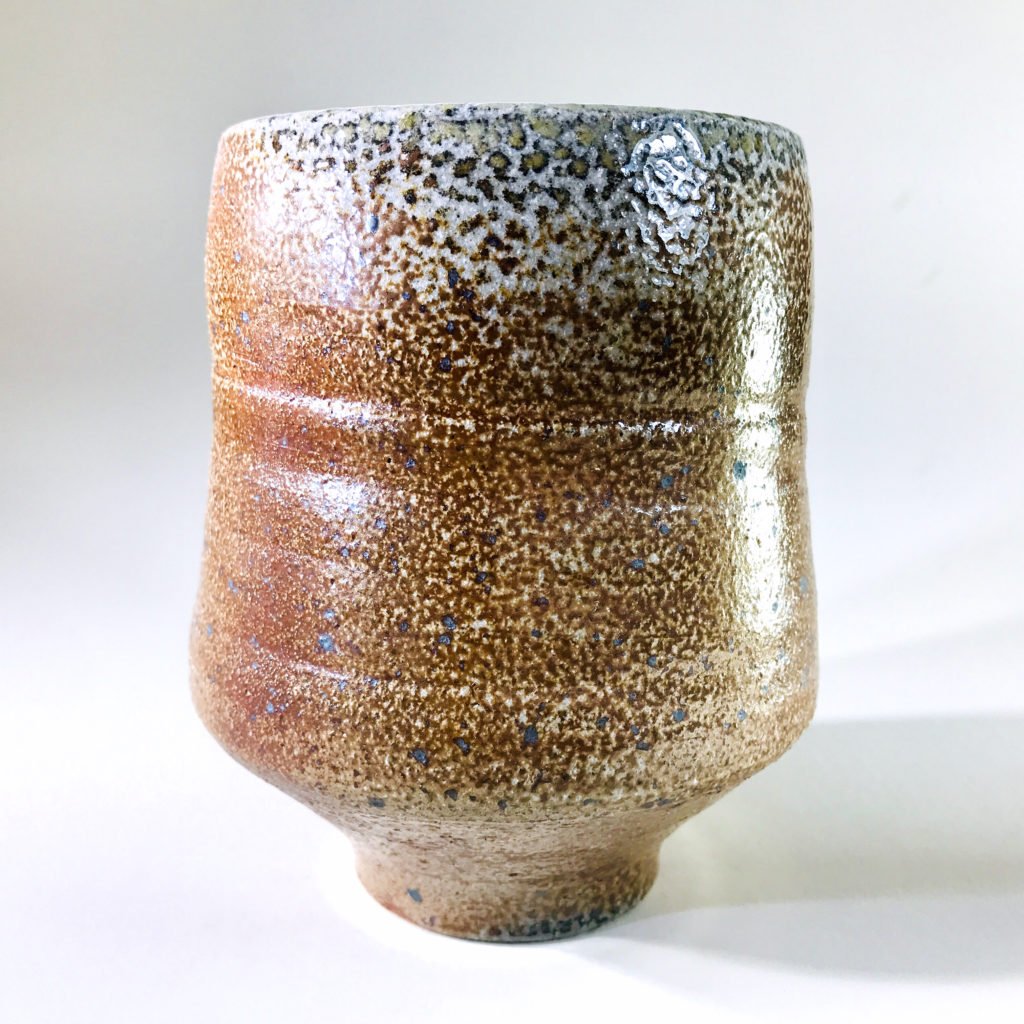
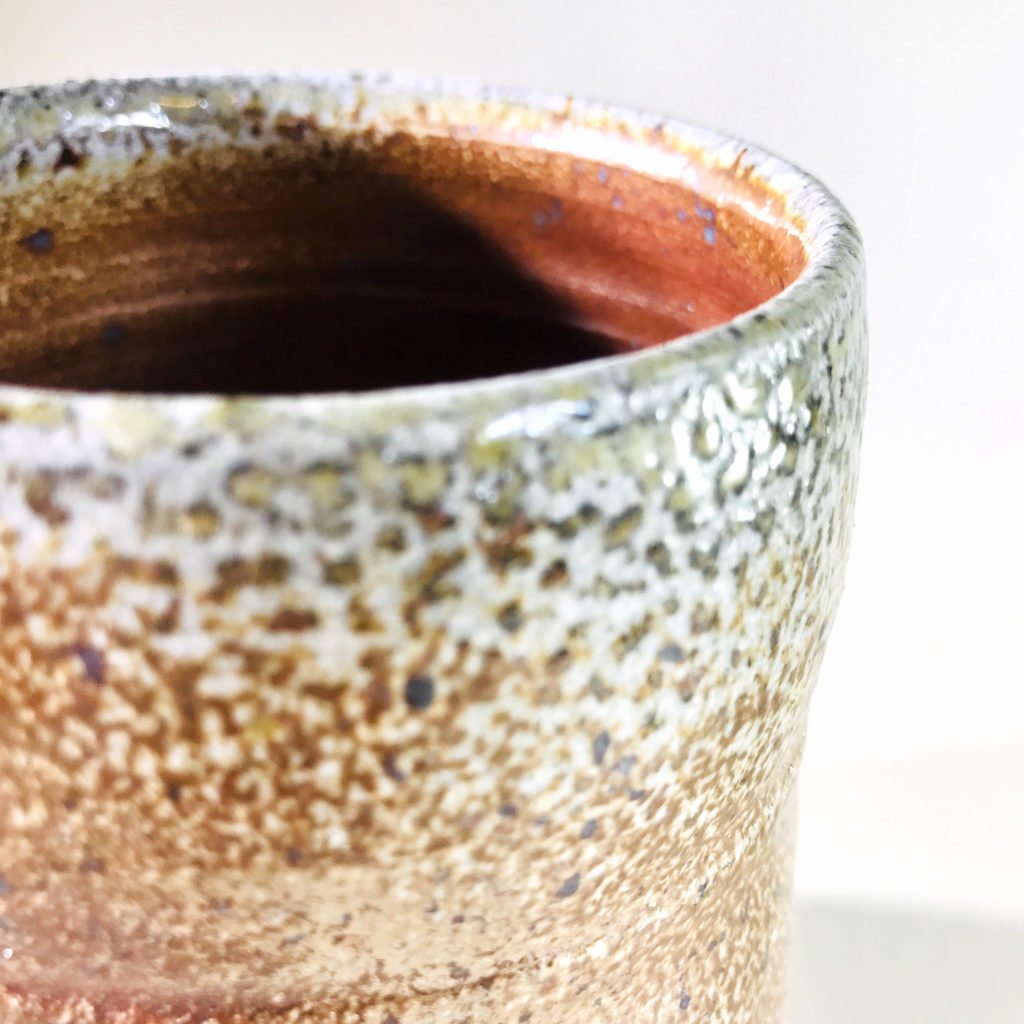
First up is the Soda Clay body from Continental Clay. It has beautiful flashing and great orange peel that can have a lovely green color to it. It is groggy and can be rough at first, but you'll quickly get used to it quickly4. But it will dull your trimming tools quickly! It has some excellent durability that can stand a lot of abuse. It seems like it has an above average high alumina content and can be a bit dry when not hit with soda. But a lovely range of flashing and texture to it. When I was primarily soda firing, this was my main clay. It a custom body that we used at Lillstreet, and then CC adapted it into their own Soda Clay body.
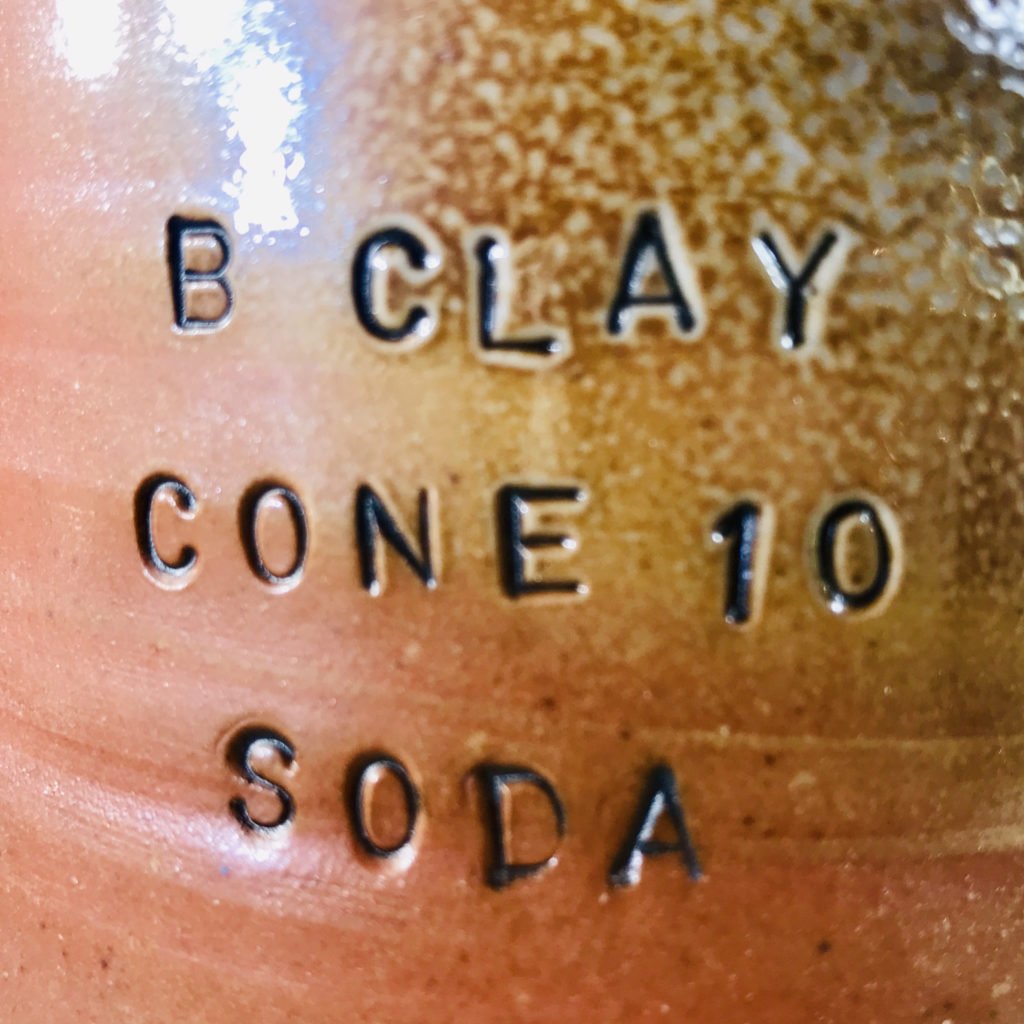
The B Clay from Continental Clay is a dream to throw and can flash spectacularly in a soda firing. Especially with shino as the liner glaze! The range of color is wide. And although this sample is very colorful, it still doesn't catch all it can do. If it is in an oxidized pocket of the kiln, it can be more tan and even in color. It's the top clay body choice by my soda students at NCC. And probably my favorite clay to throw. Both B Clay and porcelain do some extra flashing when lined with shino.
Grolleg Porcelain has my heart! It can be fickle, but when it does its thing, it is glorious! Again, the secret is glazing with shino as a liner so it takes the flashing up a few notches. Check out the range of colors! The peachy color really comes out when the piece is thin and a liner glaze of shino is used. If Grolleg is in a pocket of oxidation, it can be just white. Or if it is in a heavy soda and reduction area, it can be a shiny grey sharkskin finish! This is the main clay I use in my cone 10 oxidation work too.
The test cups that I've made of Domestic Porcelain from Continental Clay in the soda kiln always crack me up. I made one, fired it and it came out miles more gorgeous than any other example that I had seen of the clay come out of the soda kiln. So I made ANOTHER one and fired that. And that was equally stunning. But seriously, it doesn't usually look this dynamic. It's a nice clay body - and is significantly less expensive than Grolleg, but out of the soda kiln, it usually gets an "eh" from students who try it. But I can't seem to recreate the typical results it on my test cups. Maybe the kiln is just messing with me. Or maybe it just reacts really well with shino on the inside and thin walls. So I will leave it all up to you to decide if you want to dive in with Domestic Porcelain or not. And maybe share some photos so I can see what's happening in other kilns!
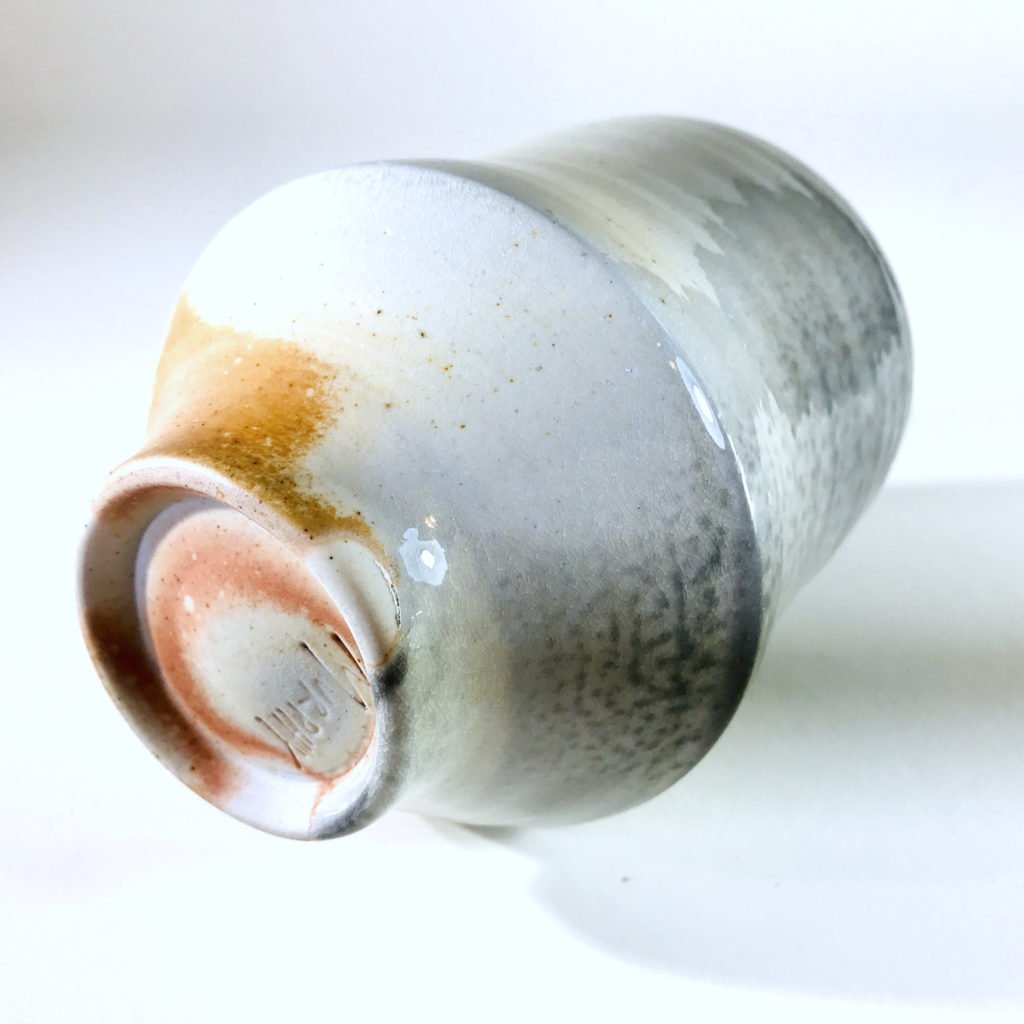
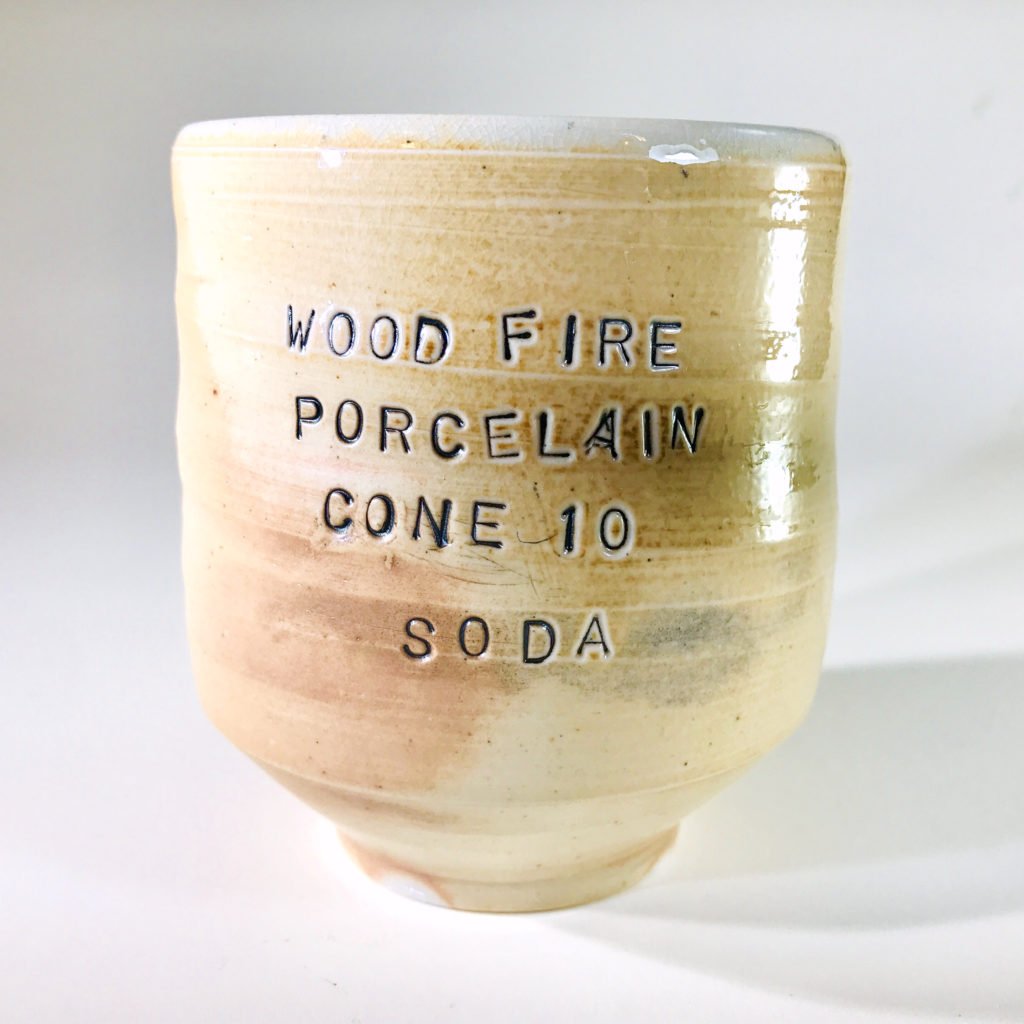
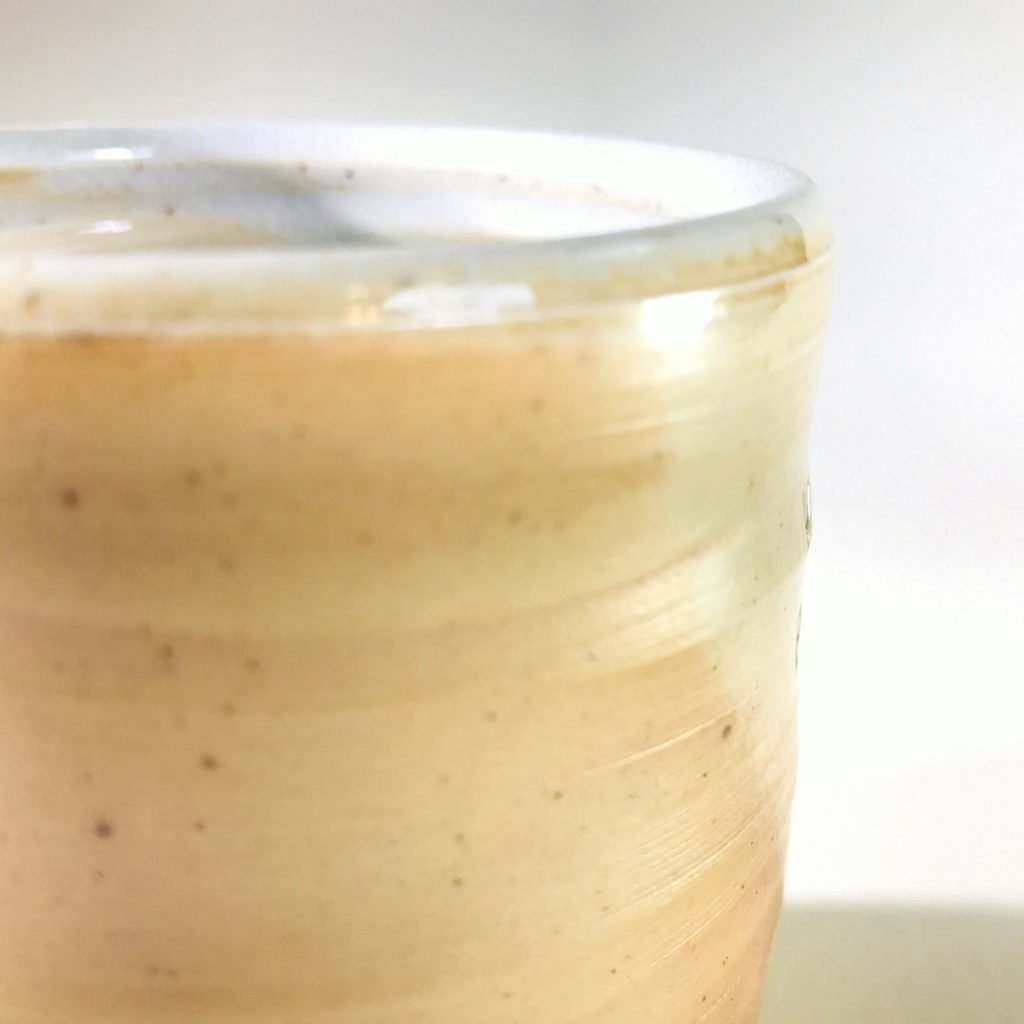
Wood Fire Porcelain is one of the Continental Clay clay bodies that I haven't worked much with, so my opinions and information is limited. I had been expecting more range of color, but on the pieces I have soda fired, the color range is limited to mostly tan with hints of peach. It throws nicely (especially for a porcelain!). And feels like you can push it quite a bit. It can go up to cone 12. I really loved throwing it. And have fired a few pieces in c.10 oxidation too. It's a bit creamier in color than Grolleg, but it is a small difference. I'm excited to fire this in a wood kiln sometime! The pieces I have seen that have been woodfired are gorgeous.
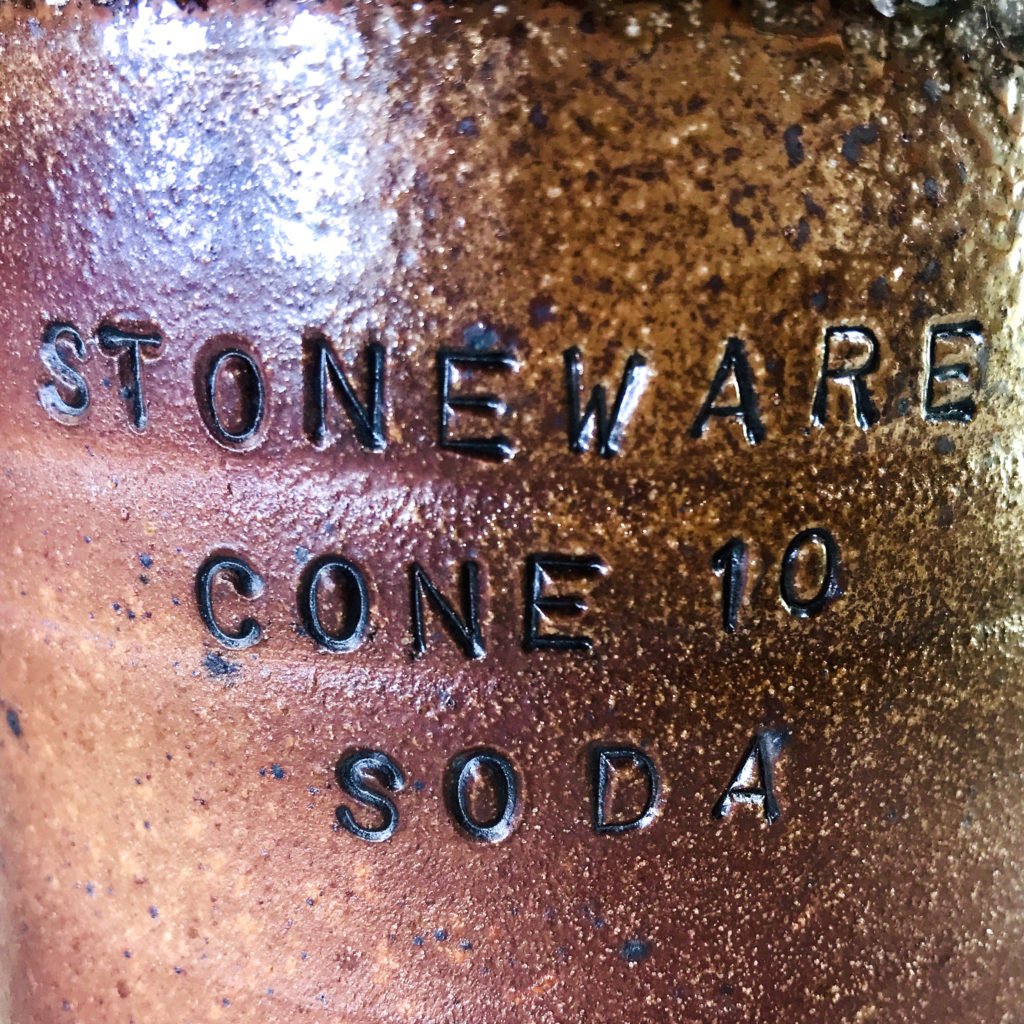
The Fireclay Stoneware from Continental Clay is a toasty choice for the soda kiln. It throws well and has a nice range of warm tones in it. It doesn't attract soda as strongly as the B Clay. So there can be dry spots if it doesn't get a direct hit with soda. But when it does get a heavy hit, there can be some rich dark tones that are quite stunning. I enjoy the Fireclay Stoneware with flashing slips brushed on. The contrast can be quite stunning!
The Fireclay Stoneware with Iron from Continental Clay is the same body as above - but with some extra iron oxide added. That iron gives it an deeper, darker color in soda. I have had some students who are looking for a metallic finish and they will use this body, and then use an iron oxide wash on top of it. I love applying a light colored flashing slip with a coarse brush. And glazes that really react to iron really shine on this clay body.
Buff Stoneware is another clay that I haven't used that much. But my students do use it regularly. It is a sandy (as opposed to groggy) clay that always feels kind of "fluffy" when I throw it. And when that thought pops into my head, I always chuckle to myself. How can clay be fluffy?! The orange peel texture from when it is hit with a lot of soda is much finer than the Soda Clay, for example. It's a nice body to throw and has nice toasty flashing in the soda kiln.
If you're looking to work in a thick, sculptural way, there is nothing better than the Raku Clay body from Continental Clay. It flashes a warm, toasty color in soda. It resists soda so it rarely gets too juicy, in my experience. But its unique coloring and durability is sometimes the best choice for some pieces. It can take a lot of altering, paddling and variety of thicknesses. I also enjoy the clay that is revealed from the rough, quick trimming. I haven't used it much, personally, but I've had quite a few soda students use it so I've seen many examples over the years.
I thought I'd share some of my favorite clay, in action. This pair of mugs were made from Grolleg Porcelain. The darker band is smooth orange flashing slip. And the blue is spray of Randy's Green. They are lined with shino. And the reds/ pinks are copper that is flashing from the copper rich glaze that is sprayed on. I had to keep this pair in my own collection. All the parts came together so beautifully that I knew I had to keep them around because there was more to learn from them.
Testing (mostly) Amaco underglazes in a soda kiln
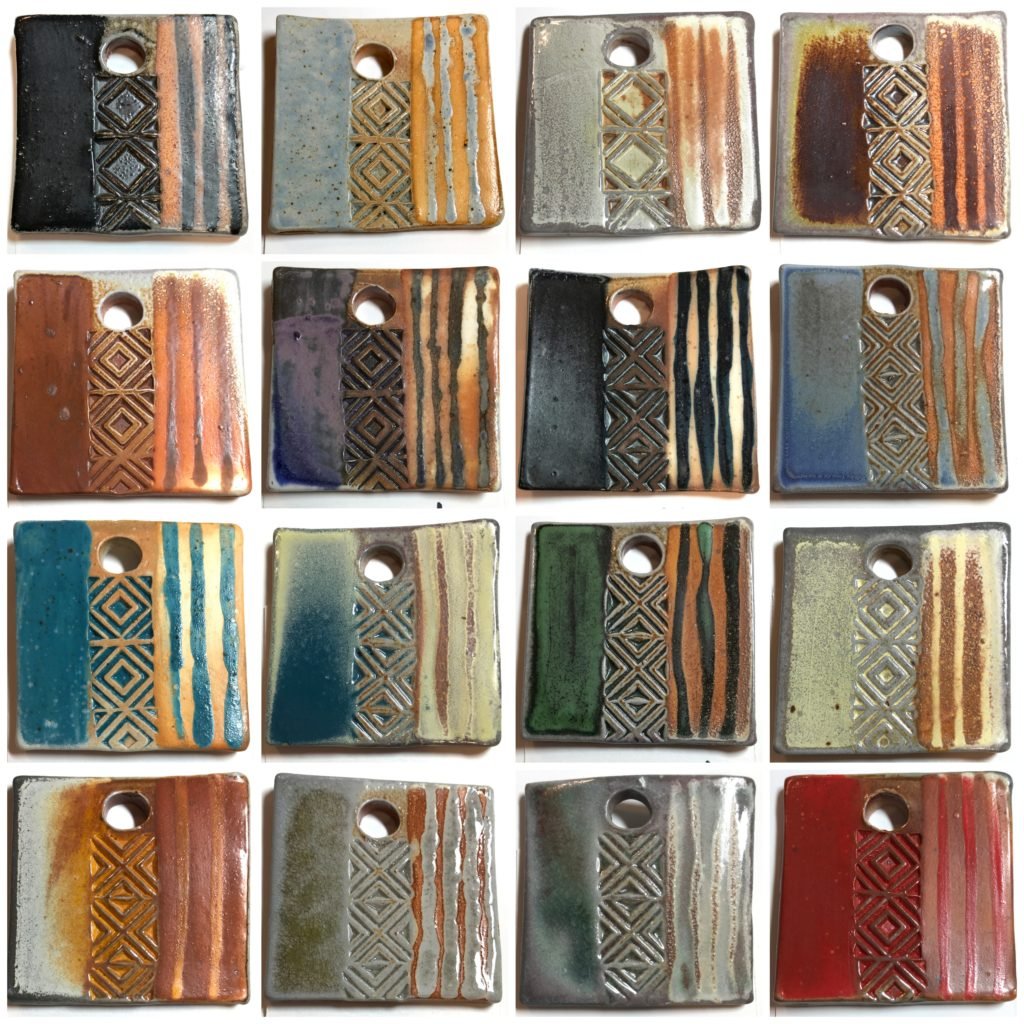
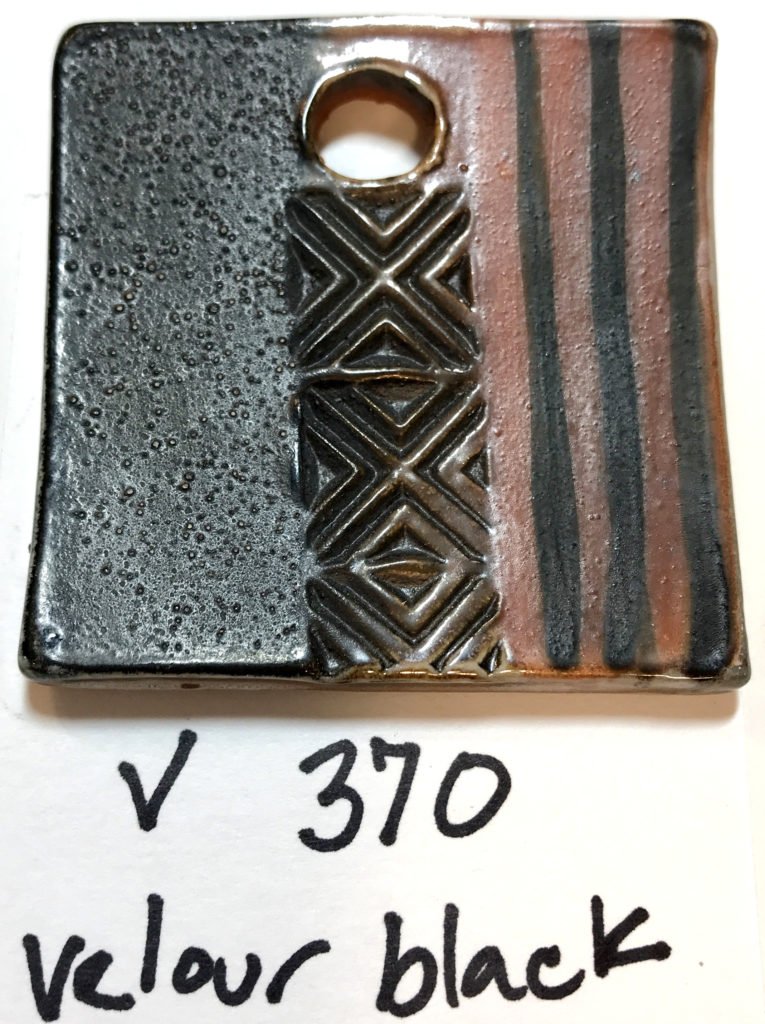
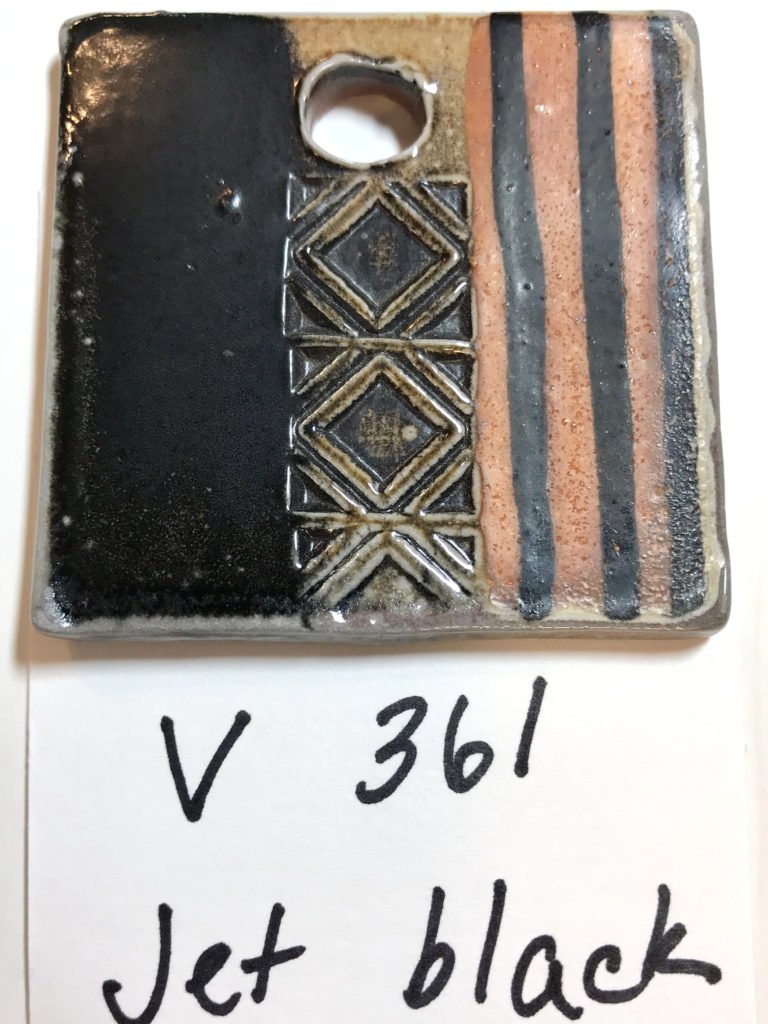
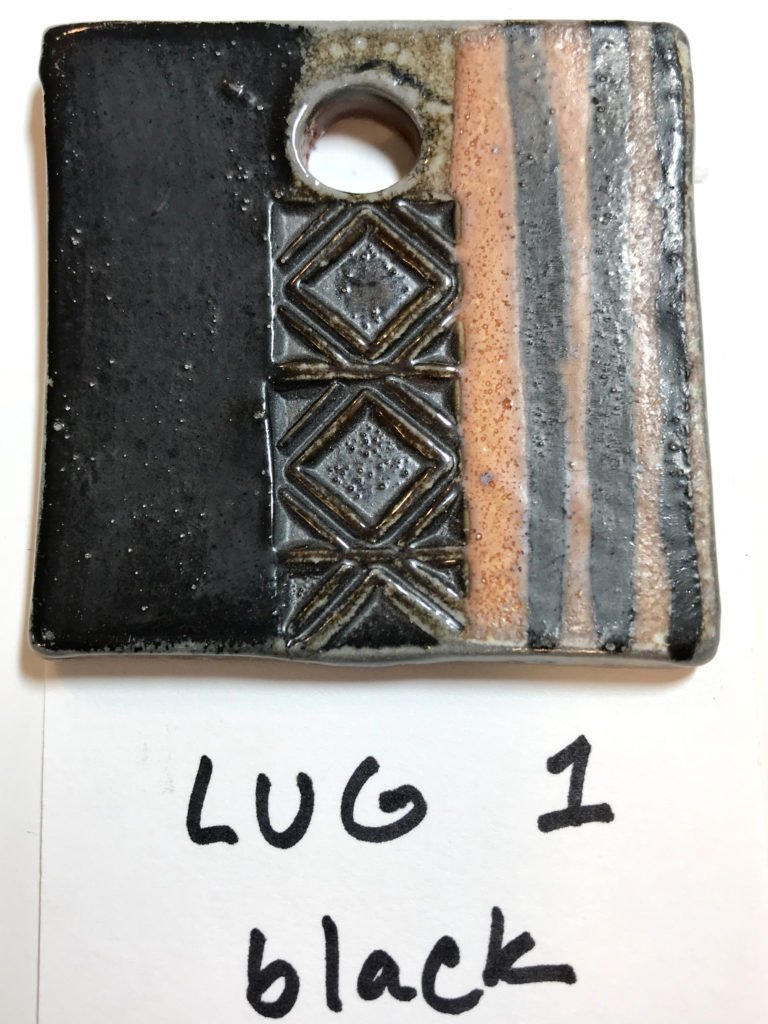
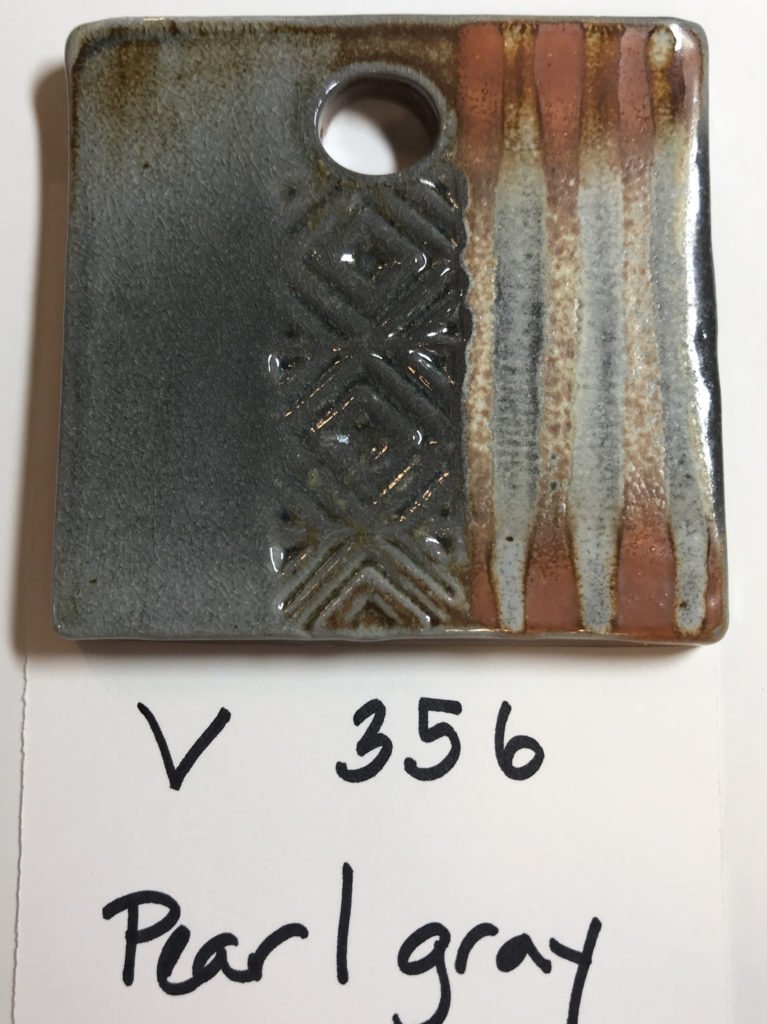
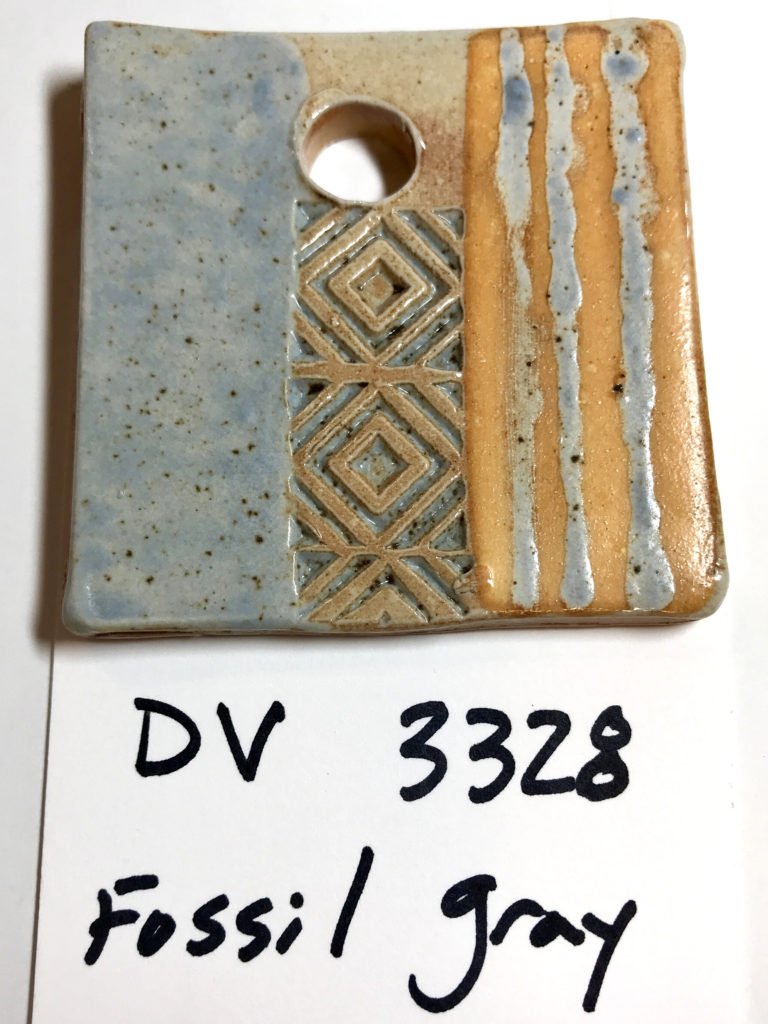
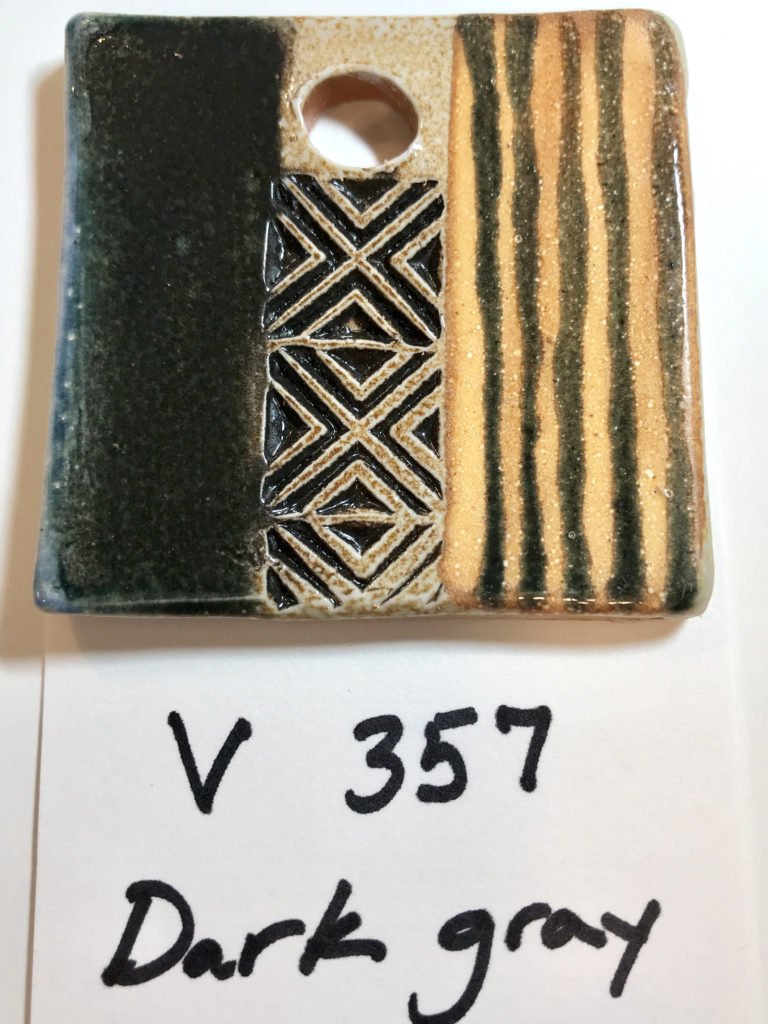
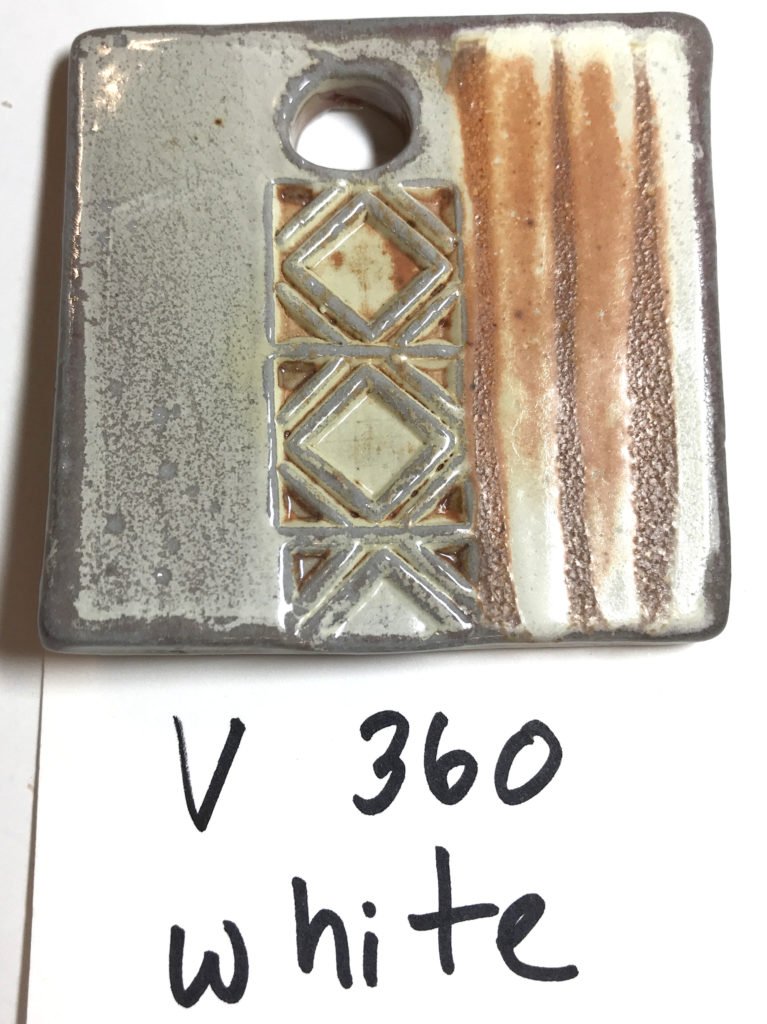
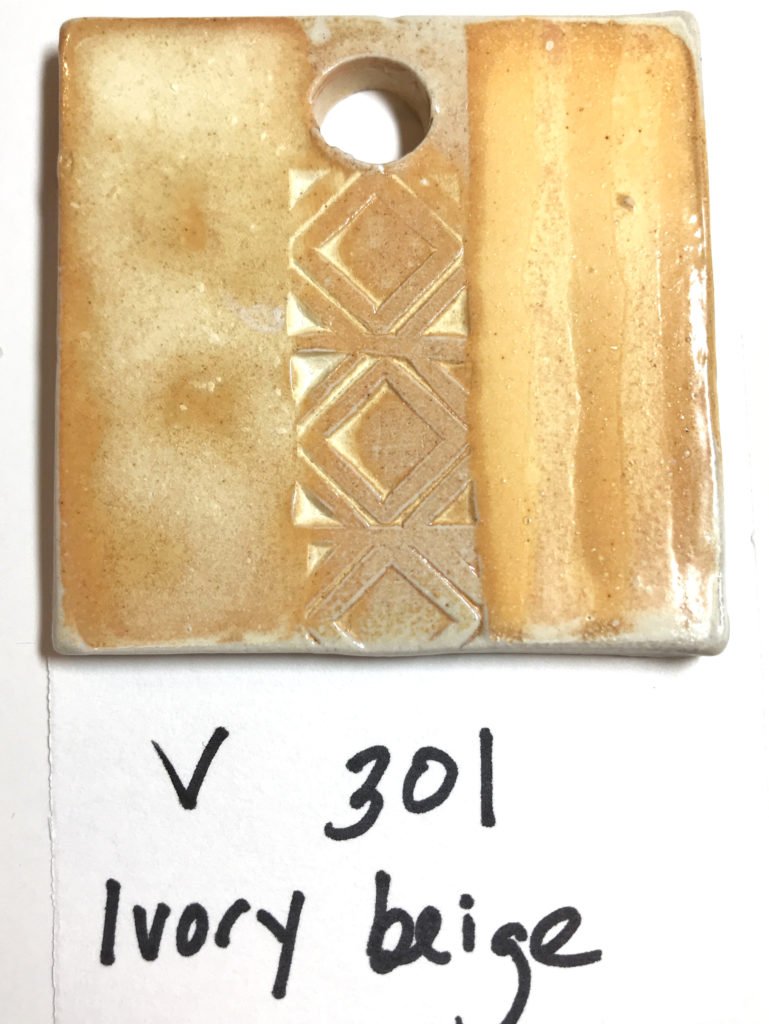
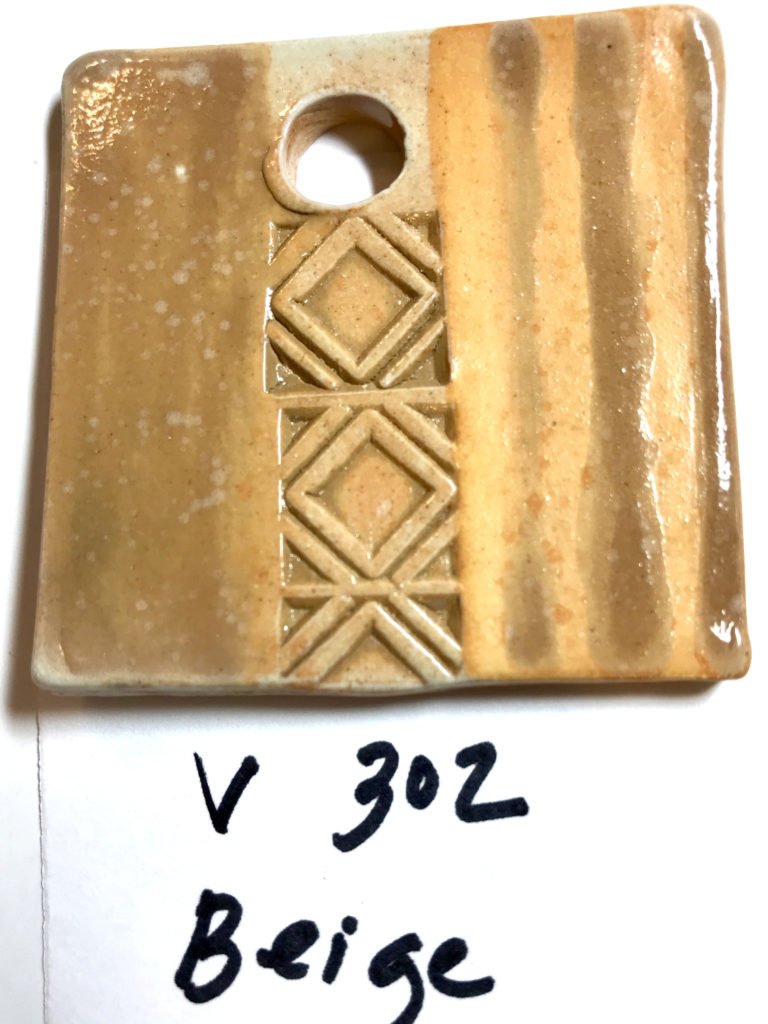
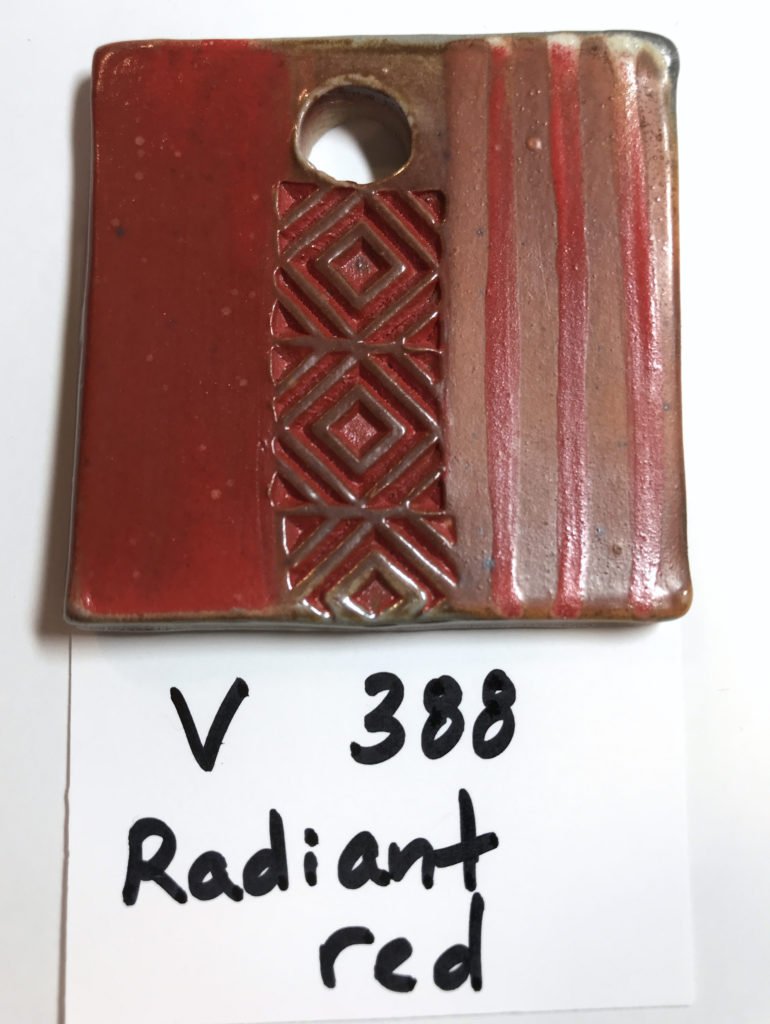
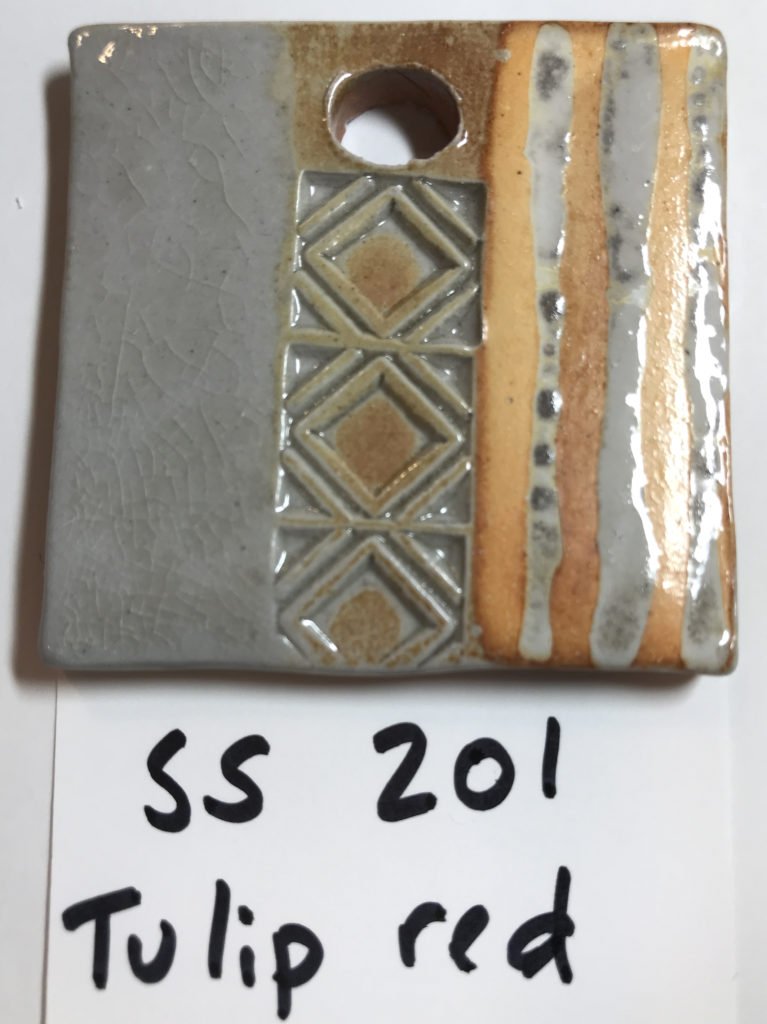
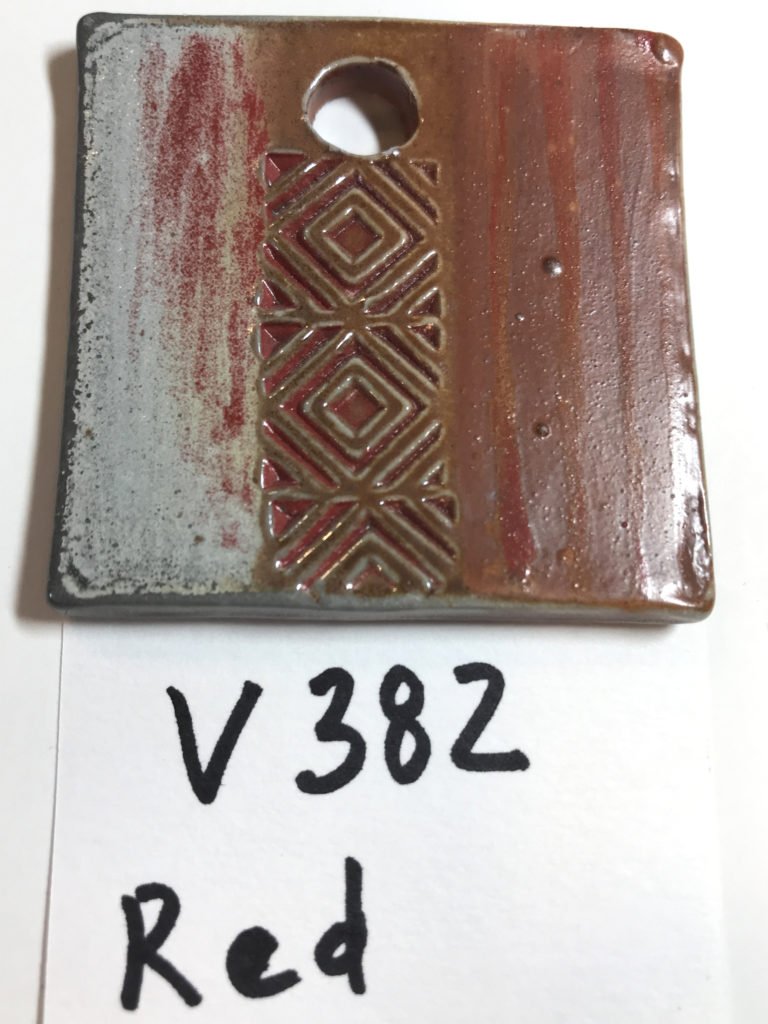
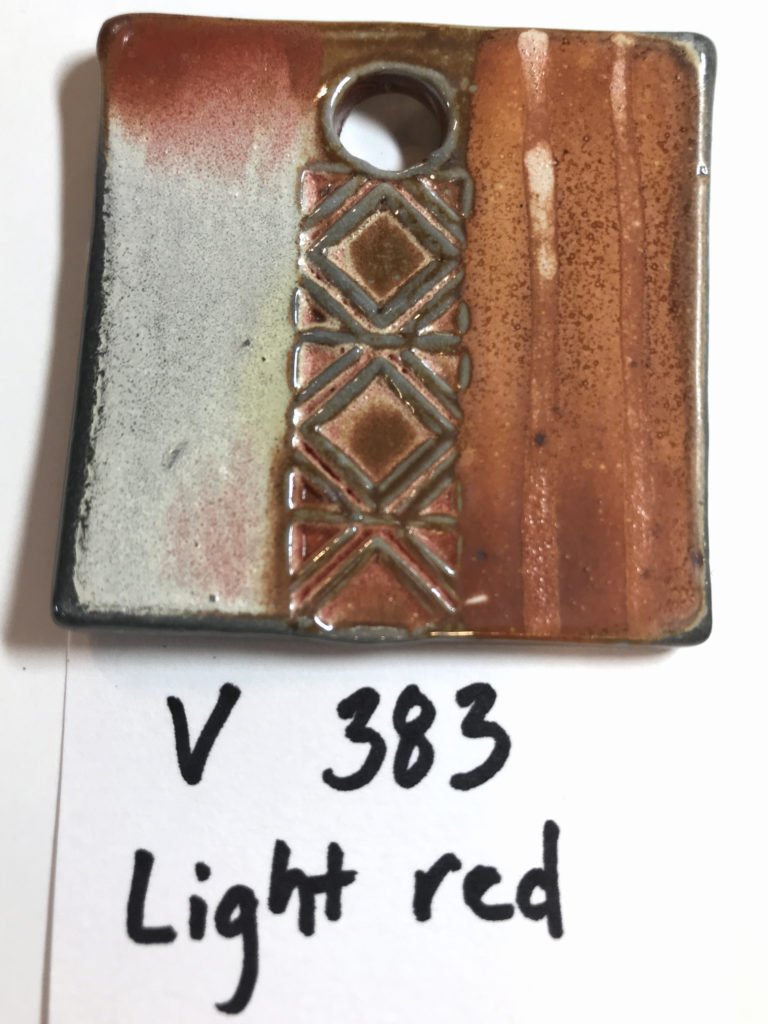
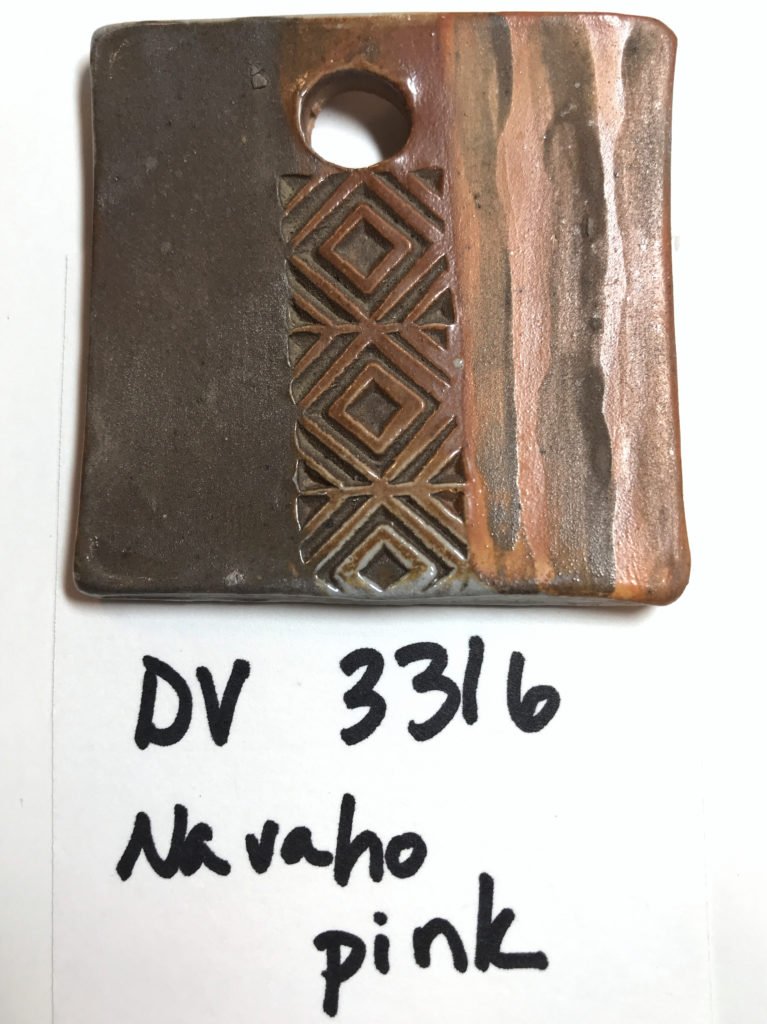
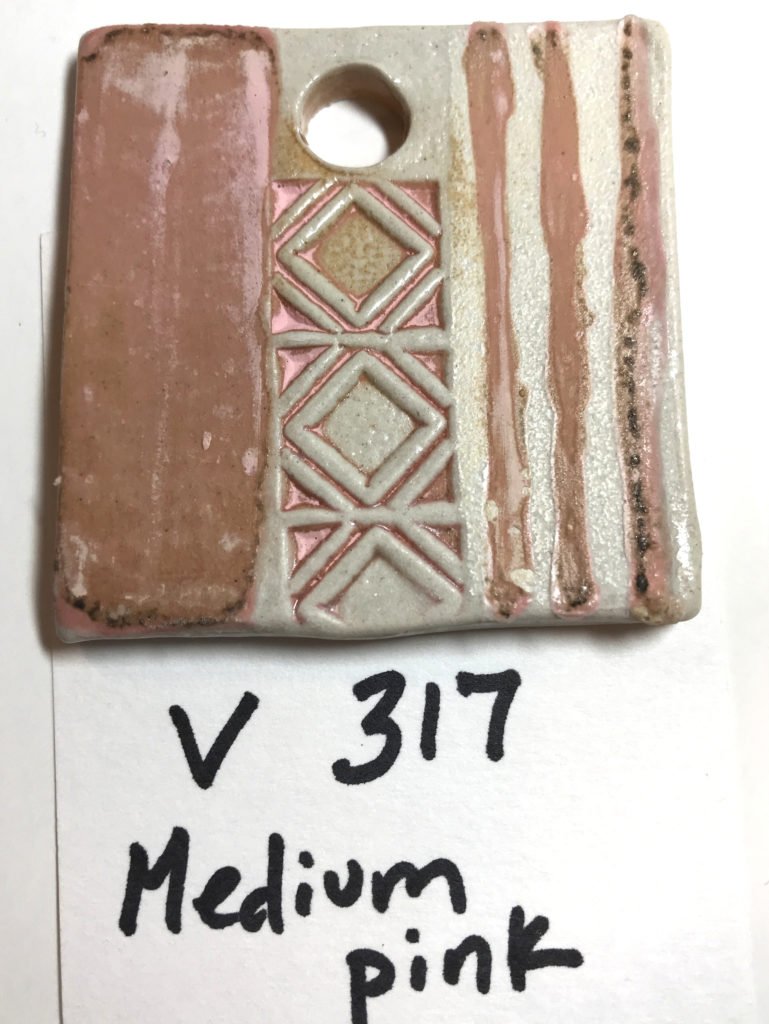
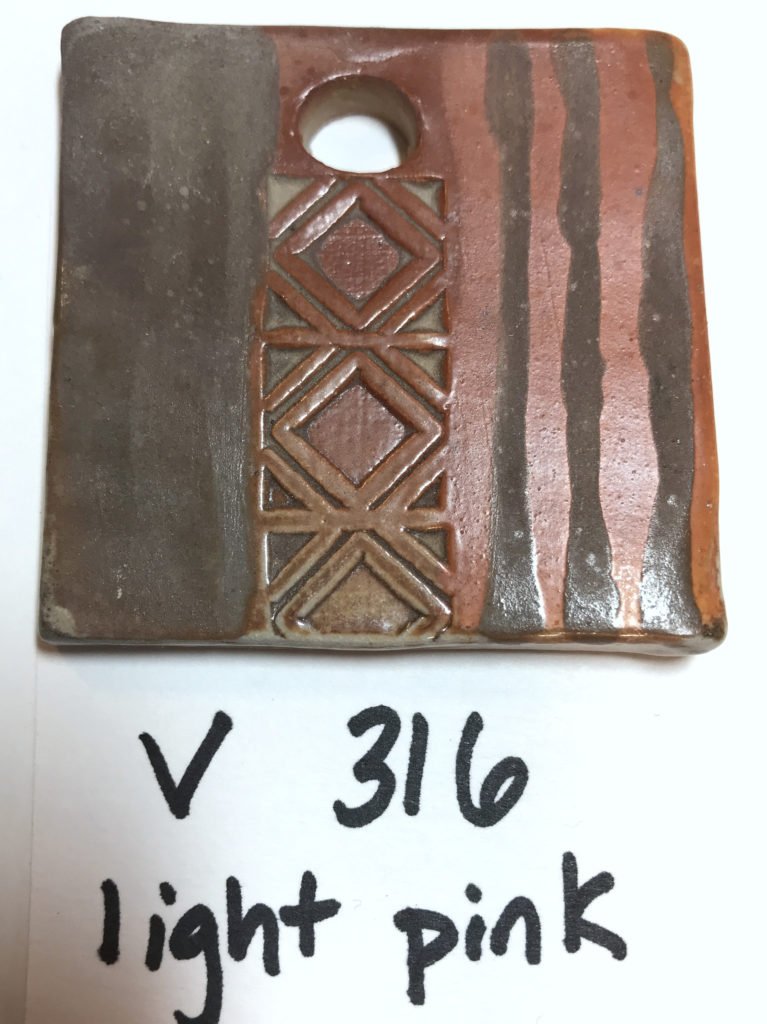
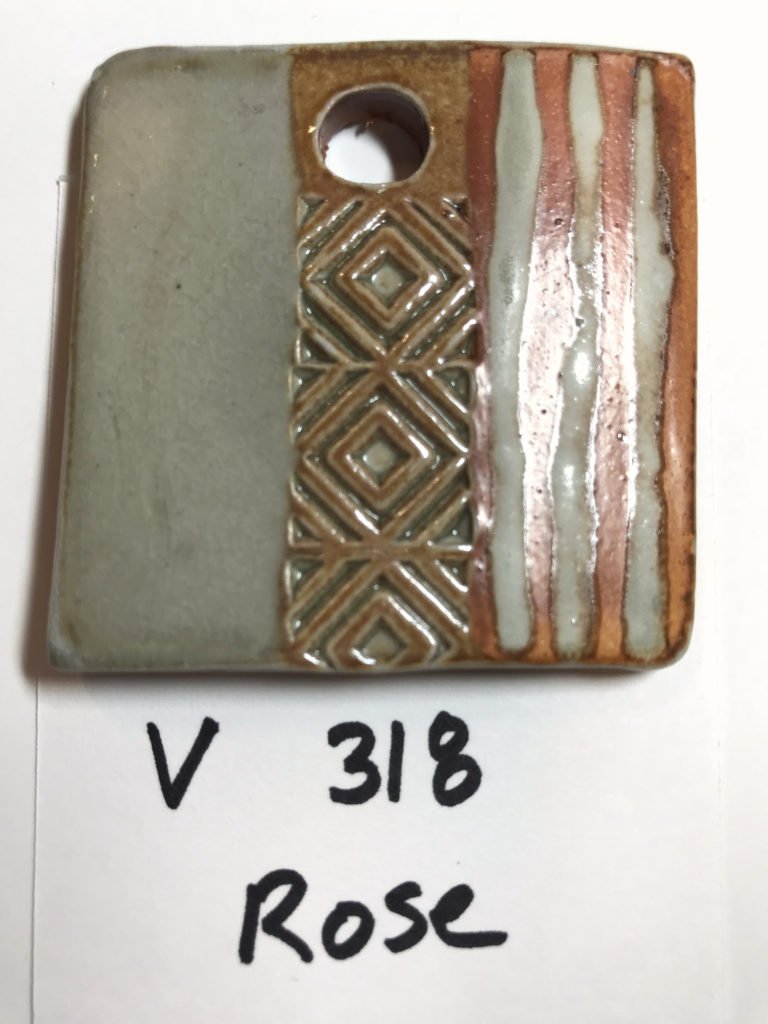
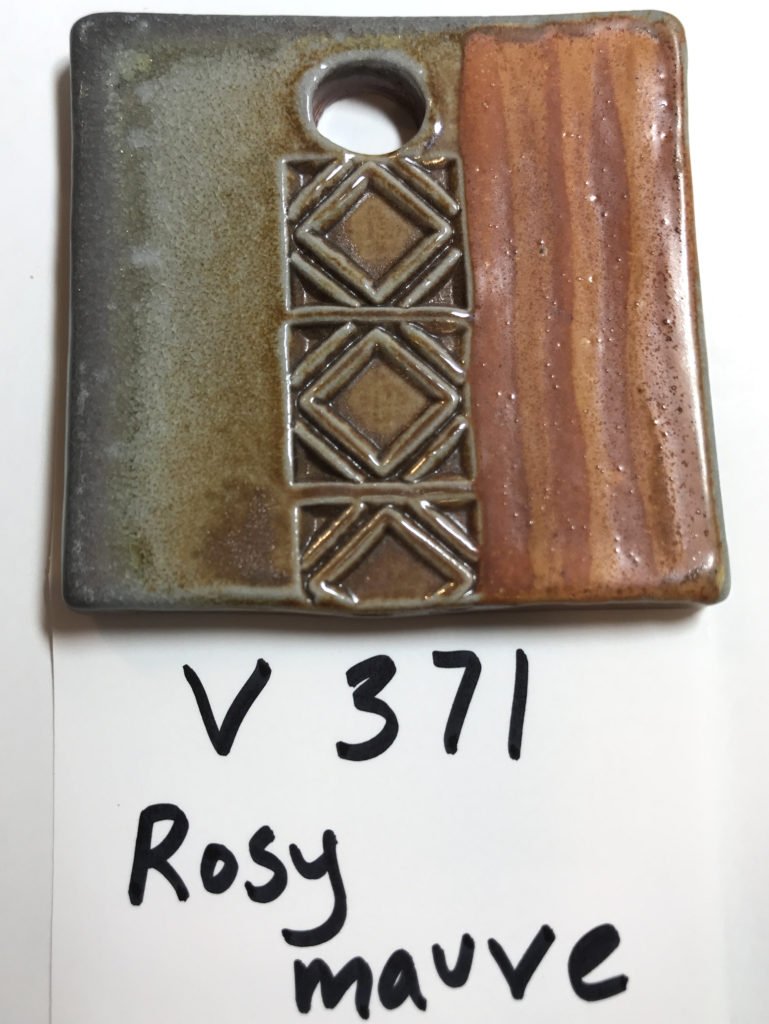
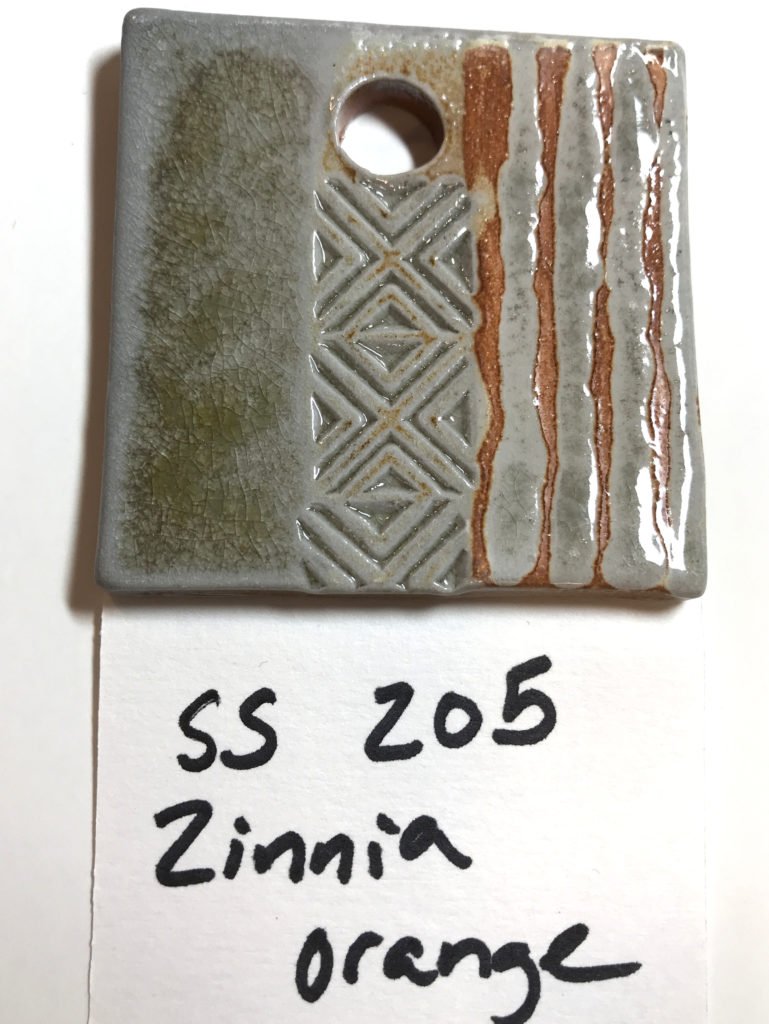
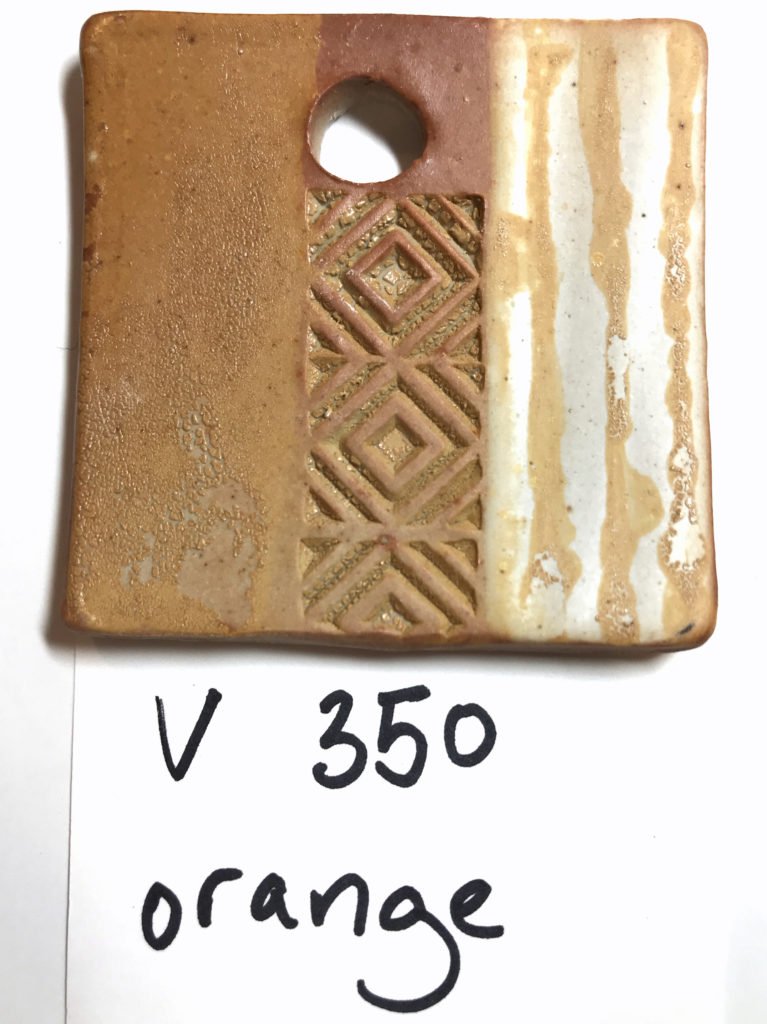
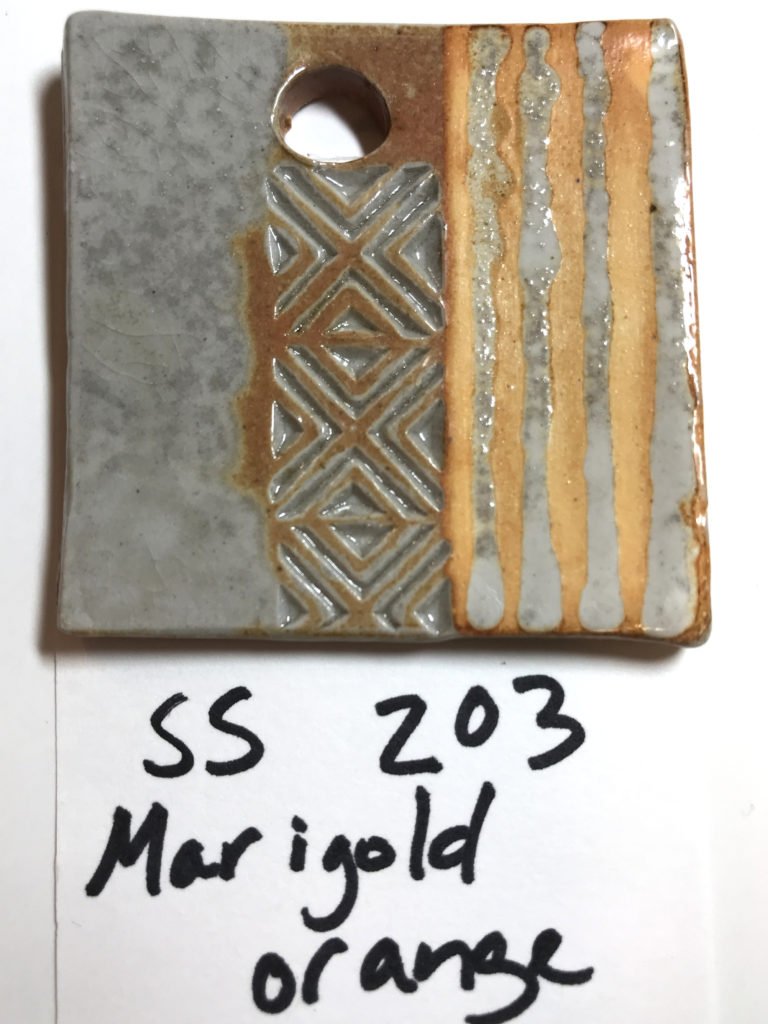
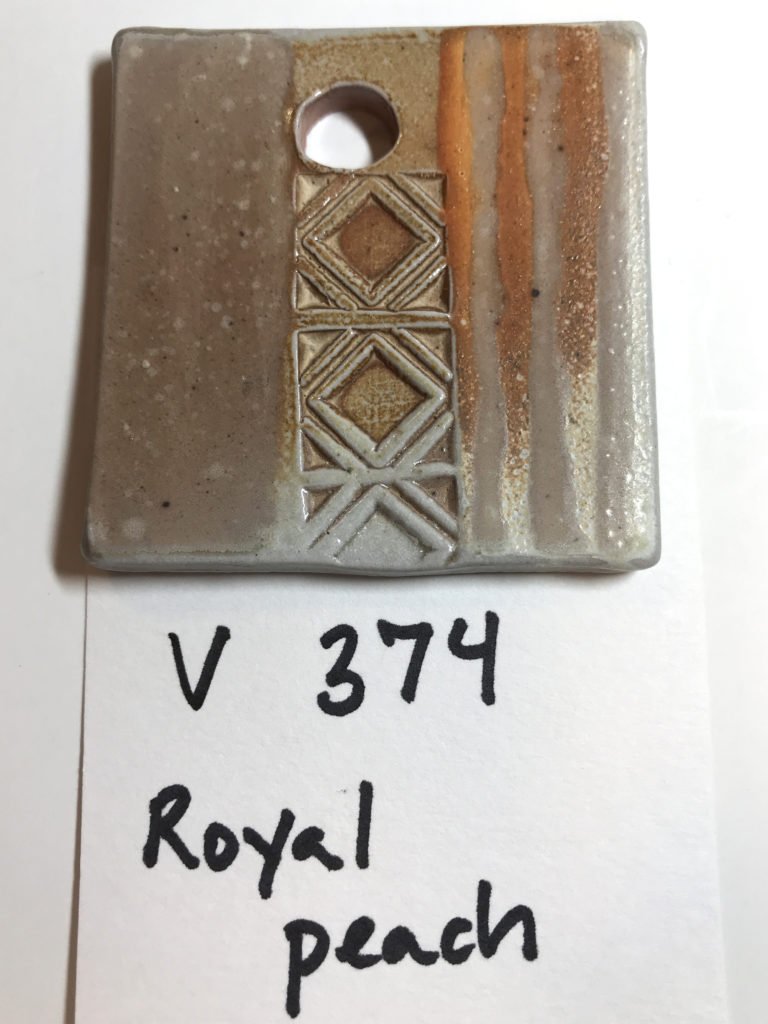
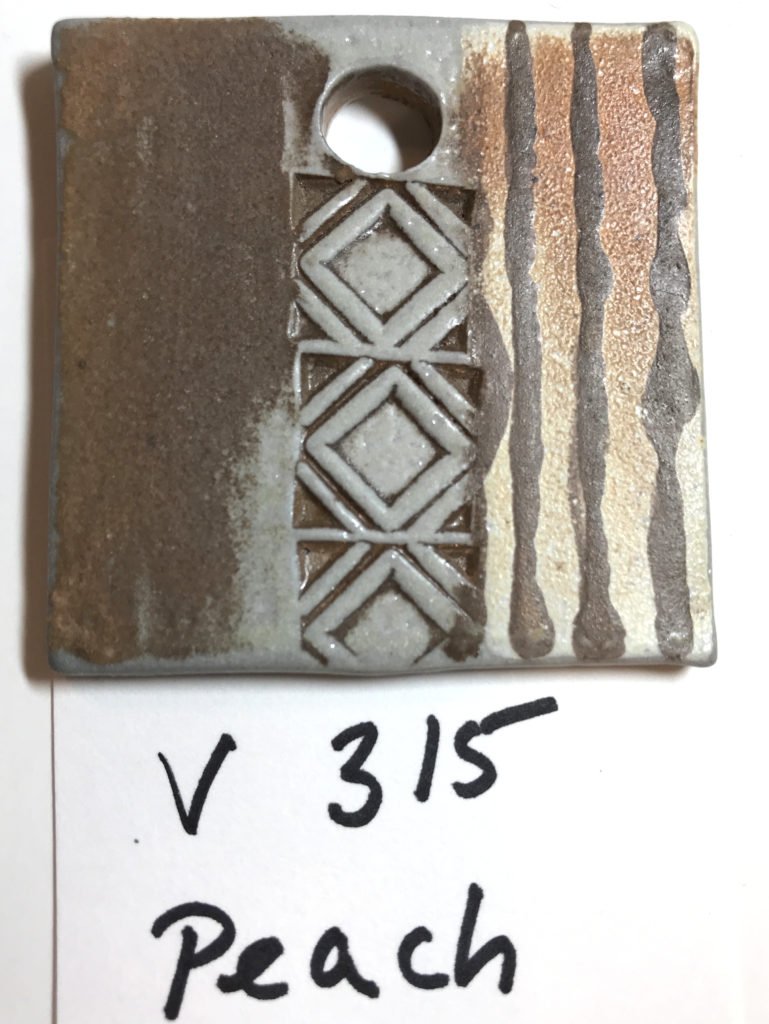
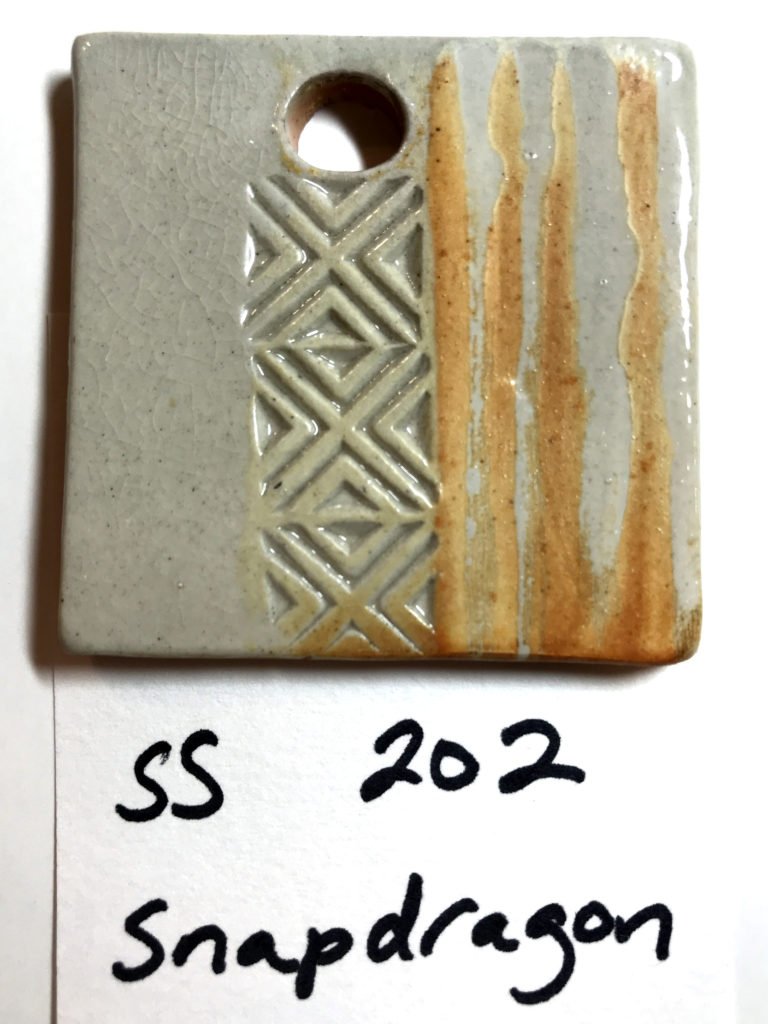
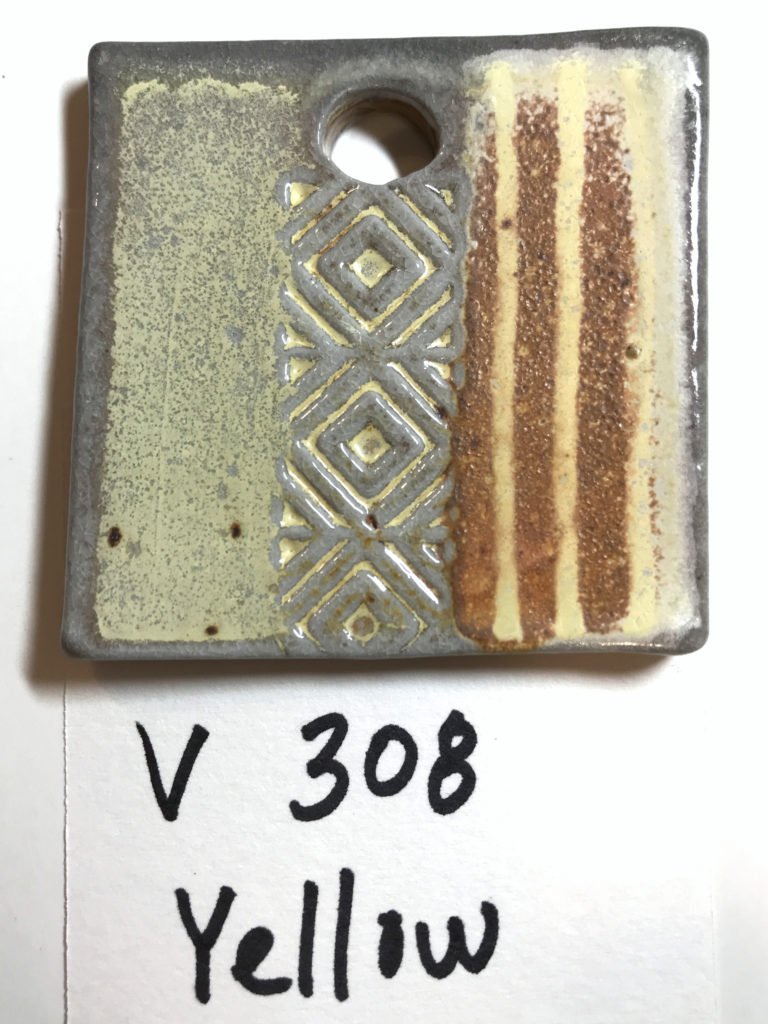
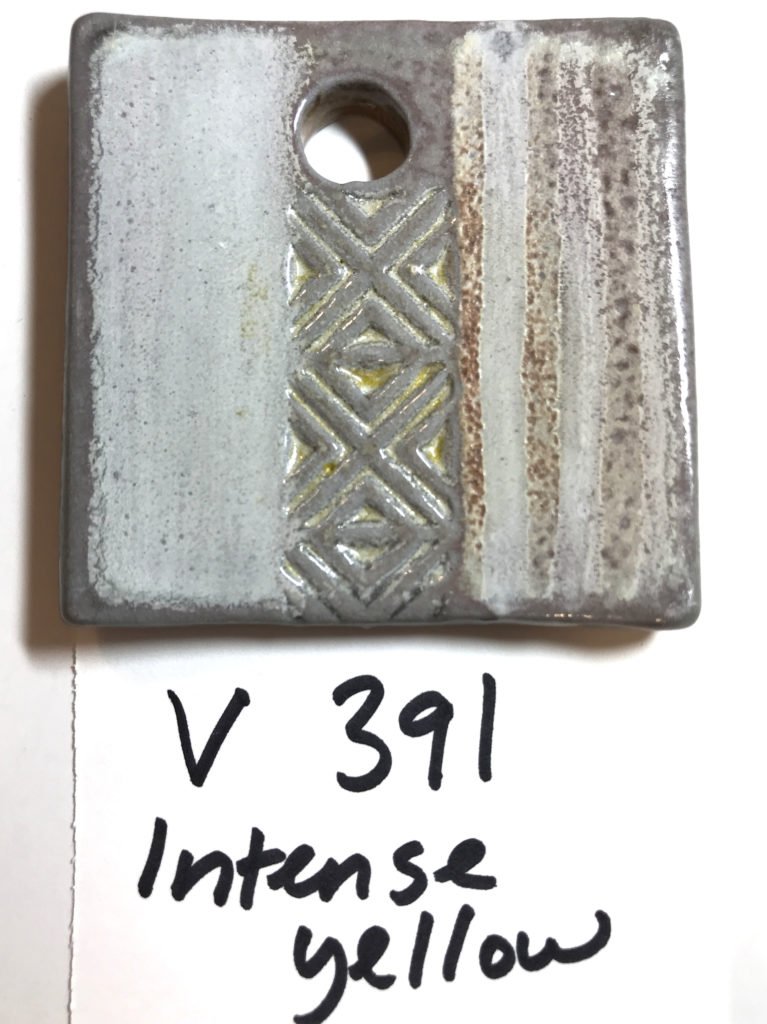
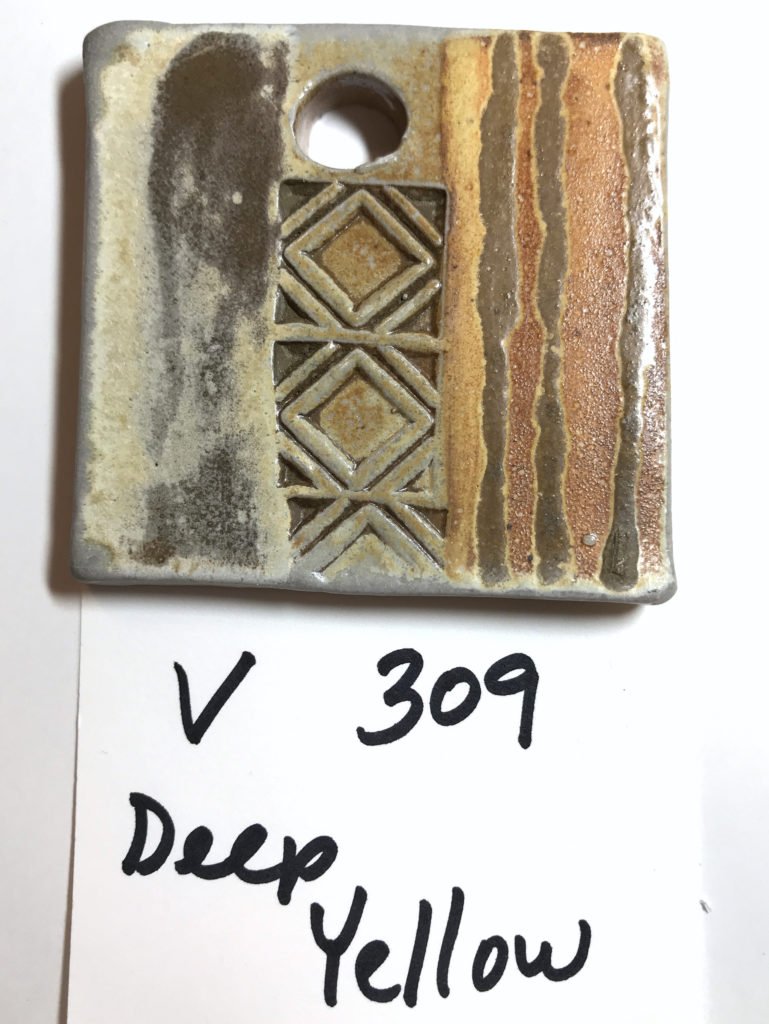
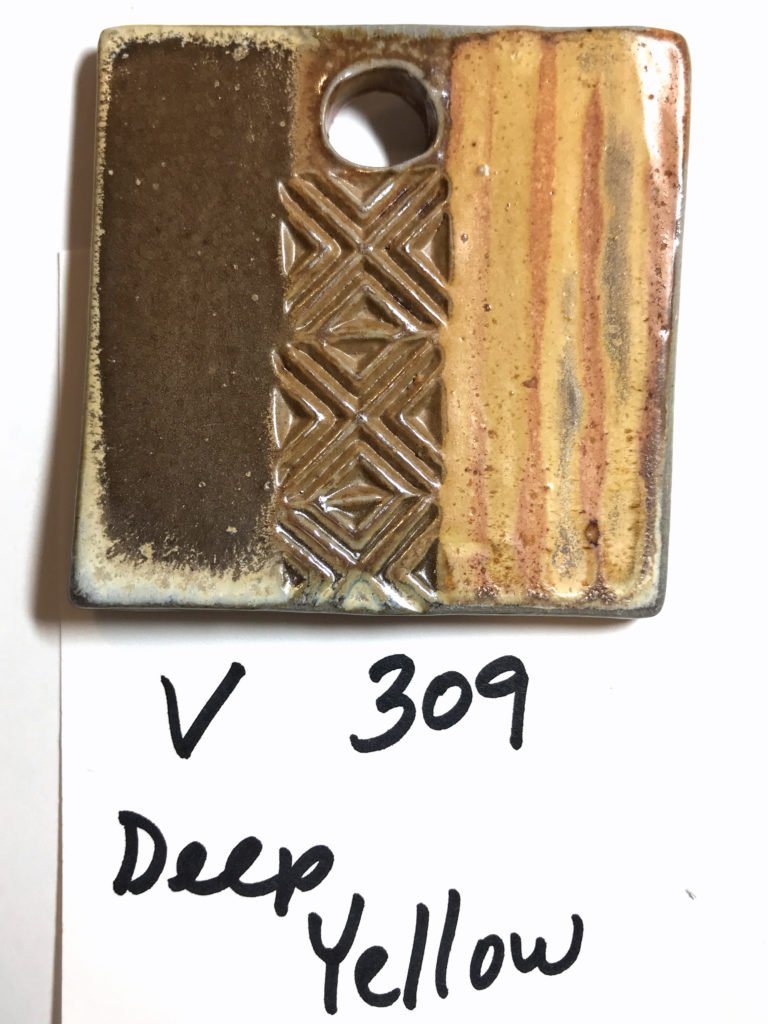
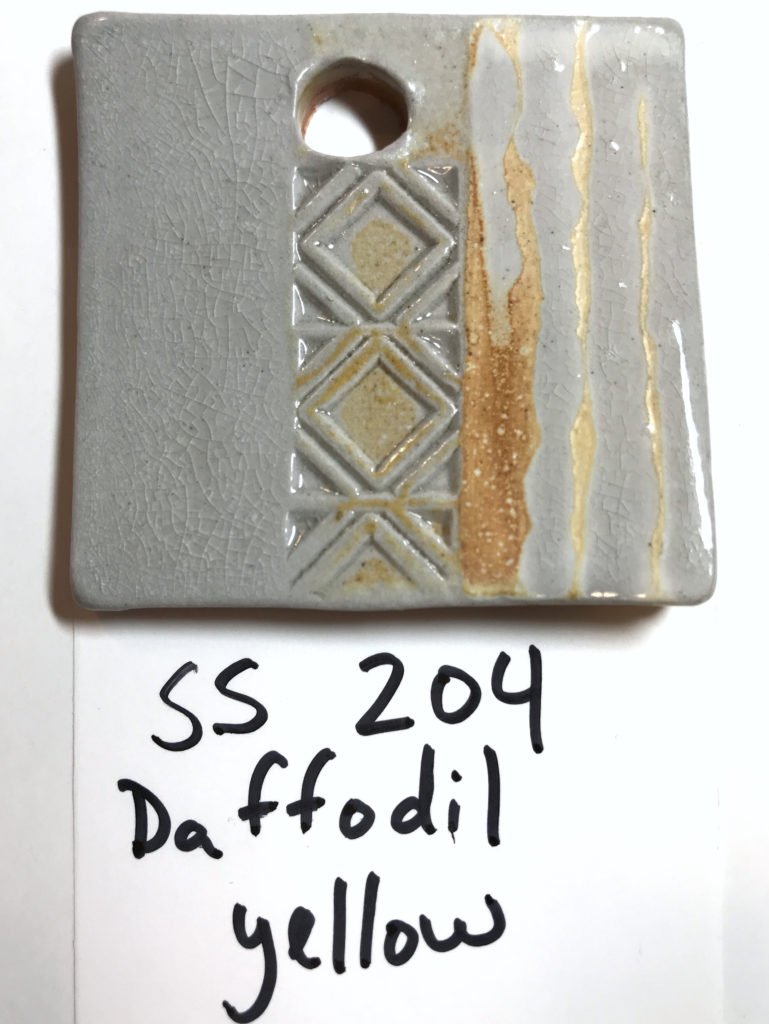
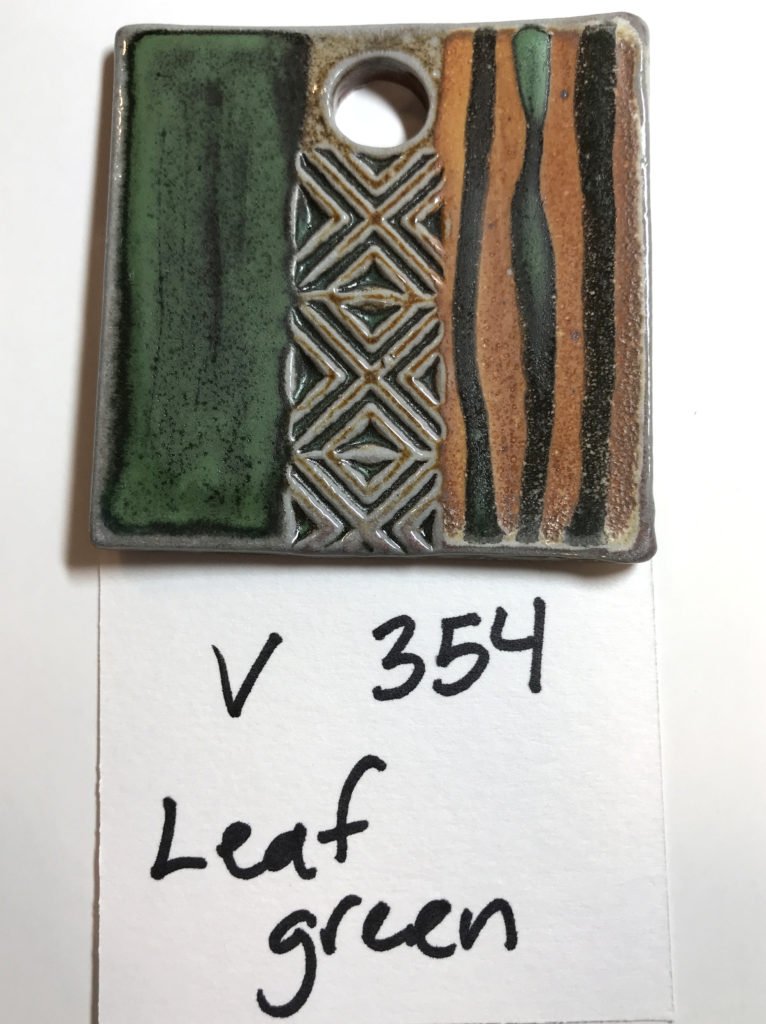
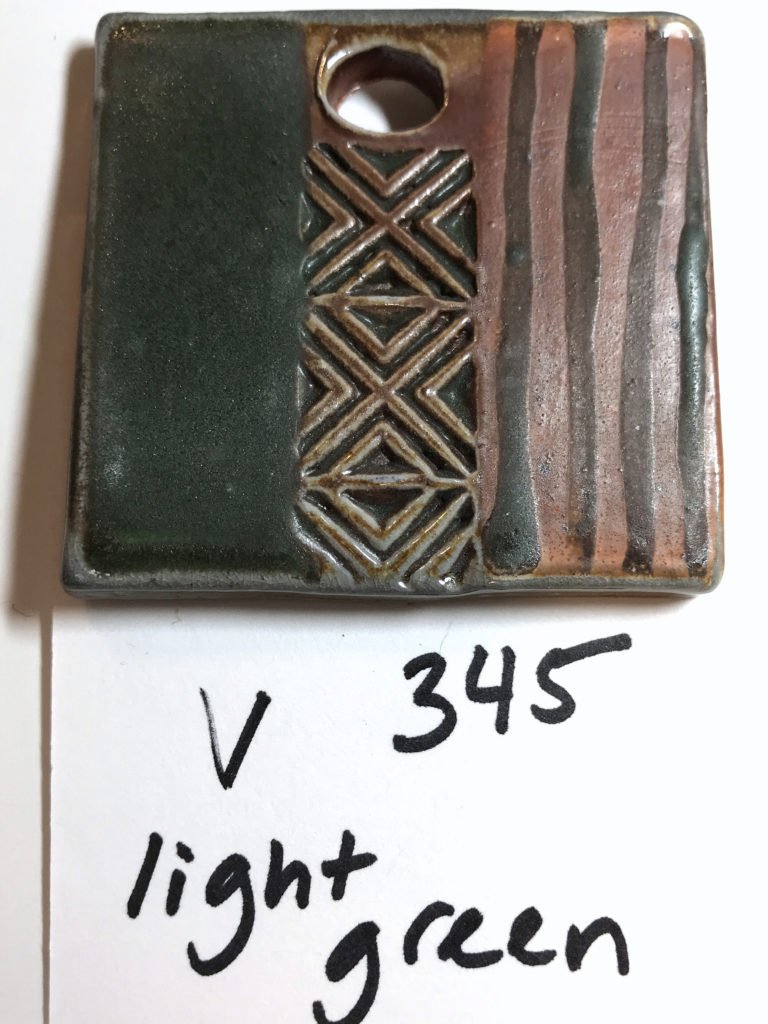
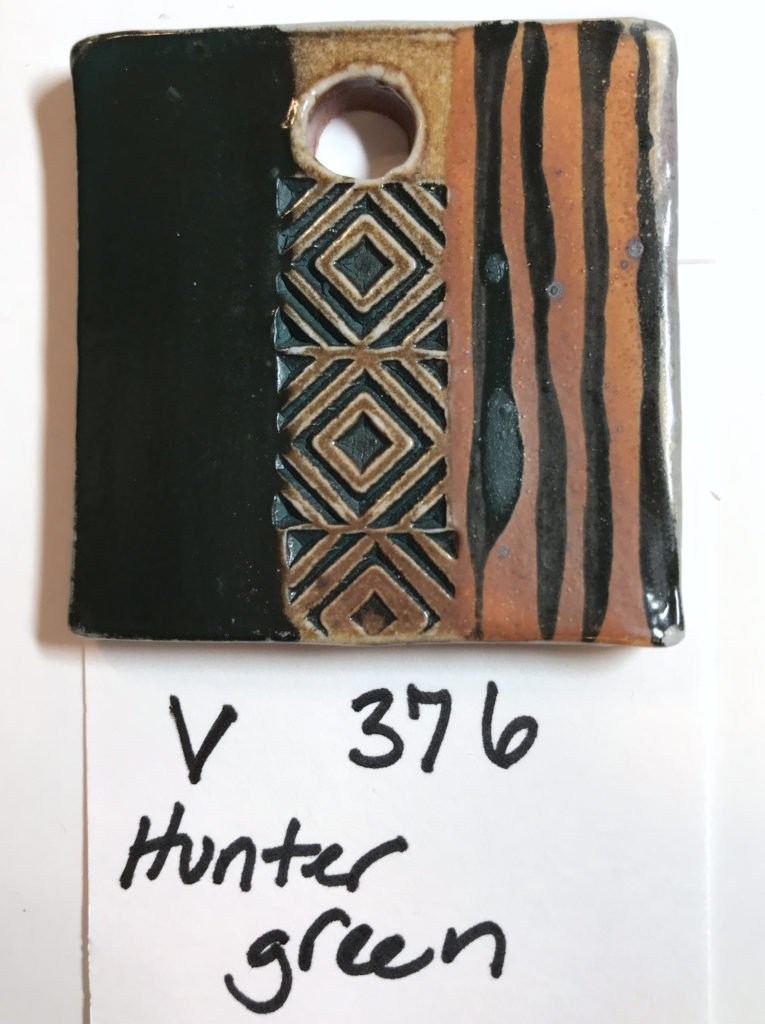
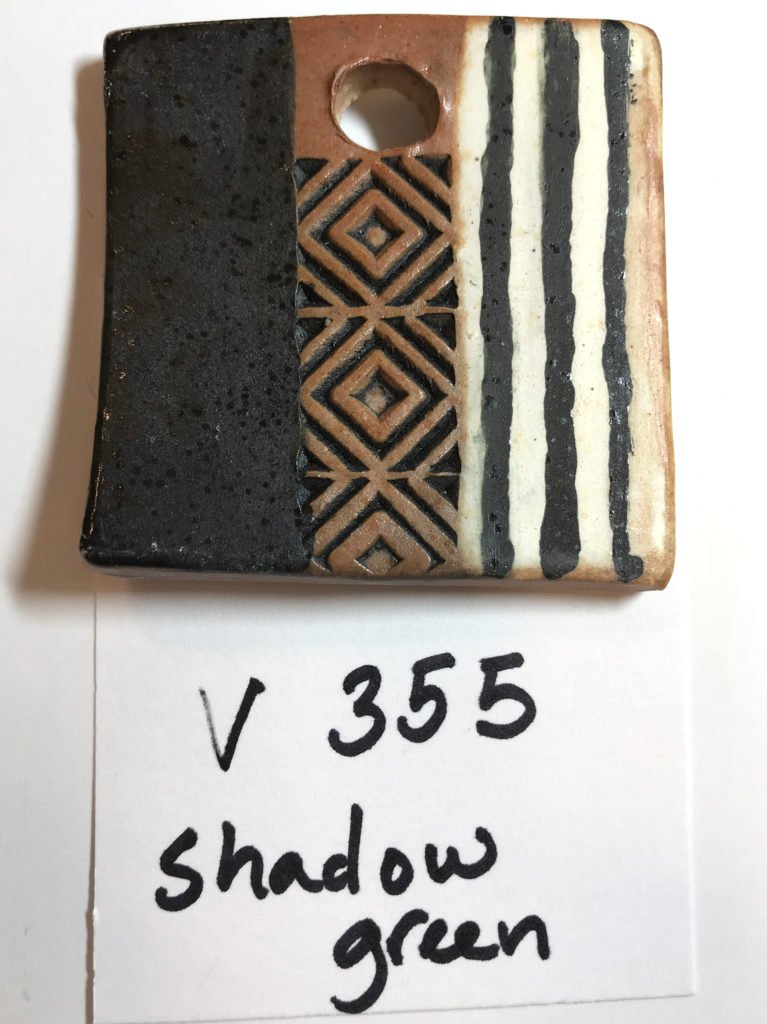
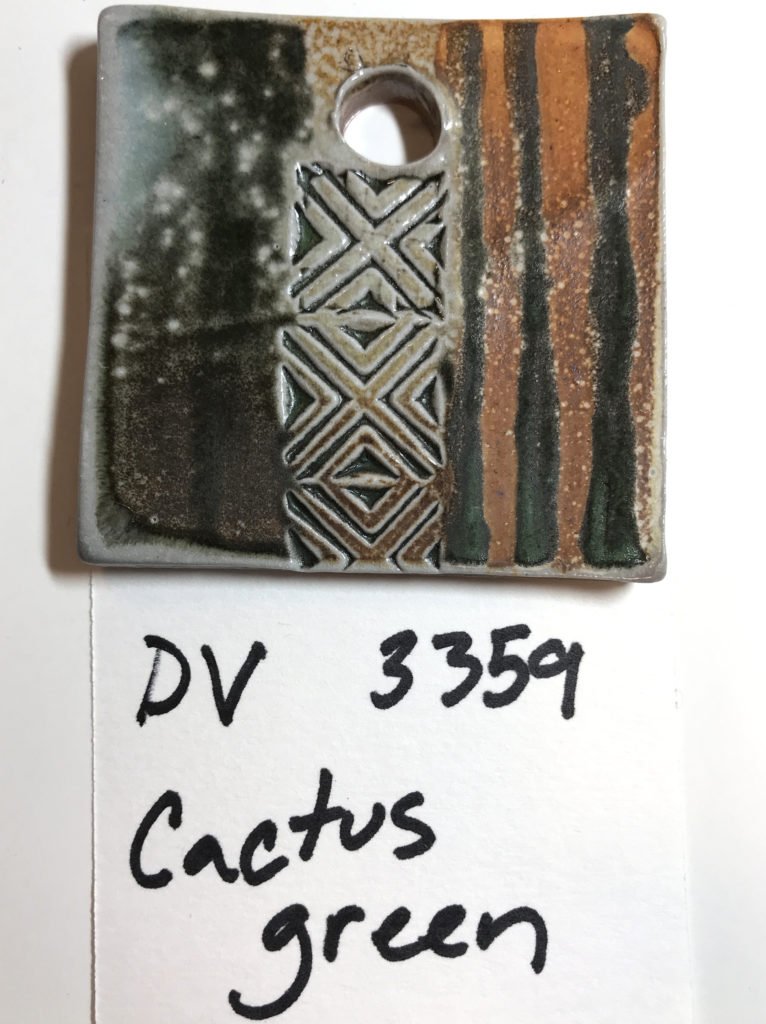
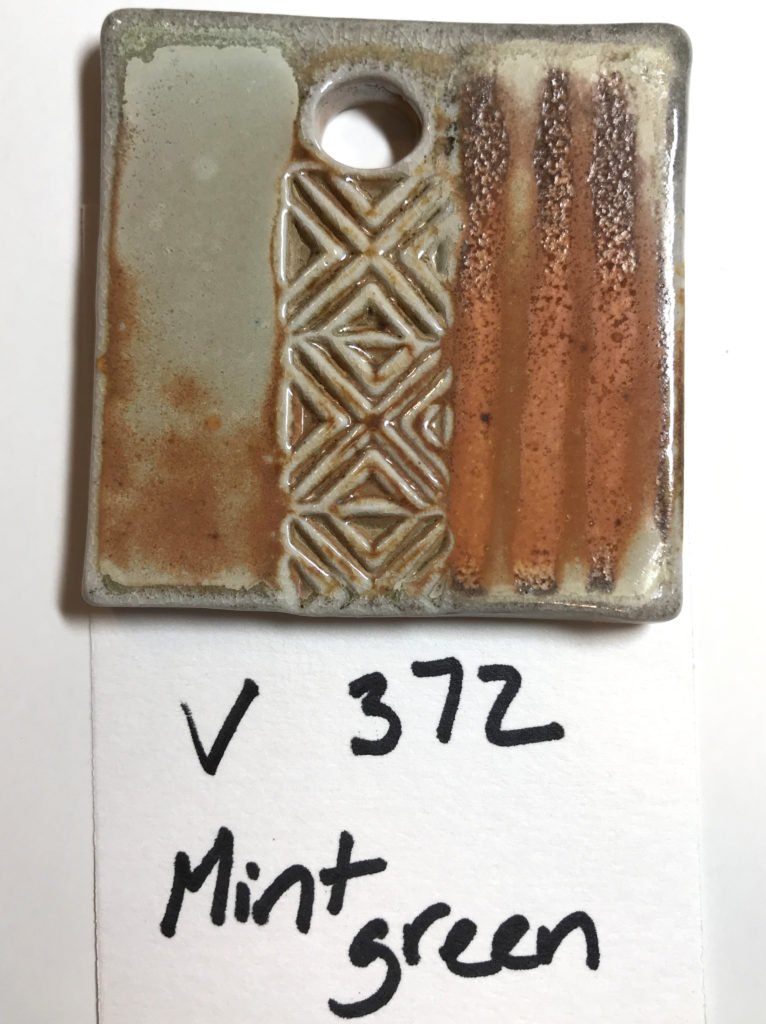
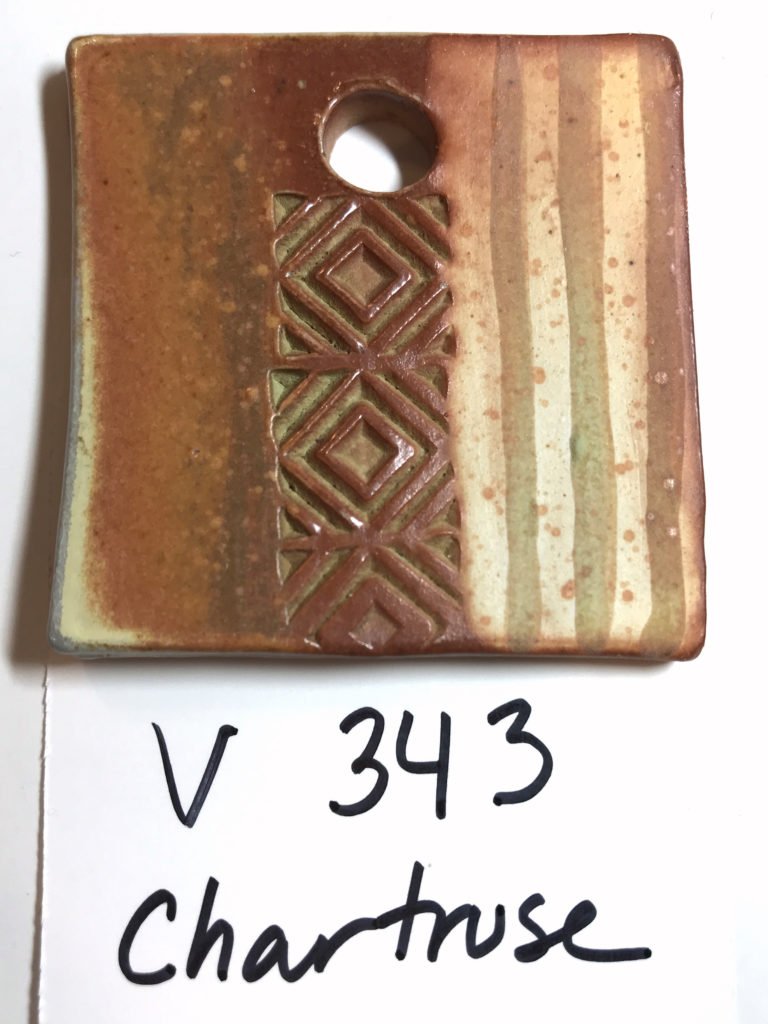
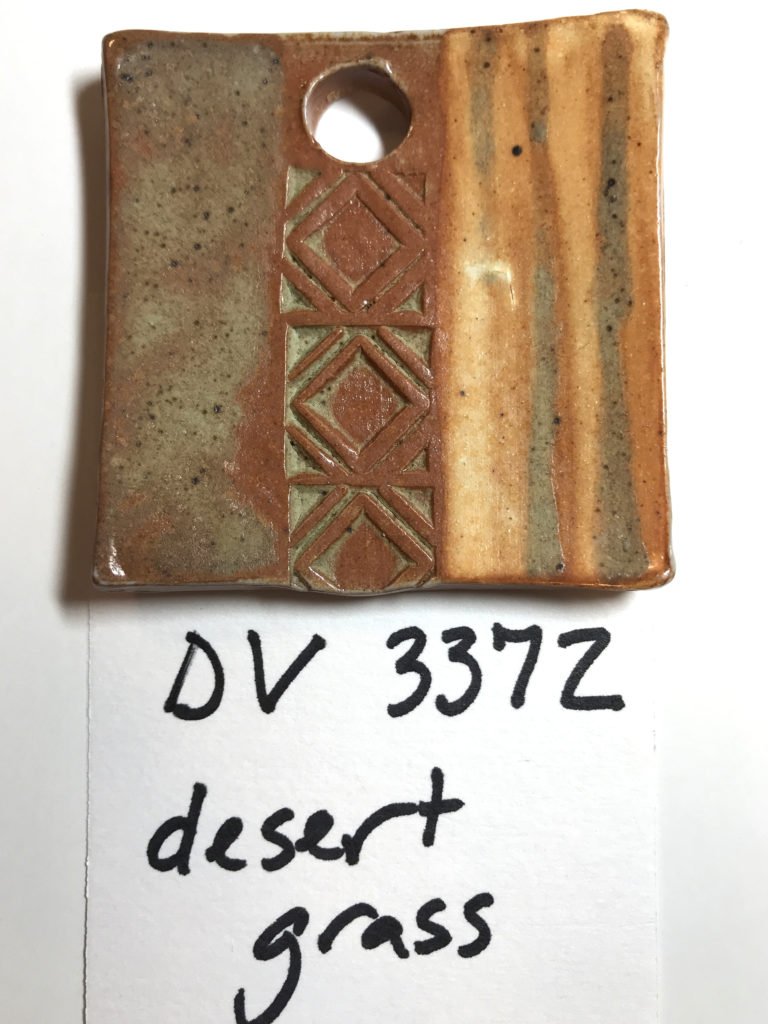
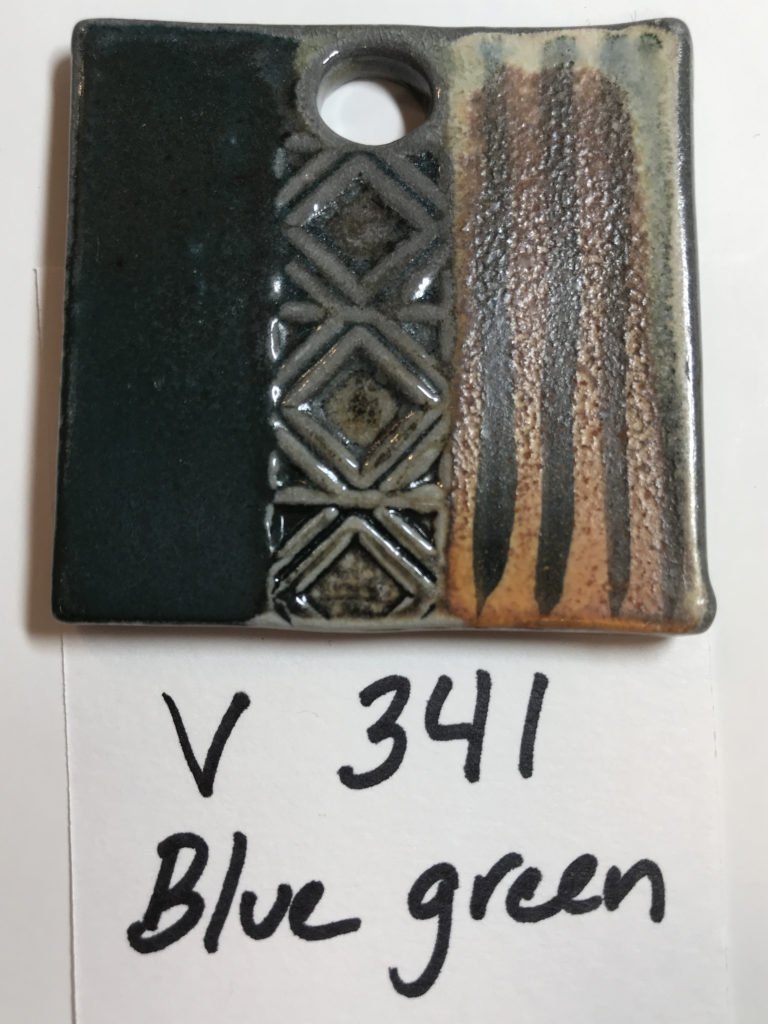
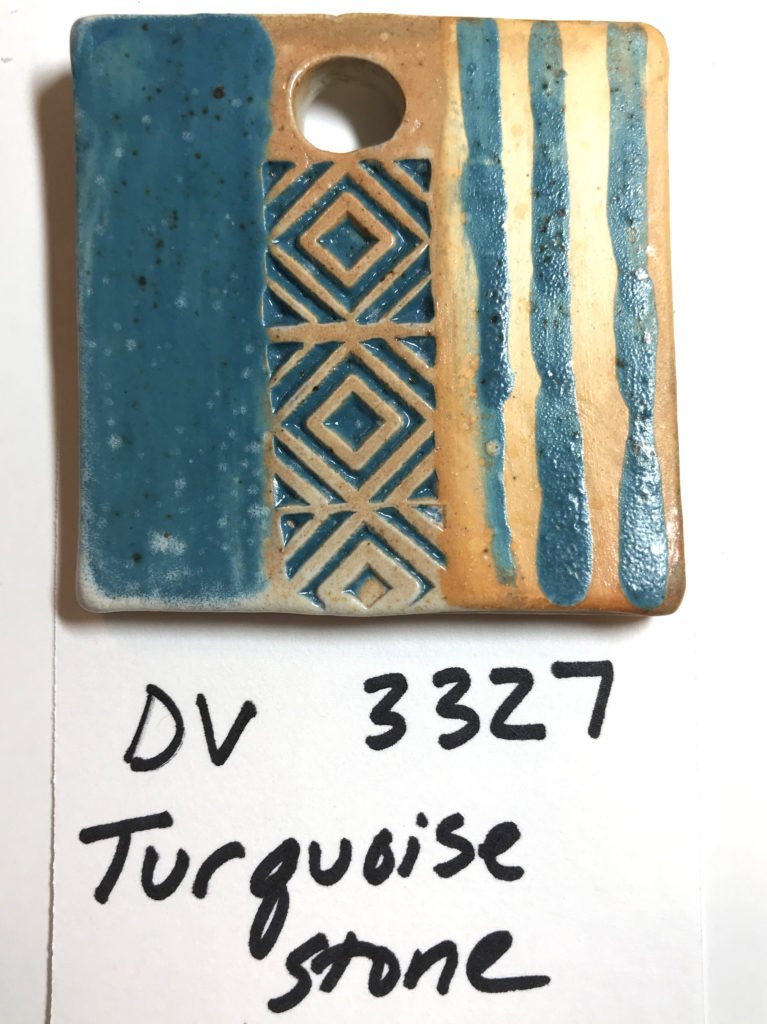
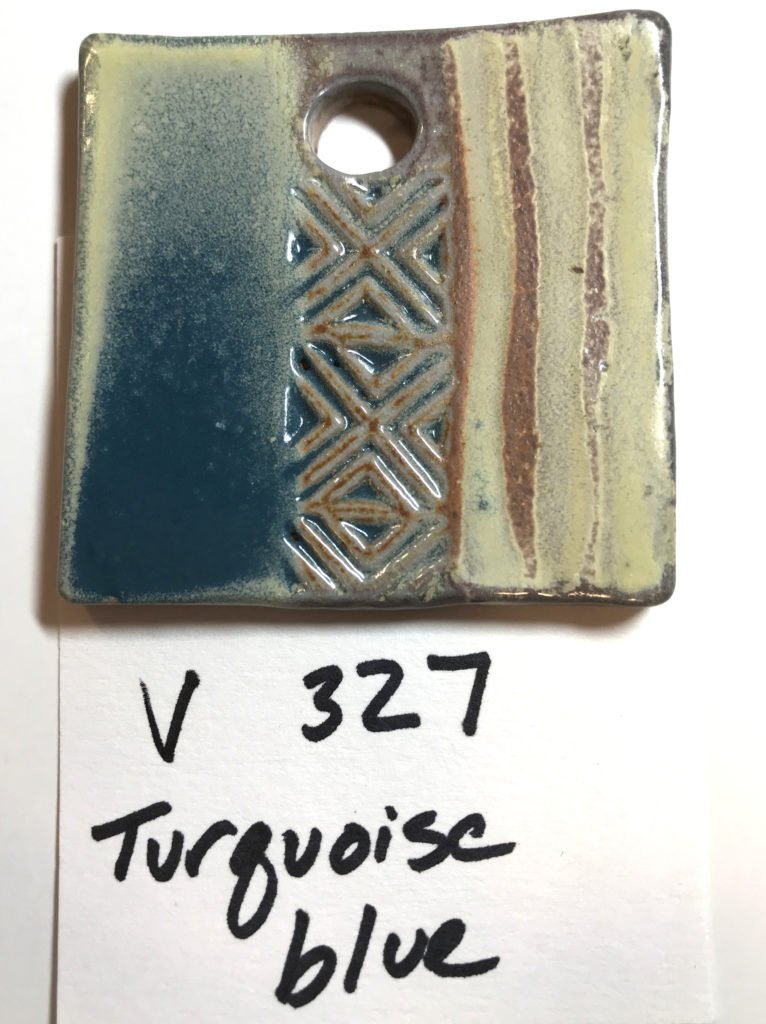
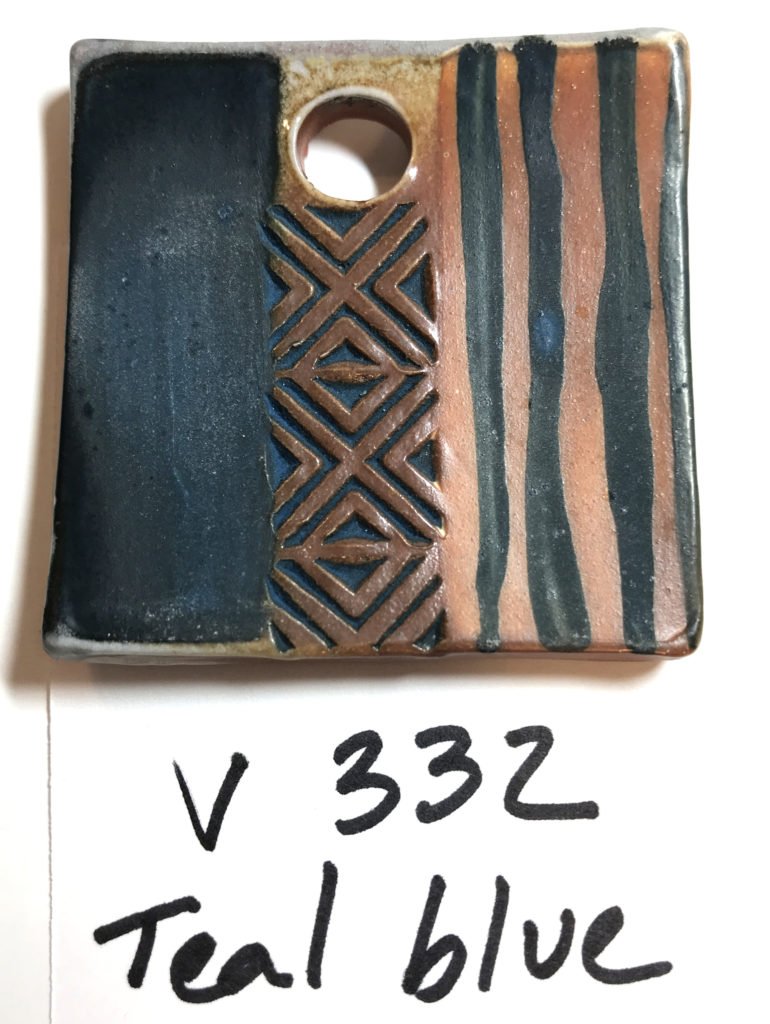
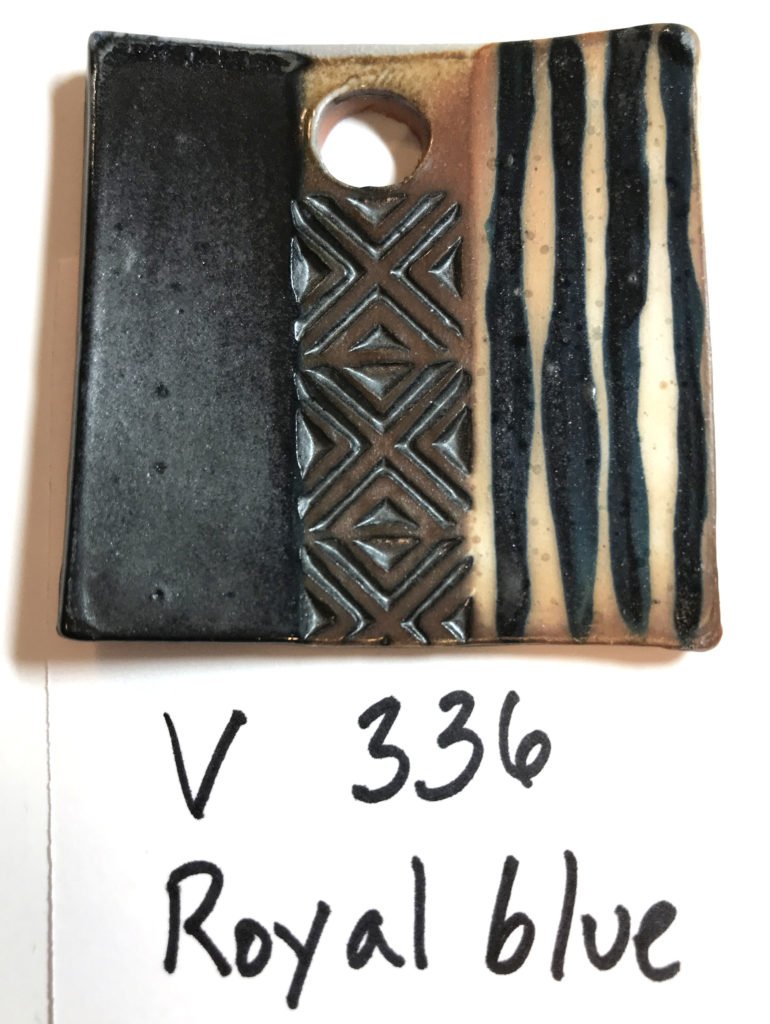
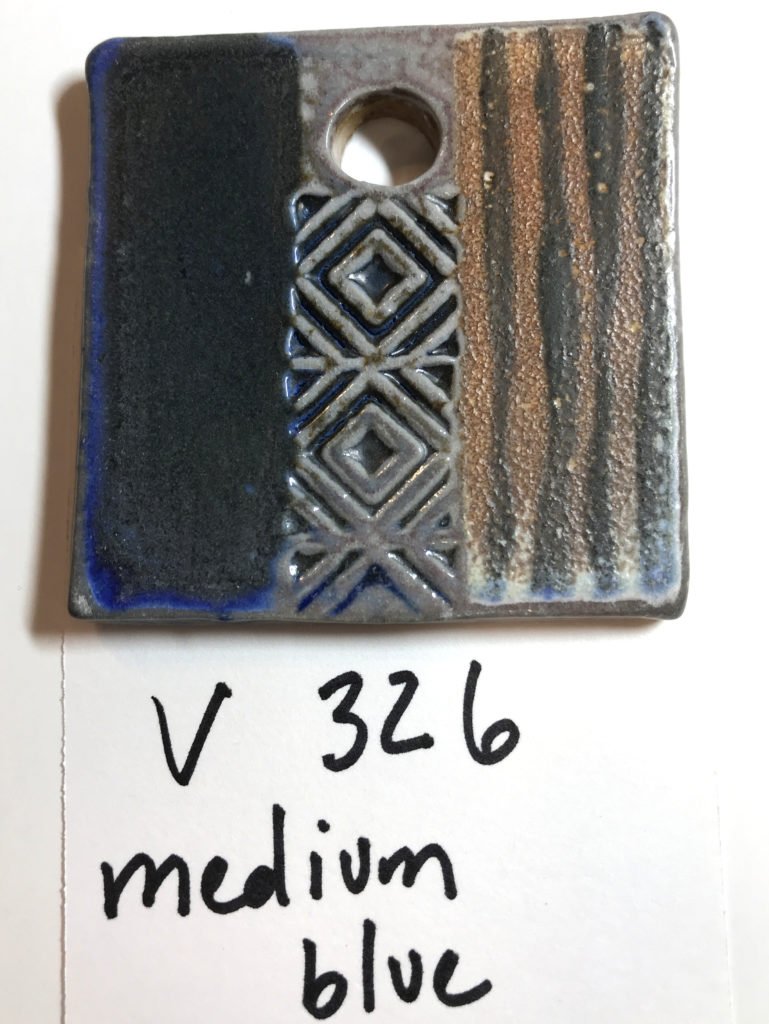
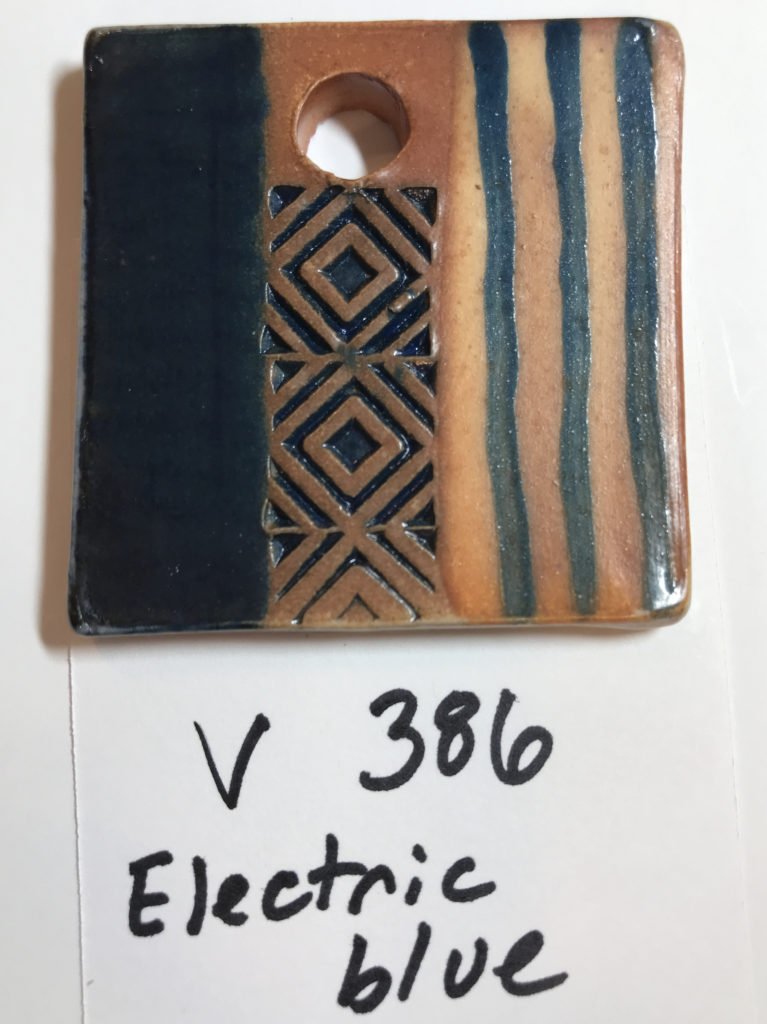
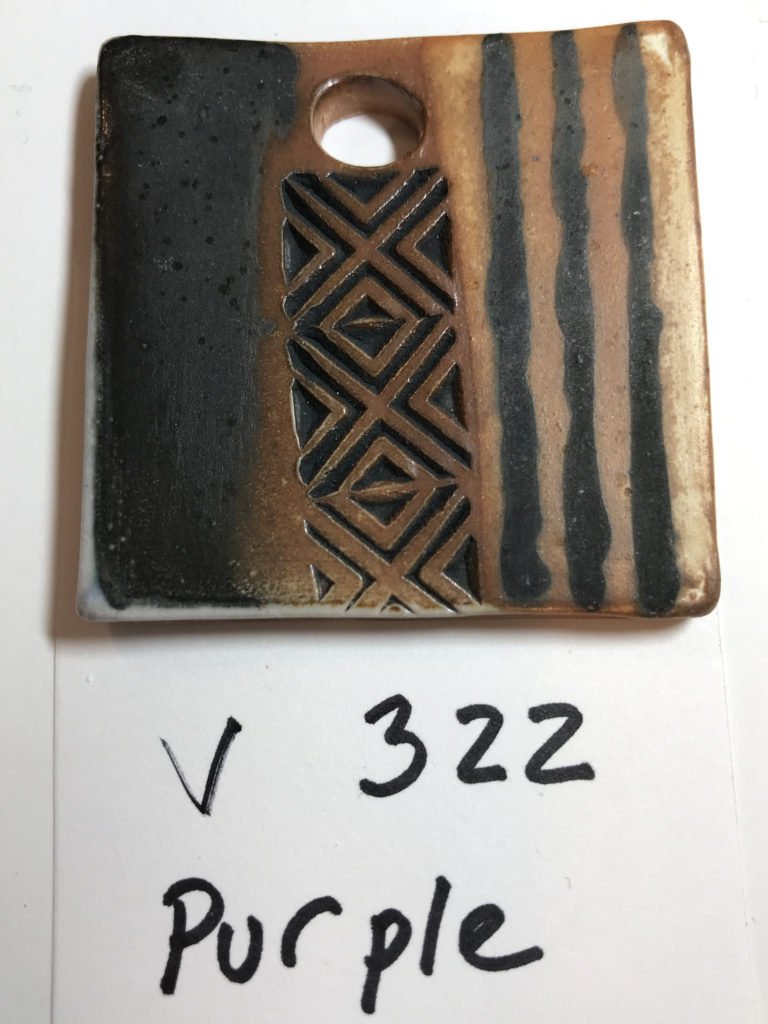
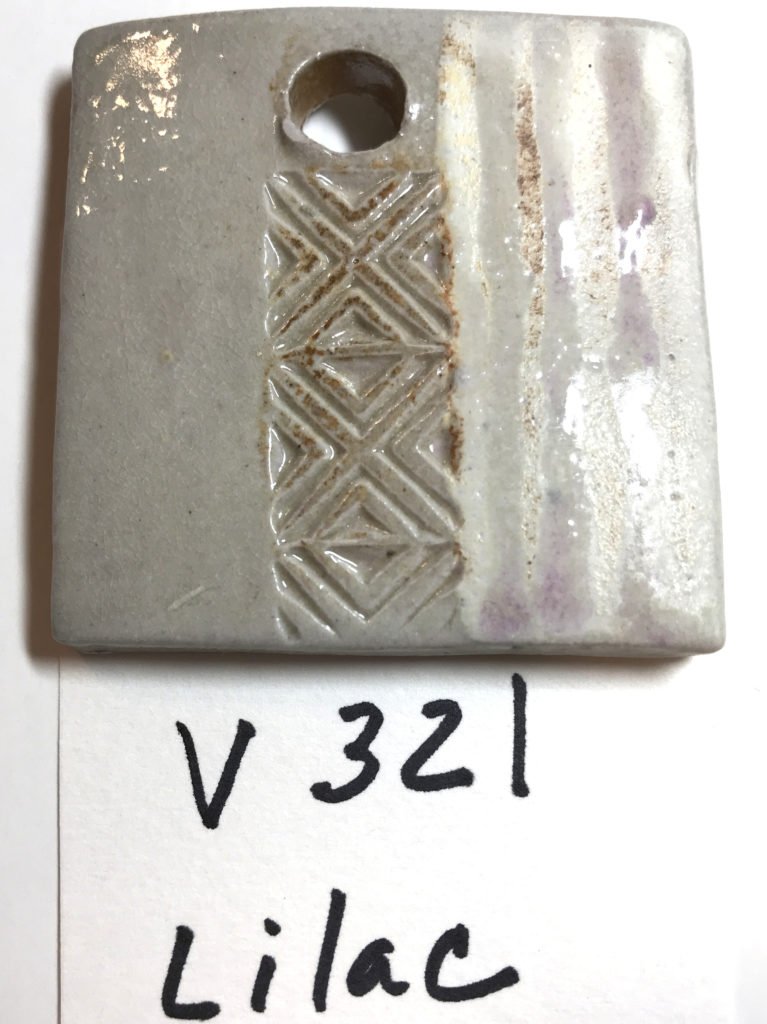
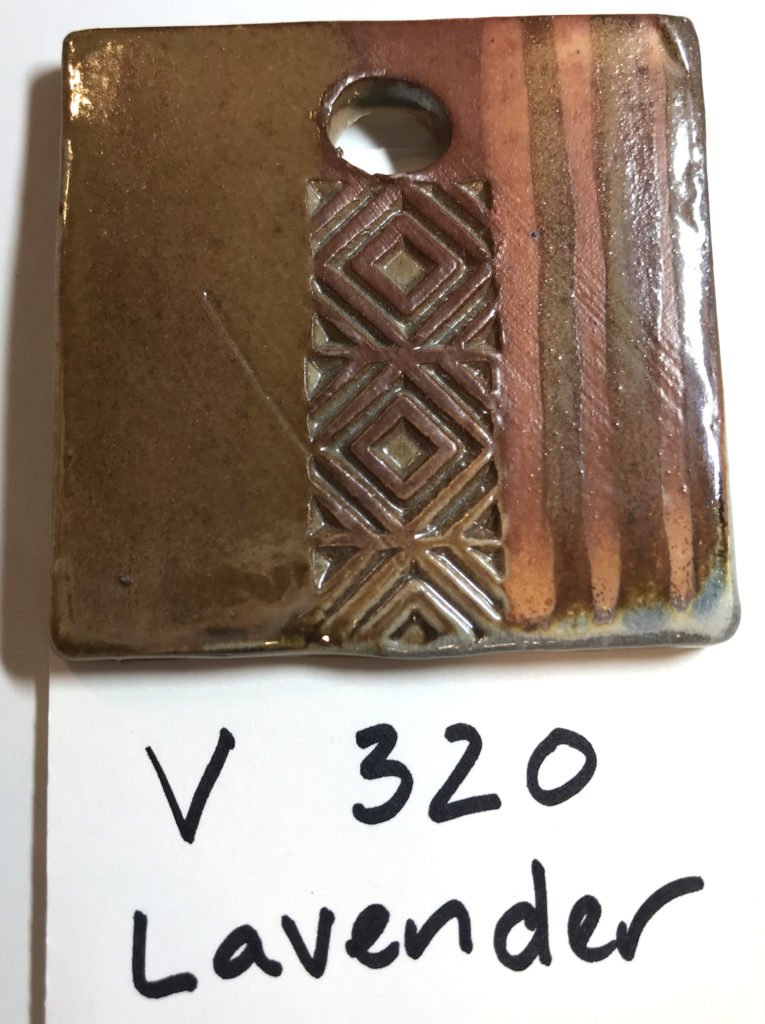
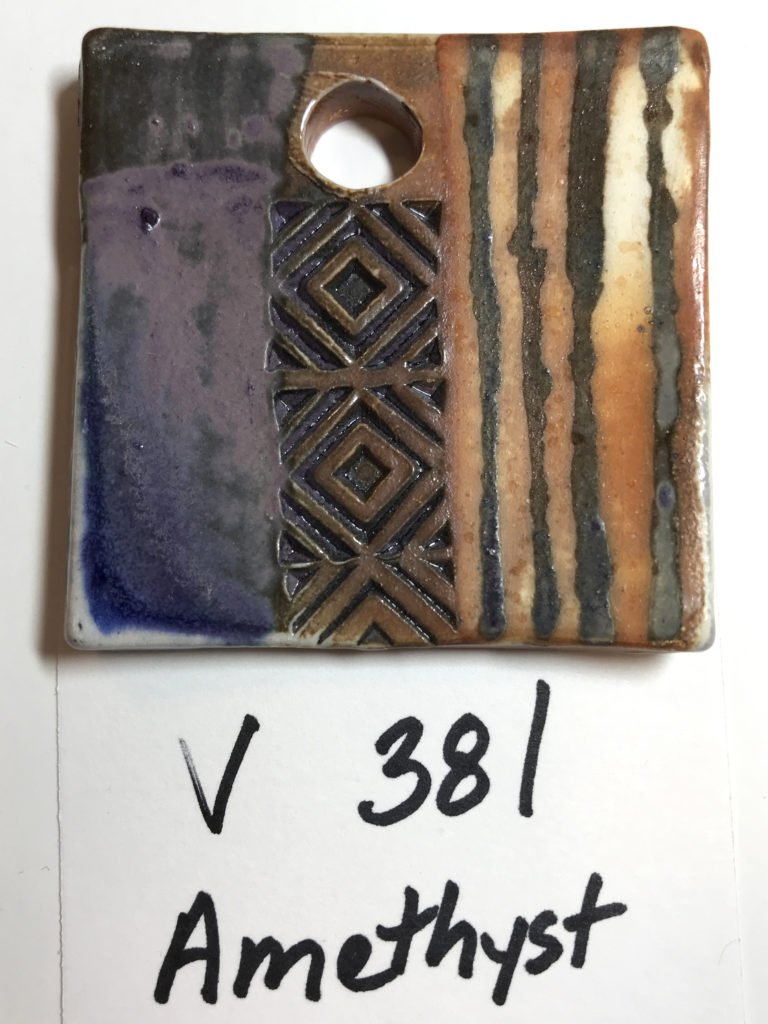
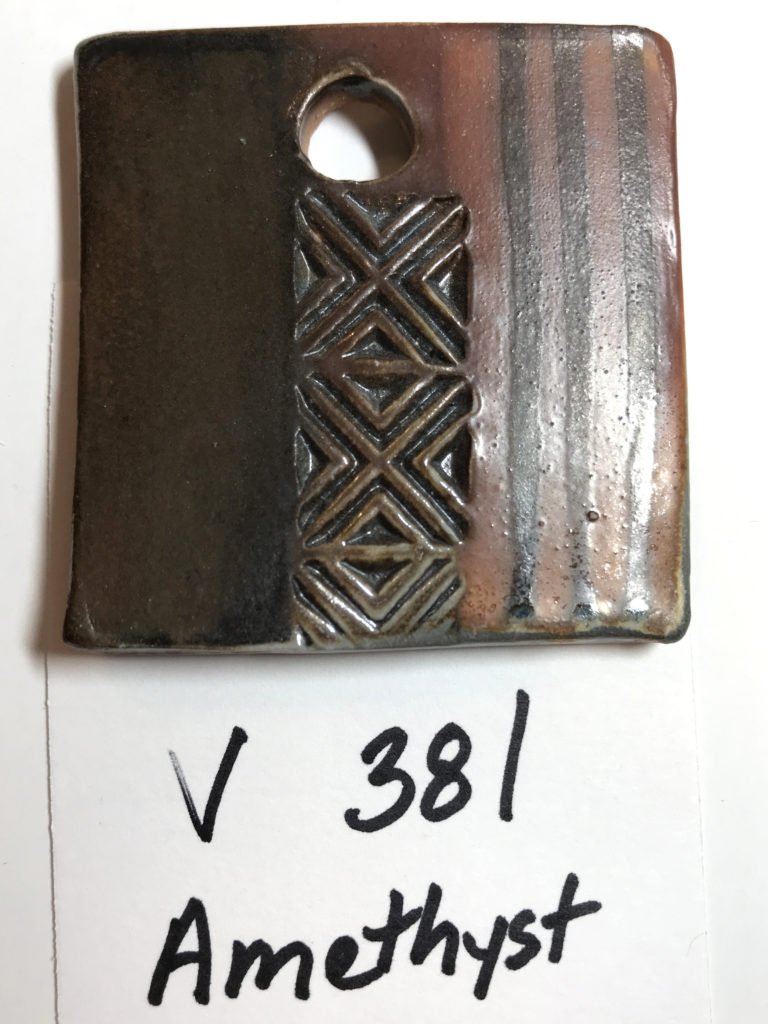
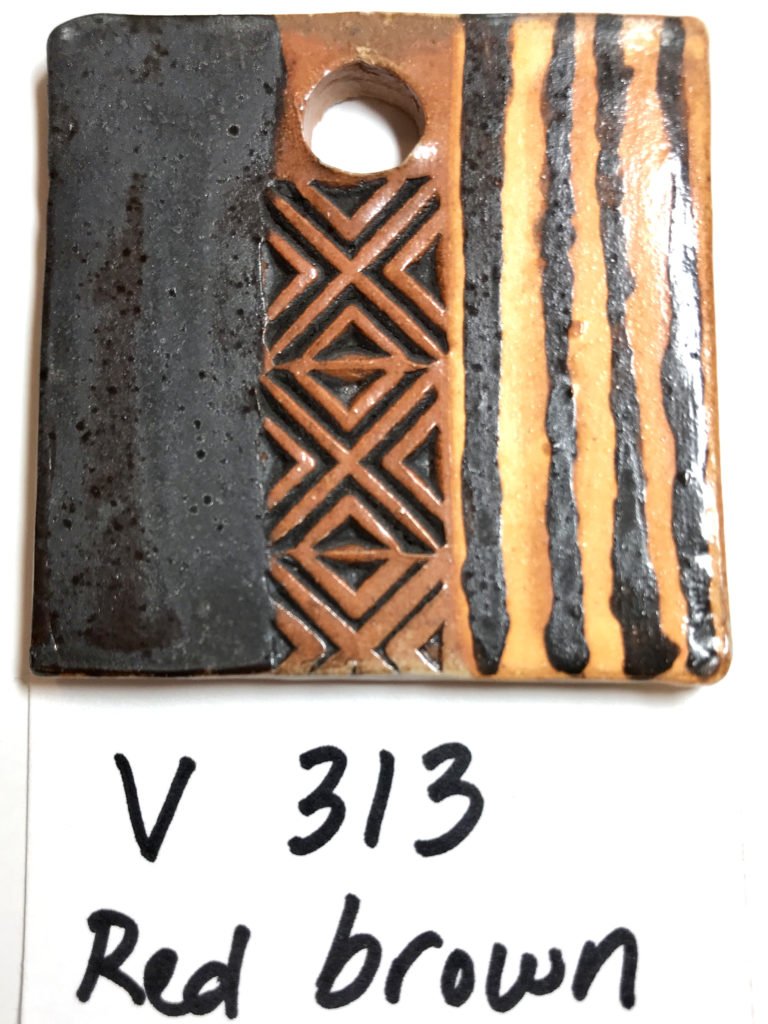
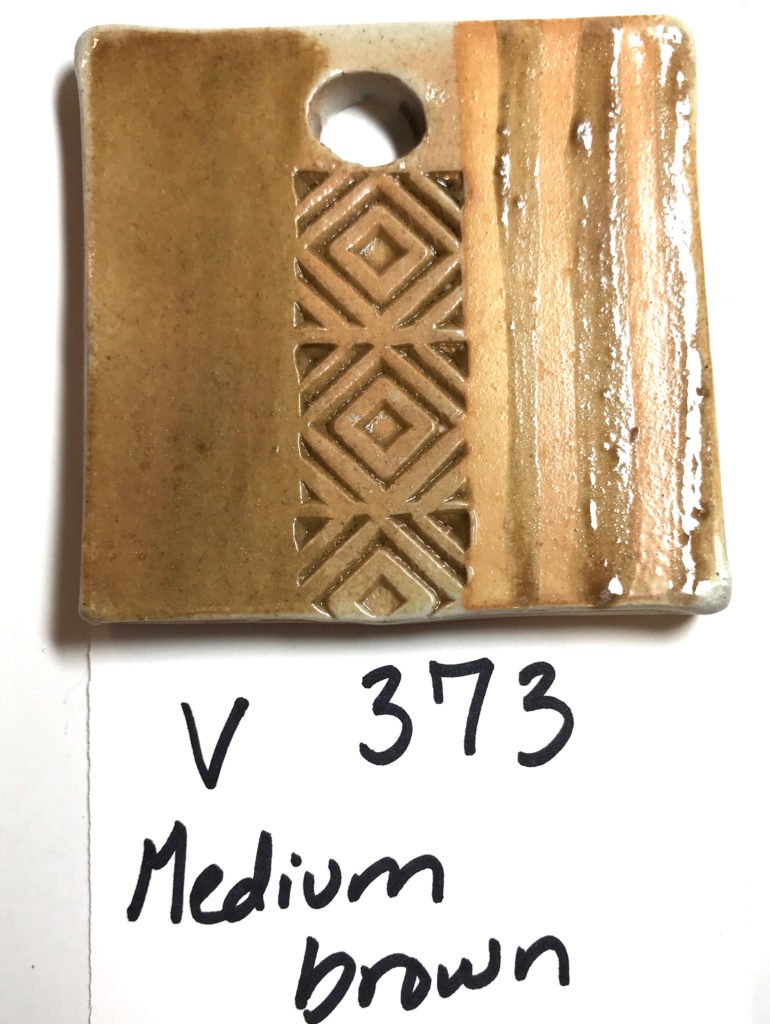
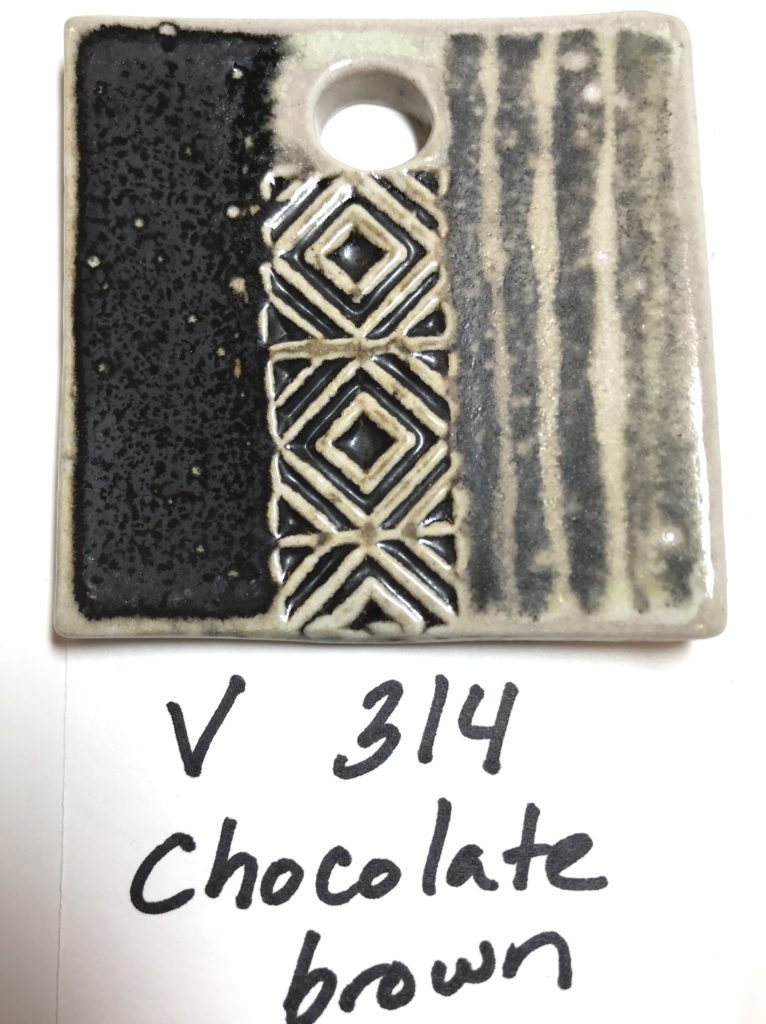
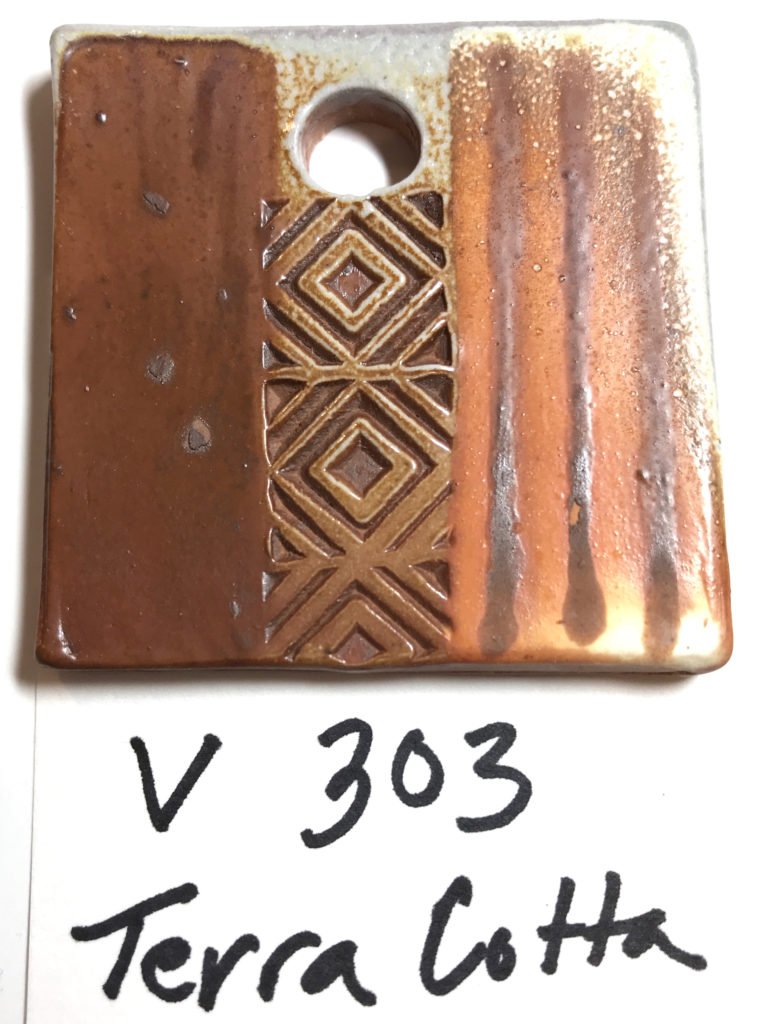
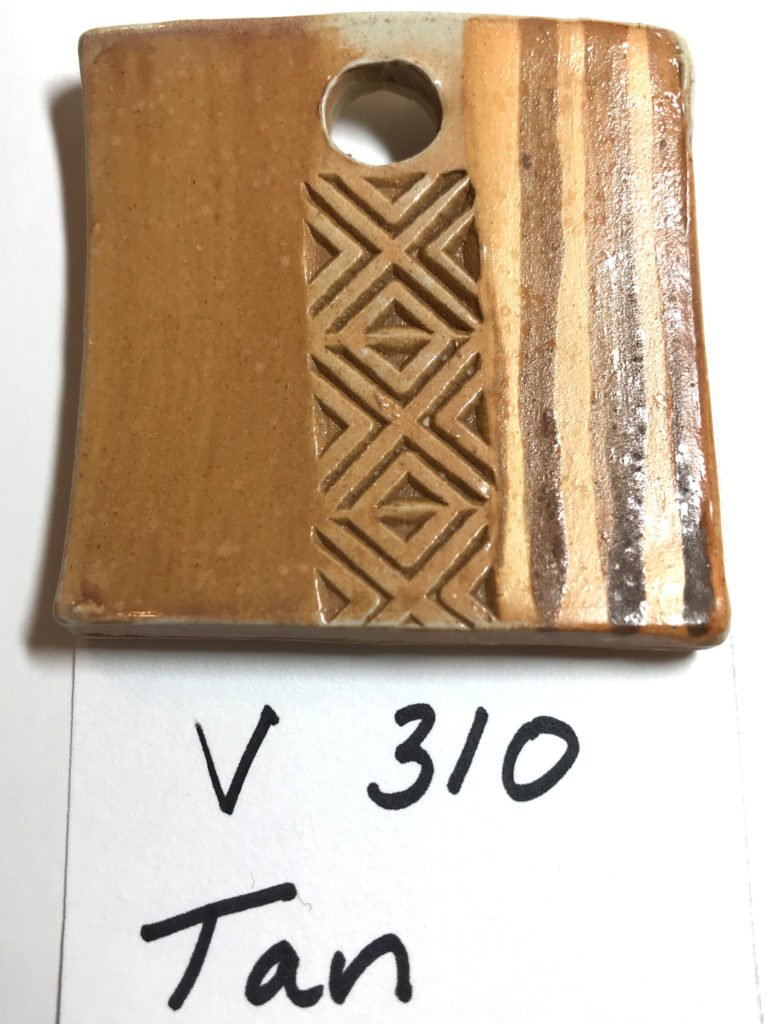
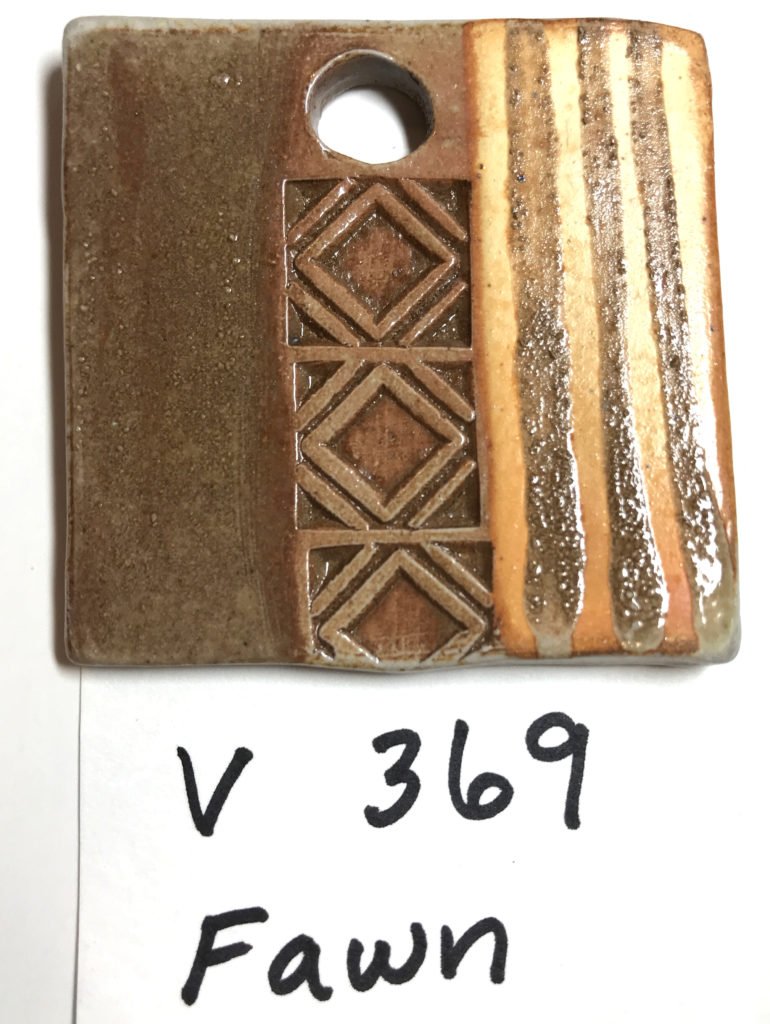
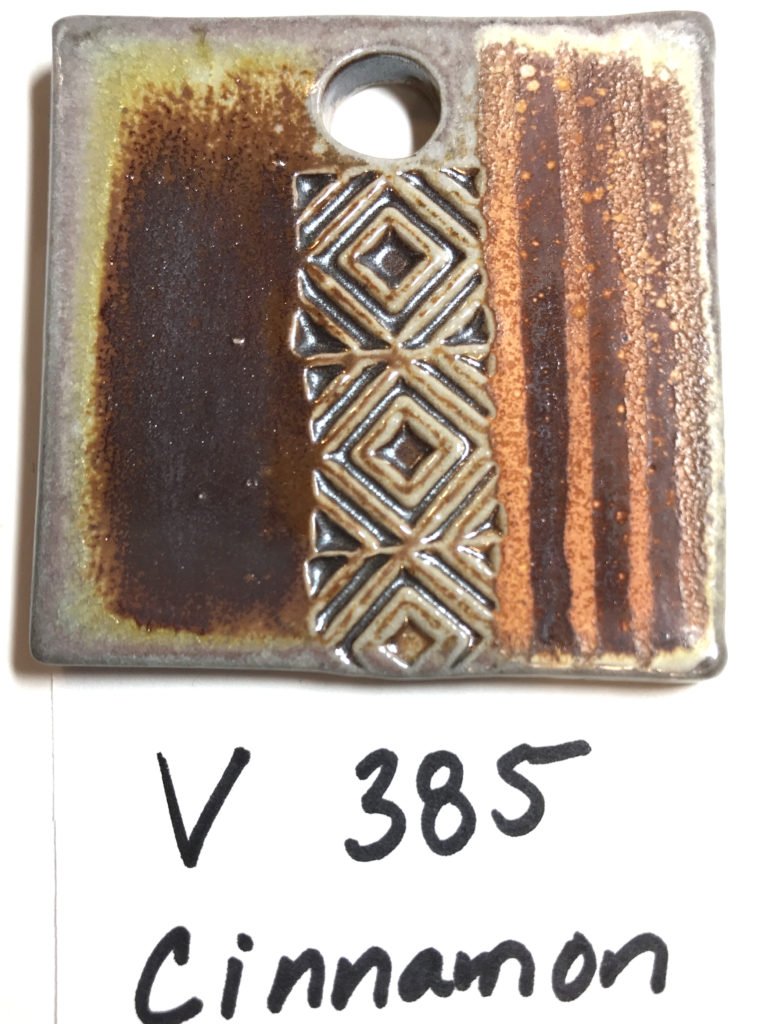
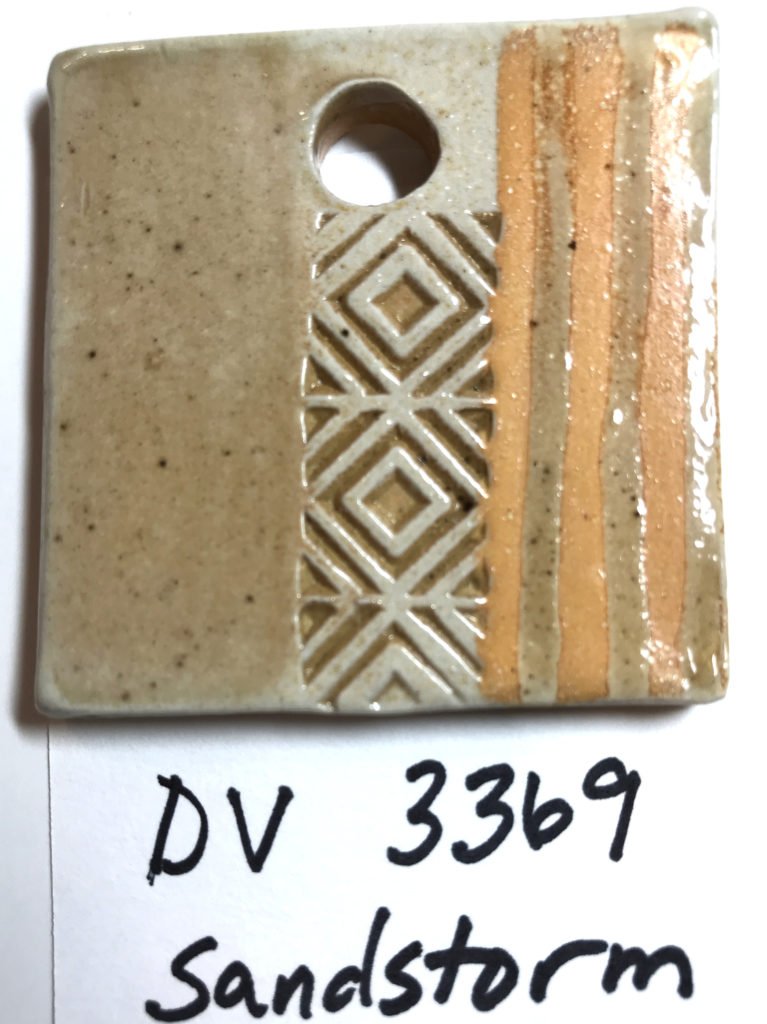
I love data! In all of my years of teaching soda firing at Lillstreet Art Center and at Northern Clay Center, I always have students asking questions about what underglazes might work in the soda kiln. There is often a desire to get a touch of color that is best achieved with an underglaze. But hard to know where to start! And some of them can be pricey (hello reds!). So I did some crowdsourcing with my NCC classes to test the Amaco underglazes that we collectively owned. Most are the line of Amaco Velvet underglazes (that's what the V is for). But there are a few other lines (DV and SS) that are discontinued. But jars are still floating around out there so we tested the ones we had. Some of the Designer Velvet underglazes are gorgeous! Firing underglazes in reduction, at cone 10 is not a typical use. So you can't get the information you might be looking for out of the maker's test tiles. These test tiles have been invaluable to my students. And I am hoping that this post, sharing them, will help many more!
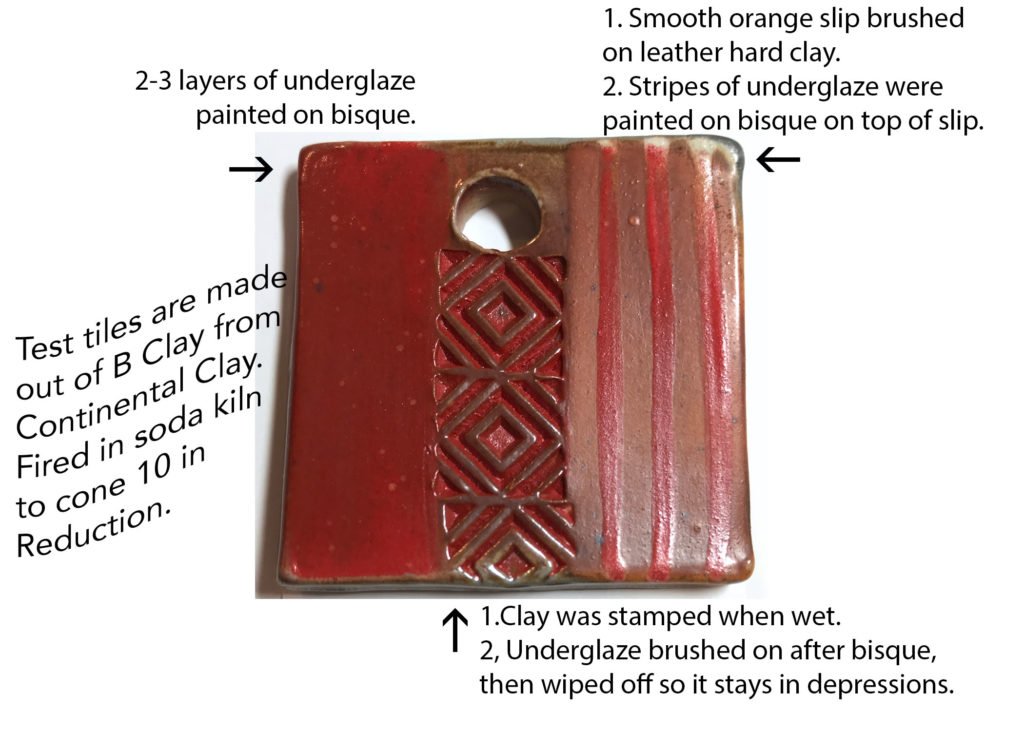
Please note: the Smooth Orange Flashing Slip recipe is included after the test tiles!
blacks and grays
whites
reds
pinks
oranges
yellows
greens
blues
purples
browns
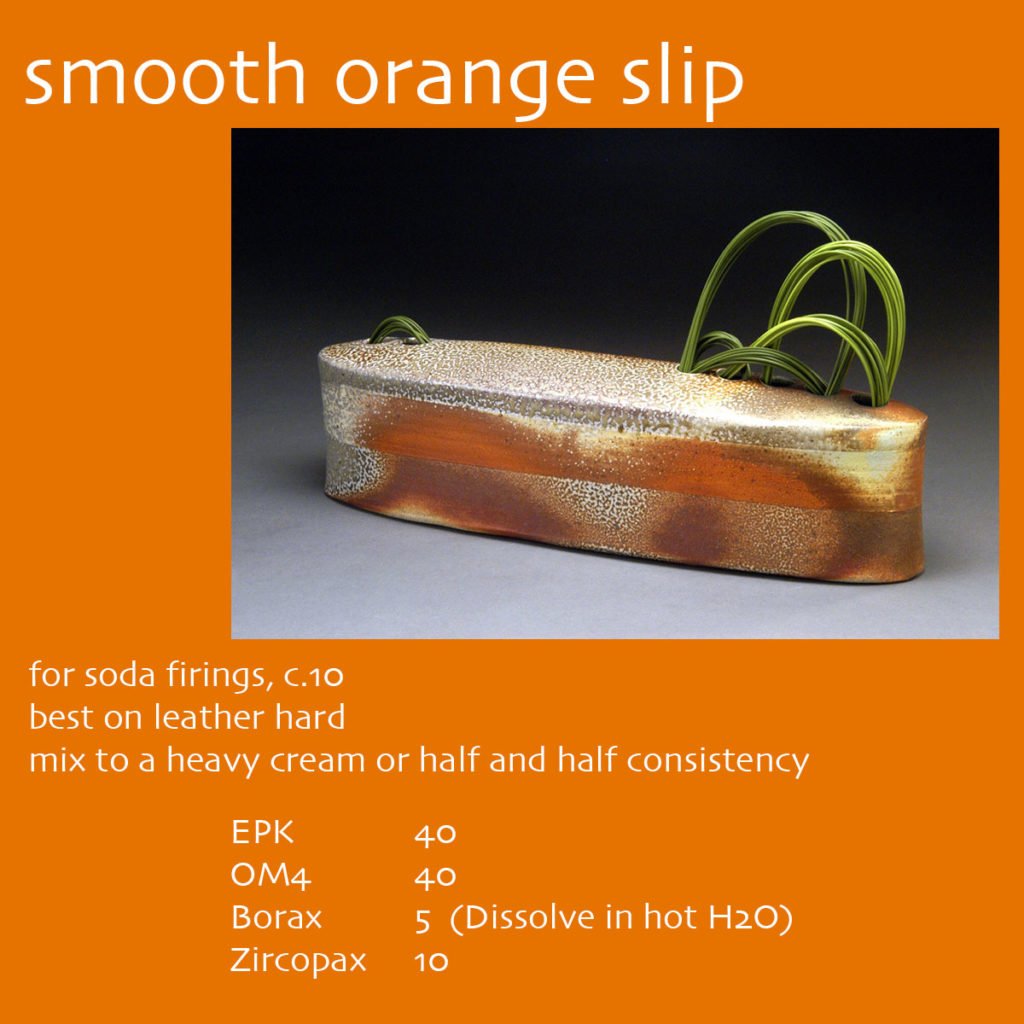
Oval vase by: Emily Murphy (me!)
photograph by: Guy Nichols
I am happy to be back to blogging! Thanks for reading and sharing!
As seen on Apartment Therapy!
I was wondering around Epcot with my family when I got a text from a friend. She had spotted one of my pots on Apartment Therapy: These Sleek Ceramics Will Make Your Home Feel Handmade! Always a treat to get a nod and a link from one of my favorite design blogs! I've been a fan of Apartment Therapy since they began!
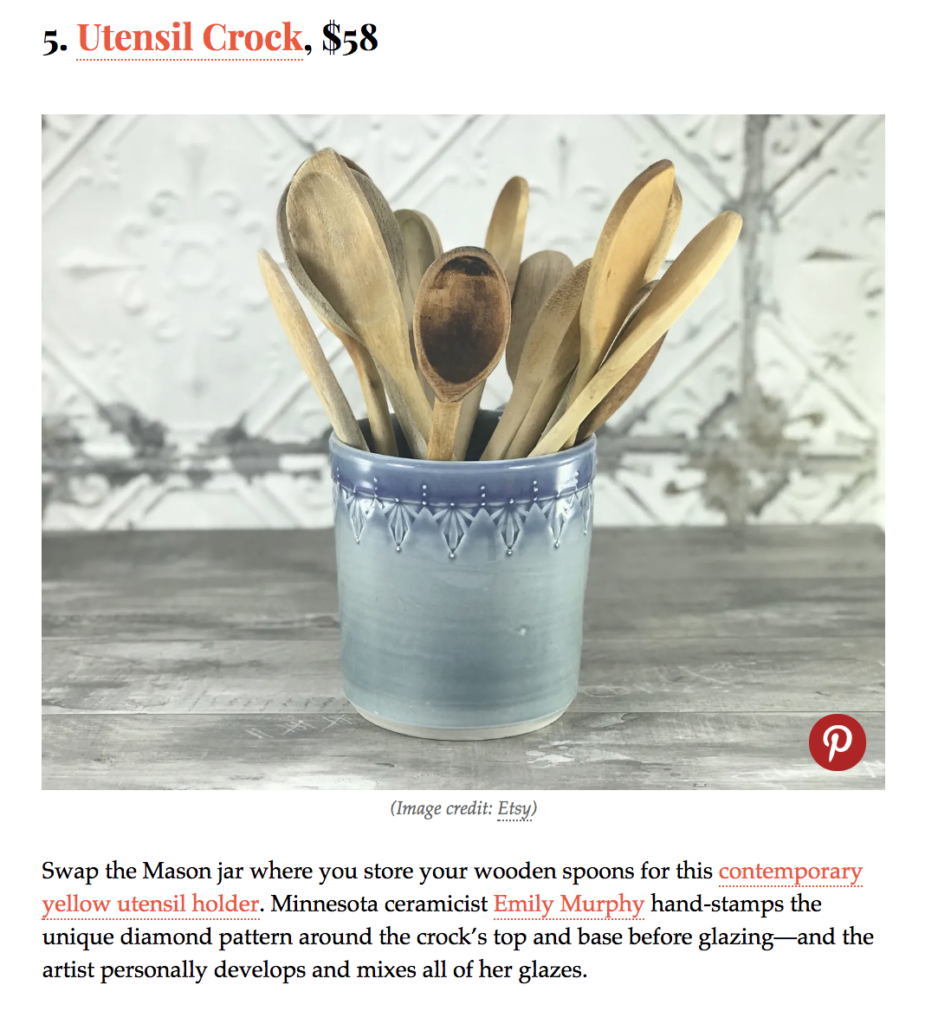
Utensil holders by Emily Murphy Pottery on Etsy as seen on Apartment Therapy.
I have a kiln load of utensil crocks waiting to be bisqued (hoping this heat wave will pass soon!). Up next: glazing then adding them to my Etsy shop!
Our trip to Florida was made possible by hitching along on my husband's business trip. We will never turn down a chance to go somewhere warm when it is the thick of a Minneapolis winter! We were so happy soaking up the sun! Life has been so busy, that I haven't even gone through my photos yet! But I dipped in and pulled a couple of my favorites to share.


That's all for now. I am trying to get back in the habit of updating my blog (always! hahaha). I have a long queue of partial posts that I am hoping to finish up. Even if I haven't been an active blogger in terms of publishing, I am forever a blogger in my head! Happy to be back!
Current work
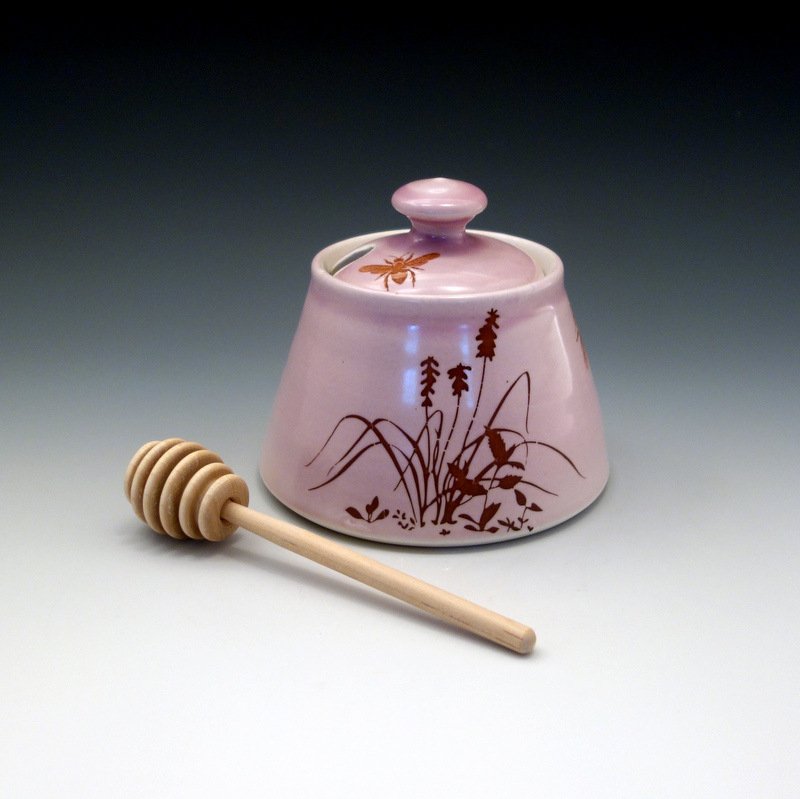
The inside of the lid of each honey pot has a small decal of a bee. A sweet little surprise.
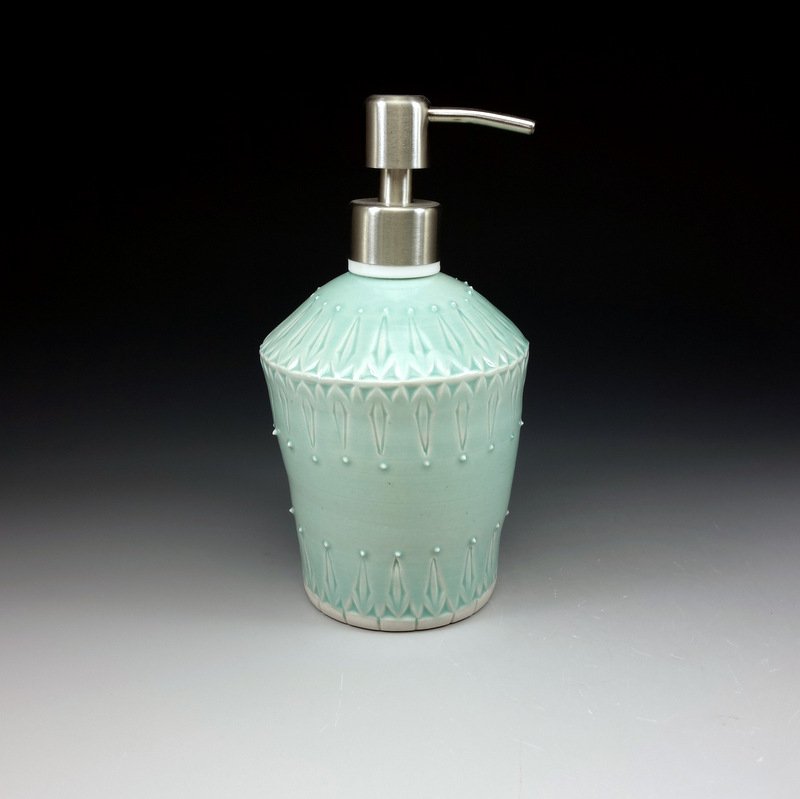
Can be used with liquid soap or lotion. I also make dispensers for foaming soap. Each one is one of a kind.
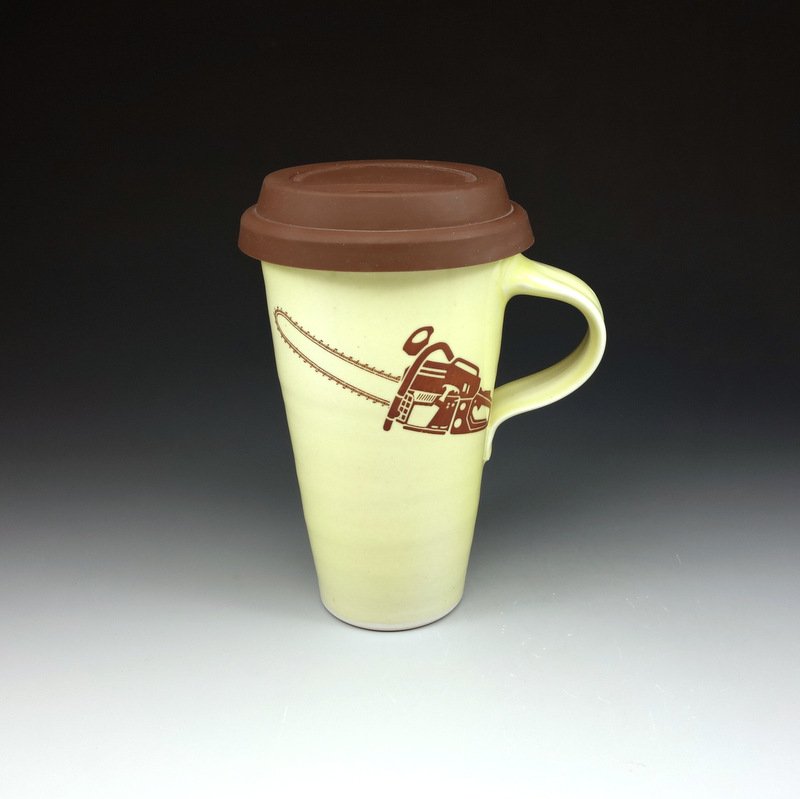
The other side of this mug has the image of a lawnmower on it. Mug can be used with or without lid. Fits most car cupholders!
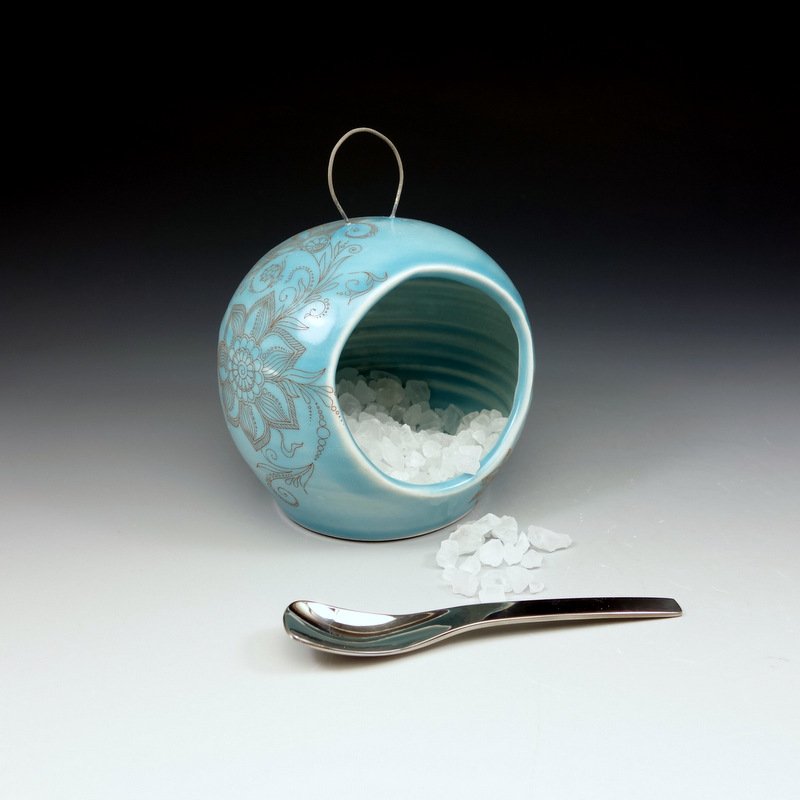
A spoon is included with each one.
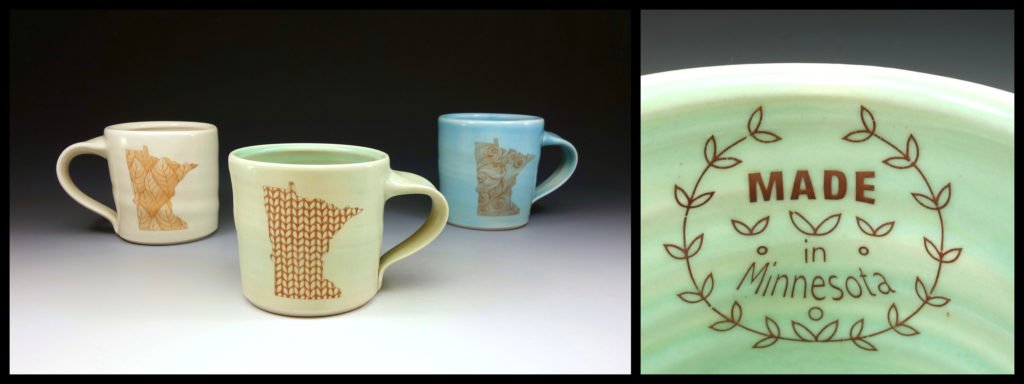
Each one has a "made in Minnesota" decal on the inside of the mug. The pattern on the inside of each "state" varies from mug to mug.
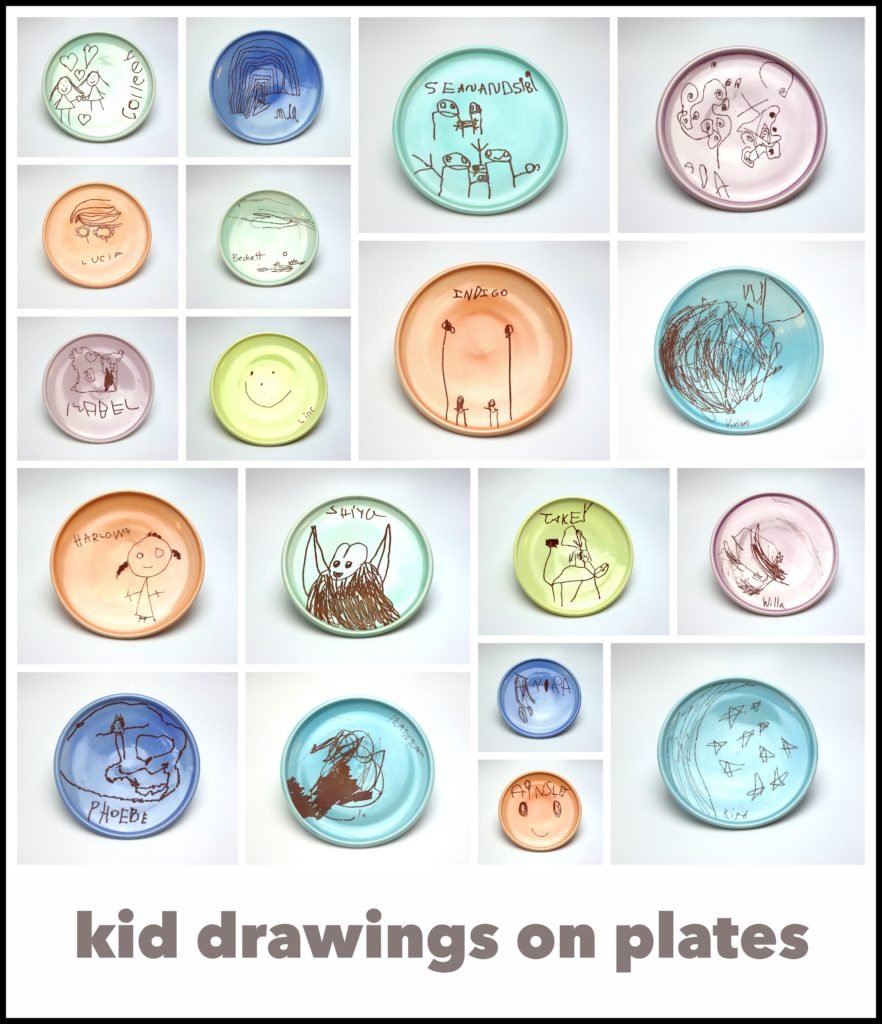
Handmade plates with kid made drawings.
For my daughter Ada's birthday, she asked to do a pottery project as part of her 5th birthday celebration. We brainstormed ideas for a while. We weren't going to be able to do a hands on / wet clay project this year. So we decided to do kid drawings on plates.
I made a 7" circle on paper as their template for their plate designs. They had pencils, thick Sharpies and thin Sharpies and all dove into drawing quite quickly. I love the confidence and lack of inhibitions they had when they did their drawings. I know at some point in time, most kids become more self conscious with their art. I'm trying to preserve that confidence that my kids have for as long as possible. I turned the images into decals and applied them to the plates and fired them onto plates glazed in the colors that the kids picked out.
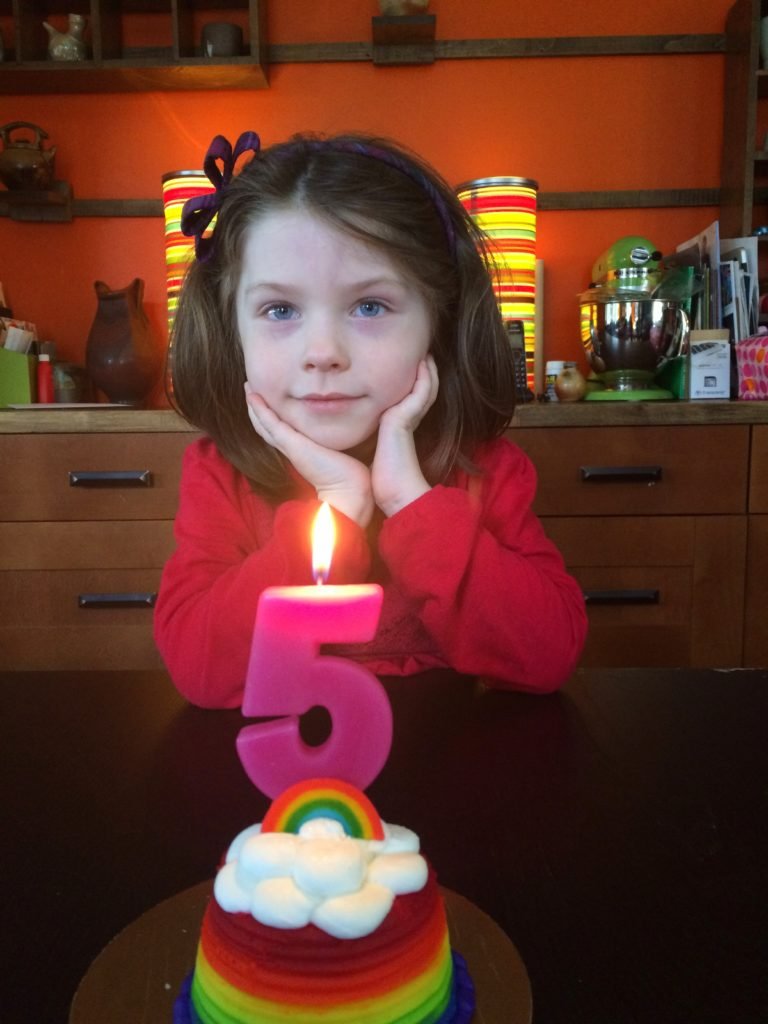
They turned out great. It was a fun collaborationwith Ada and her friends. I love that there is a big group of kids eating their meals off of handmade plates that they decorated!
Here is the collection of each of the kids' finished plates. You can click on any of them to see them larger.
A few little notes:
- Don't forget, you can get kid sized dishes as well as many other pots in my Etsy Shop. I've been busy are restocking it several times a week with new pots!
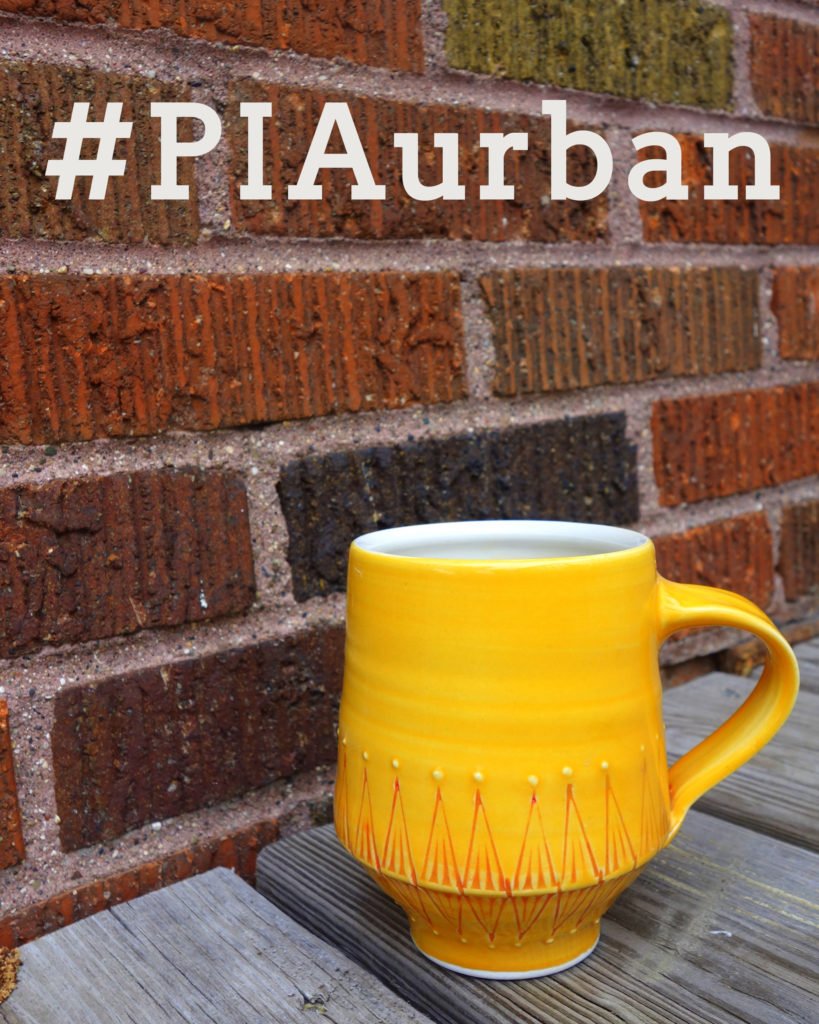
- Be sure to check out Pots in Actionon Instagram this week. I'm guest hosting with the theme #PIAurban.
- Follow me on Facebook and Instagram for regular updates!
I'm guest hosting Pots in Action this week!
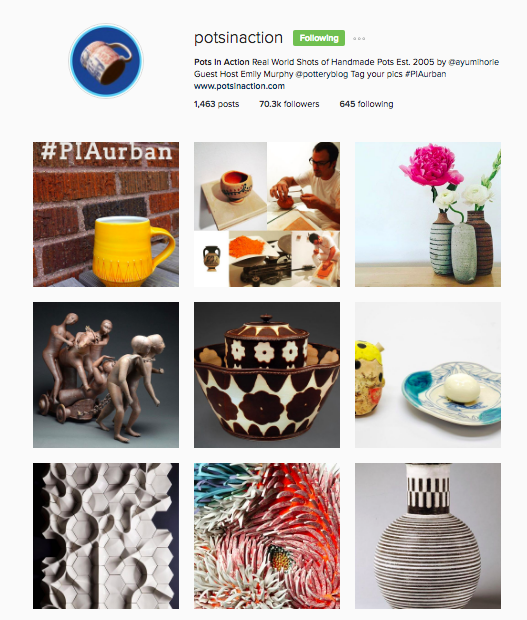
Ayumi Horie started the @potsinaction Instagram feed over a year ago. I've been a fan of Ayumi's work for years. Both her pots and also her approach to sharing clay in the world - both online and in the community. Innovative videos like this and this. And exciting projects like Portland Brick. Not to mention activism such as Handmade for Japan. Years ago, she started a collection of photos on her website of her pottery being used by their owners/ collectors submitted by those using them. She entitled this project, Pots in Action.
In part, I'm a potter because I see pots as having the incredible privilege of being part of people's private, everyday lives. Because of this intimacy, we let our guard down around pots, allowing them to convey ideas about aesthetics, function, and social issues. Through repeated use, pots can create habit and be comforting, creating memory for those using the pots. They are objects of service and conduits between people.
These pots are independent of me; they are finding their own way and accumulating histories with various people, in various homes, in various places around the world. Many thanks to all those who use my pots and contributed to this project. Keep the pictures coming.
Her "Pots in Action" project grew and developed and took on another form with the Instagram feed, @potsinaction. It is not limited to her work. It is open to anyone's work. Each week there is a guest host who chooses a theme (with Ayumi's help and guidance) to challenge followers. From PIA's Facebook page:
Pots In Action is a crowdsourcing project that collects and features the best images of handmade pottery in use by potters and ceramic appreciators all over the world. Some are candid, others are posed; what they have in common is taking the pot off the shelf and putting it to work in the kitchen, out of the kitchen, wherever pots can be found....Part of our mission is to help potters and lovers of ceramics to take better photographs. We want to help people make images that are as compelling and exciting as the work itself.
This week's challenge, #PIAurban, debuted tonight with this write-up shared by Ayumi:
Before most potters even had websites, Emily Murphy (@potteryblog) was blogging about ceramics. This week, she tours cities for us with #PIAurban. After studying ceramics and metalsmithing at Earlham College, she spent 10 years in Chicago at Lillstreet where she taught and had a studio. She's now based in Minneapolis where she's made the switch to soda-fired stoneware to cone 10 porcelain. Being true to the material and firing continues to be at the heart of her work.
Emily writes, “I'm fascinated by pots, potters, studios and kilns in cities. When I first started making pots, the image of the potter that was impressed upon me was that of the country potter. Further education was through apprenticeship until you were ready to set up your own shop on your own piece of land and continue the tradition of the country potter. In the city, expensive real estate, zoning laws, close neighbors and a fast pace aren't necessarily conducive to making ceramic objects, but because of those constraints, interesting solutions often evolve. With this week's #PIAchallenge, I'm interested to see the influence of the city on the maker. How does the density of an urban setting encourage collaboration and shared spaces and equipment? How does the space in a city influence the scale of ceramic objects? What are the ways that the approach to clay is similar or different to a rural potter? Are there any urban potters using locally sourced clay? What's happening with clay in the urban environment that isn't happening elsewhere? Who is thriving BECAUSE they are in a city? What's happening with clay in urban centers, internationally? It's been inspiring to research the city side of clay with #PIAUrban and I'm excited to see how others interpret and respond to this theme. A round of 👏👏👏 for Sarah Archer @sarcherize for#PIAadoptedcountry! -@ayumihorie
#PIAguesthostEmilyMurphy #emilymurphy #urbanpotter#urbanpottery #cityceramics #minneapolis #mpls #minnesotapottery #potterystudio #pottery#ceramics #keramik #陶器 #céramique #cerámica #陶瓷 #ë„기류 #ë„예 #keramikk #craft#contemporarycraft #handmade #potsinaction
I hope you'll follow along this week and share some images with the hashtag #PIAurban! I'm really excited to see what folks share and how the interpret this week's theme!
Lastly, my intermittent blogging is about to be more regular now. I have lots of posts in progress! Watch out for the updates!
2015 Holiday Gift Guide
My Etsy shop is well stocked for all of your holiday gift needs. Use coupon code: STAR2015 for 20% off of your purchase. Please note: all orders placed between Dec 3-12 will be shipped on Dec 14-15. Orders on other dates will ship, as usual, in 1-3 business days.
Here are a roundup ofideas if you're stumped on what to get some folks on your holiday list!
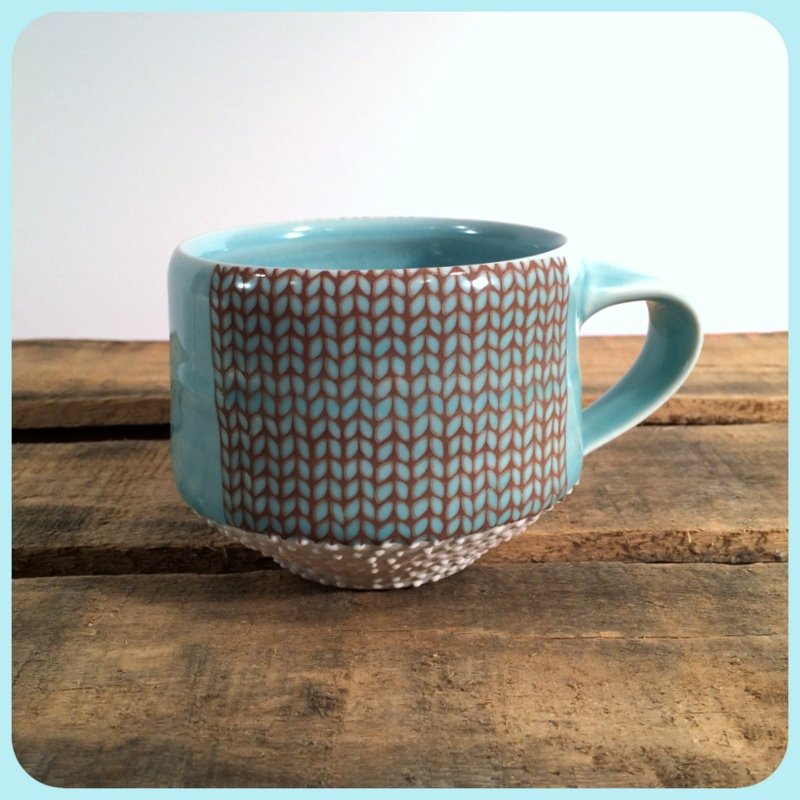
For your favorite knitter:
This mughas a rich surface both visually and physically. The dots feel great in your hands when you're cupping the bottom of this mug. Available in my Etsy shop and at Lillstreet Galleryin Chicago.
For households with (or without!) kids:
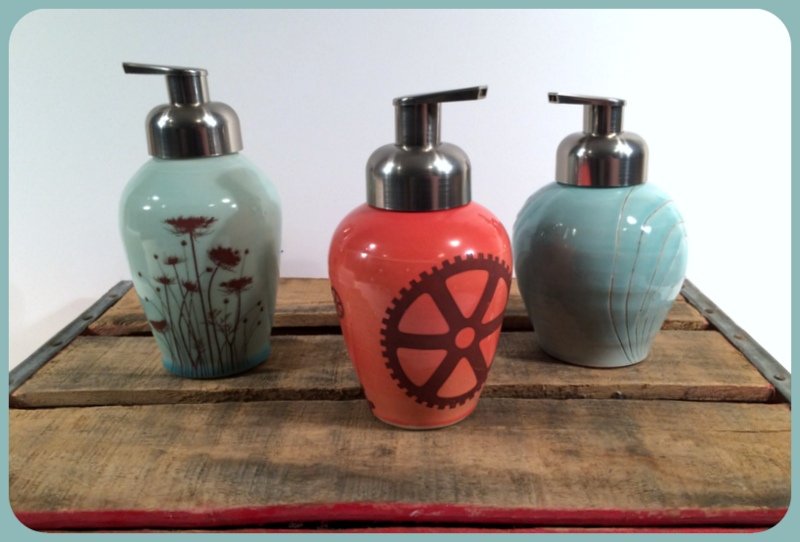
These foaming soap dispensers are great for anyone who uses soap (which iseveryone!), and theyare especially great for households with kids. The foam is really easy for them to spread on their hands, and the heft of the dispenser means it'll stay put and not get knocked over easily. I also have a selection of non-foaming dispensers in my shop. Both are available at Gallery 360 in Minneapolis.
For folks with kids or with pets:
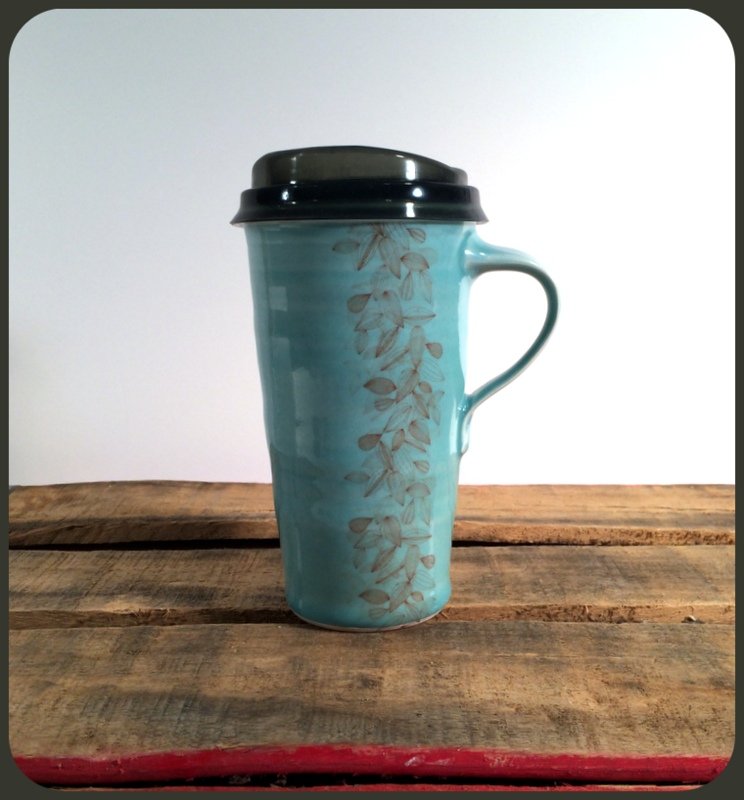
Travel mugs / lidded cups are great when you have little beings (kids or furry friends) running around and running the risk of knocking over your precious, and much needed cup of coffee. These lids will help minimize the spillage and keep your drink hot! They can be used with or without the lid and are microwave/ dishwasher safe. They come in a variety of sizes of styles/ sizes/ shapes.
For those on the go:
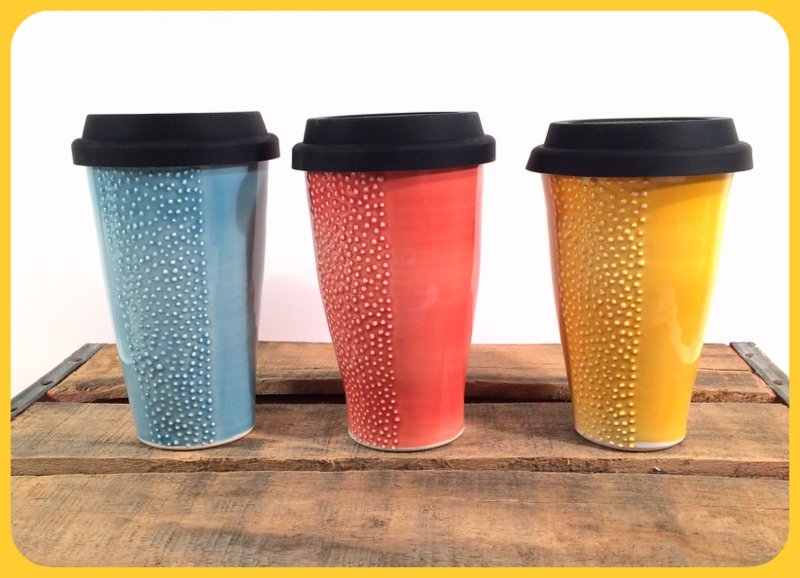
These travel tumblers with silicone lids are perfect for that special someone who is always on the go- commuting to work, heading off to a pottery class or hanging out in the back yard and want to keep the bees out of theirbeverage! They come in a rainbow of colors and the texture of the dots keep this handle-less mug from slipping in your hand.
For the special kid in your life:
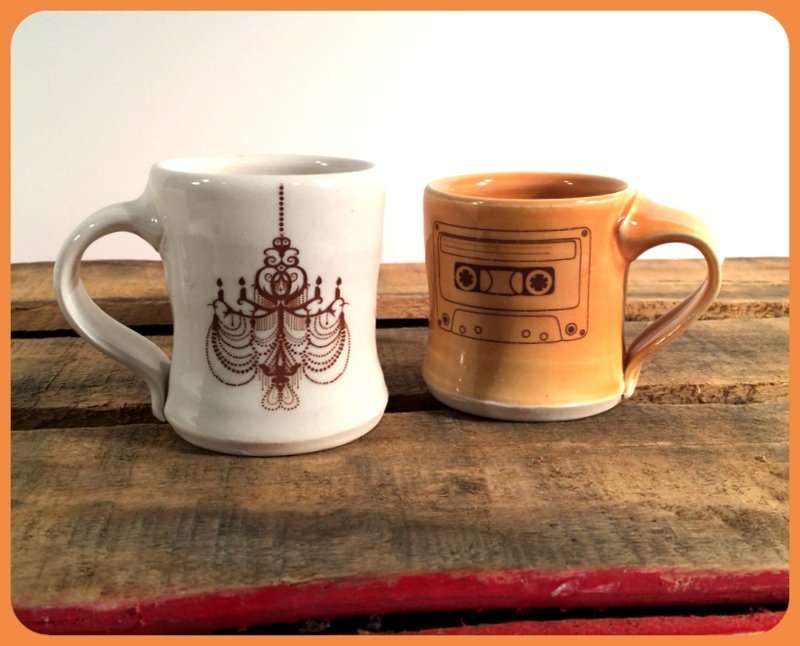
Kids love using real pots and I love making special pots just for them! As adults, we try to limit the exposure kids have to plastic and what is a better alternative to our plastic saturated world than one of a kind, handmade porcelain mugs! These mini-mugs sell out quickly and I'm continually making more, so be sure to check back regularly for more colors and designs!
For your favorite gardener:
These vintage seed packet mugs are generous in size (they hold a whole pint!). Fill the mug with a selection of actual packets of seeds or some hand tools and helpyour favorite gardener dream of spring!

For a graphic designer:
This thrown and altered "cut and paste" plate is the perfect gift for the graphic designer in your life!

For the host(ess) with the mostess:
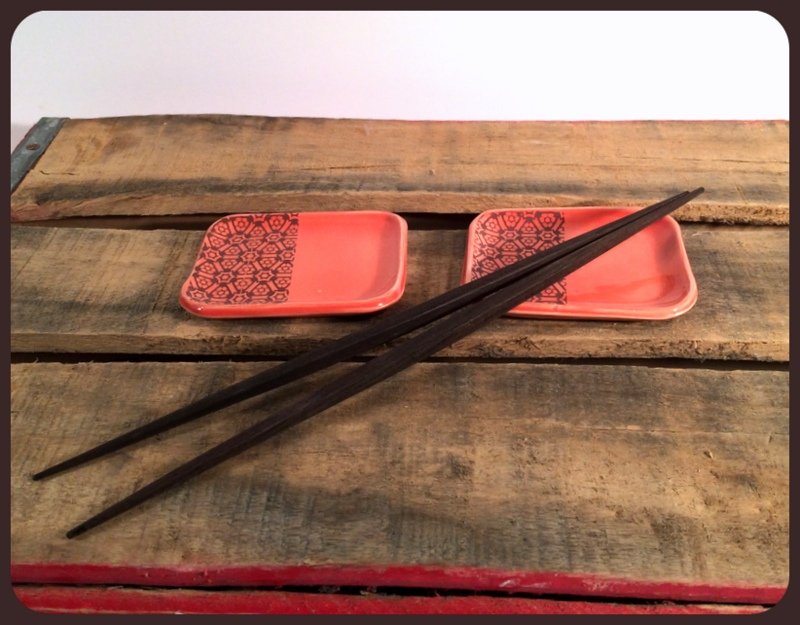
It can be hard to find a small, inexpensive AND handmade gift! You might need one for your kid's teacher, for a host(ess), for a neighbor that brings in your mail when you're away or to have on hand in case someone unexpectedly gives you a thoughtful gift and you want to have one to be able to reciprocate! These little dishesare just $20 (plus 20% off that with coupon code STAR2015). They're perfect for dipping dishes, spoon rest + teabag holder, jewelry holders or an infinite number of other uses! Chopsticks not included - but you could add a couple of pairs or a box of tea to make a sweet little gift!
For the new homeowner (or apartment dweller):
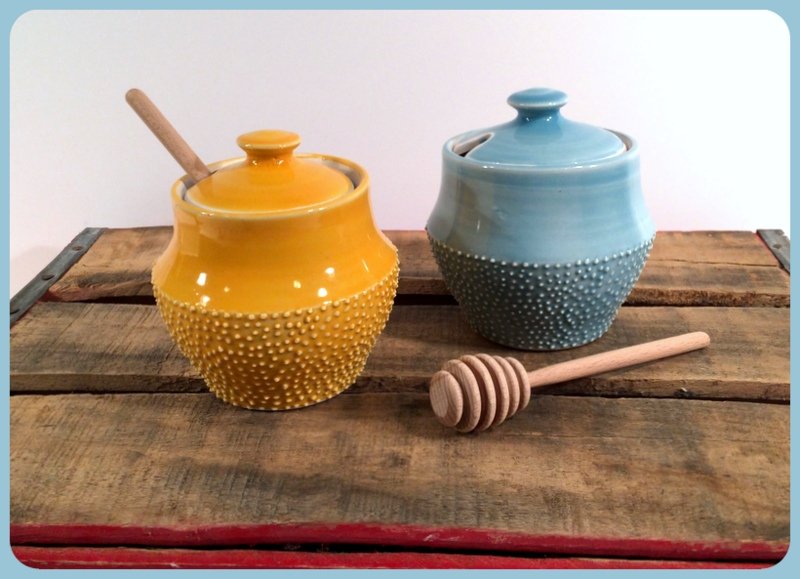
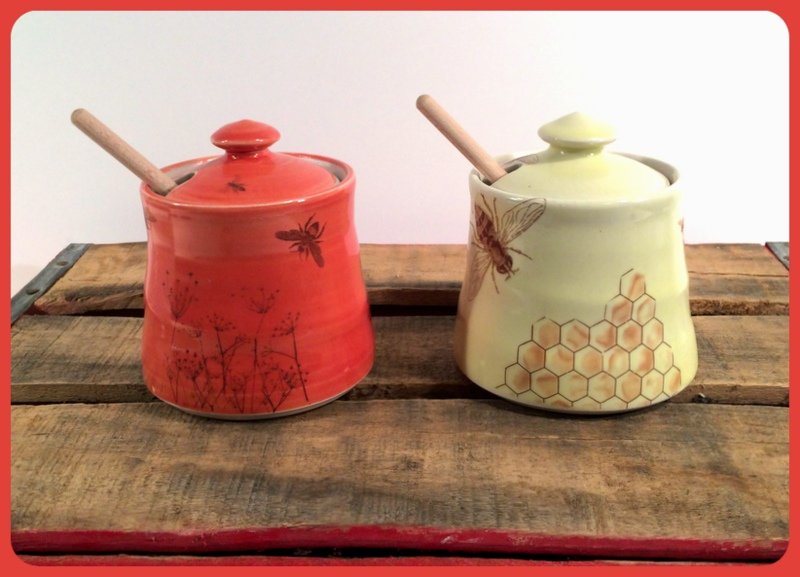
My porcelain honey pots are the perfectgift for someone who has just moved into a new home. Or maybe you know that they LOVE honey.Pair with a jar of local honey to make a thoughtful wedding gift or housewarming gift!
For the coffee lover:
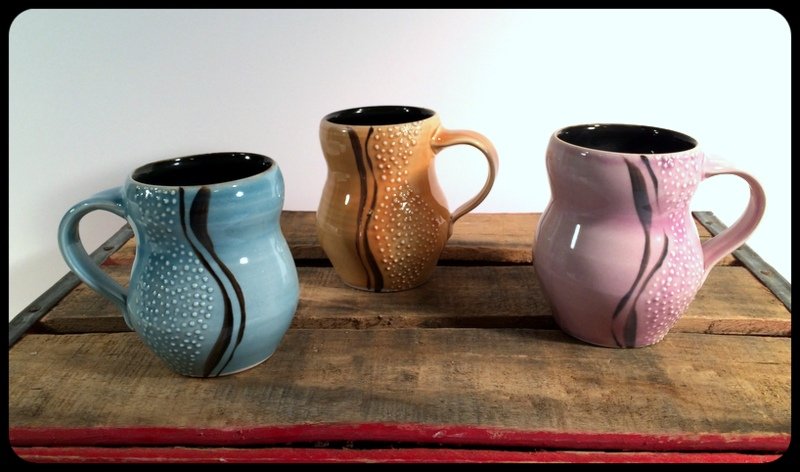
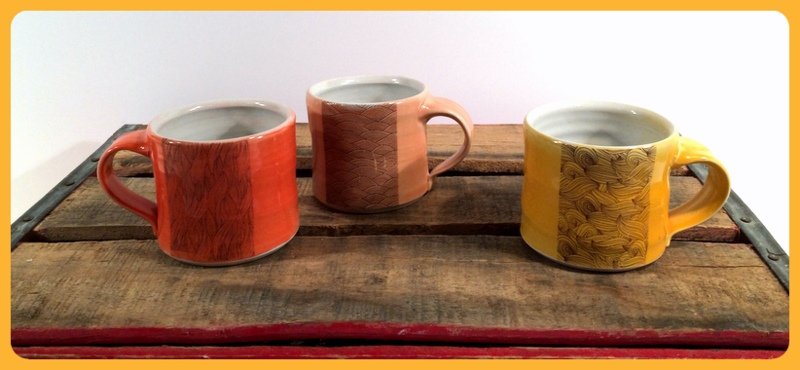
And of course the perfect gift for the coffee lover in your life is a handmade porcelain mug! Everyone has a preference for the perfect type of mug. Some like a BIG mug. Others like a smaller, americano sized cup. Some prefer mugs with a narrow opening to keep their beverage extra hot. And some like a mug with a tactile surface that they can feel while quietly enjoying their morning tea.
You can pair a handmade mug with a bag of your favorite coffee. Mine is Terra Nova which is my brother's coffee roasting company located in Surry, NH. You can buy some here!
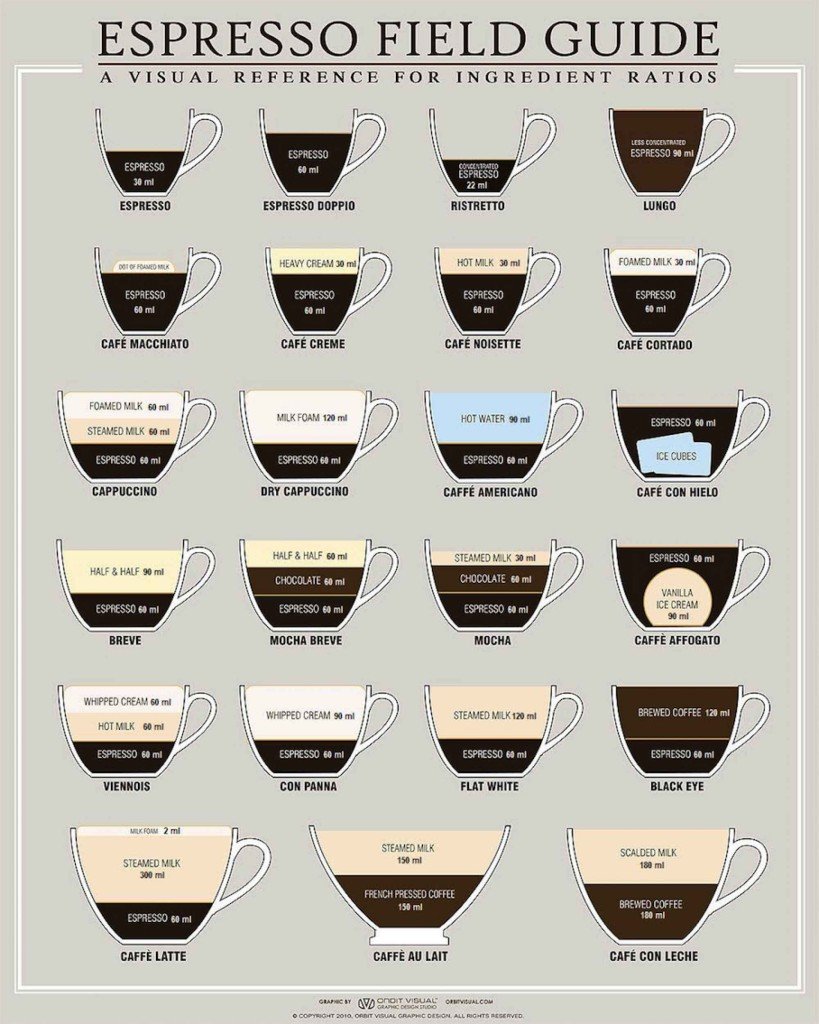
Or you can pair it witha print of this this and include it with their new mug. I include the ounces that each cup holds in the descriptions in my Etsy shop so if you know someone's favorite beverage, you can use this chart to be sure you're getting a mug that fits their favorite espresso drink (you just have to convert ML to OZ).
*Don't forget that orders placed between Dec 3-12 will ship on Dec 14-15. All other orders will ship in the usual 1-3 business days. Plenty of time to arrive before Christmas!

Thank you so much for supporting me throughout the years! It brings me so much joy to be able to do what I love and send my pots out into the world!
If there is something that you're wishing that you could find, but don't see in my shop, just ask. My full inventory is not listed online and I still have 1 decal firing to go before Christmas!
Imaginary blogger
____________________
Even though I haven't been blogging about it, I have been making pots steadily. I have two little ones (1 and 4) but I have managed to arrange a pretty consistent schedule of making. I'm in the midst right now of a cycle of glazing/ firing/ decals/ firing. My studio is a mess andI'm excited to see some new work coming through the kiln and wishing that I had just a little more time to follow through on new ideas that are flowing. I need to clear out some space in my studio for my new work so I'm having a flash sale in my Etsy shop. Until October 15th, you'll get 30% off your whole purchase with coupon code: COFFEE30(in honor of International Coffee Day too). Mugs (regular and travel!), kid cups, soap dispensers (foam and regular!), vases, plates and platters. Get ahead with your holiday shopping or get yourself a little something!
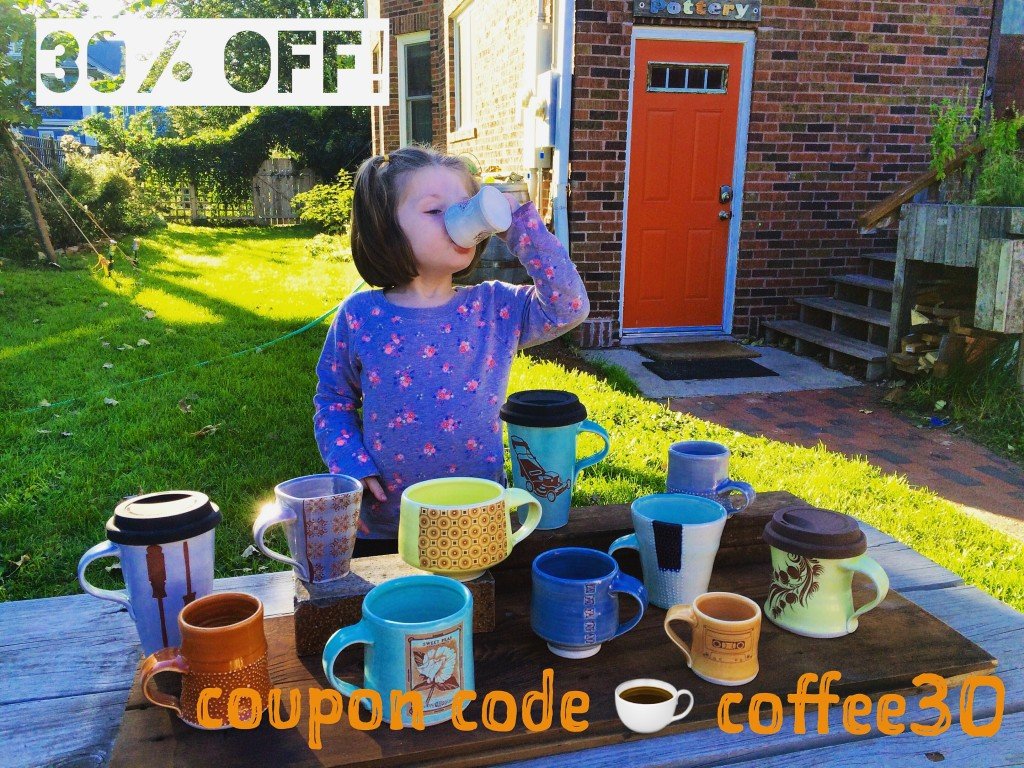
When I brought some mugs up to the backyard to photograph, my daughter was playing out there and really wanted to be in the photo. So here she is, sampling one of her favoritekid sized cups!
____________________
Although I do miss the more in depth discussions that happen on a blog, I have been having so much fun on Instagram. This is a photo that someone sent me of a honey pot of mine they had given to their mom for Christmas and this is it filled with honey from her own hives! So exciting to see my pots being used like this. 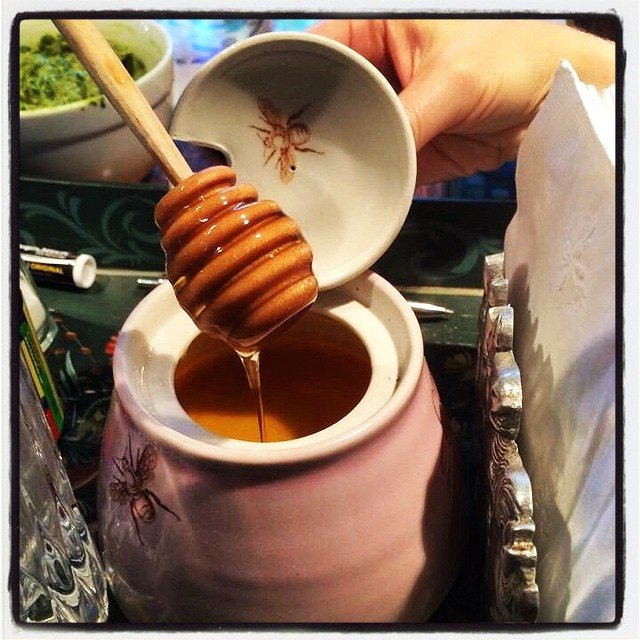
____________________
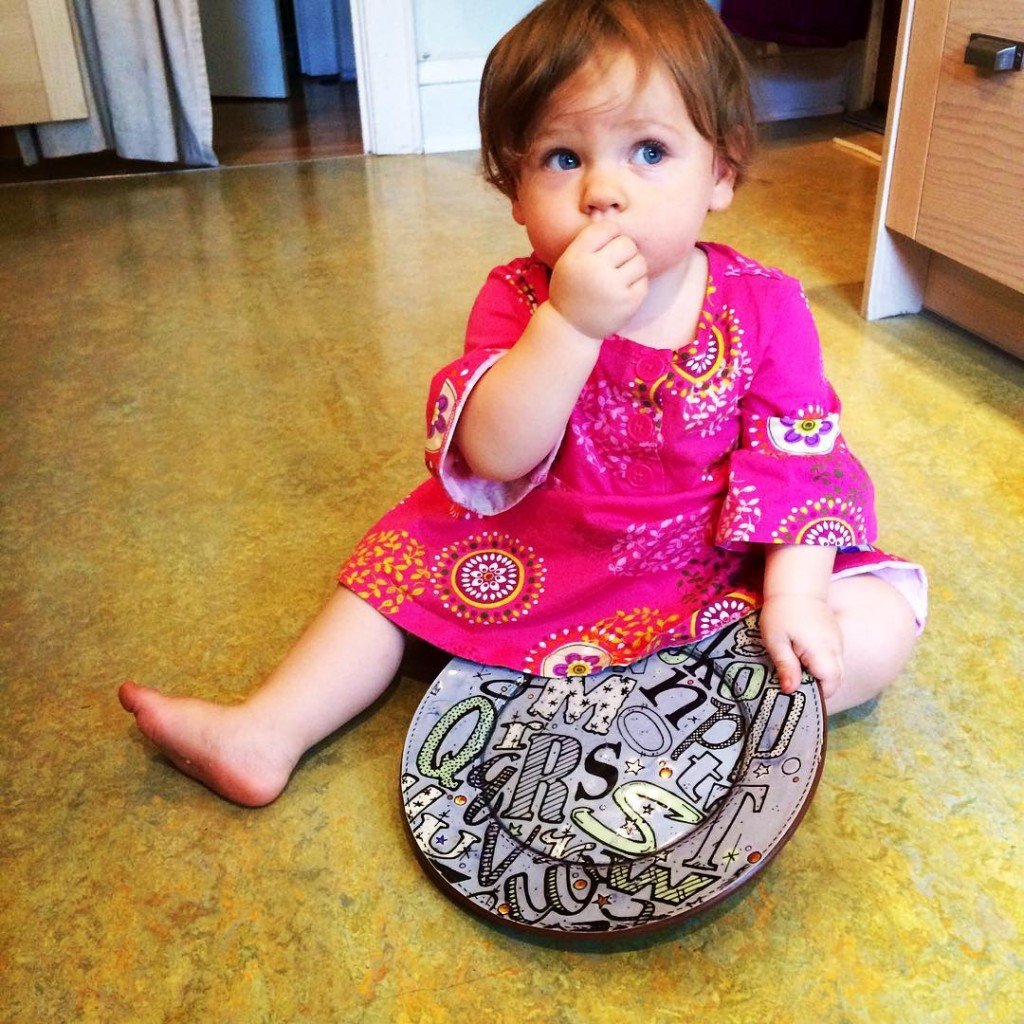
I recently got to spend a fully immersed clay weekend at the Northern Clay Center at the American Pottery Festival (mark your calendars for the 2nd weekend of September for next year's conference, seriously!!). My head is still trying to process all of the amazing pots, inspiring talks and demonstrations and connections with friends new and old. One of the pots that made it home with me was this awesome alphabet plate from Jason Bige Burnett. Here is my youngest hanging out with it - alternating signing "eat" andtapping on the plate.
At the American Pottery Festival, I had a great conversation with Mary Barringer about getting back into the habit of writing (as I referenced above). So here I go... getting my toes used to the water.
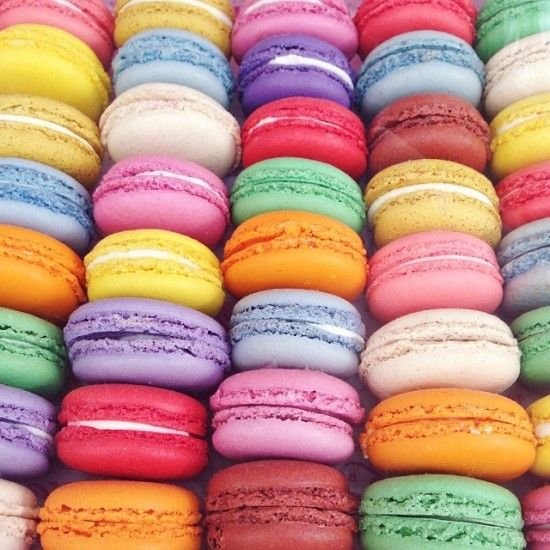
I woke up from a dream this morning with the realization that my current glaze pallet is similar to that of colorful macarons
Colorful macarons:
Some of my glazes:
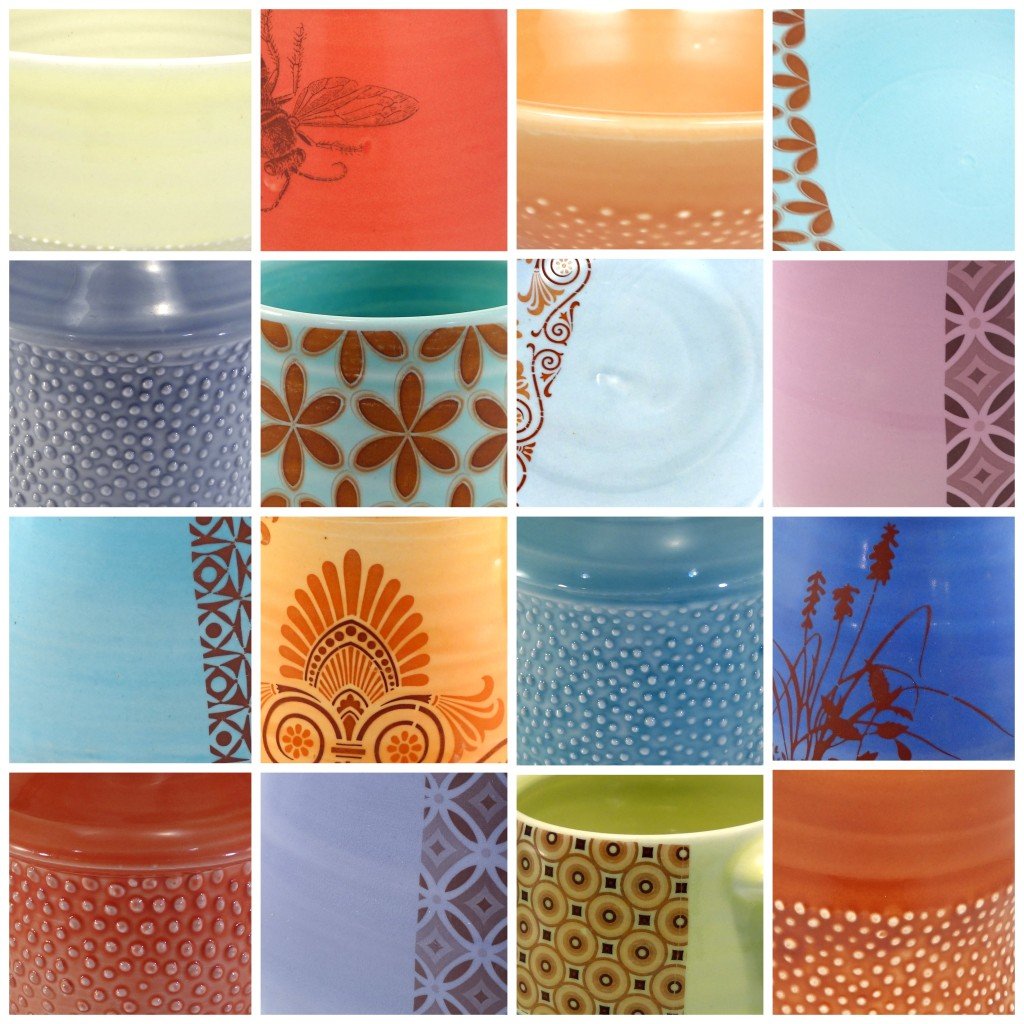
So now I am thinking about food flavors as names of glazes: pistachio, tangerine, lavender, caramel, mango, lemon, red velvet, mint, raspberry, apricot, maple, gingerbread, pineapple.... to name a few. I still have to ponder all of this, but I am thankful to my dream this morning for helping me think through this!
If you're a maker, I highly suggest that you enroll in the e-course/ lecture series THINK BIG! by Molly Hatch and Ben Carter. I'm loving it and I'm feeling really energized by it! It's a 6 week series, but you can start any time and progress at your own pace. Join us!
Trailer: THINK BIG! A branding series for ceramic artists from Molly Hatch on Vimeo.
I'm getting back into the world of blogging, but you can also always find me in these places:
Facebook: https://www.facebook.com/emilymurphypottery
Etsy: https://www.emilymurphy.etsy.com
Instagram:http://instagram.com/potteryblog
Pinterest: http://www.pinterest.com/potteryblog/
Twitter:https://twitter.com/potteryblog
Website:http://emilymurphy.com/
Spring Sale! And some news...

Just head over to my Etsy shop, and when you are checking out, use coupon code SPRING2014to get 20% off your order, plus $5 flat shipping. Sale ends next Monday, April 14th, so don't wait!
The reason why my shop will be closed again after the sale is because I'm expecting another daughter in just 2 weeks!
This was me in Milwaukee for NCECA a few weeks ago:

Adais super excited to be a big sister!

I have been working like crazy to get a bunch of work done before I get lost in the world of a newborn. Right now everything is just greenware or bisque. So when I do get back into the studio, eventually, I'll be glazing up a storm!
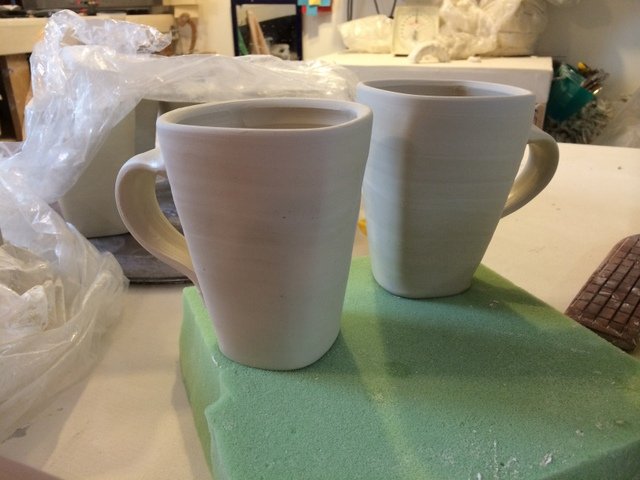
I've been working on a squared dinnerware set. These are the mugs part of the series:
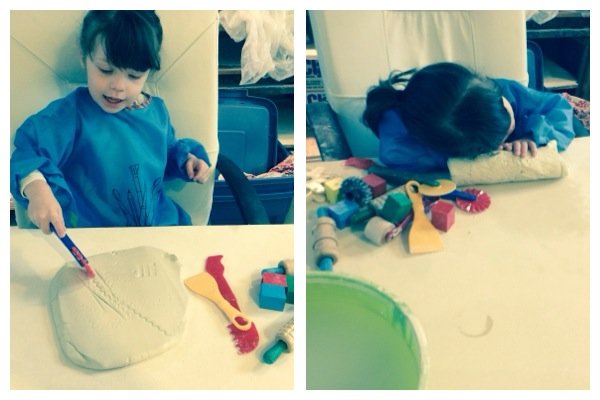
Ada has been hanging out with me in my studio, getting her hands a little dirty... and tiring herself out!
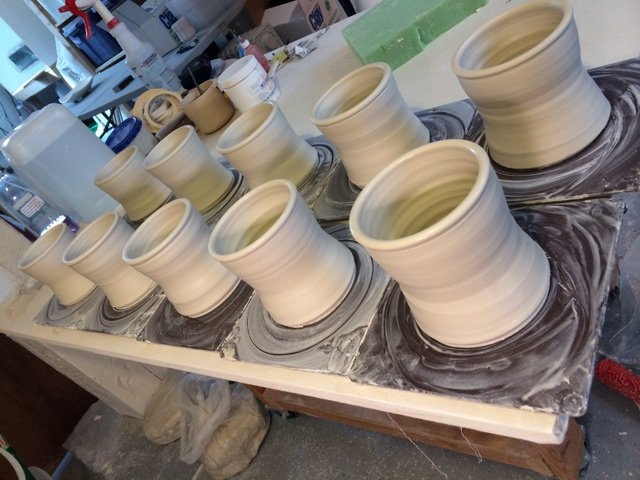
I've been having a great time throwing... wishing that there were either a few more hours in the day, or I had a little more energy at the end of my pregnancy :)
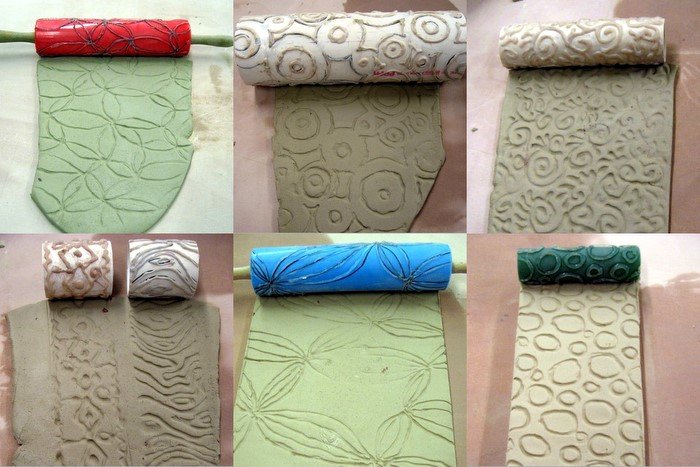
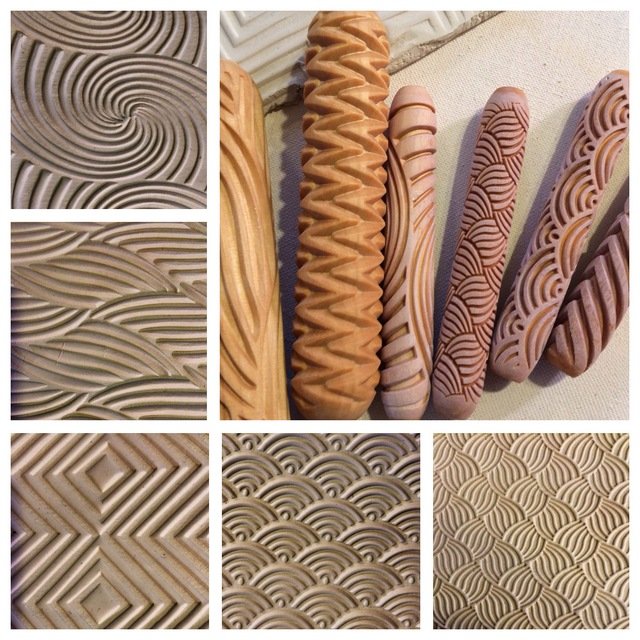
I did somehow manage to have enough energy to get to NCECA in Milwaukee last month. It was so fun to see so many friends and meet some folks that I have only know through this blog or my Facebook page. Not to mention some great talks, demos and exhibitions! And I picked up a few new tools, like these MKM rollers:
So now you can see why I haven't been posting on here much lately. But I do post regularly on Facebook, Twitter and starting to post a little more regularly on Instagram too.
Happy Holidays!
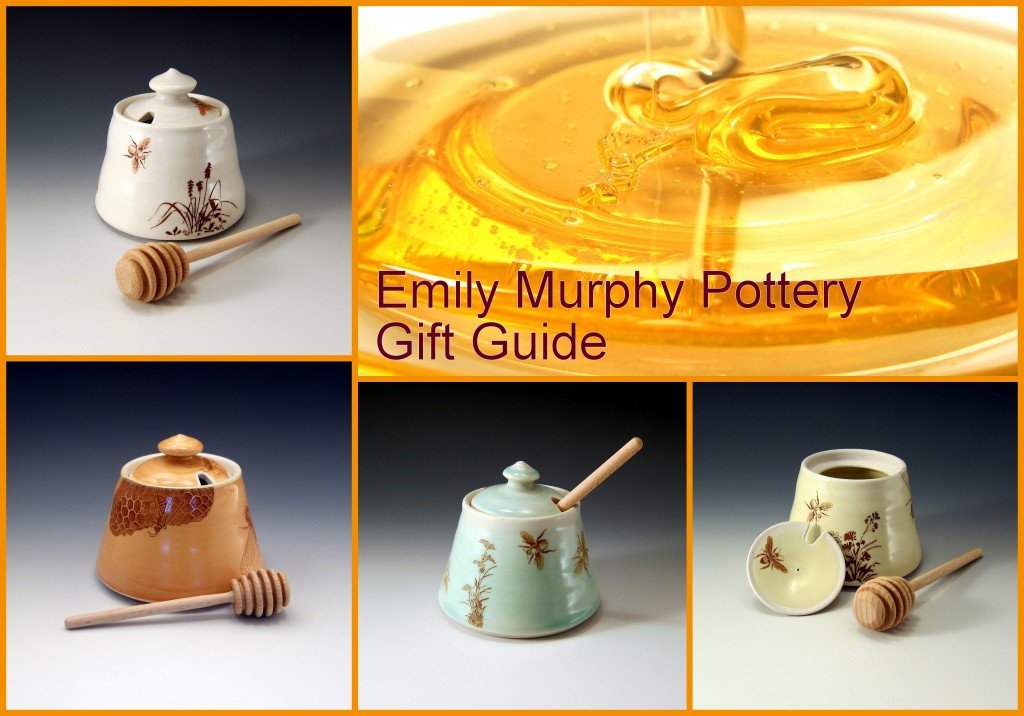
My online holiday Etsy Sale has just 3 more days to go... ending on Wednesday, December 18th at midnight. Then my shop will be closed up until early January. So if you have some gifts left to get, now is the time to order! And if you have one of my pots on your wish list, remind the gift givers in your life to order in the next couple of days. Get 20% off using coupon code JINGLE at checkout! Plus $5 shipping/ address! If you're looking for some creative ideas, check out my Gift Guide.
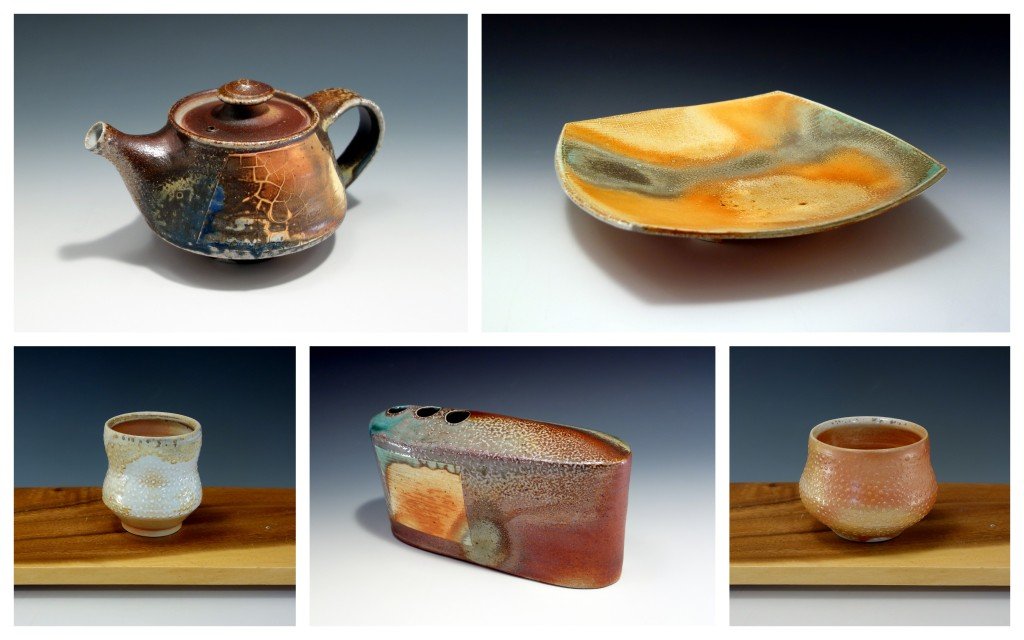
I had a lot of requests to post some of my soda fired work on Etsy this season, so I just posted some of my favorite pieces! Also available for the 20% JINGLE discount.
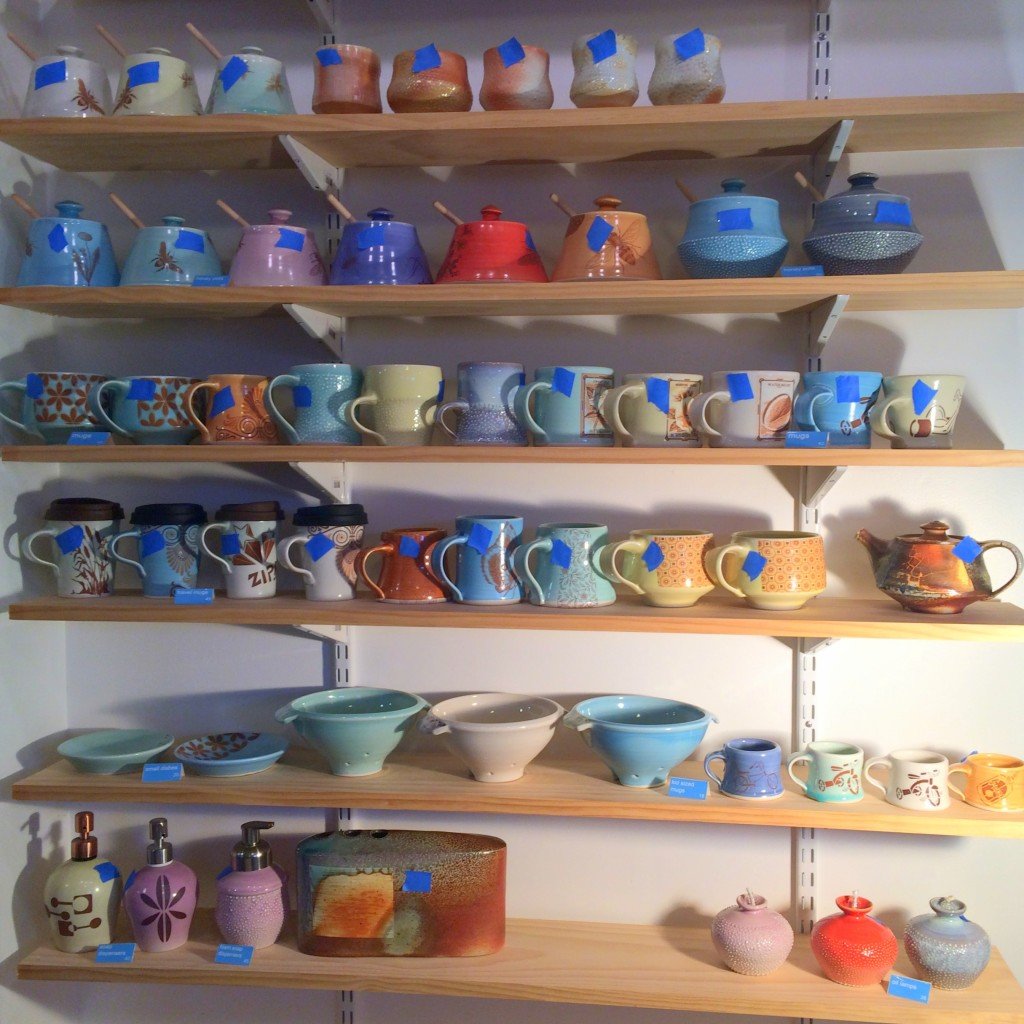
I haven't actually been making any pots over the last month.... instead my time in the studio looks like this:
I feel like one of Santa's elves. There is nothing I love more than having my pottery used. And sending pots out into the world is what makes that happen!
And as I wind down with selling pots this season, I can focus on making the holidays magical for my family! Ada got to visit with Santa a few weeks ago. She was totally enchanted and now keeps telling us how much she loves Santa. She shared her wish list with. It was nice and simple... a baby doll and a backpack. A backpack "for stuff" specifically! On Christmas morning, I'm not sure who is more excited, me or the kids. I really love the magic of this time of the year!
- photo by Amy Wurdock Photography, Minneapolis, MN
Gift Guide for Emily Murphy Pottery
Don't forget that your whole purchase is 20% off (except custom orders) in my Etsy Shop using coupon code JINGLEthrough December 18th, 2013. Plus $5 shipping/ address.
For the gardener:
Pair one of my vintage seed packet mugs with a pair of gardening gloves or your favorite gardening book for a perfect gift for the avid gardener in your life! I love reading gardening books in the middle of winter... dreaming of digging into the dirt, while drinking a toasty cup of tea.

For the cook:
Looking for something for someone who love to cook? A little dish / spoon rest and a handmade wooden spoon would be something that would be used all the time! Look on Etsy for a wooden spoon (like this one) or a local gourmet kitchen shop for one.

For the locavore:
Do you have a locavore that you love? Pair one of my handmade porcelain honey pots along with some local honey for a sweet gift! You can look on Etsy for local honey(search for your state plus honey). Or if you have a gourmet shop or food co-op, you'll find several choices there!

For the kids:
Kids love having something that is just for them... and just their size! Start them off early loving and appreciating handmade pottery! Package it with some tasty hot cocoa (from Etsy or a local food shop) and maybe some amazing homemade marshmallows (from Etsy or make your own!)

For the kid at heart:
Nostagia in a cup! These are grown-up (or big kid!) sized mugs that have the same imagery of the kid sized mugs. You can do the cocoa and marshmallow pairing like above! Or of course, you could always pair it with coffee for the grown-up recipient!

For the tea lover:
A unique porcelain mug, a tea infuser and some loose tea would make any tea lover full of warmth! Etsy has some wonderful tea infusers. And an amazing selection of teas, like this sampler! And of course, you can find both at a gourmet kitchen or food shop, or at most coffee shops.

For the hostess with the mostess:
For someone who loves to entertain, something that is both practical and beautiful is perfect. These berry bowlsare totally practical - you can wash your berries (or grapes...) in them, and then serve directly from the dish! You could even give the colander full of some colorful berries at a holiday party for a one of a kind hostess gift!

For the mom or dad:
I mentioned this in a previous post, these foaming soap dispensers are fantastic for kids! And as a parent, you really want more beauty in your home and less plastic in your life, but it can feel like a losing battle! The foam is great for really getting soap everywhere you need it to be without messy drips. I wrote a blog postwith suggestions on where to buy and how to make your own foaming soap!

For the new homeowner / apartment dweller:
Do you know someone who recently moved into a new house or maybe their first apartment? Get them a couple of matching plates or mugsfor make it feel even homier!

For the coffee lover:
Of course the obvious choice for someone who loves coffee is to give them a mug. But these handmade porcelain travel mugs are even better than the standard mug! They can be used with or without the lid. The lid is great to use at home if you like to keep your drink piping hot. Or if you have kids or pets that might knock over your hot coffee next to your computer (yikes!). And it also works as a travel mug ;). Pick up some coffee from your favorite roaster. Etsy has a ton of roasted coffee bean options!

For the person who has everything:
And then there is always the person who has everything that you can't figure out what to get for them. A beautiful porcelain oil lamp would be a wonderful gift. It's unique, practical (we always light ours when the power goes out!) and is small enough to not worry about where they will put it!Plus, it's more interesting and than another gift of a candle. And can be used as a small bud vase too. Complete the gift by giving it with a bottle of lamp oil.You can purchase smokeless paraffin lamp oil at most hardware, grocery and big box stores. You can also purchase it online, including through Amazon. There are many brands, you just want to look for 99% pure paraffin; sootless, smokeless, odorless. It's quite easy to find!

I hope my little gift guide gave you some ideas for some of the folks on your holiday shopping list! And if you buy something from my Etsy Shop, don't forget to use the coupon code: JINGLE to get 20% off your purchase through December 18th, 2013!
Holiday Sale at Emily Murphy Pottery :: Dec. 5, 7-8 :: Minneapolis
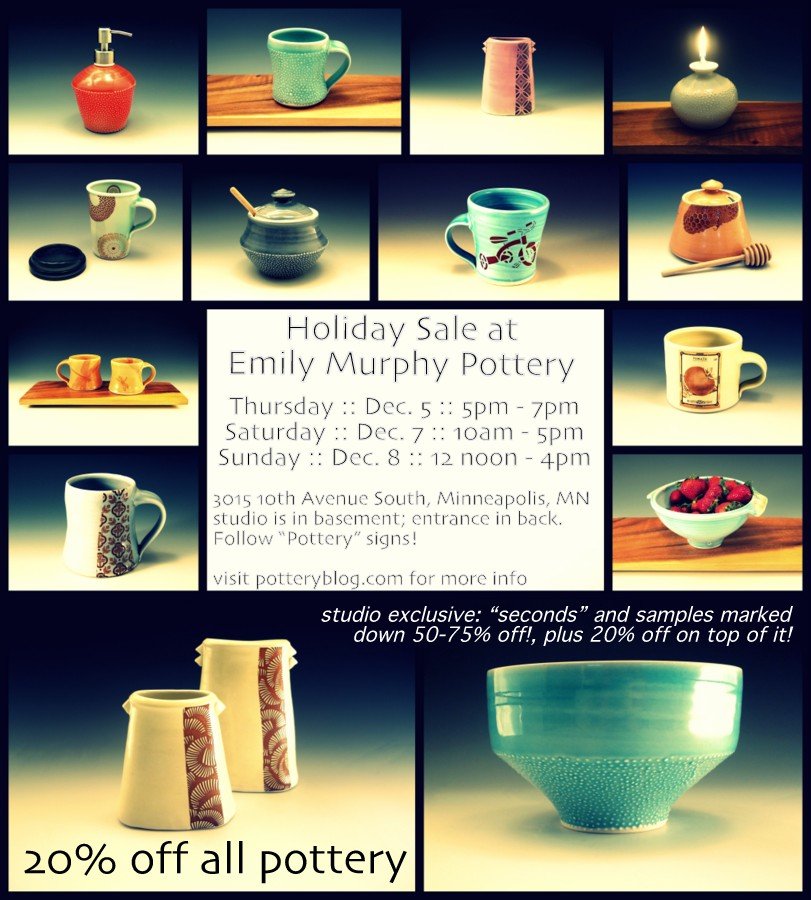
Thursday ::December 5 :: 5pm-7pm
Saturday ::December 7 :: 10am-5pm
Sunday ::December 8 :: 12noon-4pm
I thought I'd give you a little tour of my studio; it's nearly all set up for mystudio sale!
When you get to my house (3015 10th Avenue South, Minneapolis), you'll be greeted by my Pottery signs! You can enter through the front, or the back (there is a parking lot across the alley from us that you can park in), and then find your way to the back door. Enter there to go down to my basement studio! There will be lots of extra signs too!
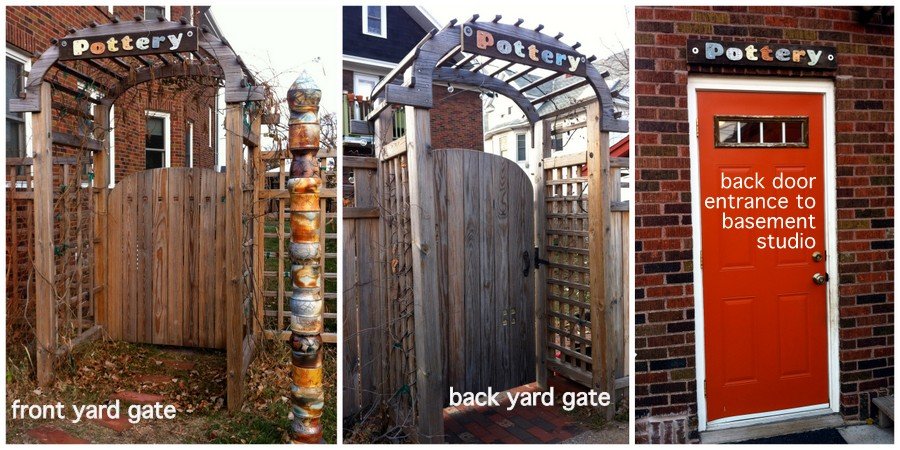
I'm located near the Midtown Global Market in the Powderhorn neighborhood of South Minneapolis. There is plenty of street parking, as well as easy access from the Greenway and public transportation. There is a craft fair, No Coast Craft-O-Rama, happening on Saturday at the Market, so you could stop by my studio sale and the craft fair and get all your shopping done directly from independent artists!
Once you get down to my studio, you'll see shelves and shelves of pots! And they will all be 20% off! I'll have plenty of yummy things to eat and if the kids come with you, there is a hang-out area for them next to my studio with toys and Christmas movies playing (although they're welcome to hang out with you too!).
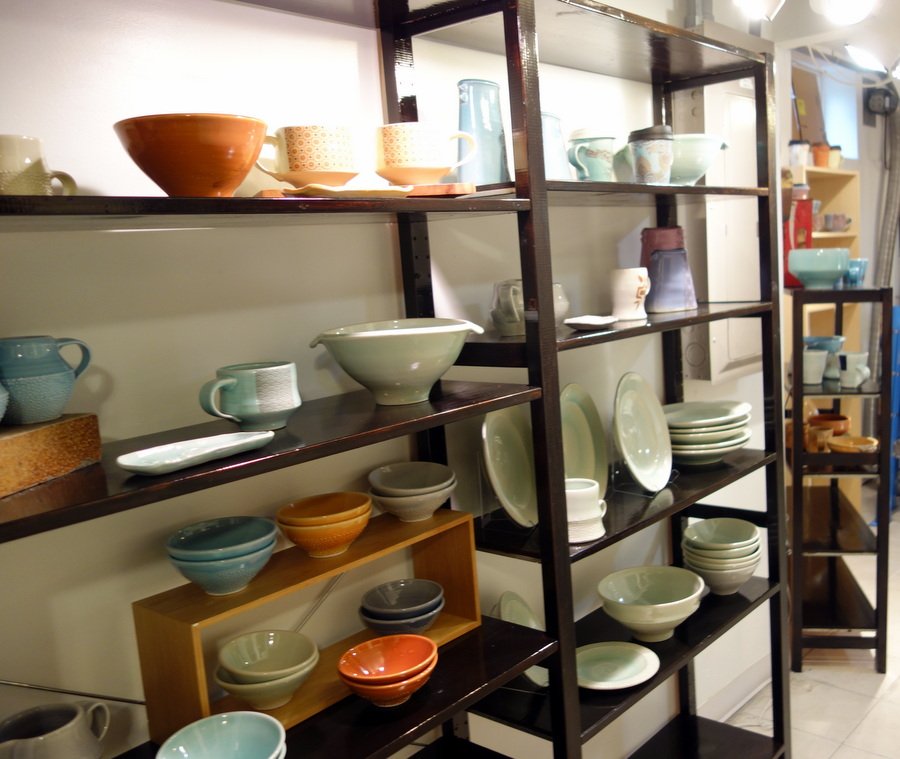
Lots of handmade porcelain dinnerware, glazed in celadon. If you're one of my customers who collect it, this sale is the perfect time to add some new pieces to your collection!

I've been having fun adding some new colors into my work. And some new forms like the travel mugs on the top shelf with silicone lids!
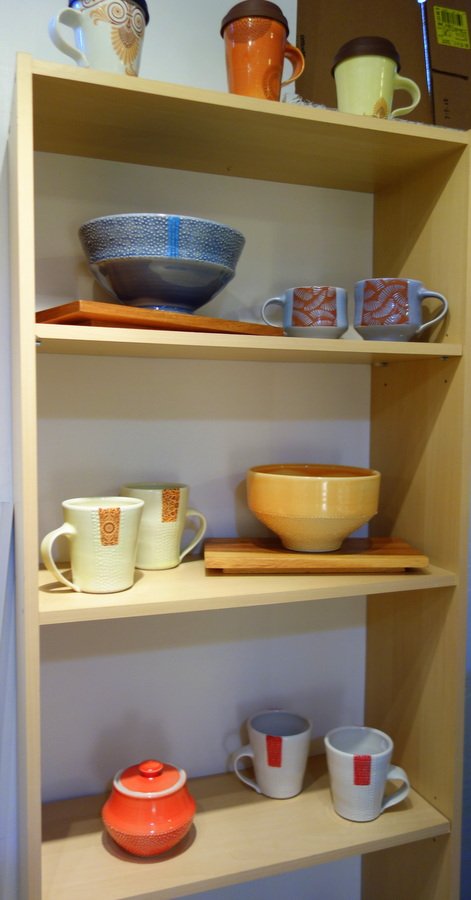
These vintage seed packet mugs are a great gift for your favorite gardener! (and yes, this display is set up on the top of my kiln!)

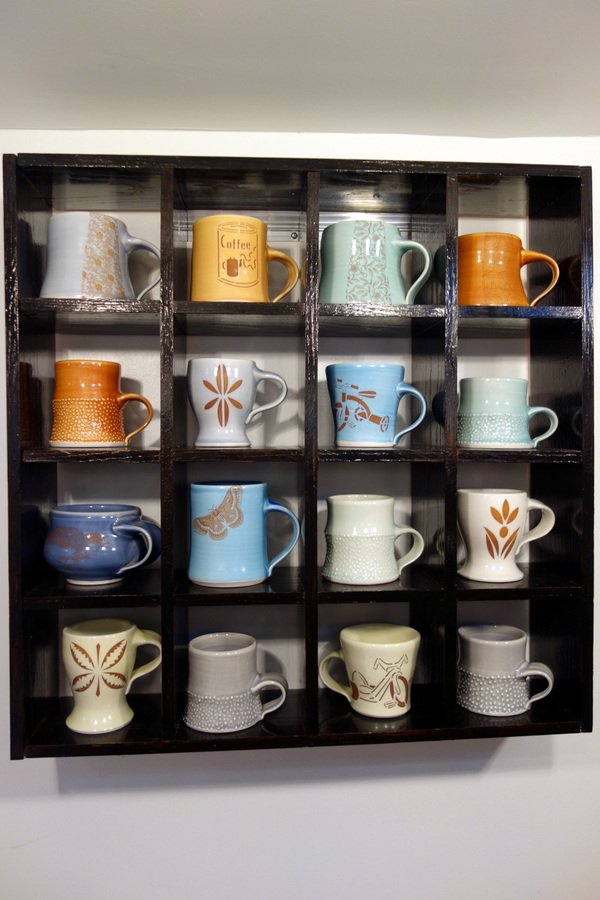
Next up on the tour...The wall of mugs! A little something for everyone! I love making a huge variety of mugs in different sizes, shapes and colors so everyone can find one that they feel like is really "their mug."
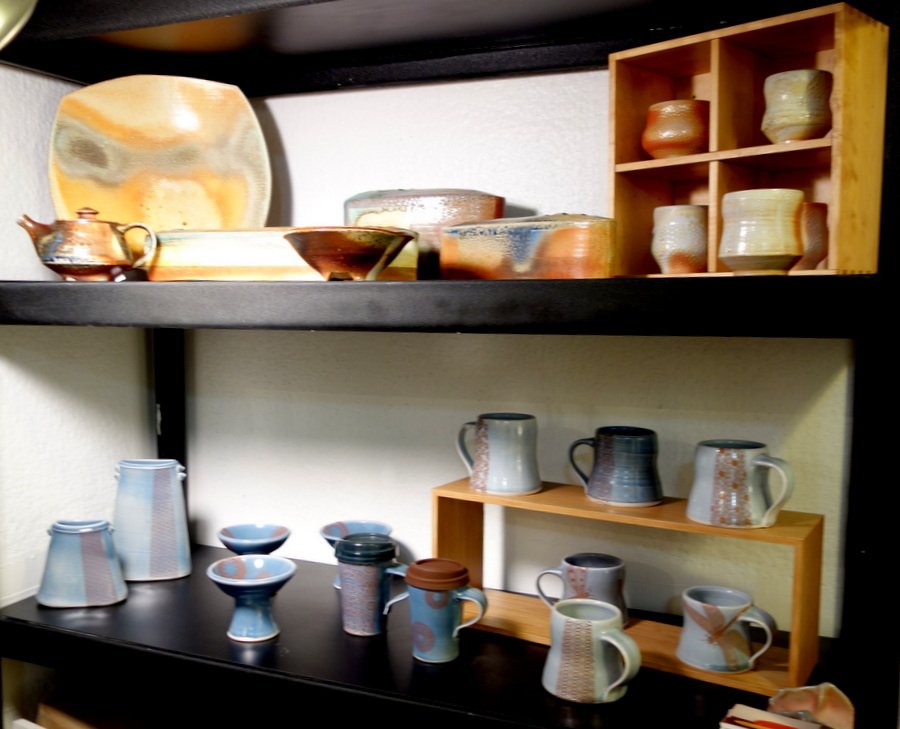
I have some soda and wood/soda fired pieces too!
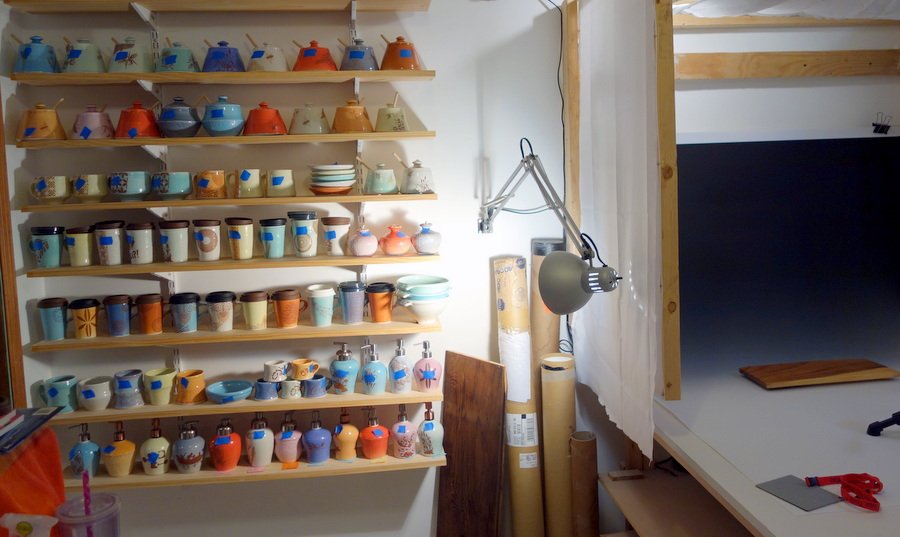
And the final photograph (although not the end of the sale!) is my "Etsy wall." Everything here is up for sale on Etsy, but you can still buy it from me during my studio sale! I just keep them together, with a piece of blue tape on them to denote that they are listed online. I want to take down a listing ASAP if someone purchases it in person! I have to keep nice and organized when I'm selling items online and in my studio.

What is NOT photographed yet (because it isn't set up yet!), is my Seconds, Samples and Discontinued items! They are already marked down 50-75% off, and then you'll get another 20% off on top of that! They are priced to move... because I am ALWAYS making more!
And back to the topic of Etsy... my online sale is going on until December 18th! I'll continue to add new pieces to my shop until then, but just know that things are moving quickly! Use coupon code JINGLE to get 20% off your online order (excluding custom orders). Plus $5 shipping for each address!

So that is the tour of my Studio Sale... or at least the part that is set up! Feel free to share this with friends and family who live in the Twin Cities even if you don't! I sell online and through galleries throughout the year. But this is the one time of the year where I can connect face to face with folks and I really love it! I hope to see you this weekend, in my studio, or online!
Behind the scenes...
I had a shop open on Etsy for yearsbefore really adding anything to it. (Sound familiar to anyone else?) I was intimidated by the process and overwhelmed at where to even begin tackling it. I knew that I really needed to have my whole process figured out before really diving into it. I wanted to make sure that all my customers would have the very best experience shopping for pottery online. I know that buying pottery online is hard. It's 3 dimensional, tactile and really personal. Part of selling one of a kind items online is that you not only want to represent them in the best light, you want to represent them accurately! You don't want someone to receive their box of pottery and be surprised at what they find inside (unless it's a happy surprise)!
I thought I'd share a bit of my behind the scenes part of the process. It might help you if you're starting to think about opening a shop. Or if you like to shop on Etsy, you might find it interesting to know what an independent artist goes through to sell online! No matter how organized you are, it is a lot of work! But by doing a bunch of work up front, you'll save yourself a lot of time later.
Before I even think about listing anything, I make sure I have a good supply of boxes, bubble wrap and other shipping supplies. More on that later.
- I pick out work to list after a firing. Mostly limited to what ships easily and what photographs easily.
- I measure work (HxWxD, plus volume when helpful) and write on note card; place with each piece.
- Using my DIY photo booth, I photograph work in order that the pots are on my "Etsy shelves." I aim for no fewer than 3 images, and up to 5. Which can easily mean 10 or 15 photos of each pot. I try to get as many angles as possible of a piece, use a 'prop' if it helps, and perhaps a group shot.
What is my Etsy Wall, you ask? They are a set of shelves that I keep almost all of the pots that are either listed, or about to be listed on Etsy. These pots have been photographed, measured and are ready to go out into the world! It's conveniently located next to my photography area and across from my desk.
- After photographing the work, I upload the photos to my computer and edit them in Picasa(free photo editing/ management software from Google). I crop into squares which work best on Etsy because nothing gets cut off when the photos are made into thumbnails on the site.
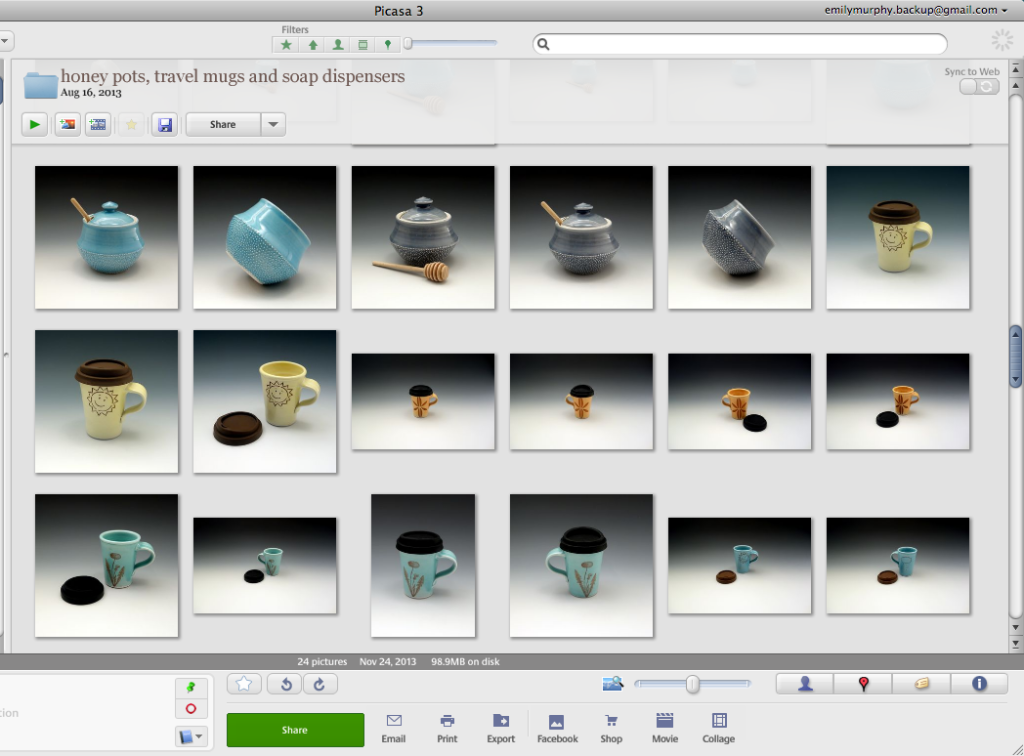
This next part is really important!
- I write/ edit descriptions for each type of piece and keep in one (long) Google Drive doc that I aptly titled Etsy Descriptions. Descriptions are both personal, descriptive and specific. I include care instructions, measurements, key words, etc... A new description for each piece and its variations.
- I then piece everything together to make an Etsy listing. Etsy has a great tutorial on making listings.
- Once listed, I mark everything that is up on Etsy with a piece of blue masking tape to note that it is live. It's an simple low tech way for me to keep track of what's listed. I also want to be sure when I have customers in my studio to shop, that I double check anything that has blue tape on it to see if it has just sold if they want to buy it.
- Then I post the new listings on social network sites- Facebook, Pinterest, Twitter, etc... I don't think you can really rely on Etsy alone for people to find your work, you really need to assume that you'll only get traffic from your advertising via social networking and blogging. That's my approach. I use it as a shopping cart system for my website, blog and Facebook page. Anything else is a bonus.
- And again, I make sure I have everything I need to quickly ship before I post anything. I ship in 1-3 business days- but I try to ship the day I get the order whenever possible. I use the USPS and free Carrier Pickup to ship.
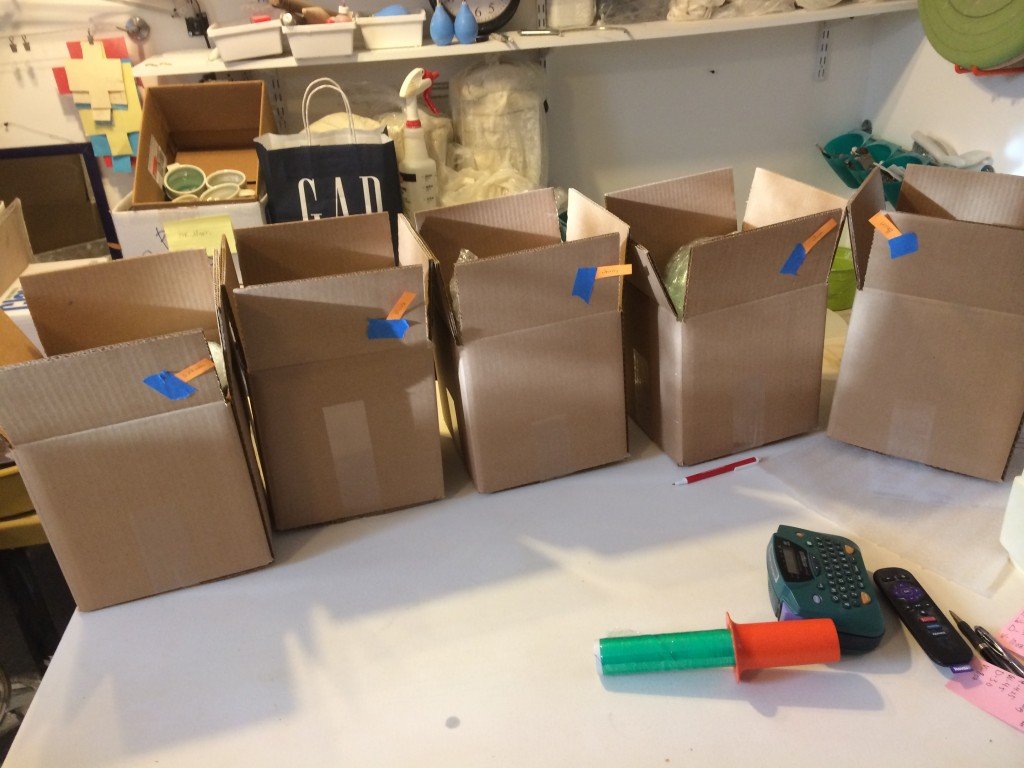
About a year ago I started using double walled corrugated boxes. They are incredibly strong. I don't have to double box with them. I don't worry at all about pieces surviving the rough and tumble shipping journey anymore! Here is a photo of my pieces bundled up before going into their boxes. I'm going to do a separate post about packing for shipping another day.
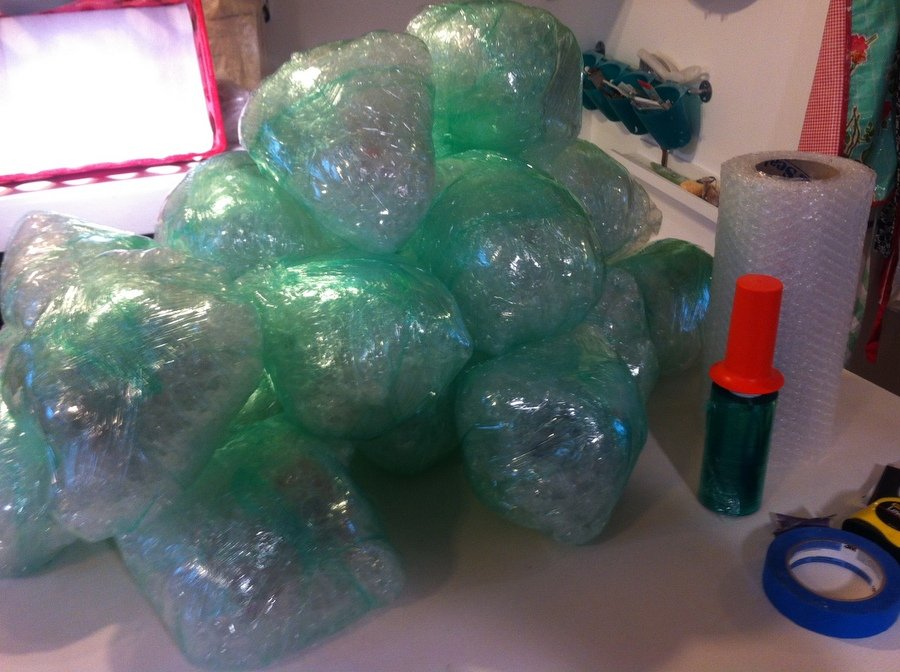
So that is my process in a nutshell. The key, for me, has been keeping all the parts organized. My descriptions are very looong. I'd rather be too wordy than leave a customer with lots of questions. I want to create a really full "image" of each piece for everyone viewing my work online. It's hard to buy tactile, 3-D work from a 2-D computer.... but I try to make it as good of an experience as possible!
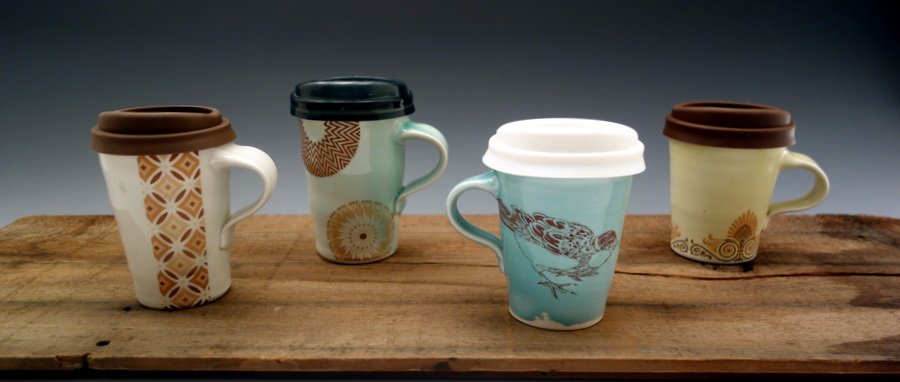
Do you have any tips to share about posting on Etsy? Or do you have any things that you particularly like to see/read when you're shopping on Etsy? I'd love to hear from others!
New! foam soap dispensers
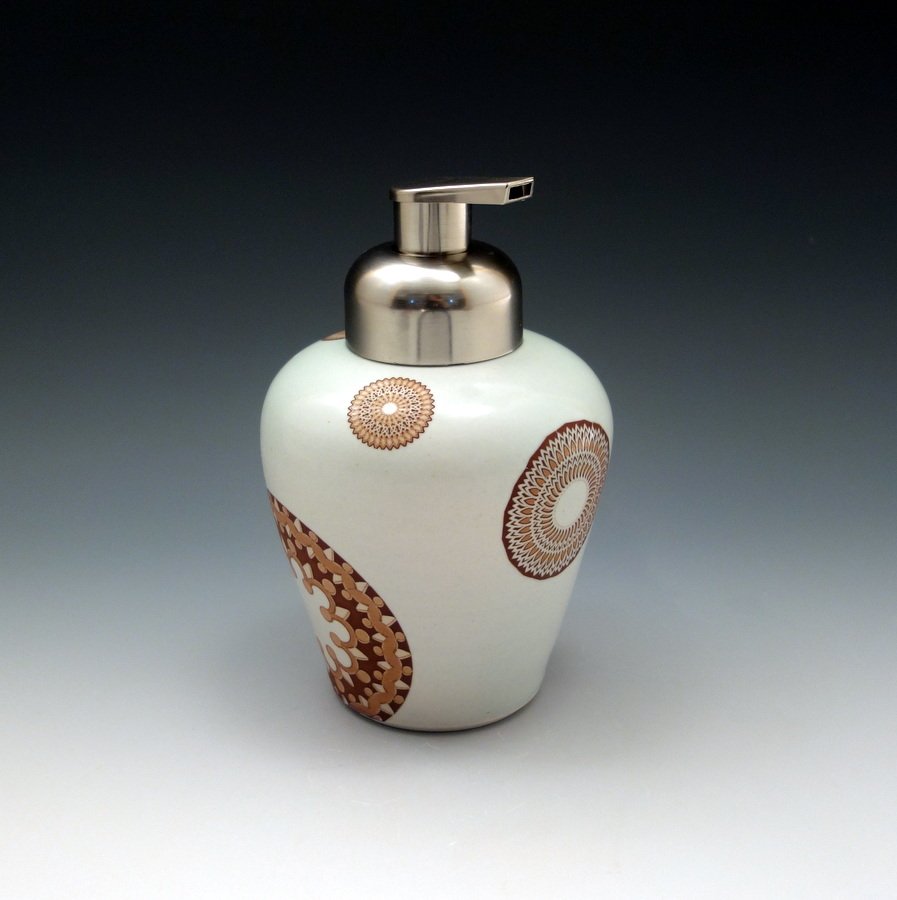
You can purchase foam soap refills in many stores and online. And you can also make your own! Here is a list of places to purchase foam soap refills:
- Method foam soap refills form Target (in stores) and Amazon
- Dial foam soap on Amazon
- Kiss my Face foaming soap on Amazon
- Vermont Organics Unscented foaming soap on Amazonalso available in a gallon refill here.
A Google search will help you find many more options. Below the next image are some links to recipes to make your own foaming soap.
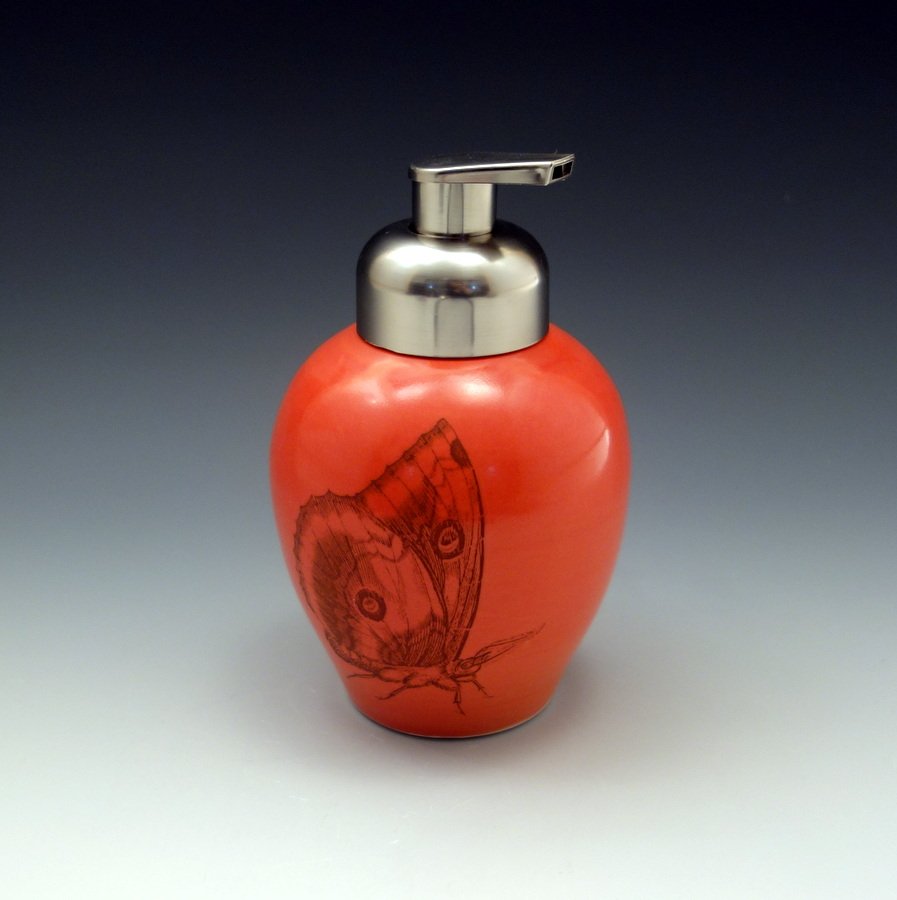
Here's a link to make your own foaming soap by watering down regular liquid soap.And here is one to make your own by using castille soap like Dr. Bronner's. You can find tons of variations on these recipes through a Google search.
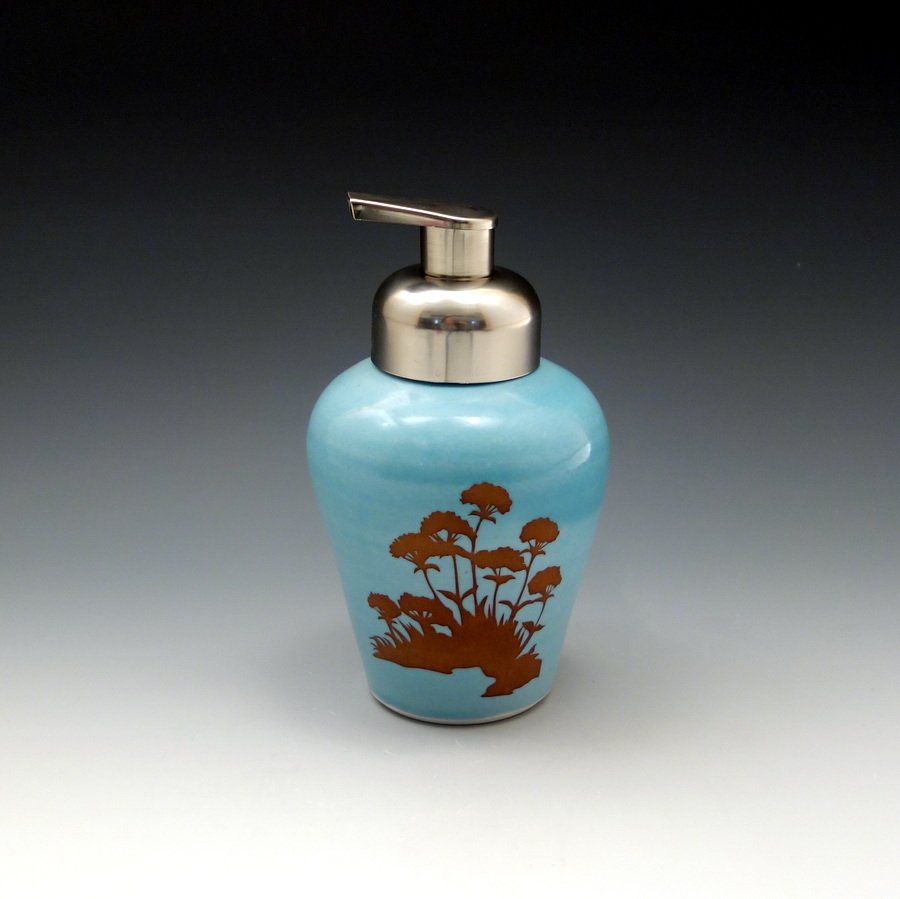
This one is using one of my new glazes:
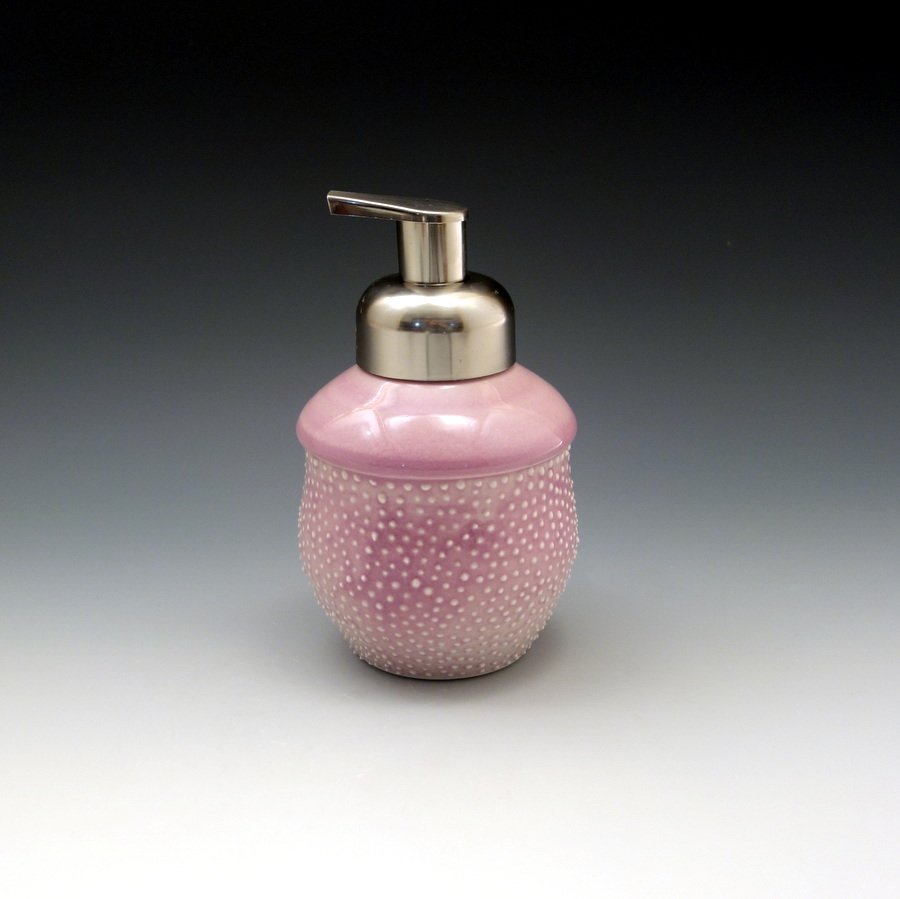
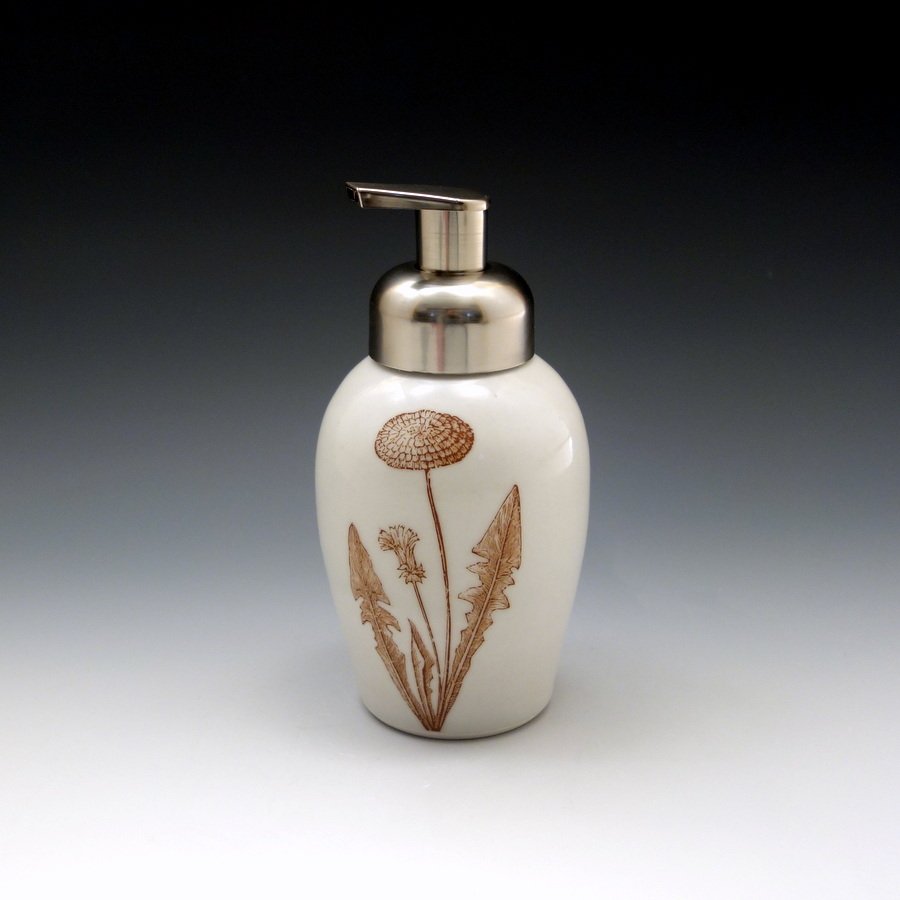
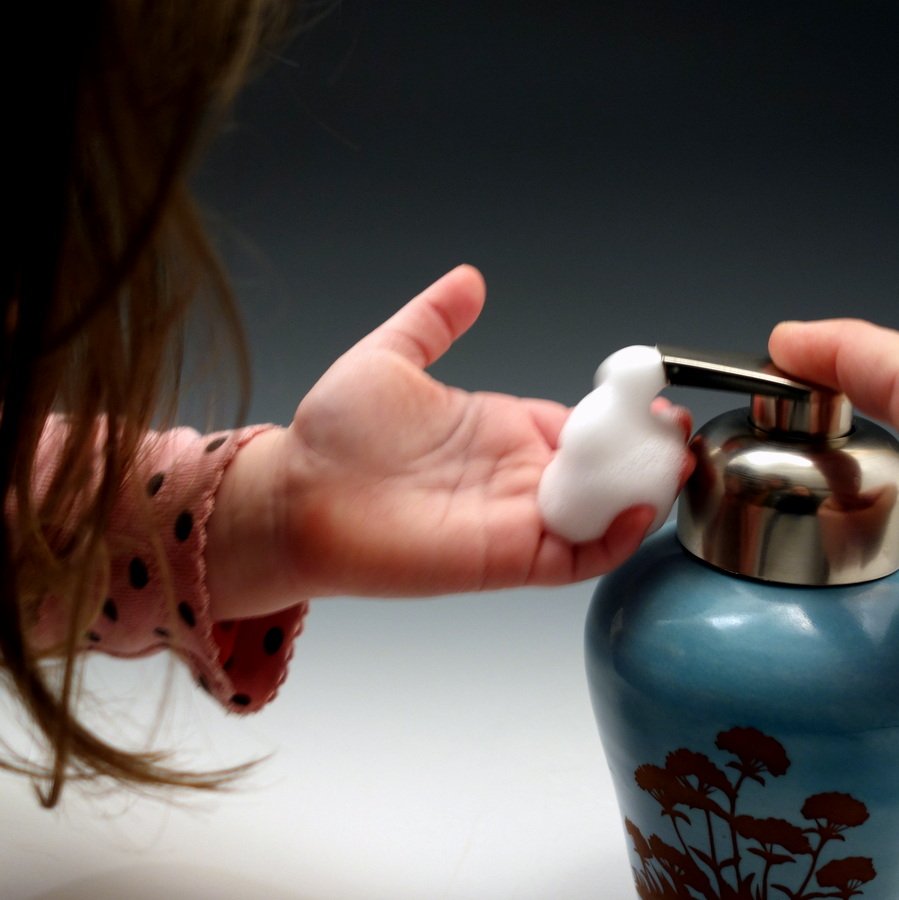
Here is the pump in action! A special thanks to my favorite hand model :)
A quick reminder that Saturday, November 30 starts Etsy Holiday Sale. 20% off your whole purchase (except custom orders), plus $5 shipping in the US. Enter coupon code:JINGLEat checkout to get the discount.
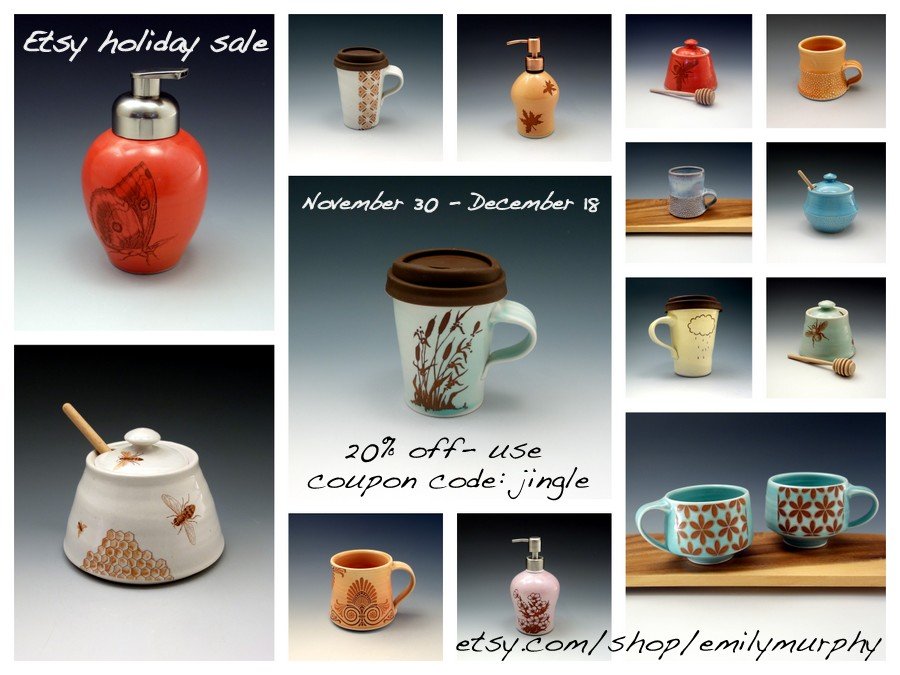
It's holiday sale time! 20% off on Etsy starting Nov 30... and studio sale the following week!

Here are some pieces that are listed (or soon to be!). A new design of honey pots! Comes with a 6" honey dipper. You could substitute a spoon for the dipper and use it as a chutney jar.
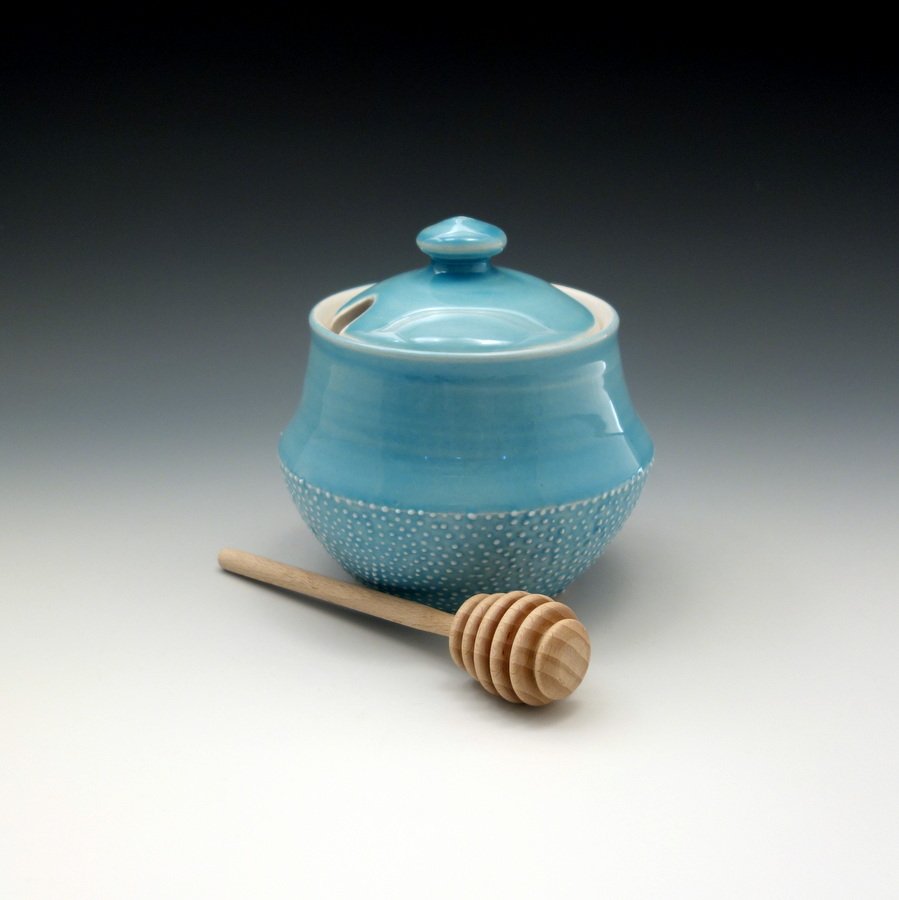
- Blue glazed porcelain honey pot
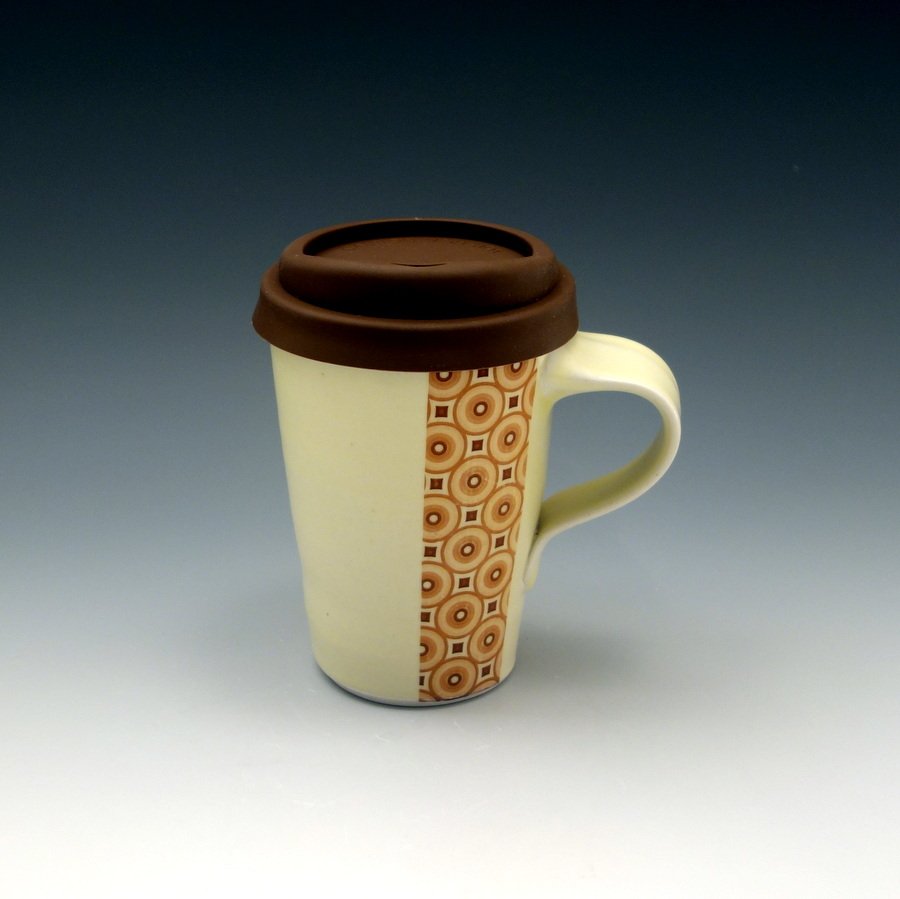
- Creamy yellow glazed porcelain travel mug with circle pattern and brown silicone lid
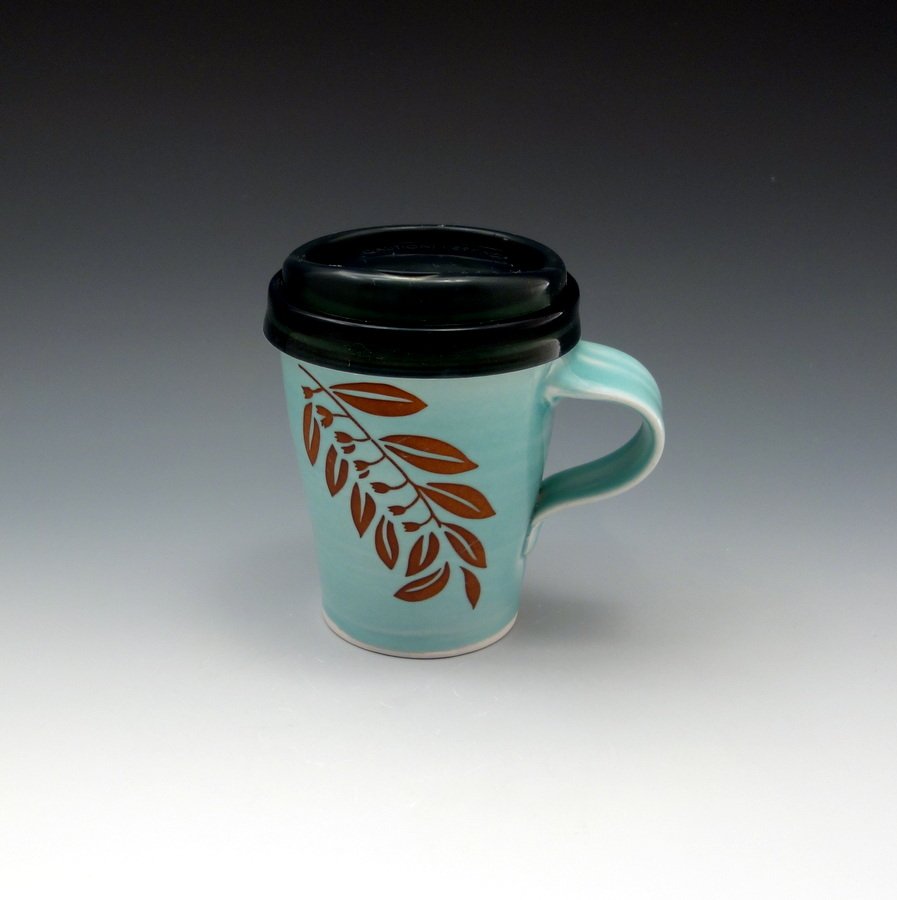
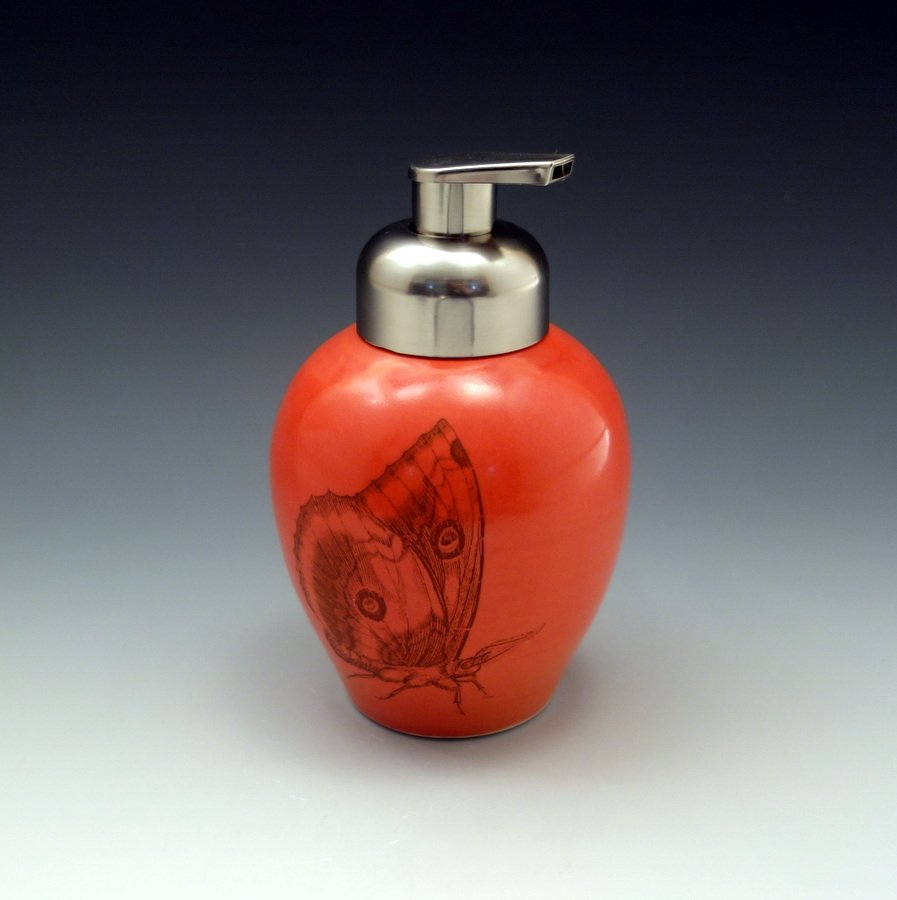
And here is another new item... a foam soap dispenser! I love using foam soap, and it took me a long time to find pumps that I could use with my pieces. The foam is so great to use with kids because they can coat their hands easily when washing by themselves.
And these honey pots have been flying off the virtual shelves. Luck for you, I made lots of them for the holiday season!
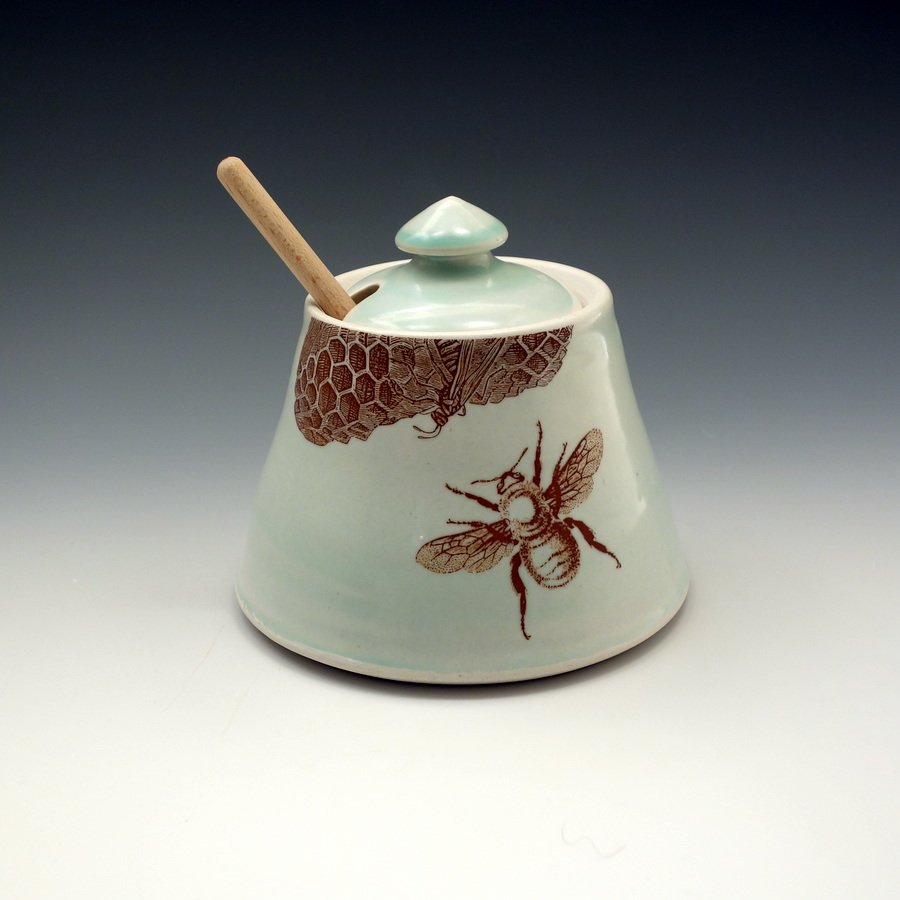
- Celadon glazed porcelain honey pot with bees buzzing and honey comb
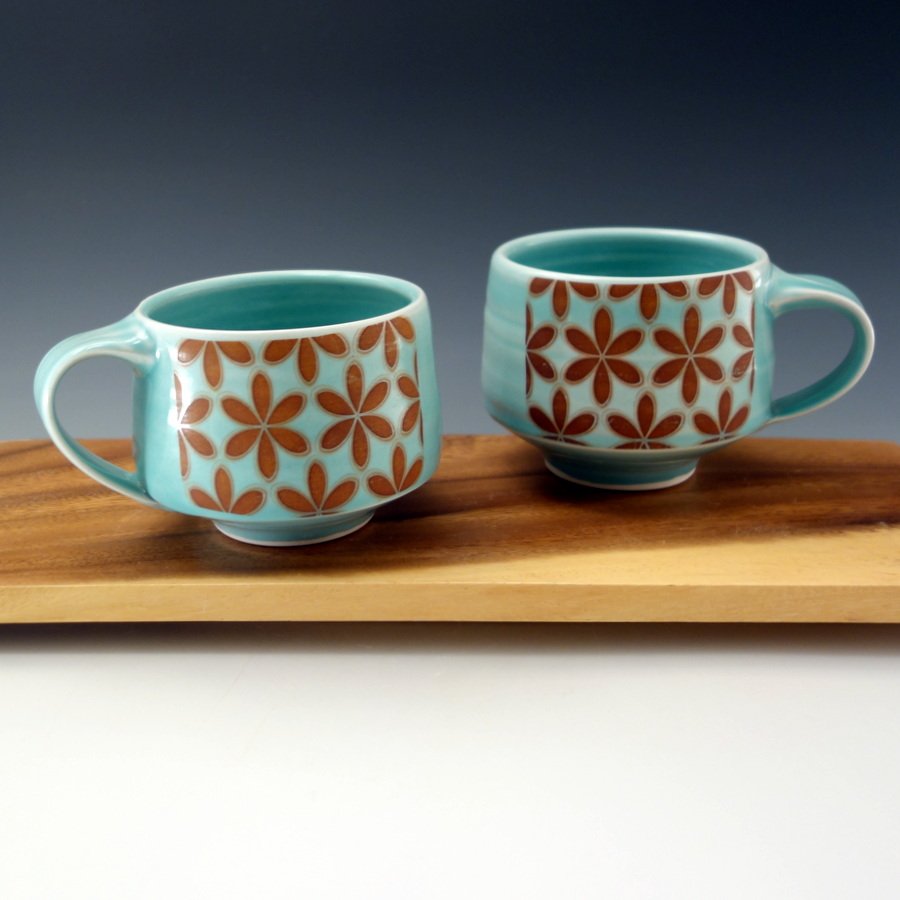
- Pair of aquamarine glazed porcelain mugs with floral pattern
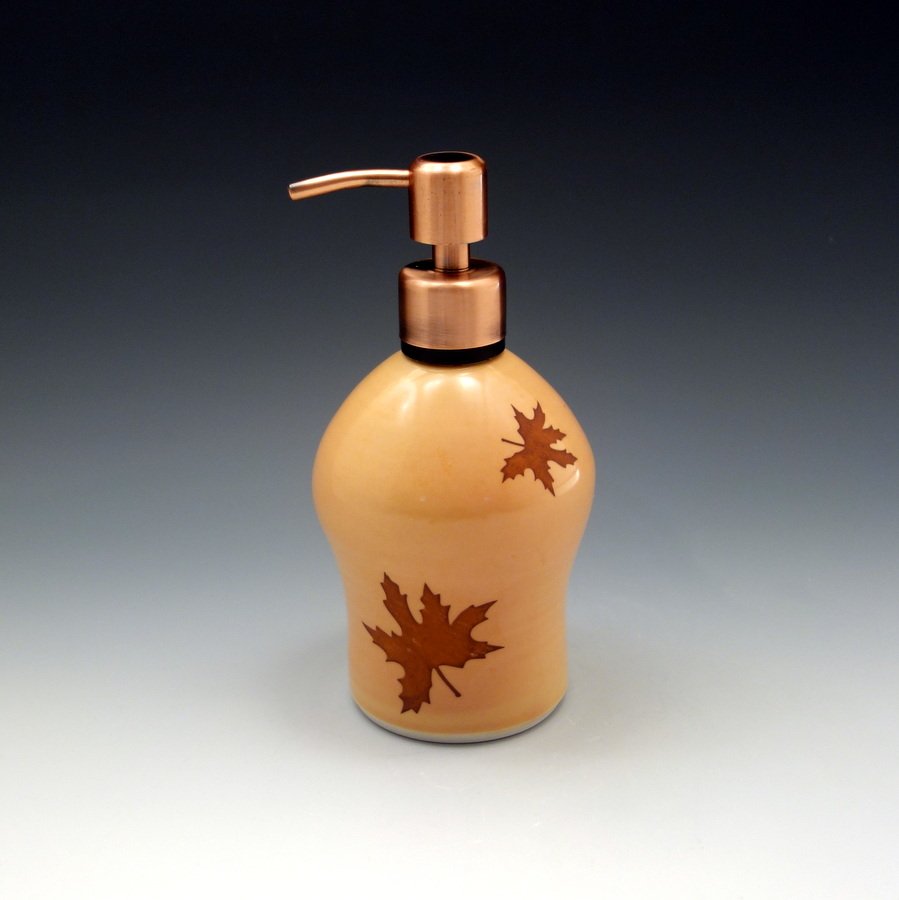
- Amber glazed porcelain soap dispenser with leaves falling and brushed copper pump.
If you're local to the Minneapolis/ St. Paul area, you can shop via Etsy and use coupon code:LOCAL PICKUPto make arrangements with me to pick up your items from my studio!
Also, I'll be having a Studio Sale next week for anyone who is local.
If you're in the Minneapolis/ St. Paul area, I hope you'll stop by my studio sale! 20% off of everything in my studio, including my seconds and samples that are already marked down!

Thursday :: December 5 :: 5pm - 7pm
Saturday :: December7 :: 10am - 5pm
Sunday :: December 8 :: 12 noon - 4pm
3015 10th Avenue South. Follow the "Pottery" signs to the back of the house to my basement studio. More information to come!
In the studio and out of the studio.
Anyway...back to the pots for a moment! Here is a favorite pair of mugs from an earlier firing.
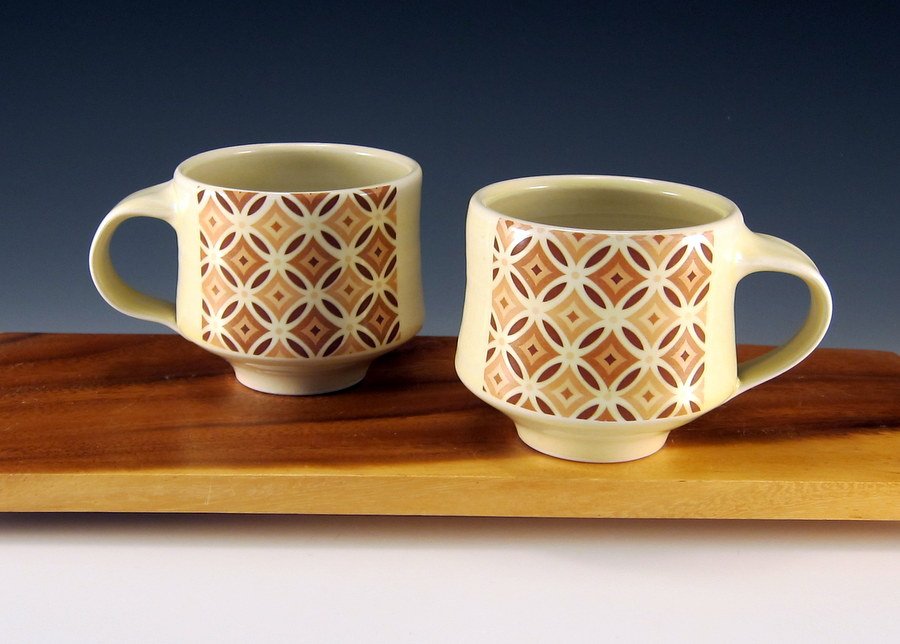
Since I'm gearing up for a busy holiday season, I just finished several back to back glaze firings and decal firings. I've been photographing, sanding, measuring and packing up pots and sending them out to various corners of the country. It's definitely the busiest time of the year for me, and most potters!
And for a non-studio update... This fall I got myself a new sewing machine and decided I should break it in by making some super fun Halloween costumes for my daughter, Ada and nephew, Shiya. I tried to have this post up the day before Halloween, but ended up having to do a big blog overhaul to fix a bunch of things that was causing problems. Luckily it is almost all fixed and working again!
Both Ada and Shiya picked out the themes of their costumes. I present to you: Ada Rainbow (as she called herself!) and Shiya the Most Awesome Viking Warrior ever (also his self appointed name). I love how Ada was mimicking Shiya's fierce look. Does that make her a fierce rainbow?

The rainbow is all felt. It's a mirror front to back. We found oodles of images online and I made up my own pattern to fit Ada. It's basically an a-line dress with straps. And I found a long sleeved red shirt at the 2nd hand store. The awesome rainbow hat was one that we already had from Zulily.

Shiya's viking costume was super fun and came together really easily. We live near the Midtown Global Marketwhere there is a little Swedish/ Scandinavian shop that always has viking helmets! I got a nice neutral shirt and sweater from a 2nd hand shop. He already had a pair of brown pants. The rest are layers of fur, felt and leather. I found some really cool bronze buttons to attach his fur cape together. My favorite part is the fur wrapped boots. I just wrapped the fake fur around his boots and wrapped some leather cording to secure it on. Such an awesome look... I might need to steal it for my own boots! Same thing was done around his arms. Anyway, it was the perfect Minnesota Halloween costume. Nice and warm!

And while we're on the topic of handmade costumes... Last year Ian and I made the kids' costumes together. They were both owls. Really adorable owls.
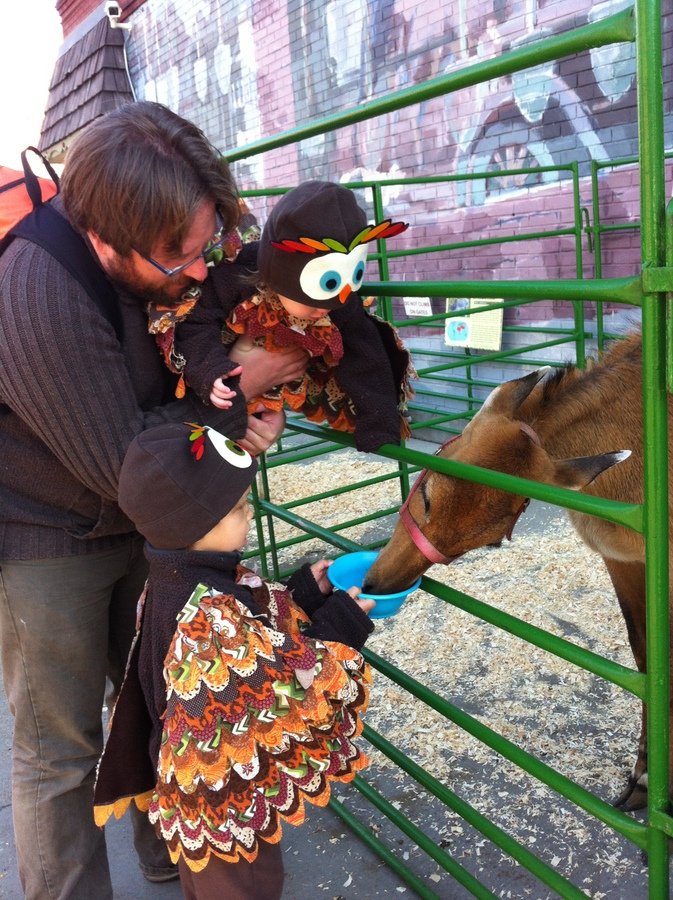
Ada the owl... She's grown so much this past year! And yes, those are owl sneakers on her feet!

We made our own owl faces with felt onto fleece hats. And used lots of different patterned fabrics to make up all of the feathers... so many feathers!
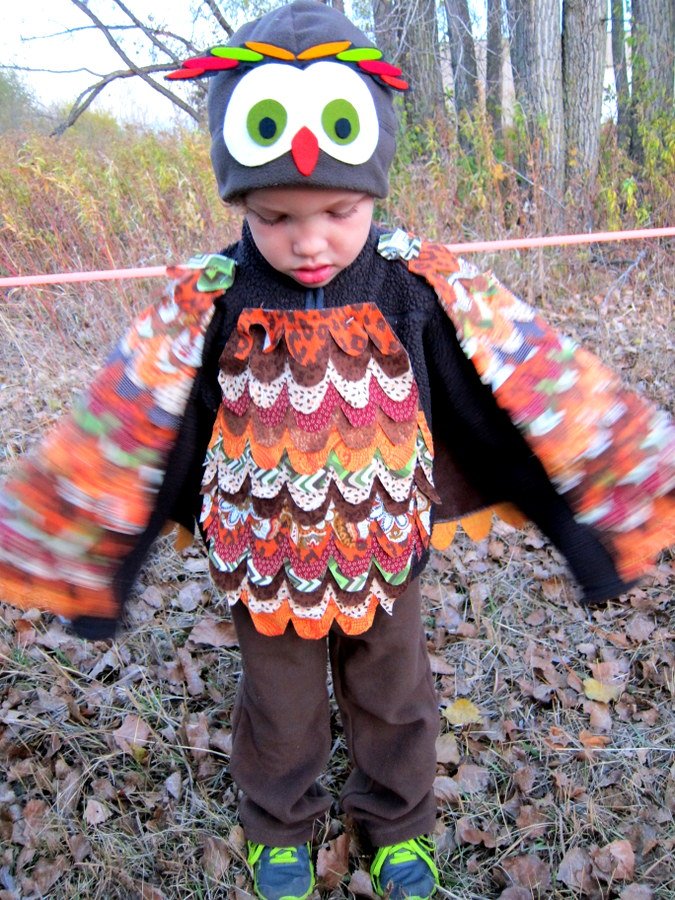
When I was a kid, we always made our Halloween costumes (except for 2nd grade when I really really wanted a store boughtStrawberry Shortcake). I think it instills a love and excitement for handmade things at an early age.
Ok, back to the pots....Here are some photos from my earlier firings. I realized that I never posted these! Some of these will soon be up in my Etsy shopor are already on their way to a gallery near you!
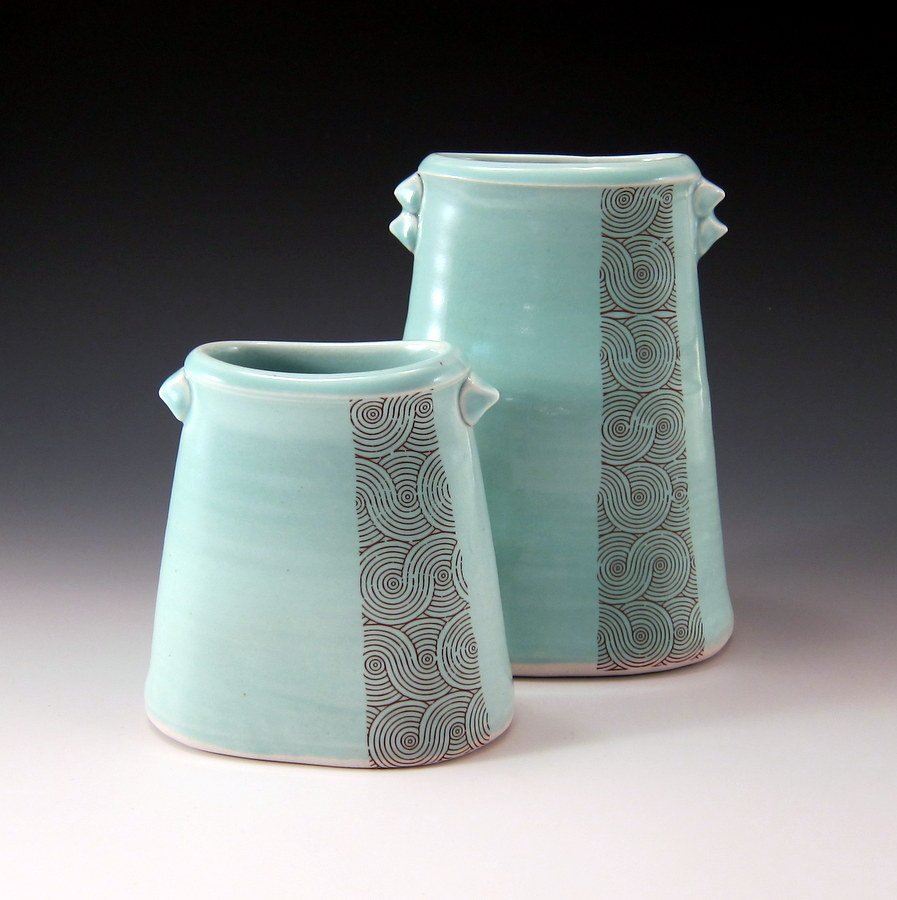
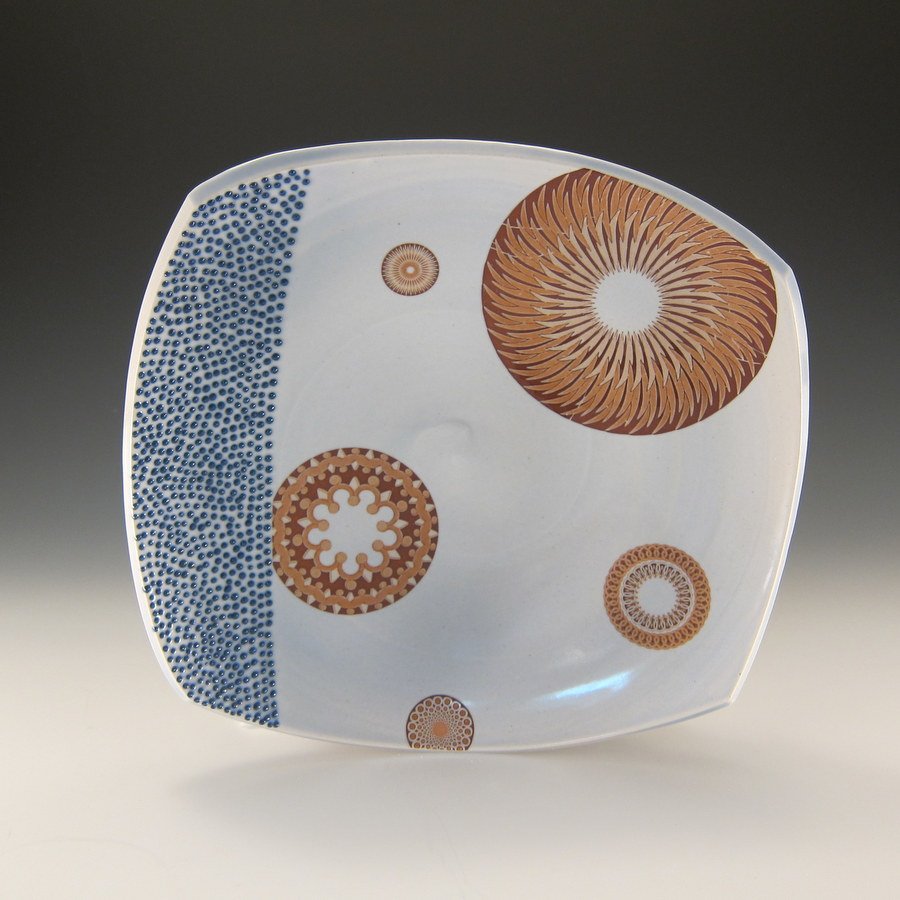
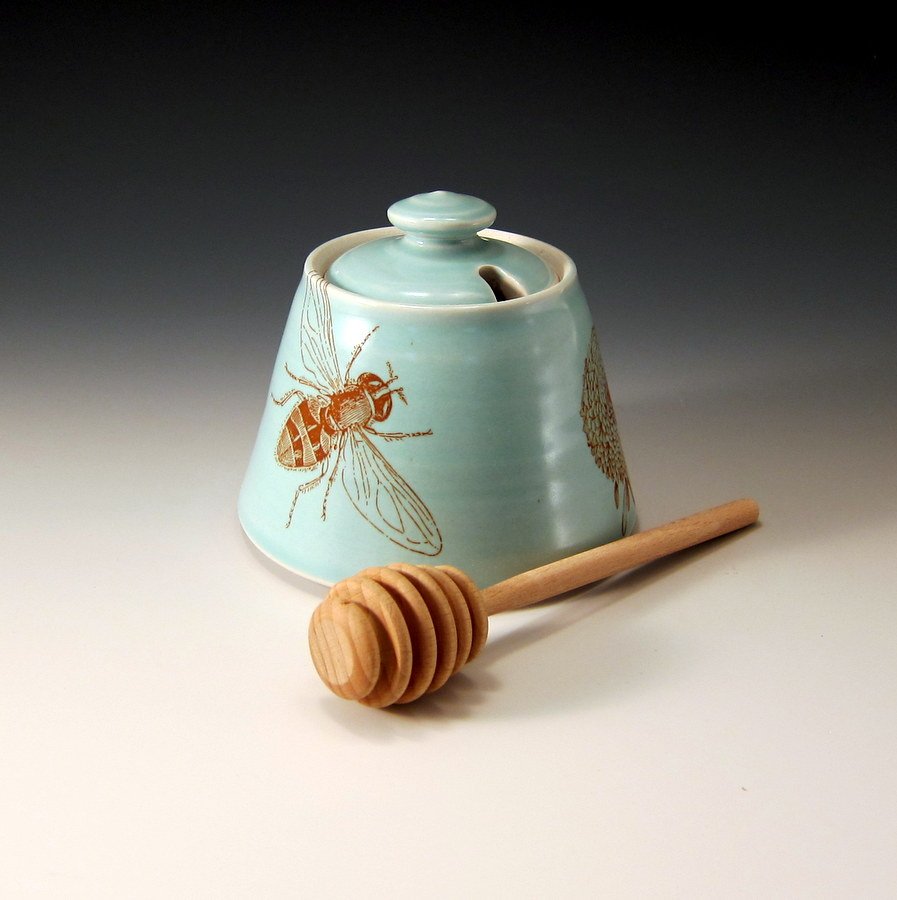
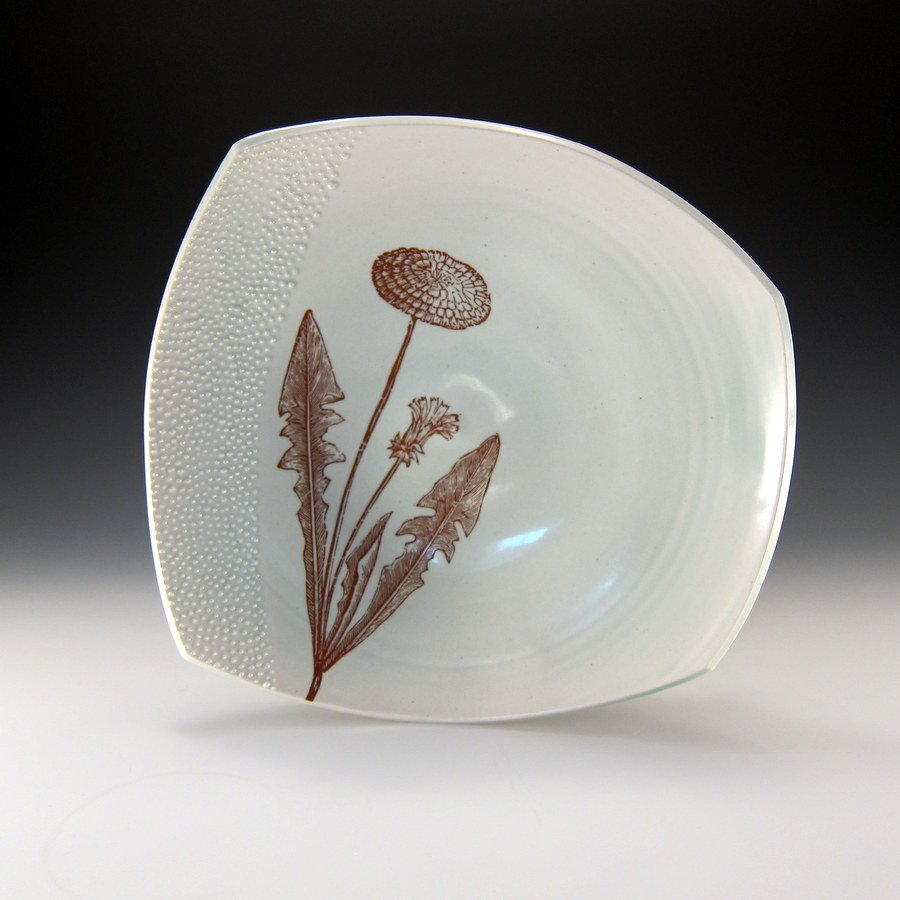
So that should catch you up just a little bit as to where I've been during my absence from this blog! And even though I haven't been blogging, I do keep my Emily Murphy Pottery Facebook page pretty up to date! It's a little easier to post a photo as I'm working. I'll be posting more soon now that my technical difficulties are mostly resolved. Hope all has been well in your corner of the world.
how-to: make your own colorful t-shirt with freezer paper stencils
__________________________________
I wanted to share a project I did with my nephew, Shiya, for his 5th birthday last month. I found a tutorial via Pinterest for making an "All by Myself Tee" from the blog i am momma hear me ROAR. Shiya is *really* into colorful clothes right now. And when I say he's into color, I mean serious, head to toe, saturated color. He prefers to wear all one color - which means his socks, underwear, shirt and pants are all the same color. He takes his personal style very seriously. When I found this tutorial, I thought it would be a really fun way of celebrating his birthday and adding some more vivid color to his wardrobe.
Materials:
- t-shirt(s). I wanted long sleeve because it's winter here in Minnesota! I got these from Amazon.
- freezer paper. I used these printable sheets. You could probably get them in a craft/sewing store. You can also just use a rollof freezer paper. I have heard that Walmart carries it but Target does not.
- fabric paint. I used these paints. But you could use pretty much any fabric paint- but I would not use puffy paint.
- X-Acto knife. Just a standard craft knife. Make sure you have a new/ sharp blade!
- cutting mat. I'm sure you could make due with a kitchen cutting board or a piece of cardboard. But if you're doing a moreintricate design, a cutting mat would make the process go much more smoothly.
- an iron. This is for heat setting the fabric paint and for getting the freezer paper to adhere to the fabric.
- brushes. Anything will do - foam ones are nice. I have these brushesand the different shapes are nice for making patterns. But you could also make your own by cutting standard foam brushes. The brushes, like most of the supplies on this list can be used over and over again for other projects.
- cardboard. This is to put inside the shirt so the paint doesn't bleed through to the back of the shirt.

Once you have your image on the freezer paper, you can start cutting! I tried using my X-Acto with whatever blade was in it and it did not work very well. I put in a new blade in and it was much easier.

After the stencils were all cut, I used an iron to adhere the freezer paper to the shirts. Make sure there is no water in the iron. And take your time to make sure all the small parts and edges are well stuck. If it isn't, the paint will bleed under the stencil.
Then I got some cardboard from the recycling bin and put some cardboard inside the shirt so the paint doesn't bleed from the front to the back.
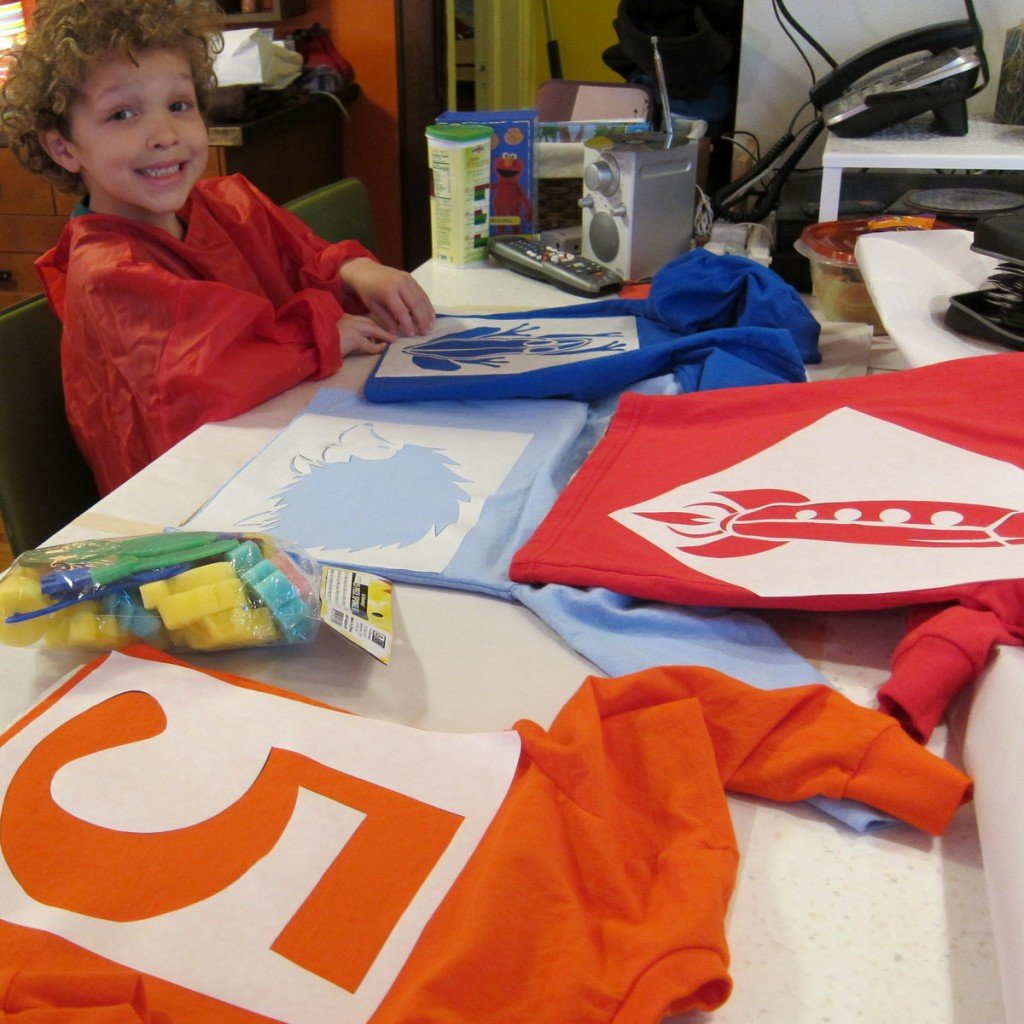
And then it's time for the fun part! Shiya dove in and started painting. Every picture I took during this step of the project, Shiya had a look of intense concentration.

Once the paint was dry (which was pretty quick)- I peeled off the freezer paper stencil. Shiya was really really anxious to see the results!
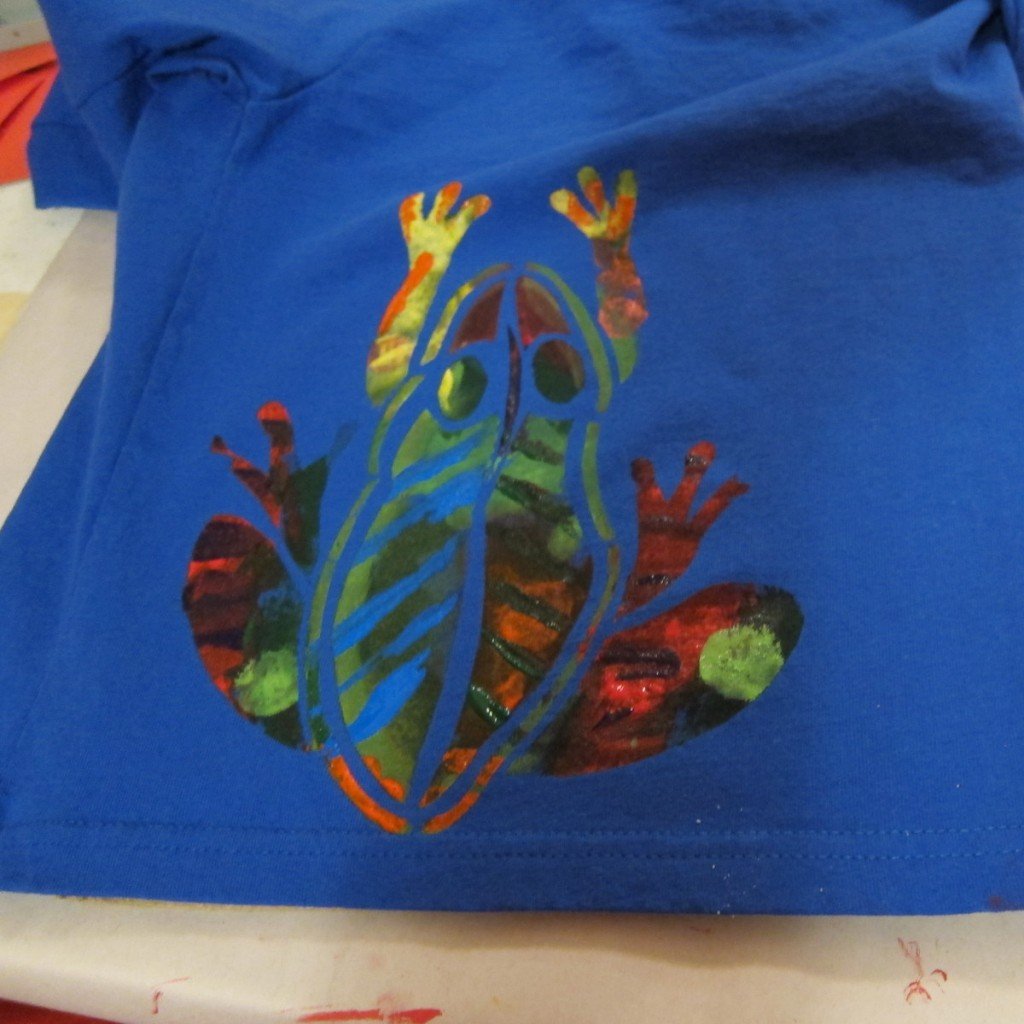
Here's the frog:
And the rocket ship:

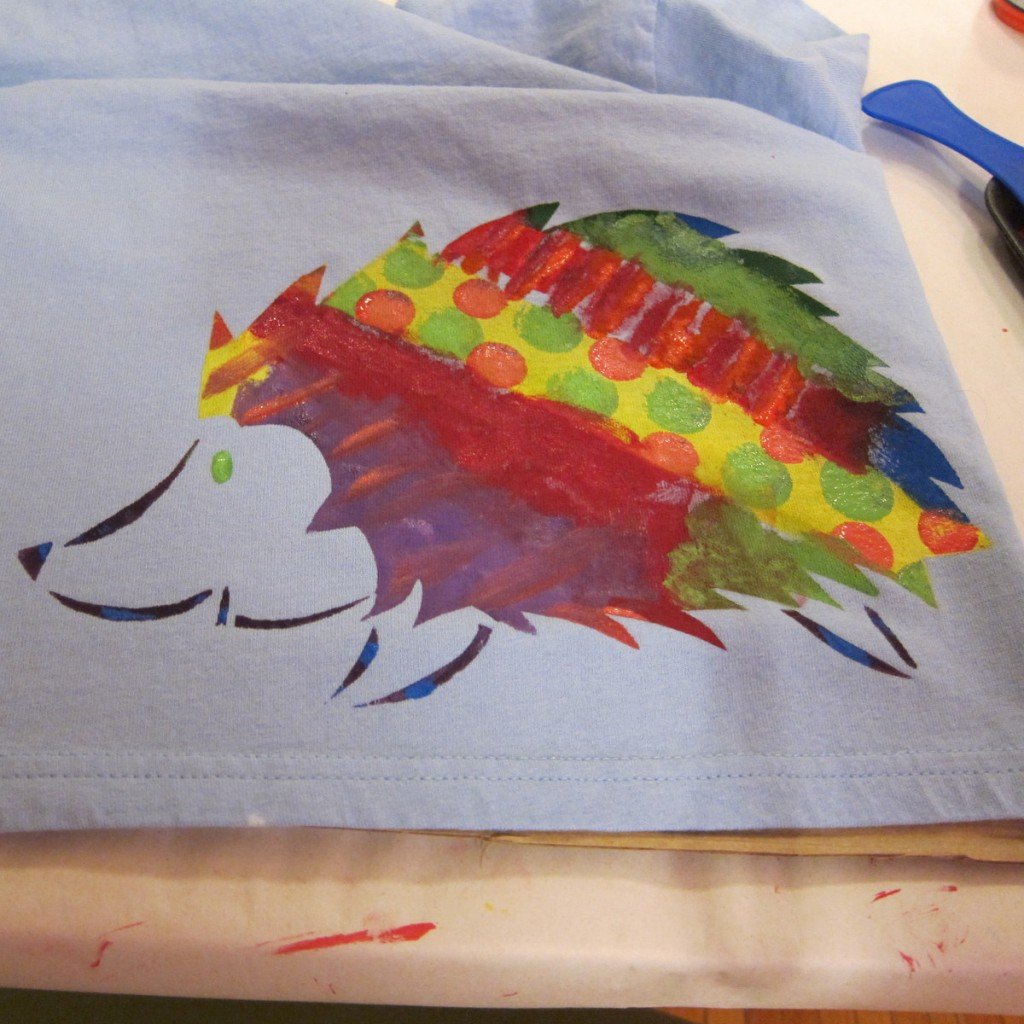
And the really fun hedgehog:
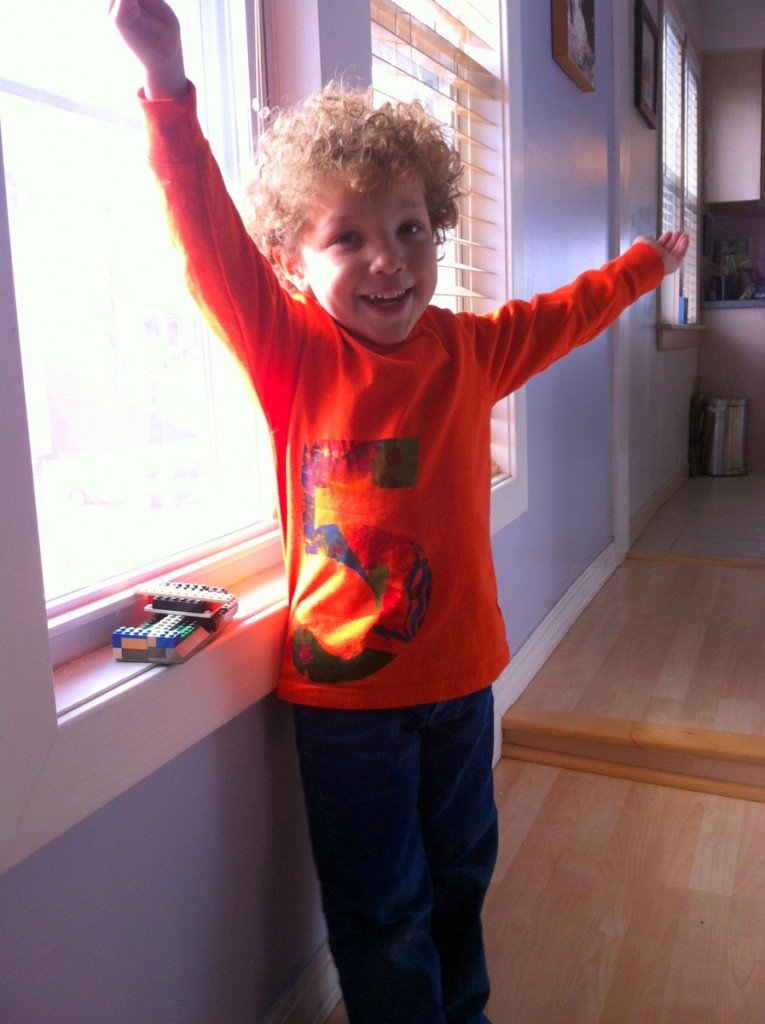
And the very special #5 shirt! Shiya was very proud!
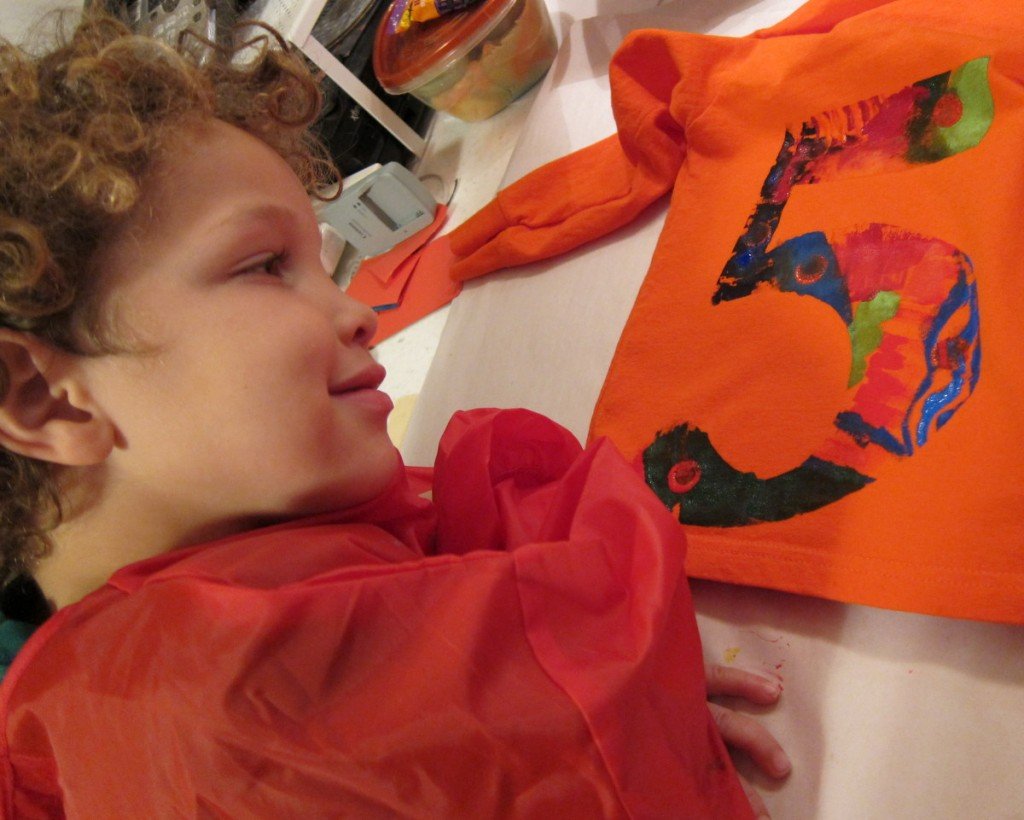
I let the fabric paint completely dry, then I used an iron to set the paint. I put a piece of cloth between the iron and the paint. You can also iron on the reverse side of the paint. I didn't have any paint come off on the fabric, but it still seems like a good idea. Follow the directions that came with your paint for heat setting. It seems like a pretty common process to have the iron (without water) set to medium, and then iron for a while (longer than if you were just getting the wrinkles out). After that it was safe to put through the wash.
These shirts have been getting lots of wear since we made them last month! And he gets asked about them whenever he wears them- and he proudly says that he painted them!
