How to make a new top for a storage ottoman
I have decided that I will sometimes share some non-clay focused blog posts on here. I have always done lots of crafty/ diy things that are not clay. My parents are both the types to do-it yourself. My mom is an amazing seamstress, quilter, cook and baker. My dadoccasionallybuilds furniture, is a painter and has the most beautiful flower gardens. I grew up in an old house which my parents fixed up/rebuilt/ renovated all by themselves. We had a vegetable garden that took up a large portion of our backyard. And as kids, we were always right in the thick of things on any projects they had going on. In college I double majored in ceramics and metals. In my first metals class my professor asked me if I grew up around tools, building things. She could tell by my interaction with tools that they were familiar and comfortable to me. That observation made me first realize how lucky I was to be brought up with the idea of being able to do something myself. My husband, Ian and I spend our evenings and weekends tackling projects, cooking and gardening. I really want our daughter to be brought up know how things work; how to fix things; how to make things.
I have realized that I love to plan out projects even more than I like doing them. (I know I am not the only one...) Designing, problem solving, figuring out materials, buying the supplies... that is the really fun part for me. It's much different from the way I approach clay. But with both clay and non-clay projects, the final results are really the best part.
Here is a recent project I did:
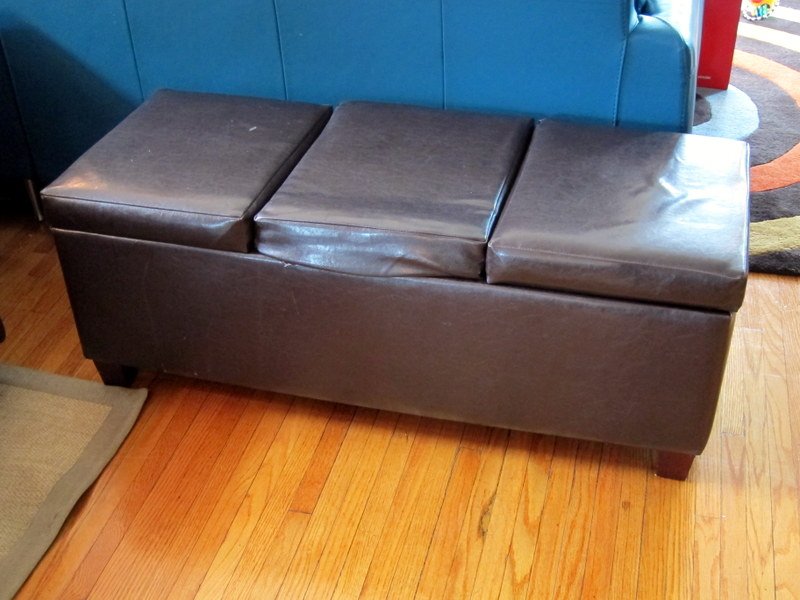
We bought an inexpensive storage ottoman off of Amazon. It was the right dimensions for where we wanted it to go and the price was right. But as I had worried, the price was too low. It was cheaply made.
The top pieces were crappy particle board and 2 of them broke within the first week. But the cost of return shipping made it not worth returning. People were always wanting to sit on it, but I'd have to quickly stop them from sitting on it and falling in.
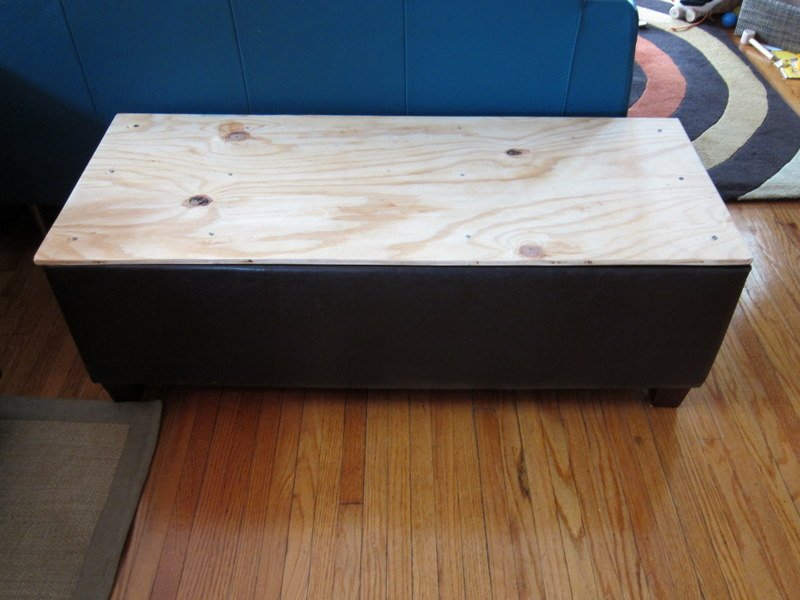
Ian (my husband) was doing some building projects anyway, so he cut me a piece of plywood to fit the top of the ottoman. It was just some scrap that we had out in the barn. I think it's 3/8" thick. I like that it wasn't too thick because I'd be afraid of tiny fingers getting smooshed if it was too heavy. He sanded all of the edges and corners on the board too.
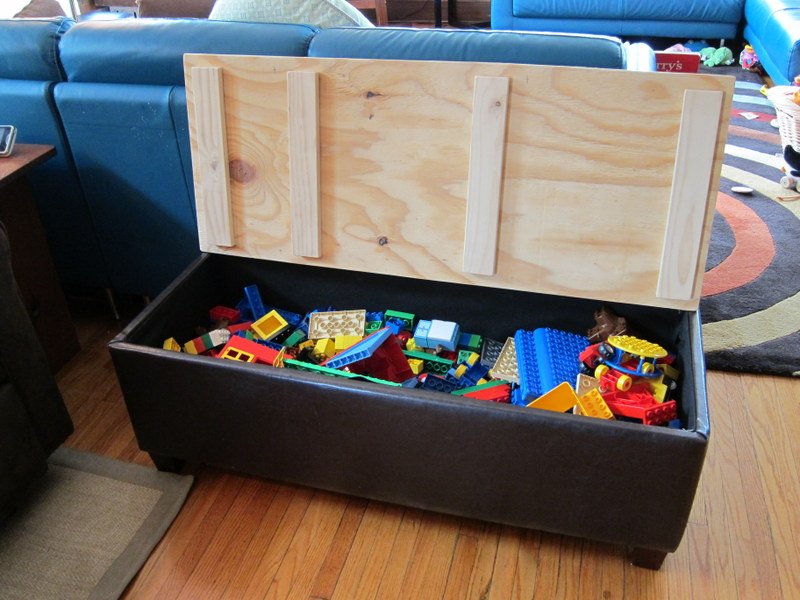
He added on these other supports in part because of how thin the plywood was. But also because it kept the lid from shifting front to back or side to side when sitting on top. You might wonder why the spacing of the slats is odd. This was a case of measure, cut some of the wood, then get distracted for 2 weeks, finish the cutting/gluing/screwing and then realize that you missed one of the cuts and had to undo/cut/redo some stuff. Hence the weird spacing of the wood slats. The slats were also scrap wood that Ian very nicely sanded down. He used some wood glue on the bottom, and then screw them in from the top. That was there were any rough edges for the kids to get caught on.
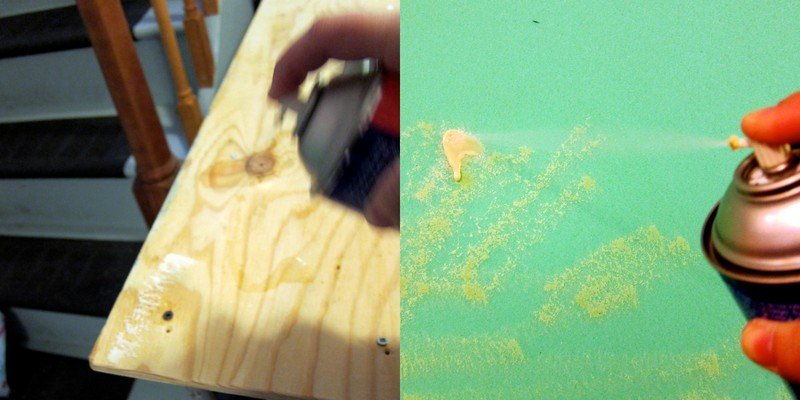
The next step is to get some high density foam. I always get mine from Joann Fabrics. It come in a variety of thicknesses (1/2 inch up to 4 inches). And you can get the length cut for you there, but not the width. It's pricey, but they always have 50% off coupons online, in the newspaper or in the mail. I used 3" foam for this. And then you'll need some spray adhesive. Craft stores, art stores or hardware stores all usually carry it. Spray both sides that are going to be stuck together. It'll be very tacky and when the two sides touch, it'll bond together quite nicely.
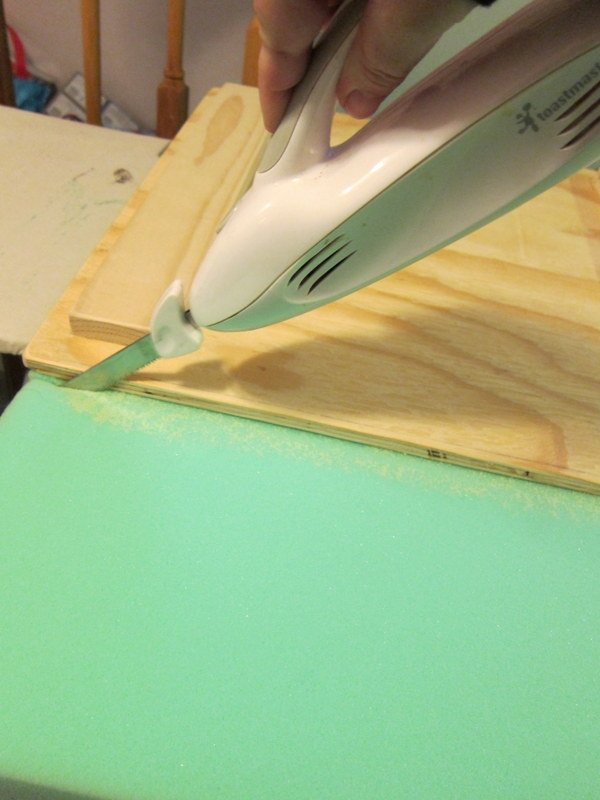
Then you want to cut the foam down to size. I use an electric carving knife. It cuts through it like butter... You can also use a serrated knife. I actually own an electric carving knife solely for the purpose of cutting foam. I'm surprised by how often I use it- like for projects likethis.
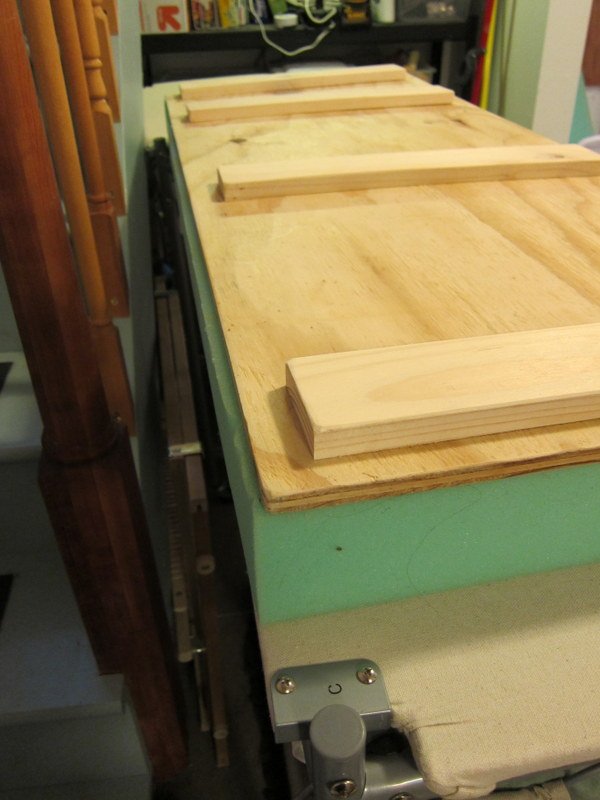
Then you'll want to let the glue dry/set for a while. I flipped it upside down with the wood on top so there was a little weight sitting on top.
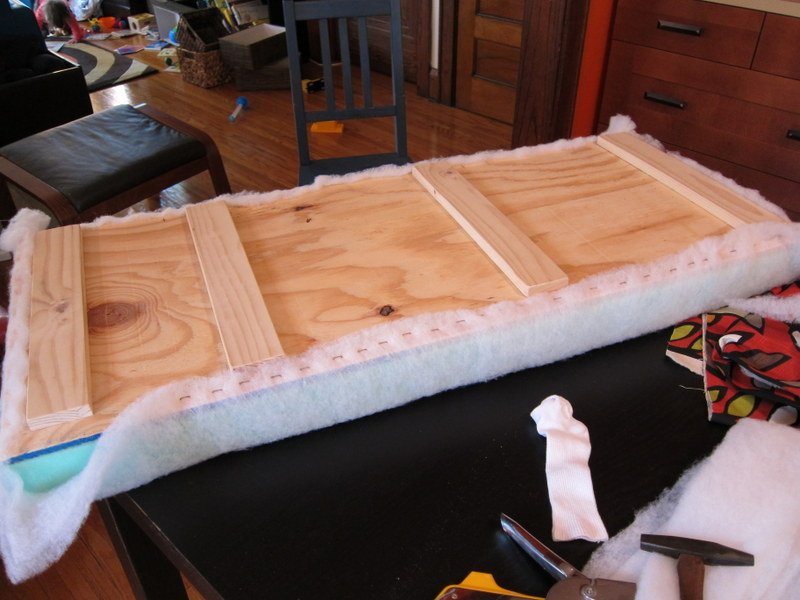
Then I wrapped the foam in two layers of batting (also from a sewing shop). And stapled it to the wood with a staple gun. If any of the staples didn't go in deep enough, I just tapped them all of the way in with a hammer.
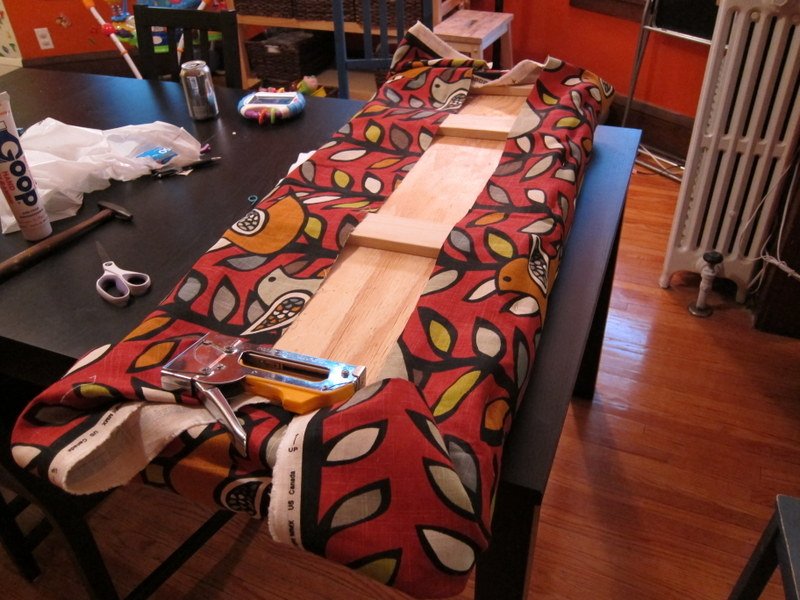
And then follow the layer of foam with the cloth. This cool fabric was also found at Joann's in the "home decor" fabric section. They were having a big sale so it was half price.The key to making sure the fabric stretched evenly (but not tightly!) is to staple from the middle top to the middle bottom. Then middle side to the other middle side. Then work your way out to the edges.
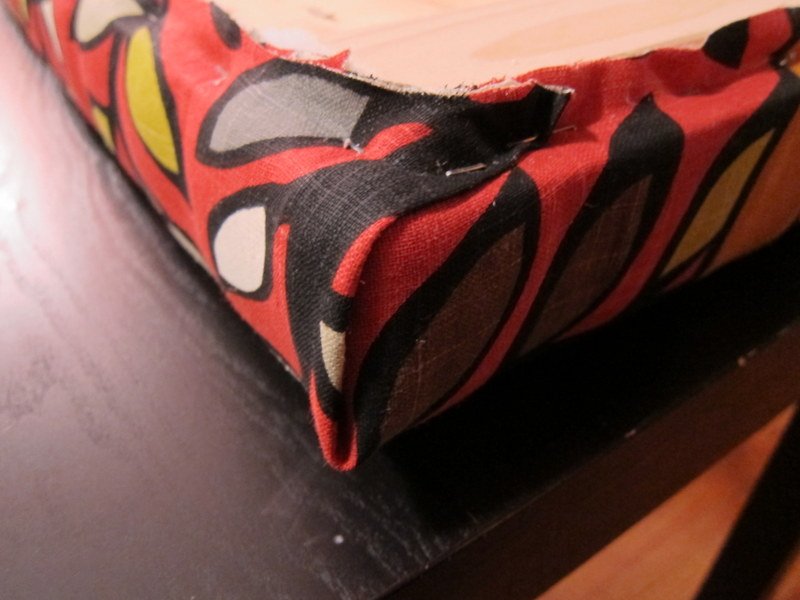
When you get to the corner, fold them like the corner of a present that you're wrapping. You can snip out a little extra fabric too so it isn't too bulky if you need to. And make sure all the staples are in all the way with a hammer.
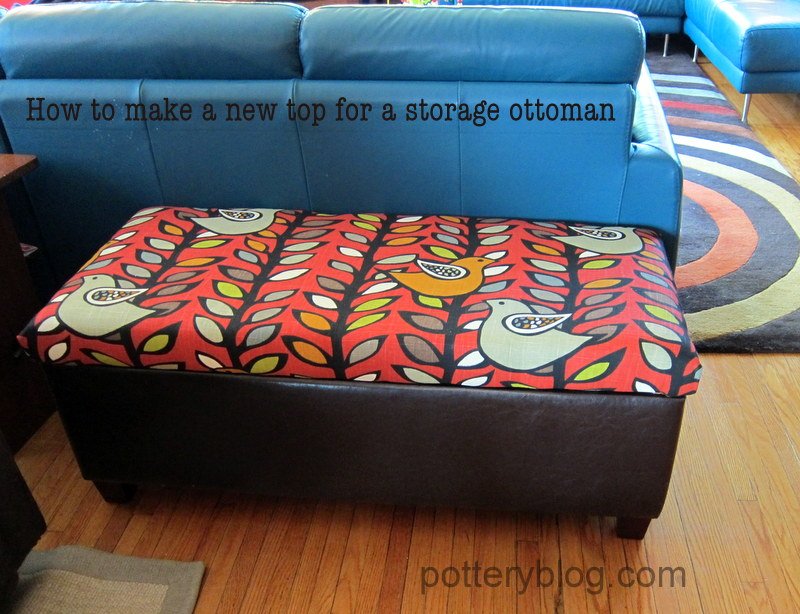
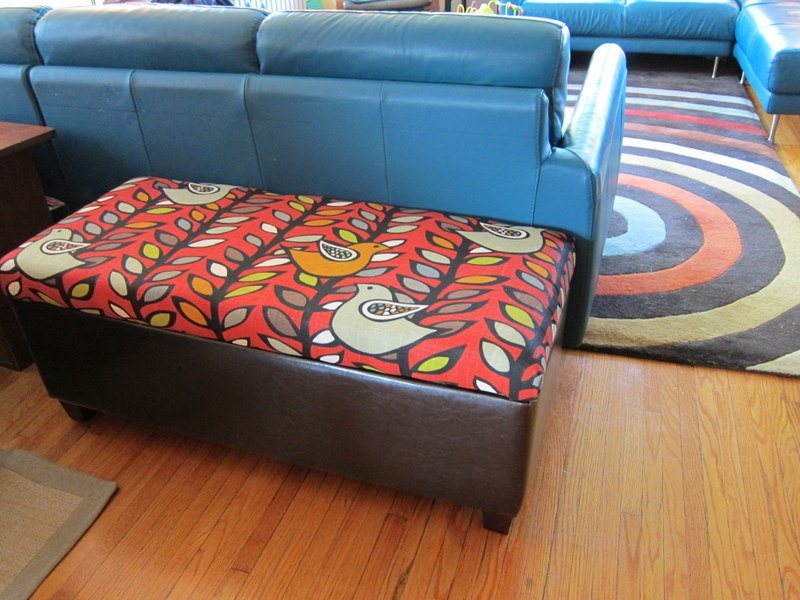
And there you have it. The ottoman has a new life. And I like it *way* more than the original.

Ada likes the birds on the fabric, and the legos inside. She has also discovered how fun it is to climb over the back of the couch and land on top of the bench. She is quite the climber.
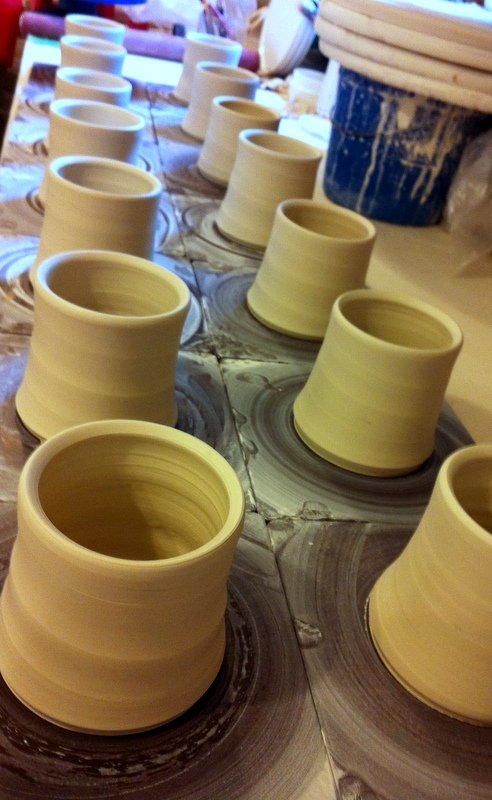
When I'm not doing projects around the house, I'm working in my studio. With temperatures hovering around 100 for the past week and a half (not the usual weather in Minnesota!), my studio has been a giant damp box. The large serving bowls I threw were able to stay out uncovered for almost a week before I could trim them. Until the humidity level goes down in my studio, I am going back to some smaller pieces! So I threw a bunch of mugs. I'm working on using decals on some of my pieces, so these mugs will be canvases awaiting some imagery.
Thanks, as always, for reading. I've been having so much fun being back in the blogging world and loving the conversations that continue after the posts through blog comments and on Facebook.
_____________________
I have realized that I love to plan out projects even more than I like doing them. (I know I am not the only one...) Designing, problem solving, figuring out materials, buying the supplies... that is the really fun part for me. It's much different from the way I approach clay. But with both clay and non-clay projects, the final results are really the best part.
Here is a recent project I did:
We bought an inexpensive storage ottoman off of Amazon. It was the right dimensions for where we wanted it to go and the price was right. But as I had worried, the price was too low. It was cheaply made.
The top pieces were crappy particle board and 2 of them broke within the first week. But the cost of return shipping made it not worth returning. People were always wanting to sit on it, but I'd have to quickly stop them from sitting on it and falling in.
Ian (my husband) was doing some building projects anyway, so he cut me a piece of plywood to fit the top of the ottoman. It was just some scrap that we had out in the barn. I think it's 3/8" thick. I like that it wasn't too thick because I'd be afraid of tiny fingers getting smooshed if it was too heavy. He sanded all of the edges and corners on the board too.

He added on these other supports in part because of how thin the plywood was. But also because it kept the lid from shifting front to back or side to side when sitting on top. You might wonder why the spacing of the slats is odd. This was a case of measure, cut some of the wood, then get distracted for 2 weeks, finish the cutting/gluing/screwing and then realize that you missed one of the cuts and had to undo/cut/redo some stuff. Hence the weird spacing of the wood slats. The slats were also scrap wood that Ian very nicely sanded down. He used some wood glue on the bottom, and then screw them in from the top. That was there were any rough edges for the kids to get caught on.

The next step is to get some high density foam. I always get mine from Joann Fabrics. It come in a variety of thicknesses (1/2 inch up to 4 inches). And you can get the length cut for you there, but not the width. It's pricey, but they always have 50% off coupons online, in the newspaper or in the mail. I used 3" foam for this. And then you'll need some spray adhesive. Craft stores, art stores or hardware stores all usually carry it. Spray both sides that are going to be stuck together. It'll be very tacky and when the two sides touch, it'll bond together quite nicely.

Then you want to cut the foam down to size. I use an electric carving knife. It cuts through it like butter... You can also use a serrated knife. I actually own an electric carving knife solely for the purpose of cutting foam. I'm surprised by how often I use it- like for projects likethis.

Then you'll want to let the glue dry/set for a while. I flipped it upside down with the wood on top so there was a little weight sitting on top.

Then I wrapped the foam in two layers of batting (also from a sewing shop). And stapled it to the wood with a staple gun. If any of the staples didn't go in deep enough, I just tapped them all of the way in with a hammer.

And then follow the layer of foam with the cloth. This cool fabric was also found at Joann's in the "home decor" fabric section. They were having a big sale so it was half price.The key to making sure the fabric stretched evenly (but not tightly!) is to staple from the middle top to the middle bottom. Then middle side to the other middle side. Then work your way out to the edges.
When you get to the corner, fold them like the corner of a present that you're wrapping. You can snip out a little extra fabric too so it isn't too bulky if you need to. And make sure all the staples are in all the way with a hammer.
And there you have it. The ottoman has a new life. And I like it *way* more than the original.

Ada likes the birds on the fabric, and the legos inside. She has also discovered how fun it is to climb over the back of the couch and land on top of the bench. She is quite the climber.
_____________________
When I'm not doing projects around the house, I'm working in my studio. With temperatures hovering around 100 for the past week and a half (not the usual weather in Minnesota!), my studio has been a giant damp box. The large serving bowls I threw were able to stay out uncovered for almost a week before I could trim them. Until the humidity level goes down in my studio, I am going back to some smaller pieces! So I threw a bunch of mugs. I'm working on using decals on some of my pieces, so these mugs will be canvases awaiting some imagery.

Thanks, as always, for reading. I've been having so much fun being back in the blogging world and loving the conversations that continue after the posts through blog comments and on Facebook.
