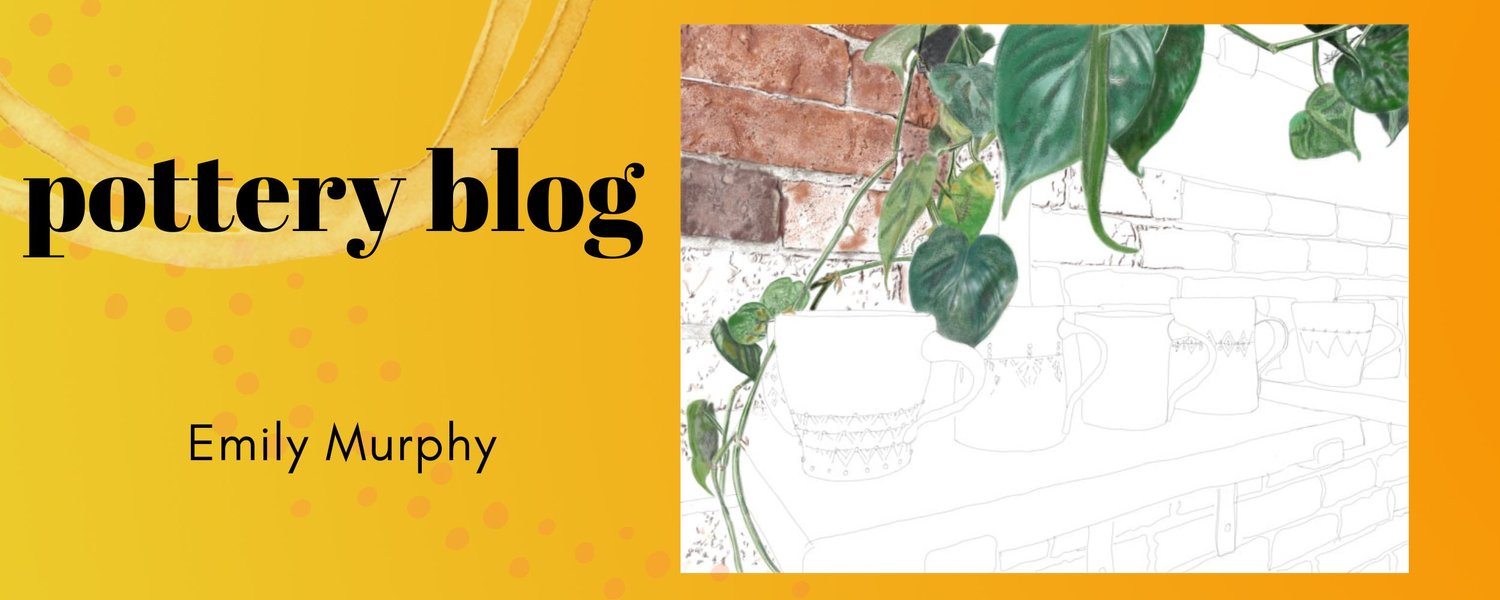
Assignment: Exploring a form, part 1
So here is first part my favorite self assignment.
- Pick a form. Something simple: mugs, small bowls, tea bowls, etc...
- Pick a weight for the piece. If it's cups, I usually do a small range: 3/4 lbs - 1 1/4 lbs. If it's plates, I usually pick the same weight. Maybe 3 lbs. I did mugs this week, so all the descriptions below are for mugs.
- Weigh out and wedge up at least 12 pieces. (Do more if you can. The more the better. Do 40 or 50.)
- Think about the different parts of the form: lip, handle, foot, curves... Think about how these parts relate to one another.
- Consider future glazing and decorating. Segment the form for clear places to decorate. Add lines for a glaze to break. If it's going to be fired in an atmospheric kiln, think about where the liner glaze will stop.
- What will the cup be used for? it might be used for: coffee, tea, cocoa, latte, espresso.., and
- Think about who might use it and where. A coffee cup for the office, a mug for a nightly cup of Sleepytime Tea, etc... Is the cup going to be cradled and savored? Should it have a narrower opening to keep the coffee extra hot? If the user has little kids or pets, something with a wide, stable base is really important.
- Start throwing - different forms. Push each form to be different from the previous one. Some will be radically different. Some with be variations on earlier pieces. Some you'll love, some you'll want to smush. But don't, yet. You'll want to study it to figure out why it didn't work and might discover why part of it did.
Note: All these pieces shown below are porcelain in greenware/leather hard state. They are not decorated yet- that's not part of this part of the assignment. (btw, I took these quick snapshots on my new studio photography set-up. Blog post about that coming up!) I want a form to be able to be strong and stand on it's own regardless of the decoration, glaze or firing of the piece. So to study them in a leather hard state is perfect.
I shared some quick thoughts about the forms below each grouping (which are in no particular order). These notes are not at all comprehensive, deep critiques, just quick gut reactions to the forms. Feel free to just look at the images. Or if you want to know what my thoughts are about them, you can read the notes.
group 1:

top left: I'm usually a no-trim mug kinda potter. But I've really been loving the yunomi/mug hybrid. I love how the handle placement is so obvious.
top right: This is a standard form for me. I love how it feels to hold when you're drinking from it, but I don't love the handle placement. Need to push this more.
bottom left: Great for atmospheric firing. Top third can be glazed and has room to run.
bottom right: Eh- not my favorite. But playing around with yunomi hybrid.
group 2:

top left: I like the easy curves of this piece. But I think I want it to feel "fuller"
top right: Standard "diner" mug. Should try it thicker- with aheftier lip. But that's hard for me to do!
bottom left: I like that the top and bottom of the handle have obvious placement. The curves and lines of this mug will be great in a soda or wood kiln.
bottom right: The form a a bit weak for my taste. But this type of form is great for hot chocolate with whipped cream. There's lots of room to top it off. Also good for a latte. I want to play around with this. Taller form, lower handle placement.
group 3:

top left: This is my least favorite of one of my new favorite forms. The lines are too stifled. I prefer the curvier ones. But didn't know until I played the form in both directions.
top right: This is a form that I always have a hard time with handle placement. I have a mug from another potter that gets it perfectly. But I can't do it. I'll always try, and maybe someday I'll get there. I love drinking peppermint tea in the winter out of a full mug like this.
bottom left: I love the elegant flow of these curves. The taller form keeps the hot liquid hot too. And the curves feel good to hold.
bottom right: Another one of my favorite new forms. I'm excited to do some simple decorating on this form. The band is just calling for some attention.
group 4:

top left: This is a pretty large, wide mug. Maybe good for soup?
top right: This form is getting a little closer to what I want. I love the fluidity of the form. But I want theproportionsto be a little different.
bottom left: This form is working a little better for me than the previousiteration. But still isn't quite gelling. Something to push a bit more.
bottom right: I love the looseness of this form- both when I was throwing it, and the finished product. It has that night balance between a nice strong form and an ease of form.
group 5:

top left: This is similar to one in the previous group, but I tried to play around with having a stronger line and it doesn't quite work. Next time I think I'll make the top of the form a bit taller.
top right: I like the curves of this form with the break in the form at the top. I also like that that break gives me a nice place to attach a handle.
bottom left: Another version of one of my new favorites. Something that doesn't come through in these photos is scale. Some of these similar forms are quite different in size.
bottom right: A taller diner style cup. But this one is quite large. Great for someone with big hands. The very linear lines of the form work well with most of my decoration. A big blank canvas.
group 6:

top left: This is my favorite one of this kind of form. The proportions and fluidity are just right. This is a very generous size cup.
top right: This gets the mix of the softer curves with the stronger angle/line break in the form. Will definitely explore this form more.
bottom left: This is a form I haven't played with before. I was thinking about those stacking mugs. I didn't think about making them actually stack, but maybe I will.
bottom right: Again, this cup is a different scale from the previous one. It's a bit smaller. More "standard" mug size.
group 7:

top left: The curvy mug with a straighter top.
top right: Diner mug with more of a waist. I like that it give you extra room for your knuckles without having the handle loop out too far.
bottom left: I really like the strength of this form. I am mug, hear me roar.
bottom right: This is a variation of one of my first mug forms. I like playing with the proportions of the top and bottom. A slight change makes a major difference.
group 8:

top left: The curvy tea bowl hybrid with a straighter top. I like the swelling of the bottom part of the form, and the restrained upper part.
top right: I wanted to push the idea of the indented band around the cup, but it didn't work. Often times, creating a whole new form with a very specific idea leads to an overworked piece. But sometimes that's just where you have to start.
bottom left: Similar to earlier ones, but with a straighter bottom. Prefer the curves.
bottom right: This is another new form that I want to play around with. Nice and stable and a nice break in the form that can be a nice inspiration fordecoratingthis piece.
___________________________________________
There are a couple more parts to this assignment, but that should be enough to get you started for today.
Thisassignment is something that I do pretty regularly. Not just for mugs, for all different forms. I prefer to sketch in clay rather than paper. By doing so many different forms, it really pushes me to try things that I wouldn't do otherwise. When you start getting to number 10, you'll really have to start creating new forms and pushing your standard ones.If you do this in the next 2 weeks- take a photo of your grouping and email it to me: emily at emily murphy . com. Maybe line them up and take a photo of them in a row. It'll be easier for me to post than to have to edit individual photos.
Have fun!
___________________________________________
If you're a Facebook user, become a Fan on theEmily Murphy Pottery Fan Page. I post there almost daily- links, updates, photos, and questions. It's been a really fun way to get to know you guys and some great information and advice is shared and debated on there.
Studio work table
The top of the table is covered in canvas. If you've never stretched canvas before, here's a little tutorial on how to do it. It's something that I learned how to do from my dad, who is a painter. It's basically the same process of stretching a canvas for painting, but on a solid surface, like plywood. If it's not stretched right, it will be really annoying to work on. One thing that I do that's a little different from the paint canvas technique is I wet the canvas down with a sponge. It makes it a little easier to stretch and you'll end up with a tighter fit. I usually buy my canvas at an art supply store, but during one of the discussions on Facebook, someone suggested getting a canvas drop cloth from the painting department at Home Depot. It has a coarser texture, but a good price if the size works for you. It's an interesting idea.

When I was shopping around for really good locking casters for the table,Kristin Kieffer suggested that I get casters from Caster City. So I ordered up 4 for the table and they're great! When you're shopping around for casters for a table like this, make sure you get dual locking casters. It's really solid enough that you can wedge on it.
________________________________
You might have seen my post last week about my built in trimming splash pan. I asked for photos or links to other DIY splash pans and Ben Stark shared a post with me that he had written a while back. So here's another splash pan idea, courtesy of Ben Stark Pottery:

Make sure you look at the original post. The way he designed it to be removable and slide on and off the wheel is pretty genius! If you have any projects that you've done at your studio, send me photos or links! I love this stuff! Just send an email to:emily (at) emilymurphy.com or post a comment on any blog post and I'll see it. Thanks for sharing Ben!
________________________________
The next project that I'm working on (and will be blogging about shortly) is a new photo taking set-up. I'm really excited about it- and excited to share it. In the age of digital cameras and Etsy, it's something that we all want to have. I've been designing my set up for years, but never had a good place to actually build it. When I took an informal poll f potters about what they wished they had in their studio that they didn't have, a photo taking set-up was top on the list. Part of the light diffuser that I built is made out of PVC. Last weekMiri, over atNick and Miri's PR Prattle had some fun ideas about PVC including this get dolly for kiln shelves (photo below). The Rincon Facebook Fan Page had some more ideas too. I love the description of PVC being tinker toys for adults. ha!

________________________________
A couple of weeks ago, I was catching up with some shows on Tivo, and something caught my eye. It looked like the character, Angela, on the show Bones, was wearing one of my pendants. I have no idea if it really is, but when I look at it, my reaction is: Hey! That's one of mine! It's a simple design that is not unusual, but the coloration and the knotting of it makes me feel like there is no question. If it is, it's one of the larger sizes, stoneware with tile 6 slip, a very light spray of a copper glaze around the center. Anyway, it's fun to think that one of my pieces ended up on a show that I love. A few years back I had some large bottles and platters in the show "Dream Home" on HGTV. A producer borrowed some pieces for the season finale. I wish I had some screen shots from that show!
After I finish my photo set-up, I'll have some more pendants up on Etsy in the next couple of weeks. My shop's been empty for a long time. Time to dust it off!

New clay trap for the studio sink

Whenever I think about a clay trap, I have the image of a box trap trying to entice the tiny clay clay particles from escaping down the plumbing.
But that doesn't really seem like a realistic solution! I had been planning on putting together my own trap, but then I read of stories about how they can "go bad" by getting super stinky or leaky or they prove to be too difficult to change when they get full. So I got scared off of the DIY solution. If it's something that you've thought about doing, these plans look interesting. Then there is the Gleco Trap. People seem to like it, but the little containers seem expensive, and as a full time potter, I was worried that I would have to change it all the time. Then I discovered that they had a couple of larger sizes, but the price tag was too steep. Thanks to Facebook, Paul Randall gave me a fantastic tip. Gleco Traps are used by dentists, and if you buy directly though a dental supply company, they're much cheaper. I am a huge supporter of ceramics suppliers (trust me, they get lots of my money!), but I couldn't ignore the price difference. Since I first looked at the traps, the price from the dental company has inched up a little, and the price from the ceramic supply company has dropped quite a bit. But when I bought it, it was literally almost half the price.

The directions are pretty straight forward. When we first had a sink installed, we left room for a system under the sink, so it was easy. If you have a closed sink cabinet, it would be good to make sure you have enough room to squeeze it in before you order it. I bought the 3.5 gallon size. There is also a 5 gallon size, but this seemed like it would be enough, plus it would be a little moremanageable.

It comes with lots of extra fittings so it should work with most plumbing situations. Everything just screws together so you can disassemble it when you need to change the bucket. The downside is that you do need to buy a whole replacement bucket. But hopefully that will be a long time from now.

I have no idea if this is going to be the ideal solution, I'll let you know in the coming months. You can see into the semi-transparent bucket and how much sediment is in to so it'll be obvious when it needs to be replaced. Changing the bucket will really be the test of the system! It does have the possibility of getting a little stinky, so they suggest adding chlorine crystals from a pool supply company, but it seems like bleach should do the trick, right? That's what I've done with other trap systems.
What do you do in your studio to keep the plumbing from getting clogged?
Trimming splash pan
I always like having my trimming wheel in a corner. Since I don't clean up my trimmings every day, I like having it out of the way so I don't track the trimmings around the rest of the studio. So I already had 2 walls next to my wheel. Separating my two wheels is a wedging table. It's bolted to the wall and I decided to add some sides to the table to keep trimmings and wheel splatter from getting over all the stuff stored under the wedging table. So that gave me the 3rd side of my box.
So this is what I came up with:

My trimming wheel is a Brent wheel that I picked up 2nd hand from a friend. Brent wheels have a metal plate under the wheel head. A normal splash pan fits under that metal plate. If you put the splash pan above the plate, you'll end up with a spinning splash pan. So I definitely wanted to avoid having anything above the plate, but with plywood, I couldn't fit it below, so I just went around the plate.

Here's a close-up of the plate and how the board fits around it.

I wanted to be able to remove the "splash pan" for cleaning, or if I wanted to use the wheel to throw occasionally. So it sits on top of 2 strips of wood screwed into the wall and the wedging table.

So there you have it. My super simple solution for my trimming splash pan. Of course, odds are you don't have the exact same space as me, but the idea is adaptable.
I would love to see other photos of homemade splash pans, or other studio solutions. Send me an email with a photo and description if you have something to share: emily (at) emilymurphy.com
________________________________
Besides the new splash pan, it's been a busy week around the studio. The building out of it is just about finished.
I also installed a new clay trap under my studio sink. I'll be posting photos about that on the blog soon. My last work table is built and the casters for it arrived today.
Over on the Emily Murphy Pottery Facebook Fan Page, the conversation has been continuing between blog posts. I can't believe it took me so long to make a Facebook page, I'm having so much fun with it! It's been a great way to connect with people and I'm getting a ton of ideas for blog posts from it. Everyone wants more tool making tutorials!
I recently caught up with several months of pottery blog reading. My Google Reader was full of unread posts. Now that I'm caught up, I've been adding lots of new blogs to my blogroll. I'll be posting about that soon, but if you want to get a jump start, check out my updated list here. Let me know if there are any that I should add that I'm missing. My 2 main criteria are: it must be mostly about clay, and it must have real written content, not just posts that update Etsy, etc... My blogroll is connected to my Google Reader, so I read every blog on the list. So I have to have some sort of limits on it!
I'm heading over to Continental Clay right now to pick up someGrolleg Porcelain! It's (finally!!!!) time to start throwing! I can't wait!
My new pottery studio, so far.
As promised, this post is all about my studio build out. A few months ago we finished the walls, ceilings, lighting and flooring in my studio, but more recently, we've been building out the space: customizing tables, shelves and storage to suit my needs. The project is still a work in progress, but you'll get a sense of the space from the tour below. Enjoy!
________________________________
The tour starts off in the hallway that leads into my studio. The studio consists of 3 rooms: the first one is a "clean studio," the next is the glazing/ chemical room and the last one is throwing and decorating room. The studio will be closed off by a pocket door (which is in process of being installed). The left side of the hall is a display area/ storage for finished pots. I have some fun ideas for display that I'd like to do at some point, but it's lowest on my list of priorities. For now, I'm using Ikea shelves from my show display.Straight ahead is where my electric kiln will go.

My "clean studio" is home my studio office. I'll be using it mainly for doing photos and updating etsy, etc... Right ahead is my electric kiln area (around where the tool bucket is now). The walls have cement board on them (with an air space behind them) and the ceiling has 5/8th inch drywall. The shelves you see to the right will be for work waiting to be fired, kiln shelves and furnitures, etc... This room used to be a kitchen, and the tile floor are left over from it's previous incarnation.

Another view of my desk. I'm trying to set up an area that is well set up for photographing pots, listing them online and packing for shipping. I've never had a good space to do this before, so it always made it much more of a chore than it needed to be. Across the room is a table for photographing work, as well as packing up boxes. I had conversations with a ton of potters as I was designing my space and I asked "what is the one thing that you wish you had in your studio" and everyone's answer was to have a better space for photographing and packing up pots.

This next photo will get more of anexplanationin a future post. This is the start of my photography set-up, but since it's not done yet, I'm not going to explain the contraption just yet! The table is on casters has space under it for box storage. There is also a leaf that opens up to make the table larger, but stays out of my way when I'm not using it. This table will be for both photographing work, and also for packing up work.

This next area is just to the right of the photo table, and directly behind my desk. The utility sink is getting a trap installed under it (another post coming up about that). Suspended from the ceiling is a big roll of packing foam (which I forgot neaten up before the photo, oops!). The counter will be more area for staging work for photos and wrapping/shipping. Below the counter is space for both boxes and wrapping paper. There is also a spigot below the counter, where I can fill up bigger buckets without having to lift them in and out of the sink.

The next room: this is my glazing area, as well as clay storage. The shelf building is still in progress, but I'm pretty excited about this space. The counter top in here (and by the utility sink) is just "in stock" laminate counter top from Home Depot, which were also 20% off when I bought them which made them a great deal. For the floor in the glazing room and the throwing room, I did an epoxy coating over the cement floors. I'm really impressed with their durability. To the right of this will be where I eventually hope to have a spray booth just past the window. The clay storage is a pull out dolly so I don't have to awkwardly reach to get clay out and put clay away. The wheelie things the 5 gallon glaze buckets are on are actually plant holders from Ikea. Much cheaper than ones from hardware stores, and definitely durable enough. I've been using them for years.

The next set of shelves are across from the glazing area.These shelves will be for dry material storage, and the bottom part can be more clay storage (also pulls out). The glazing room & throwing room are separated from the clean room by a door to help keep the dust from migrating too much.

Our tour continues into the next room, which is where I'll do my throwing, trimming, altering and decorating. The 2 rooms used to have a wall dividing them, but I opened them up to get more light, cross ventilation, and generally more space. There will be another table built that will roll between glazing and throwing rooms whenever I need more horizontal surface, but that won't happen for another week or so. These shelves will hold greenware and work in progress. The shelves on the right is a full cart that I inherited from a previous studio that I altered to fit my needs. There is another rolling dolly for more heavy duty storage at the bottom of the shelves to the left.

This next part is my favorite part of my studio! It's a canvas covered counter that is 14 feet long and 2 and a half feet deep. There is a space for me to sit at right in front of the window. All the tools and slips are right at my reach. I can't wait to spend hours sitting here, decorating pots! The throwing area is to the right of this photo, directly across from the shelves/cart.

There is still some building to do in this next area, but you can get the basic idea of the space. I use one wheel for throwing (on left) and one for trimming (on right). The wedging table has some pretty slick bat storage built in. I'm going to build a big catch-all splash pan for the trimming wheel and room storage above each wheel.

So that completes the tour of my studio, so far. I'll be revisiting some of these spaces on my blog as I finish them and start to use them. I've been having fun building out the space that is customized for my needs. I'm not planning on moving anytime soon, so I can really settle in. I've had 4 studios over the past 10 years so I've always beenhesitantto build too much that was not movable and was too customized. But now that I'm more or less permanently settled, I can customize away! It's taking a little longer to get set up, but it's definitely worth it. With that said, I'm so glad that the end is in sight!
_____________________________________
When I finished writing this post, I was talking to Ian and telling him how I had just written an overly detailed (and very long) post about my studio build out, but I knew if I didn't write all the details, I'd get a lot of questions about the parts I skipped over, so I just went for it. I know how much people love details about studio design! I soak up every blog post, book chapter and magazine article that is about setting studio set up- no matter the size or location. Ian pointed out that it was like HGTV for potters. I think he put it perfectly!
And don't forget to become a fan of Emily Murphy Pottery on Facebook!
Become a fan on Facebook.
One of the best parts of writing this blog is connecting with other people. When I first began writing it 5 and a half years ago, I had no idea that it could be such a back and forth dialog. I created a Fan Page on Facebook to help continue the conversation! I just started the fan page this weekend, and it's been a great start of a conversation. I'll be using this page to share what I'm doing on a day to day basis in the studio and I'll ask for advice and try to have an ongoing conversation with the group. I hope you'll join in!

And you can still find me on Twitter:http://twitter.com/potteryblog
If you have a pottery fan page on Facebook, or if you're on Twitter, leave a comment with a link to your page.
The case of the missing pottery blogger: solved!
As many of you know, I recently moved to Minneapolis after 10 years in Chicago. The move was crazy, but the real crazy part was that we bought a duplex last winter that was condemned, and we brought it up to code through months and months and months of intense renovations. The house had a total of 4 units (2 original, 2 illegal units)- which included 4 kitchens and 4 bathrooms and not a single part of any of them wassalvageable. The house has 54 windows, and only 4 of them were worth keeping. The house had been empty for 2 years when we bought it. I'm sure much of the deterioration happened during that time. Minnesota winters are rough! But we saw past all that and we fell in love with the house. It's brick, after all! And the raw space and layout were perfect for us. So we dove in head first and have learned a lot along the way.

Ian and I live on the 2nd floor, and my sister Nora, and her two little boys, Ayrie and Shiya live on the 1st floor. The attic is Ian's office, and guest space. The basement is my studio and a shared family room. Lucky for me the basement has tall ceilings and full sized windows. It's the perfect space for me.
For the construction, we tried to hire people that were friends, family, friends of family and friends whenever possible. Most people commuted to work on bikes, so this is what our yard looked like on a busy day:

This picture will just give you a little idea of what the house looked like when we bought it. Our Realtor thought that we were crazy, but now thinks we were brilliant :)

This is what our kitchen looks like now. It's a pretty dramatic before and after!

We designed these shelves to hold our pots for every day use. As they were being built, everyone kept saying: what are you doing? These are super engineered to be incredibly sturdy. There are no worries about overloading them! I'll do a blog post at some point in the future so you can see the interior structure of the shelves.


Of course I have tons more pictures of our renovations, but I just picked out a handful to give you a sense of what I've been up to. If anyone wants to see more photos, I could post a slideshow of the rest of the house. My next post will be of my studio progress so far, so there will be some more house photos to come.
* * * * * * *
Then, just as we were nearing the end of our renovations, Ian and I decided, after 13 years together, to make it 'legal', and we got married! We had a tiny ceremony, in our living room. It was perfect. We're planning a larger celebration in the spring in our back yard after the snow thaws but before I begin construction on my soda kiln and kiln building.

So that basically sums up where I've been. It's been a great year with a lot of exciting changes. I'm anxious to be back to blogging, and back to the world of clay! I have a ton a blog posts lined up in my head, and even more ideas for pots! Thanks for checking back in with me.
Pottery Clearance Sale!
As moving day draws closer, my studio gets a little emptier. I'm officially past the point where I could make any work. My wheels, tools and (most importantly) clay are all packed onto our first Pod. It feels very strange to be without a studio to work in. It's been a long time since I've been without. The house renovations and getting ready for our move to Minneapolis is keeping me plenty busy, but I'm seriously missing making pots.
I'm excited about starting fresh with a whole new body of work from my new studio and (future) new kiln. So I'm selling off most of my inventory. I'm having one last (last minute) Moving Sale this Friday, June 5th from 4pm - 7pm. Everything is at least 50% off. Much of it is marked down even further. I'm finding new gems as I clear off my shelves during the packing process. If you're in Chicago, swing by on Friday after workand say hello and maybe pick up a pot or two. One for yourself and one for that wedding you're going to this summer!

The Details:
Moving Sale - Final Clearance
**everything must go!**
Emily Murphy's Pottery Studio
Friday, June 5
4pm - 7pm
studio 205 west - Lillstreet Studios
Chicago, IL 60640
Do you have a woodkiln?
Do you have a woodkiln? Simon Levin is building a map of woodkilns from around the world. It's a searchable database. What an amazing resource this is going to be! Help out by submitting your kiln or passing this onto someone you know who has a wood kiln.

For privacy reasons only post kilns submitted by the owner's of those kilns will be added.
If you would like to add your kiln to the database: Please email Simon Levin,[email protected]with the following information:
- Type of kiln
- Size in cubic feet
- Street address and zip code
- Any information as to what the kiln building looks like, ex: green roof or to the east of the house
- Contact name and information
- Any website you want linked to the information
This would be a great thing to do for soda kilns too...maybe after I move...
______________________________
Another great project that Simon has been working on is The Studio Potter Collector Card Series. Its a fundraiser for my favorite journal: TheStudio Potter.This is the first in a series of 3 packs of 11 and includes MVP's and Rookies :)

Moving Sale - Mugs and Dinnerware
I'm almost done setting up my studio for this weekend's sale. Displays are getting dusted, pots are getting priced and shelves are getting organized. It's making the prospect of packing up my studio a little less overwhelming.
I've been sharing previewsof my moving sale all week on my blog and I'm continuing today with some shots of mugs for sale. As usual, the photos aren't the best, but they will do. It's a good reminder for me to not paint the wall where my display will be in my new studio light yellow or pale green. I like the colors when I'm in my studio and the pots look good against them in person, but the combo of florescent light and the wall colors just don't look great when I try to take photos of my studio display. There will also not be any florescent lights in my new studio either - but that's not something I need to be reminded of!


And in addition to the mugs, I have plates, pasta bowls and bowls from my shino dinnerware line. These pieces are just very comfortable everyday pots. At least that's how I see them.

______________________________________
The details on the sale:
Emily Murphy'sPottery StudioMovingSale!
Saturday, April 25, 10am - 6pm
at least35%off all pottery*including already marked down sale! priced items.
After 10 years at Lillstreet, Emily'smovingto Minneapolis and doesn't want to move any of the pots in her studio! Help her raise money for her new soda kiln!
2nd floor - studio 205 west - Lillstreet Studios
4401 N. Ravenswood
Chicago, IL 60640
mugs - plates - teapots - vases - pitchers - platters - bowls - bottles - soap dispensers - necklaces - spoon rests - tea bowls- serving trays -tumblers - floor vases - cruets - pasta bowls - wall pieces - tiles
Also forsale:
- art books
- aprons
- pottery display items
- pottery tools
- photo backdrops
*unless otherwise marked
for additional information:
Moving Sale - Practical Pots
______________________________________
It's time to pick up a new soap dispenser for your bathroom and kitchen! Brushed stainless steel or copper tops these soda-fired porcelain and stoneware pots. Why use one of the plastic dispensers that the soap came in when you could have a handmade dispenser next to your sink instead?

One of the galleries that I've worked with for years used to beg me to make honey pots. I put them off for a long time. I make pots that I use, but I had never used a honey dipper before, so I wasn't so keen on the idea. Then I used one and I was totally won over. They're ingeniously designed little utensils. Or if you're not a honey user, you can turn it into a sugar jar by switching out the dipper with a spoon. A honey pot is something that sits out in your kitchen, why nice make it a beautiful handmade pot?

This is one of my newest additions to the practical pots collection. It's a spoon rest for your teaspoon and teabag. The problem: coffee and tea stains on the counter top or edge of the sink from setting your spoon down that you just used to stir your coffee or take out your teabag with. The solution: a little dish that was made to hold your spoon and a teabag. Problem solved.

This is where the spoon rest idea started. When I'm cooking I tend to have many hot pots and pans going at the same time and a spoon, spatula or tongs for each one. The small, narrow spoon rest just won't do! So I started making these large ones that will fit a couple of utensils or an oversizes spatula. And it's low and wide so it's stable and won't get tippy.

The practical pottery collection has evolved over time to include nicely designed pieces that can be used daily and can happily be left out in your home. They are all on sale for 35% off this week (reg. price is between $14 - $40).
______________________________________
The details on the sale:
Emily Murphy's Pottery StudioMovingSale!
Saturday, April 25, 10am - 6pm
at least 35%off all pottery*including already marked down sale! priced items.
After 10 years at Lillstreet, Emily'smovingto Minneapolis and doesn't want to move any of the pots in her studio! Help her raise money for her new soda kiln!
2nd floor - studio 205 west - Lillstreet Studios
4401 N. Ravenswood
Chicago, IL 60640
mugs - plates - teapots - vases - pitchers - platters - bowls - bottles - soap dispensers - necklaces - spoon rests - tea bowls- serving trays -tumblers - floor vases - cruets - pasta bowls - wall pieces - tiles
Also forsale:
- art books
- aprons
- pottery display items
- pottery tools
*unless otherwise marked
for additional information:
Moving Sale: Necklaces

The photos aren't great, but it'll give you a sense of what I have available. I love the punches of color in some of these. I always start craving color during this time of the year. The daffodils are starting to sprout and there are bright green buds on the trees.

The pendants are made out of stoneware and porcelain and then textured and decorated with slips, glazes and underglazes. Each piece is unique. No two are the same. A hand dyed silk cord is knotting on in a decorative pattern. Some are adjustable with sterling silver toggles. Others have a large lobster clasp.

______________________________________
The details on the sale:
Emily Murphy's Pottery StudioMovingSale!
Saturday, April 25, 10am - 6pm
35%off all pottery*including already marked downSale! priced items.
After 10 years at Lillstreet, Emily'smovingto Minneapolis and doesn't want to move any of the pots in her studio! Help her raise money for her new soda kiln!
2nd floor - studio 205 west - Lillstreet Studios
4401 N. Ravenswood
Chicago, IL 60640
mugs - plates - teapots - vases - pitchers - platters - bowls - bottles - soap dispensers - necklaces - spoon rests - tea bowls- serving trays -tumblers - floor vases - cruets - pasta bowls - wall pieces - tiles
Also forsale:
- art books
- aprons
- pottery display items
*unless otherwise marked
for additional information:
Studio Moving Sale!

The sale will be 2 days: Friday, April 24 from 5:00pm - 7:00pm and Saturday, April 25 from 10:00am - 6:00pm at my studio in Chicago.
I will have a huge selection of pottery including soap dispensers, floor vases, mugs, teapots, and tumblers, to name a few. I will also have some gorgeous new ceramic and silk necklaces for sale. Throughout the next week I am going to using my blog to highlight some of the pieces that I'll be selling like these pasta bowls from a shino dinnerware set.

I am also selling stuff from my studio:
- aprons (fun vintage ones)
- stools (short and tall)
- pottery display stuff (bowl stands, dried grasses, bamboo platforms, place mats and tablecloths)
- art books (books on: photographing crafts, business of art, etc...)
- tables, shelving, metal rolling carts
- bats, chucks, various pottery tools
All pots will be marked down at least 35%. Even the pieces that are already on sale will be marked down an additional 35%. And a special bonus will the a bin of $5 pots. Yes, you read that correctly. Those are guaranteed to move quickly!
Have you been waiting to pick up some plates for yourself? Do you have a wedding to go to this summer? And don't forget that Mother's Day is only 3 weeks away! Plan ahead and get some great deals on handmade gifts or something for yourself.
If you can't make it on Friday or Saturday and would like to make arrangements to meet before or after, just send me an emailand we'll figure something out.
A new beginning

Some of you might have noticed that I haven't been posting lately. It's not for lack of want... just a lack of time. Some big changes are in the works. Ian and I just bought a house and we're moving to Minneapolis!
We were caught off guard by our own decision. We've been in Chicago for 10 years and thought the windy city would be the place that we'd be for a very long time to come. But there were some things that we've dreamed of that we just couldn't see happening in Chicago. I've had a vision for years that we'd buy a two flat or a three flat (duplex, triplex depending on where you live). We'd live on one floor, family or friends would live on the other(s) and there would be some shared living space. Of course, a big part of this dream is that I'd have a studio at home and a soda kiln that I can call my own. I've been renting studio space and running the soda program at Lillstreet for the last 9 years, but I've been aching for my own space for quite a while now. Due to the cost of housing in Chicago, it was feeling like our dreams could not be realized in this city.
Last Thanksgiving we were in Minneapolis visiting Ian's family (he grew up in Minneapolis). His sister had just bought a house and started putting on some friendly pressure on us to move there. The discussion was fun but I kept dismissing the idea. I'm not really a fan of big change. On the drive home I had a 'lightbulb' moment. It occurred to me that if we moved there, we could realize this vision of our future that has been so clear for so many years. When I had the moment of realization that the picture was right but we had the city wrong, the decision was simple. We would have a piece of land to take care of. A place to build a kiln. My sister Nora and her two little boys are moving with us to complete the vision. Nora will be starting a PhD program at the University of Minnesota this fall which has been a part of her dream for years.
________________

So this is our new home. Ian and I ignored the lack of heat in the middle of January and mint green walls throughout and fell in love with this building. It's a duplex in the Powderhorn neighborhood in South Minneapolis. (Check out this amazing photo blog of the neighborhood: powderhorn365.com.) We'll live on the 2nd floor, my sister and nephews will be on the first floor. We'll have guest space and Ian's office space in the attic and the basement will be my studio and a shared family room. My soda kiln will be built in the backyard. We're hoping to get the majority of the work done by June so we can move up there and start building out the studio and settling in.
One of the things that we loved about the house was the garage out back (this picture below is a view from the 2nd floor porch). It's actually a carriage barn from the mid-1800's that pre-dates the house (which was built in 1927). For now we'll be just fixing it up, but it has future studio potential. We definitely won't be using it as a garage- but we have some interesting ideas for this interesting space.

We're doing a huge amount of demo and construction on the house. New plumbing, new window inserts, new furnaces and hot water heaters. The picture below is of one of the bathrooms. We "discovered" a window in each bathroom that had been hidden by the tub surround!

________________
I love the location of our house. It's a block and a half from Powderhorn Park, a huge park that we'll be spending a lot of time at! We caught the end of a cool Art Sled Festival last month. Minnesotans are not afraid of winter. One of my favorite things about the location of our new house is that it's only 1/2 block from the Midtown Global Market. The photo below was taken from our front steps. Our block is a dead end so we have a nice quieter street, but it's close to so much.The market has been an amazing resource throughout this project. Quick access to heat and plumbing during February as well as warm coffee and food has been invaluable! I've been using it as an office space during our time up there- using the free wireless and plentiful table space to spend the afternoon making phone calls and writing emails.


If you're in the Minneapolis area, send me an email and say hello! I can't wait to start meeting potters up there. Or if you know of any references for builders, carpenters, landscapers, etc... please pass on any info that you have to me! We're so happy to hire folks to work on the house that we have some sort of connection to.
I'll be posting updates on the projects (house, studio and kiln) in the coming months. For now I'm going to attempt to return to my life in Chicago. We're not actually moving for a couple of months (June maybe?). The renovations have been totally consuming and my studio has been completely neglected. I'm heading to the studio now for the first time in a while. It's time to start working on some tiles for our new kitchen...
Wow. You have to see this method for moving bricks.
(if it's not showing up in your blog reader, make sure you click through to here to see it.)
I'm so blown away by this video. Besides the fact that it's an unbelievable feat, I also have a thing for bricks (that can't be very unusual for a potter).
Thanks to Kumar for posting this incredible video to Facebook. You should check out his recipe for Glögg that he posted to his blog. Ian made up a pot of Kumar's recipe for Christmas Eve. Mmm!
Cooking steel-cut oats in a rice cooker
At least now I know that I'm not the only one who loves waking up on a cold winter's morning to a warm pot of steel-cut oats. Usually that would require someone else getting up early and spend an hour cooking the oats (they take much longer than rolled or quick oats). That's just not going to happen at our house. I used to cook a big pot of oats on Sunday afternoon and then reheat it in the mornings. Still too much work. Then I discovered something great. You can cook them in a rice cooker, set the timer and wake up to a fresh warm breakfast. Here's how I do it...
You'll need:
- A rice cooker. One with a timer is best. If you don't, I think you can still set it up with a plug in timer. I haven't actually tried this, but I think it'll work.
- A rice cooker measuring cup. All rice cookers come with their own measuring cup. Even the $15 ones. They aren't equivalent to a cup.
- Steel-cut oats. They're really cheap if you buy them in bulk. Even from Whole Foods. But you can also get them at a regular grocery store.
- Cinnamon. I go through a lot of cinnamon in the winter so I buy a big thing from Costco.
- Salt & water.

The night before, pour 2 cups (the rice cooker kind) of steel-cut oats into the pot of the rice cooker.

Add cinnamon to taste. I like a lot of cinnamon. I don't ever measure, so I can't tell you how much. But it's probably several tablespoons of cinnamon.

Add salt to taste. Every once in a while I will forget to add the salt and you can really tell it's missing. Mix up the oats, salt and cinnamon well. Cinnamon is a fat soluble spice so it doesn't mix well in just the water. If you mix it up and sort of coat the oats before adding water, it works best.

Add water up to the 5 cup mark. On my cooker, that's as high as I can go. It gives me a thinner consistency but I usually make enough for a couple of days, and thinner is better if you're going to reheat. You can play around with the ratio of oats to water and figure out what works for you. I imagine it's not the same as mine, but you can use it as a starting point.

I then set it to the "porridge" setting and set the timer for the next morning. If you don't have a porridge setting, I'm sure it'll work on the default setting. And again, the timer is something that you could set up if it's not built into your cooker. The key is that the oats have to soak overnight. You could also set up the cooker and let it sit overnight and then turn it on manually in the morning if you're not going to eat it first thing after you wake up.
Our rice cooker is kind of a fancy one, but we use it almost daily between steel-cut oats and brown rice for dinner. You can also make quinoa, your own pilaf and other types of grains. To make quiona, you do the same proportions of quiona to water as you would do rice to water and press start.

In the morning you'll wake up to a nice pot of oats that only took a couple of minutes of actual prep time! I like to add raisins, but I usually add them directly into my bowl. If you add them too early, they'll bloat and lose flavor and texture. And if I have leftovers, I wait until the oats have cooled down before adding raisins and refrigerating the leftovers.
I have two favorite bowls that I always gravitate towards for my morning oats. They're a bit over sized, but I like how the size and shape prevent any spillage when I carry a bowl from the kitchen to my computer where I eat my breakfast while reading through everyone's latest blog posts. What's your morning ritual?

My boxes and bubble wrap are being held hostage!

Yesterday was our warmest day in 2 weeks (we hit a balmy 39°) so I went out back to check out the ice to see if it was melting and I totally wiped out. On my way to the basement steps, I fell down our porch stairs (which were the ones that weren't supposed to be slippery). Ouch! Luckily I ended up without anything broken or sprained. Just bruised and sore. Ian managed to get down the basement steps to clear up the drain to hopefully keep the icy from getting much worse (and snap this picture) .
There are 2 problems with this situation.
1: We can't get to the washer & dryer
2: I can't get to my newly stocked stash of boxes and bubble wrap.
In anticipation of needing to ship a huge dinnerware set to California (and an upcoming move), I placed an order for a slew of boxes, bubble wrap and foam a couple of weeks ago. As usual, I stored it all in our basement (before the ice appeared). I usually try to use recycled packaging, but I did so much shipping over the holiday season, I had completely depleted my supplies. Now the ice is holding all of my shipping supplies hostage! The fall down the steps that weren't very icy has scared me off from trying to rescue my boxes and bubble wrap until there's some major melting. Please send your warm thoughts to Chicago!
Pretty coffee stains


About these pieces:
Stain is a set of a teacups designed to improve through use. This project examines the assumption that use is damaging to a product (For example, scratches on an iPod).
The interior surface of the cup is treated so as to stain more in predetermined places. The more the cups are used, the more the pattern is revealed. Over time they will build up an individual pattern dependent on the users personal way of drinking tea.
I have a soft spot for coffee stained mugs. I don't have any cups that have stains as fancy as these, but my favorite pieces definitely are marked from years of use.
People tend to have very strong opinions on the interior glazing of mugs. I have customers who come in wanting dark glazed interiors so there is no chance of staining. And others who want a light interior so they can see how steeped their tea is. I make some of each depending on the design of the piece. My personal preference is a lighter glaze so I can see how much milk I've added to my morning coffee. What's your?
From my last soda firing
As I mentioned in my last post, I fired my first soda kiln of 2009 last Sunday. I unloaded it on Wednesday between classes and managed to snap a couple of quick pictures in the process. We've been having some crazy weather here in Chicago that has kept me from going back to my studio to spend some time with these pieces and to take more pictures. We've had back to back to back snow storms and it got cold enough for the thermometer to hit -15°F. That meant that I didn't get back to the studio to take some decent pictures before heading out for a road trip, but I thought I'd share a quick sneak peak from the unloading.
I'm hoping that I can figure out a way to capture the surface of this piece. It is full of little sparkly crystals. I've never had crystals develop over such a large area in this kiln before. Of course you can't see them in this picture, but you can see the kiln wash splattered floor in the background!

This is one of the espresso cups and saucers that I mentioned before. This sweet little cup is maybe just under 3" tall. While I was unloading, I discovered that one of these saucers mysteriously made it into the kiln without any wadding... oops!

I'm regretting that I didn't take a pictures that had any sense of scale. This teacup is much larger than the espresso cup above.

Blog odds and ends
Perhaps a little more than usual, this week has been a bit of a balancing act between working in my studio and working on this blog. I've been on a roll getting the new site for my blog up to where I want it to be (obsessed, some might say). But I've also been building up for a soda firing all week. Surprisingly, I think I've actually been making good progress in both sides of my clay world. I'm spending my Sunday firing the my first soda kiln of 2009. There are some espresso cups and saucers that are at about 2200° I'm dying to see in a couple of days!
Today's post is a bunch of odds and ends about blogging that I've been meaning to write about. Nothing big enough for it's own post, so I threw them all together.
Exploring pottery blog(s):
- Take a look at the visual archives (also located in the top tab labeled "Archives"). When I was digging through the old posts and tagging and categorizing everything, I came across a lot of information that is pretty timeless. I wanted to make these older posts really accessible to dig through and came up with this page.

- Also take a look over at the sidebar categories (located in the right hand column. I can't give you a direct link, you'll just have to look to the right side of any page). As I mentioned above, I spent a lot of time re-categorizing and retagging all old posts so they'd be extra easy to search through and I created a parent/sub category system that I think should be pretty easy to dig through to find what you may (or may not be) looking for. This took a shocking amount of work, but now that the archives are done, I can move forward and just keep things properly categorized as I go so there won't be such a big chunk of work moving forward.
- Another new feature that can be found on the right sidebar is some shared posts from other bloggers from my Google Reader. I have been in the habit (not always very consistently) of "starring" posts (a GR thing) that I want to look back at, share a link or maybe comment on. I turned this into a list of posts that you can read on it's very own page and even subscribe to. Now that I have created this way to share, I'm planning on being a bit more consistent with marking posts that I want to share. If you want to share items from your blog reader to your friends and readers, this will help you get started on your own share page.
- Even if you spent some time checking out my pottery blogroll last week, you should take a minute and check back. Several new blogs have been added. And if you're interested in using Google Reader but feel like you need a little more help, you might find this interesting.
Commenting:
One of my goals (or resolutions if you prefer) with this blog and other clay blogs I read is to do more commenting and replying to comments. It takes some time and energy, but it is a big part of blogging that I thoroughly enjoy. I like the commenting/ reply system on Wordpress better than Blogger and I think it'll be easier for everyone (including myself) to continue the conversation on beyond the actual blog post. And I've been adding in a couple of features that improves upon the commenting system just a little bit more.
- If you've been doing any commenting on my blog over the last week, you might have noticed the little pictures (gravatars) that are showing up by some of the comments:
![]()
A gravatar is a globally recognized avatar. You can create your own little image and connect it with you email address(es) and it'll automatically show up with your comment on this blog and on many others. I really like the extra personal touch. It becomes a little more like a conversation than just commenting. It's easy to make your own gravatar and it only takes a couple of minutes.
- To help continue the post-post conversation: Each time you comment, you'll see a little box that you'll need to check so you can get an email when there are more comments and responses to the post that you just commented on.
Some things for bloggers and potential future bloggers:
- Make your own little favicon for your site with this site and this plugin. If you're on my site, you'll see a little tiny mug by the url. This little detail makes me very happy.
- This plugin for Wordpress will make a nice little excerpt and choice of thumbnails when you post your blog to Facebook, etc... I've been really happy with this feature. My old blog would just have the URL, no image and no text which made it not very interesting to post something. Simple and spiffy.
And on a totally unrelated topic: You might remember an earlier post about Bison Trimming Tools. I just got a tip from Jeanette Zeis that Bison Tools are now being sold through Etsy!
It's time for me to head back to the kiln and put the second round of soda in. I'm enjoying the warmth from the kiln on a very chilly (and snowy) Chicago night. Pictures of the new pots will come soon!