Surface Decoration Techniques: faceting with a wire.
Faceting the walls of pots is a great way to change the surface of a piece. The facets can be highlighted with atmospheric firings and glazes that break on high points. There are many ways to facet a pot - wet or leather hard, with a wire or a special faceting tool, with a straight wire or a curly wire. Each choice will give you a different final look. I do have a personal preference for faceting while wet. If you facet right on the wheel after your piece is thrown, you can still alter the shape while pushing out from the inside of the piece and you can "re-throw" the lip which is great for a drinking vessel! And if you happen to go through the wall of your pot, you can still re-wedge the clay and try again.
Below are images of a sample cup of wire faceting techniques:


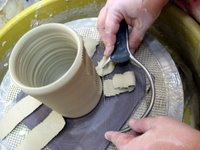
top left: a curly wire that I made that you can see in a previous blog post.
top right: a Bill Van Gilder Wiggle Wire.
bottom left: a Mud Tool straight wire tool.
bottom right: a Mud Tool curly wire.
top right: a Bill Van Gilder Wiggle Wire.
bottom left: a Mud Tool straight wire tool.
bottom right: a Mud Tool curly wire.
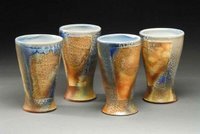
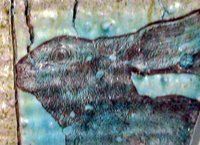
And below you can see the finished result of the sampler cup:

firing: soda fired, c. 10 reduction
slip: top half dipped in Bob Briscoe's Slip for all Occasions
glaze: rutile blue
This is part of my "Surface Decoration Technique" series.
I have been creating, soda firing and documenting simple straight sided cylinders with a variety of surface treatments for examples for my classes and this blog. The original idea was to create demos to show students that aren't specifically "my pieces." The fun result of this project has been that it's given me an excuse to return to things long forgotten and to try some new techniques.
Watch out for upcoming tutorials with lots of pictures and slip and glaze recipes.
How to: make a cut off wire
I have some issues with the standard cut off wire. They can break and it usually isn't easy to replace the wire. Sometimes you need a longer wire to cut off a big platter. And sometimes you want something different from you wire - either a thinner wire or maybe something that will add texture.
To make a cut off "wire" that fits your needs, this is what you need to get started:
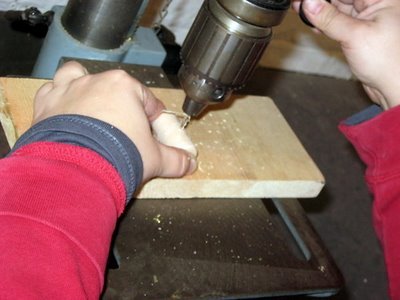 Drill a hole into the center of your cork.
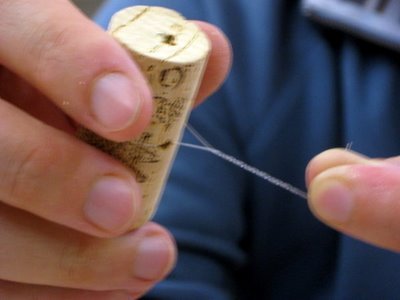 Thread your cord, wire or spring through the cork. If you're using fishing line, thread it through multiple times and tie a couple of knots. If you're using beading wire, use a crimp bead. If you're using a spring or other single ply wire, twist the wire after you thread it through the cork.
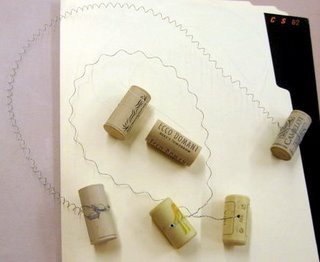

An added bonus: they float!
Next blog post will have some images of the wires in action.
Check out some more of my "How to" posts. If you have any suggestions for future tutorials, send me an email or add a comment!
To make a cut off "wire" that fits your needs, this is what you need to get started:
- A pair of corks. I prefer the rubber wine corks.
- A drill with a small drill bit.
- A wire of some sort: fishing line, thin wire, a stretched out spring.**


An added bonus: they float!
Next blog post will have some images of the wires in action.
**Some ideas for "wires:"
- Fishing line of whatever thickness you prefer. You can find it as hardware stores, Target, craft stores, sporting good stores, etc...
- If you prefer to have an actual wire, beading wire is perfect! There are a bunch of different brands out there. Look for multi-strand braided wire. You can find it at craft stores and anywhere they sell beads. Or you can find it here.
- To make a wavy texture wire, you need to find a spring that is made from a thin gauge wire that will be easy to stretch out. I have found the BEST springs at one of my favorite stores - American Science Surplus in Chicago (and they only cost 20 cents!). Unfortunately, they don't sell the exact wire online, but you can get a package of assorted springs from them here, and I'm pretty sure that you can find something that'll work in the package.
Check out some more of my "How to" posts. If you have any suggestions for future tutorials, send me an email or add a comment!
Ask a Potter: Photography
I regularly get questions emailed to me about clay, kilns, the business of clay, etc... I have decided to start a series "Ask a Potter" where I answer some of these questions on PotteryBlog.com that I think will be interesting and helpful to other readers. Please feel free to share your 2 cents and join in on the dialog!
-----------------------
Who takes your photos? What kind of camera do you use?
-Diane in Georgia
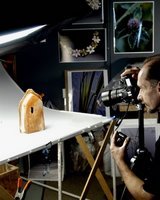 My "professional" images are taken by Guy Nicol in Chicago.
His studio is also at Lillstreet Studios. If you're not in the Chicago area, don't let that stop you, you can ship your work to him.
I have been using Guy for my photos for the last 7 years, and his work is amazing. He specializes in studio arts such as ceramics, jewelry, fibers, etc... I've used the images he taken to apply to shows as well as promotional materials (postcards, business cards, etc...). Some of Guy's images of my work published in exhibition catalogs, 500 Cups (2 images), 500 Pitchers (2 images) and Ceramics Monthly.
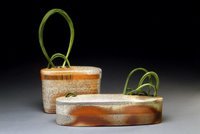
Some examples of photos that Guy has taken for me recently:


-----------------------
Who takes your photos? What kind of camera do you use?
-Diane in Georgia

His studio is also at Lillstreet Studios. If you're not in the Chicago area, don't let that stop you, you can ship your work to him.
I have been using Guy for my photos for the last 7 years, and his work is amazing. He specializes in studio arts such as ceramics, jewelry, fibers, etc... I've used the images he taken to apply to shows as well as promotional materials (postcards, business cards, etc...). Some of Guy's images of my work published in exhibition catalogs, 500 Cups (2 images), 500 Pitchers (2 images) and Ceramics Monthly.
Some examples of photos that Guy has taken for me recently:


I do take lots of photos myself that are posted on this blog. I got a new digital camera early last fall, the Canon PowerShot A570 and I've been really happy with it.
I would say the photos that I take myself fall into 3 categories - personal, studio shots/ works in progress, and images for online selling. I've been dabbling in online selling for a while trying to figure out what outlet I think is best. I'm finally ready to jump into the Etsy pool (more on that to come!) and easy, high quality photos are a necessity.
Below are some photos that I have taken with my digital camera:
Busy busy!
I have some fun blog posts in the works, but they're a bit ambitious and it's taking me longer to get them posted than I thought it would. Here is some other stuff that I'm up to (in no particular order).
Feb. 16th, 2008
I'm so excited to teach a workshop for Earlham Alums! I learned to make pots at Earlham where ceramics was highly supported by the students and faculty. Over the years of having a studio at Lillstreet, I've had a lot of EC alums visit me. Their support of clay as students at Earlham has transformed into a life long appreciation of handmade pots.
If you're an Earlham alum in the mid-west, I hope you can make it to the workshop. Or if you know someone else who is... pass it on!
________
Another Cup? at Baltimore Clayworks curated by Deborah Bedwell.
Jan. 12 - Feb. 23, 2008
I was excited to be invited to be a part of this exhibition. See the pictures 0f the show here.
________
Yunomi Invitational at Akar
I have also been invited to be a part of the Yunomi Exhibition at Akar. I'll keep you posted when the show is online. Right now the pots are in the mail, on their way to Akar.
They have the tea bowls from last year's exhibition online. Take a look, there are some amazing vessels!
________
My plan has been for a long time to redo my main website: sodafired.com
But everything else gets in the way (like making pots, my blog, etc...). But I am trying to at least keep some of the info updated.
Here's the latest:
updated artist statement
________
A new class session at Lillstreet Art Center in Chicago began a couple of weeks ago. Spring session starts mid-March. The classes I'm teaching will be the same next session, but with slightly different days & times.
Advanced Wheel - Throwing and Altering
Tuesdays, 6:30 - 9:30pm
Advanced Topics in Soda: Investigating Materials
Wednesdays, 7 - 10pm
________
The Conversation Continues...
You might remember the show that I was a part of last fall: Being to Being: Collective Conversations in Clay. Check out the website- there are new images of the show (installed) and the process. And it sounds like there will be another show this fall with a new twist. As always, I'll keep you posted!
________
Ask a Potter
I regularly get questions via email from other ceramic artists seeking my advice. There are certain questions that I get over and over again: new graduates asking advice on what to do after graduation; questions about kilns and soda; people coming to visit Chicago wondering what clay focused things there are to do an see when they're in town, etc... I try to answer these questions as best I can within the limitations of my time and knowledge. Last week I got a bunch of emails, many of which are variations on common questions that I get. I thought to myself: "I should use each question and my answer as a blog post." So that's what I'm going to do. And I'm hoping that maybe a dialog can open up and the Pottery Blog readers can help fill in the gaps in my advice with their own knowledge and experiences.
________
Europe, clay?
Ian and I are planning a trip to Europe in mid to late August. We have a wedding to go to in Germany, but other than that, we don't have any specific plans. We're in the VERY early stages of planning (I think we're heading north, Denmark, etc...). Does anyone have any suggestions for clay related things that we should consider doing/ seeing and maybe take in account in our planning? Thanks in advance for the suggestions!
Those are all the updates for now. It's nice to be back!
Feb. 16th, 2008
I'm so excited to teach a workshop for Earlham Alums! I learned to make pots at Earlham where ceramics was highly supported by the students and faculty. Over the years of having a studio at Lillstreet, I've had a lot of EC alums visit me. Their support of clay as students at Earlham has transformed into a life long appreciation of handmade pots.
If you're an Earlham alum in the mid-west, I hope you can make it to the workshop. Or if you know someone else who is... pass it on!
Join fellow Earlhamites, parents, and friends of the College at Lillstreet Art Center for a hands-on workshop with Emily Murphy '99. Each participant will have the opportunity to learn hand building techniques and create his or her own mug or vase. Pieces will be fired and available for pickup approximately 2-3 weeks after the event. All work will be completely non-porous, food-safe, and microwave and dishwasher safe! We will gather at 11:30 for pizza and an opportunity to hear an update from campus!
________
Another Cup? at Baltimore Clayworks curated by Deborah Bedwell.
Jan. 12 - Feb. 23, 2008
I was excited to be invited to be a part of this exhibition. See the pictures 0f the show here.
An invitational exhibition featuring cups from established and emerging ceramic artists. The curator, Baltimore Clayworks' Executive Director Deborah Bedwell believes, “… that a beautifully made cup, which satisfies its utilitarian and/or artistic intention is exactly what our culture needs and answers the question “Does the world need another cup?
________
Yunomi Invitational at Akar
I have also been invited to be a part of the Yunomi Exhibition at Akar. I'll keep you posted when the show is online. Right now the pots are in the mail, on their way to Akar.
They have the tea bowls from last year's exhibition online. Take a look, there are some amazing vessels!
________
My plan has been for a long time to redo my main website: sodafired.com
But everything else gets in the way (like making pots, my blog, etc...). But I am trying to at least keep some of the info updated.
Here's the latest:
updated resume
updated artist statement
________
A new class session at Lillstreet Art Center in Chicago began a couple of weeks ago. Spring session starts mid-March. The classes I'm teaching will be the same next session, but with slightly different days & times.
Advanced Wheel - Throwing and Altering
Tuesdays, 6:30 - 9:30pm
This class is for the proficient thrower to take their wheel work to the next level. We will push, pull and cut the clay on and off the wheel to create new forms on and off the wheel. We will use the wheel to make the basic forms, and then incorporate hand-building techniques to build forms that are out of round.
Advanced Topics in Soda: Investigating Materials
Wednesdays, 7 - 10pm
This class is for advanced students who have had some experience in soda and atmospheric firing, and are looking to investigate the process more deeply. We will be focused on exploring and understanding different clay bodies and dozens of slips. We will look at slides for inspiration and will identify particular finishes that are interesting and exciting. From there, we will study individual materials and how they react in the soda kiln. The end goal will be to create some new and unique finishes through the investigation of materials
________
The Conversation Continues...
You might remember the show that I was a part of last fall: Being to Being: Collective Conversations in Clay. Check out the website- there are new images of the show (installed) and the process. And it sounds like there will be another show this fall with a new twist. As always, I'll keep you posted!
________
Ask a Potter
I regularly get questions via email from other ceramic artists seeking my advice. There are certain questions that I get over and over again: new graduates asking advice on what to do after graduation; questions about kilns and soda; people coming to visit Chicago wondering what clay focused things there are to do an see when they're in town, etc... I try to answer these questions as best I can within the limitations of my time and knowledge. Last week I got a bunch of emails, many of which are variations on common questions that I get. I thought to myself: "I should use each question and my answer as a blog post." So that's what I'm going to do. And I'm hoping that maybe a dialog can open up and the Pottery Blog readers can help fill in the gaps in my advice with their own knowledge and experiences.
________
Europe, clay?
Ian and I are planning a trip to Europe in mid to late August. We have a wedding to go to in Germany, but other than that, we don't have any specific plans. We're in the VERY early stages of planning (I think we're heading north, Denmark, etc...). Does anyone have any suggestions for clay related things that we should consider doing/ seeing and maybe take in account in our planning? Thanks in advance for the suggestions!
Those are all the updates for now. It's nice to be back!
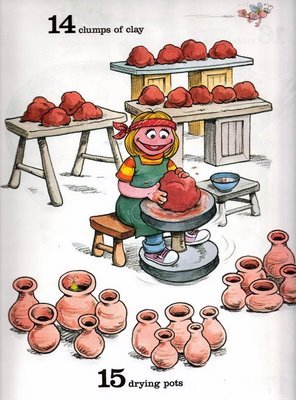
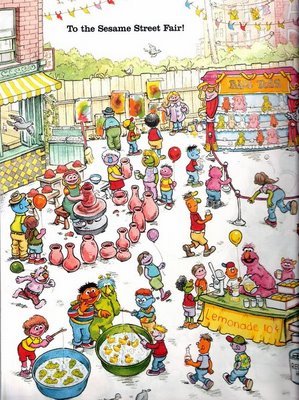
A potter is a person in your neighborhood.

I have always been a fan of kids books. Having 4 little nephews gives me an excuse to add books to my collection. This one book holds a special place in my heart: ABC and 123: A Sesame Street Treasury of Words and Numbers.
A Holiday Tour of Lillstreet Studios
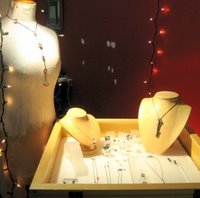
I thought I'd give a little tour of what some of the studios are offering this holiday season at Lillstreet Studios in Chicago. It's truly a unique shopping experience to be able to shop directly from the artists in their studios. I'm including photos of just a sampling of the studios. There are over 50 artists under one roof - and that's not including Lillstreet's Gallery!
ceramics by Emily Murphy
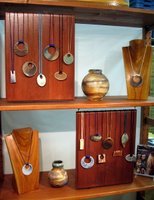
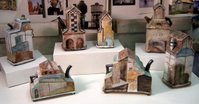
pottery by Karen Avery


porcelain by Deborah Schneider


Photography by Guy Nicol


ceramics by Emily Murphy


ceramics by Lisa Harris

pottery by Karen Avery

pottery by Gary Jackson


porcelain by Deborah Schneider


Photography by Guy Nicol


jewelry by 2nd floor metals artists

Many of the studios are open daily...
check in with individual artists for their hours
check in with individual artists for their hours
Monday - Friday 12noon - 6pm
Saturdays 10am - 6pm
Sundays 12noon - 5pm
Saturdays 10am - 6pm
Sundays 12noon - 5pm
Studio Holiday Sale
Tonight's the night! It's the opening night for the holiday show at my studio at Lillstreet Studios in Chicago. 
If you're in the area, I hope you can stop by tonight, or any time over the next 3 weeks. Details and some pictures to tempt are below.


If you're in the area, I hope you can stop by tonight, or any time over the next 3 weeks. Details and some pictures to tempt are below.

Opening Night Reception
Friday, November 30, 2007 - 6pm - 9pm
Lillstreet Studios
205 west
4401 N. Ravenswood
Chicago, IL 60640
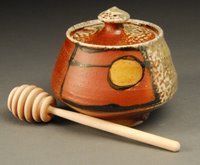
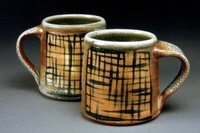

There are over 40 artists at Lillstreet Studios making functional pottery, tiles, sculpture, jewelry, photography, handmade beads and more. If I'm not at my studio, one of my studio mates can help you out. If you want to be sure to meet up with me, just send me an email (emily@sodafired.com).
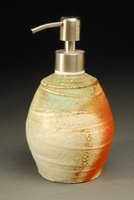
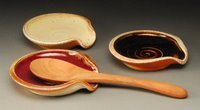 You can probably find something for everyone on your list at Lillstreet Studios. I have some ridiculously functional things that everyone can use. Why shouldn't your soap dispenser be as beautiful and functional as your favorite mug?

And on a much more personal note...
I haven't been writing to my blog much lately because I've had a very happy distraction. My sister, Nora, had a little baby boy, Shiya, on November 18, 2007 at 4:12pm. Congratulations!
I've been spending a lot of time with my sister, baby Shiya and big brother Ayrie. (The happy new family is in the picture to your left!)
Lillstreet Studios
205 west
4401 N. Ravenswood
Chicago, IL 60640
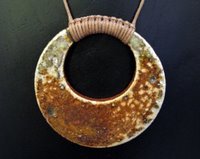
I have a studio full of new work including the ceramic pendants that you see above that hang on a cord of hand dyed silk. You'll also see the familiar faces of mugs, serving bowls, honey pots and more.


weekdays: 12 noon - 6pm
Saturdays: 10am - 6pm
Sundays: 12 noon - 5pm
Saturdays: 10am - 6pm
Sundays: 12 noon - 5pm
There are over 40 artists at Lillstreet Studios making functional pottery, tiles, sculpture, jewelry, photography, handmade beads and more. If I'm not at my studio, one of my studio mates can help you out. If you want to be sure to meet up with me, just send me an email (emily@sodafired.com).

Directions to my studio.
I accept cash, checks, Visa and Mastercard.
It's easy to get to with lots of parking for cars and bikes.
There is a ton of public transportation to help you get there. And the exciting news is that the Montrose Stop on the Brown line is open after a year of renovations!
I accept cash, checks, Visa and Mastercard.
It's easy to get to with lots of parking for cars and bikes.
There is a ton of public transportation to help you get there. And the exciting news is that the Montrose Stop on the Brown line is open after a year of renovations!
------------------------------------------------------------------

And on a much more personal note...
I haven't been writing to my blog much lately because I've had a very happy distraction. My sister, Nora, had a little baby boy, Shiya, on November 18, 2007 at 4:12pm. Congratulations!
I've been spending a lot of time with my sister, baby Shiya and big brother Ayrie. (The happy new family is in the picture to your left!)
Happy Holidays!
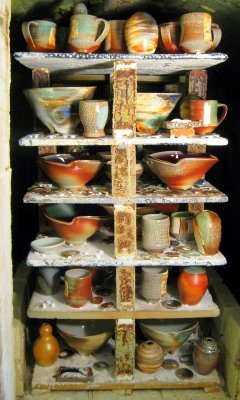
A Happy Soda Firing
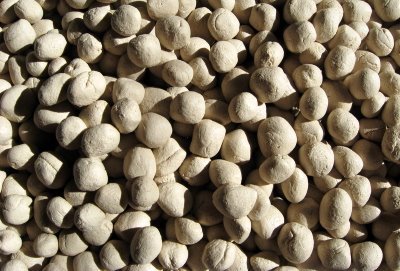
Wadding Recipe for the soda kiln (pretty standard) (by volume):
- 1 part EPK
- 1 part alumina hydrate
- medium grog to taste (not really, but you know what I mean...)
I roll my wads ahead of time and put them in a plastic container (the ones from the local Thai take-out place are the best). Then I glue them to the bottoms of pots before loading (Elmer's glue). Breaking up the wadding into steps keeps my hands cleaner and helps me avoid the problem of getting wadding where it doesn't belong.
(new) Soda Mixture:
Mixed together with 1/4 of a 5 gallon bucket of wood chips. Mix together well, then add enough water (while mixing) to the consistency of oatmeal cookie dough. I add it on an piece of angle iron through the ports on the front of the kiln when c. 9 is soft. (More on this in a future post.)
- 1.75 lbs. of soda ash
- 2.25 lbs. of soda bicarb
- 4 lbs. of whiting
Mixed together with 1/4 of a 5 gallon bucket of wood chips. Mix together well, then add enough water (while mixing) to the consistency of oatmeal cookie dough. I add it on an piece of angle iron through the ports on the front of the kiln when c. 9 is soft. (More on this in a future post.)
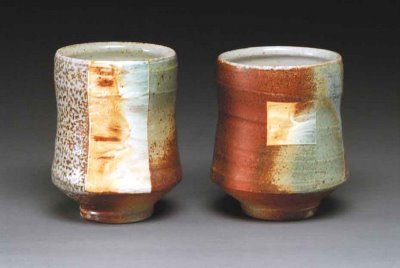
Below are some tea bowls that I got out of this firing.

How to: Make a texture roller for clay
This project is instant gratification. Something that is not that common in the world of clay. With this texture roller, you can use it as soon as the hot glue has cooling, which is very fast. It's a great project to do in a class, or on your own so you have a custom tool that no one else has.
Supplies:
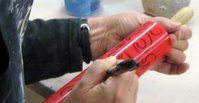 Draw your pattern onto the rolling pin. It's easier to work out the pattern before with a Sharpie than it is later with the hot glue. Think about some sort of connected pattern, they tend to have the best results. And don't go overboard with the lines, you'll regret it later. And remember that the hot glue line aren't going to be perfect, so just go with the imperfection.
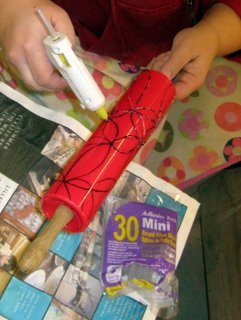
While you're drawing, plug in your hot glue gun. Make sure that you do it on a surface that you can toss when done, like newspaper or cardboard. When you're done drawing on your design, start gluing. Be a bit heavy handed with the glue. If the lines are too thin, they won't show up on the clay as well.
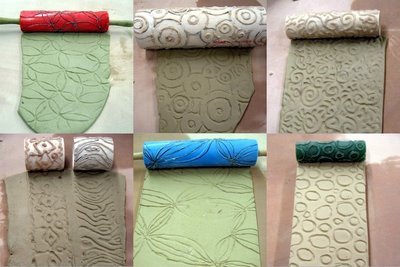 After the glue seems cool, start rolling away... The first attempt might stick a bit, but after there is some dusty clay on the roller, it won't really stick.
If you're not a hand builder, a nice use for one of these textured slabs is in the bottom of a thrown and altered casserole.
Supplies:
- a roller of some sort (cut up pieces of PVC, empty rolls of tape, couplings for PVC, plastic rolling pins from the dollar store or craft store).
- a sharpie.
- a hot glue gun. They only cost a couple of bucks.
- extra hot glue sticks.


While you're drawing, plug in your hot glue gun. Make sure that you do it on a surface that you can toss when done, like newspaper or cardboard. When you're done drawing on your design, start gluing. Be a bit heavy handed with the glue. If the lines are too thin, they won't show up on the clay as well.

If you're not a hand builder, a nice use for one of these textured slabs is in the bottom of a thrown and altered casserole.
Useful web tools for the potter
There are some great web tools out there for ceramic artists that are simple, straightforward and easy to use; not unlike a good pot. You probably aren't surprised that I spend a lot of time both in my studio and online. When a question or problem arises in my studio, I head to Google.
I have put together a collection of these (free!) tools that I use to make fast work of some of the less fun parts of clay- like glaze chemistry and shipping.
Get ready to do some bookmarking!
calculations for the ceramic artist:
Celsius to Fahrenheit calculator and vice versa
weight conversions (grams to pounds, etc...)
basic glaze calculatorMetric/Imperial Converter
metric/ imperial converter from Clayzee
volume calculator - how much does that pitcher hold?
shipping:
compare carriers on iShip. Figure out the best deal on shipping your pots.
USPS postage calculator
UPS time and cost calculator
firing information:
Orton Cone Chart - pdf download
firing temperature color chart - pdf download
firing chart - what happens to clay
other helpful things:
This to That - tips of what sort of glue you should use (surprisingly useful)
Picasa - a FREE photo organization program that makes it easy to edit, print & upload images. A program that I can't imagine owning a digital camera without.
Doodle - create a poll and figure out the best time for a meeting. I have used this a lot when organizing meeting times for an organization (like a guild or co-op).
If you have any web tools that you like to use, send me the link!
Simple Tweaks to a Better Wheel Set-up
I have seen too many potter friends suffer with back problems over the years. It's made me be very conscious about the health of my back and my efforts to stop any problems before they begin. Every potter who throws at a wheel has a different set-up. Although mine is based on a pretty traditional set-up, I have tweaked it enough to be both a more efficient work space and back friendly.
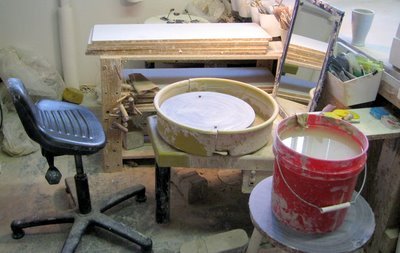 You might notice that there is a 2nd wheel in the background. I have a throwing wheel and a trimming wheel. I love being able to move back and forth between the two wheel and not have to clean up and change the set up. I keep either my Giffin Grip or my foam bat on my trimming wheel. I have it set up in the corner of my studio so I do not track any clay trimmings around my studio.
I know many potters who throw standing up to alleviate any potential back problems. For me this just creates another problem from being on your feet all the time. I think the most important thing I can do is to constantly change my tasks (throwing, trimming, wedging, decorating, glazing, paperwork, cleaning, etc...) and my sitting and standing positions throughout the day. Sometimes I will even give up efficiency for this.
Another thing that I did to help keep my back happy is to get a new throwing stool. After a ridiculous amount of research, I found this great potter's stool: Artisan S-2 Stool that I bought from Clay King. It's totally adjustable- both the height and the tilt. It tilts your hips into your work so your back can stay nice and straight. This has made a HUGE difference for me. I also put my non-pedal foot on a brick to keep me balanced and symmetrical.
You might have also noticed from the picture the mirror in front of my wheel. I started doing this a couple of years ago and it has also made my throwing life much happier. It took me about 2 days to get used to it (I had to remember to look up!). It stops me from constantly cranking my head over to the side to see what my piece looks like. It also makes a huge difference in the forms that I thrown. I can see exactly what is happening by looking straight ahead. You can make sure that each piece you throw actually has the shape that you think it does. The result is that both me and my pots have better posture. My back and neck are straighter and my pots end up having more lift.
 I feel like I've lost a lot of time over the years looking tools on the other side of my splash pan. To stop this problem from continuing, I built this little shelf on the right side of my wheel. All the tools I use regularly are kept right there- nice and easy for me to find. (The mini-Altoids tin is perfect for a pair of bat bins). The tools in the picture are on the list of "clay tools that I cannot live without." (I'll talk about that in another post.) This little shelf mean less bending forward trying to search for the clay covered rib that has slipped under the splash pan.... My throwing bucket sits right in front of the shelf also for easy access (I'm right handed).
I realize how much I miss my tweaked space when I am teaching and do not have this set up.
A couple of (cheap!) things that you can do, even if it's in a shared space, like a classroom:
update (10/29/07)- a post from John Zentner about his standing wheel set-up on his blog pots and other things.
update (10/30/07)- another great post from Anne Webb at Webb Pottery about her favorite tools and her wheel set-up.
update (10/30/07)- an article from the archives of Studio Potter magazine on back problems and potters.
update (10/31/07)- a post from Jeanette Harris about tools that she can't do without.

I know many potters who throw standing up to alleviate any potential back problems. For me this just creates another problem from being on your feet all the time. I think the most important thing I can do is to constantly change my tasks (throwing, trimming, wedging, decorating, glazing, paperwork, cleaning, etc...) and my sitting and standing positions throughout the day. Sometimes I will even give up efficiency for this.
Another thing that I did to help keep my back happy is to get a new throwing stool. After a ridiculous amount of research, I found this great potter's stool: Artisan S-2 Stool that I bought from Clay King. It's totally adjustable- both the height and the tilt. It tilts your hips into your work so your back can stay nice and straight. This has made a HUGE difference for me. I also put my non-pedal foot on a brick to keep me balanced and symmetrical.
You might have also noticed from the picture the mirror in front of my wheel. I started doing this a couple of years ago and it has also made my throwing life much happier. It took me about 2 days to get used to it (I had to remember to look up!). It stops me from constantly cranking my head over to the side to see what my piece looks like. It also makes a huge difference in the forms that I thrown. I can see exactly what is happening by looking straight ahead. You can make sure that each piece you throw actually has the shape that you think it does. The result is that both me and my pots have better posture. My back and neck are straighter and my pots end up having more lift.

I realize how much I miss my tweaked space when I am teaching and do not have this set up.
A couple of (cheap!) things that you can do, even if it's in a shared space, like a classroom:
- Tilt a standard throwing stool by sticking a 2 x 4 under the back 2 legs. You can even drill into the wood about 1/4 - 1/2 an inch so the stool won't accidentally slip off the wood.
- Get a mirror. A hardware store, thrift store or Ikea are all great places to find a mirror. The just lean it up against whatever is in front of the wheel- shelves, a table, a wall. You'll really see a difference in your throwing, and your back might be a bit less achy.
- Keep your tools and water bucket on a stool next to your wheel. You can keep the stool clean by putting a bat on top of the stool, and tools and bucket on top of that.
update (10/29/07)- a post from John Zentner about his standing wheel set-up on his blog pots and other things.
update (10/30/07)- another great post from Anne Webb at Webb Pottery about her favorite tools and her wheel set-up.
update (10/30/07)- an article from the archives of Studio Potter magazine on back problems and potters.
update (10/31/07)- a post from Jeanette Harris about tools that she can't do without.
Empty Bowls - Chicago Style

The request that I'm sending out is for potters, glass blowers, wood turners, and metal smiths of all levels to make a bowl (or 2 or 20) and donate it to Chicago's Empty Bowls event at Lillstreet Art Center. We'd also like for you to come a share a meal, if you're in the area on December 7, 2007 from 6pm - 9pm. For $20, guests are invited to choose a bowl and are served a generous serving of soup and bread made by First Slice Café. Guests keep the bowl as a reminder that there are always “empty bowls in the world.
Lillstreet has a very unique restaurant in it's building (sharing space with the gallery), the First Slice Café. Proceeds from the cafe go to feed Chicago's hungry. They help fight hunger in a very direct way: the food they make for various organizations is the same amazing food that is served in their café. In addition to First Slice making the food for the event, they will also be the recipient of the event's proceeds so they can continue to create healthy meals for these local organizations: Heartland Alliance, The Night Ministry, American Indian Center Youth Program, and Howard Area Alternative High School.
If you would like to participate in this event by donating a bowl, please deliver or mail your bowl(s) by November 18, 2007 to:
Lillstreet Art Center
4401 North Ravenswood
Chicago, IL 60640
Attn: Empty Bowls
If you'd like to join us for a bowl of soup, come to Lillstreet on December 7, 2007 from 6pm - 9pm.
If you have any questions about this event, you can contact the event organizer, Joanna Kramer.
Please help us spread the word by forwarding this to a friend. Thanks!
The bowls that are in the photo above are by Gary Jackson, Fire When Ready Pottery.
A path to being a greener potter.

I think my aversion to actually writing this post that has been in my head is the same thing that stops many of us from creating greener lives. I wanted this post to be epic, to have all of the answers. It was going to be very complete and very satisfying. But that is truly an impossible task. When I think about all of the environmental changes that I want to make at home or at my studio, the ultimate goal is overwhelming and paralyzing. The only way to get past the paralysis is to stop for a moment, and break it down into steps. The steps will get you closer to your end goal, but they are much easier to conquer than taking a gigantic leap.
Here are some steps that I have taken on my path to being a greener potter...
- I use almost all recycled materials for both shipping and retail customers. I actively collect bags, boxes, packing paper and bubble wrap from friends, family, students and customers.
- I recycle my clay scraps and try to aggressively edit unfired work. I don't want to turn greenware that is reclaimable into something that is not if I am not truly satisfied with the piece at that stage.
- I try to make my test pieces as functional pieces (like small cups) that might go on to live a life beyond just testing a slip or glaze.
- I live close to my studio so I can either walk or drive a very short distance. I teach in the same building that I have my studio so I don't have to commute to class too.
- I work in a co-operative type studio that conserves resources in many ways. One specific way is by ordering clay and materials together so there is only 1 delivery truck instead of 20.
- My studio space is small and efficient. Each space has multiple uses. One table can transform from a wedging table to a decorating table to a glaze table to a display table. Much of the furniture in my studio is on wheels so it can be more easily converted.
- My studio display lights are on a timer. My studio is often open to the public even when I am not there, and the timer stops the lights from being on all the time. (Does anyone know of nice track lighting fixtures that are energy efficient?)
- I set up a "free-cycle" area in a common area (hallway) at my studio where the studio artists can pass on unneeded things to the next person.
- I sell my seconds as "flawed yet functional." They are still totally usable, but I can't send them off to a gallery. Customers get to go on a treasure hunt, and give life to a piece that might otherwise be doomed as landfill. In response to the "flawed yet functional" sign in my studio, I once had a customer get teary eyed and tell me that that was exactly how they felt... flawed yet functional.
I know there are people reading this that are working under very different conditions from 60 different countries. Some are students working at a high school, university or art center. There are country potters with lots of land, and urban potters, like me, that are working in a smaller studio. The problems and solutions that you face are going to be very different if you're a tile maker, production potter or a sculptor. I hope that you'll share the steps you take in your clay world to being a little bit greener with the rest of us.
update- 10/15/07 - another clay blogger, Anne Webb, wrote a Blog Action Day post
update - 10/29/07 - Pam McFayden wrote a great post over at lureart ceramics about studio recycling.
Being to Being: Collective Conversations in Clay
This is a virtual tour of a show that I am currently in: Being to Being: Collective Conversations in Clay at Park West Ceramics Gallery in Chicago. The concept for the show is very unsual (remember, I like unconventional things...).
Here's the idea: There are 5 artists, all with different styles of making and decorating. Each artist made 5 pieces. One of the pieces is made start to finish by that original artist. The other 4 pieces are handed off in the leather hard stage to the other 4 artists. Each participant decorates the 4 pieces from the other artists. Carving and cutting, slips and glazes, adding clay pre- and post firing, atmospheric firings and decals were some of the techniques used.
The photos in this post were taken on opening night and aren't actually the best images. Sometime in the next couple of weeks I'll add better images, but I was too excited about this show to wait for those images. But for now, you can get an idea of what the show is all about...
top left: Slipped wood fired with low fire decals by Gina Hutchings.
top right: Cut, carved, slipped, glazed and wood fired by Jay Strommen.
bottom left: Slipped, glazed, punctured, reduction fired, then sewn by Joanna Kramer.
bottom right: Cut, then applied stoneware "staples" and porcelain coil then soda fired by Shane Grimes.
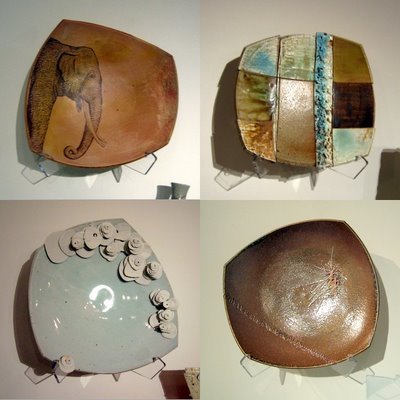

top left: Glazed and wood fired with low fire decals applied by Gina Hutchings.
top right: Slipped, glazed, cut and carved then wood fired by Jay Strommen.
bottom left: Slipped, glazed and soda fired by Emily Murphy.
bottom right: Slipped and carved with stoneware staples and porcelain coils attached and then soda fired by Shane Grimes.

top left: Slipped, glazed, wood fired with decals by Gina Hutchings.
top right: Slipped, punctured, glazed and reduction fired then sewn by Joanna Kramer.
bottom left: Lots of stoneware staples and porcelain coils added, then soda fired by Shane Grimes.
bottom right: Slipped, carved, glazed and then soda fired by Emily Murphy.
The next group is from Shane Grimes. Shane's pieces are thrown and altered. His solo piece has his trademark stoneware staples and incredibly thin porcelain spines/coils attached, then soda fired.
 top left: Cut, carved, slipped, glazed and wood fired by Jay Strommen.
top right: Soda fired then a decal applied by Gina Hutchings (it's a very cool spider).
bottom left: Slipped, cut, punctured, glazed and reduction fired by Joanna Kramer, then sewn.
bottom right: Slipped, glazed and soda fired by Emily Murphy.

The Geisha series is by Gina Hutchings who is also the organizer of the show.
Her piece below is glaze and wood fired with a decal applied.

top left: Stoneware staples and porcelain coils attached then soda fired by Shane Grimes.
top right: Slipped, punctured, glazed, reduction fired then sewn by Joanna Kramer.
bottom left: Slipped, carved, glazed and wood fired by Jay Strommen.
bottom right: Slipped, glazed and soda fired by Emily Murphy.

The next group of photos are some close up detail images. Because of the lighting in the gallery, it was hard to get really good photos on opening night. I hope these detail images help you fill in the gaps. (click on images to make them bigger)


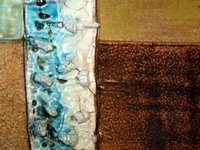
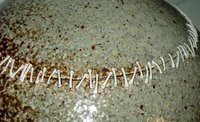
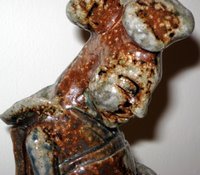

Here's the idea: There are 5 artists, all with different styles of making and decorating. Each artist made 5 pieces. One of the pieces is made start to finish by that original artist. The other 4 pieces are handed off in the leather hard stage to the other 4 artists. Each participant decorates the 4 pieces from the other artists. Carving and cutting, slips and glazes, adding clay pre- and post firing, atmospheric firings and decals were some of the techniques used.
The photos in this post were taken on opening night and aren't actually the best images. Sometime in the next couple of weeks I'll add better images, but I was too excited about this show to wait for those images. But for now, you can get an idea of what the show is all about...
_______________________________________
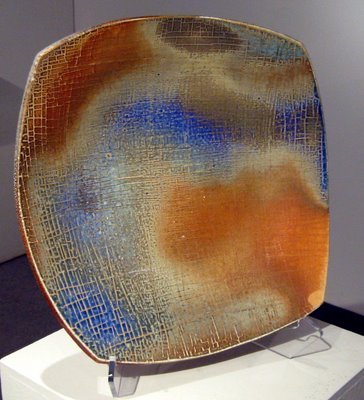
Platter by Emily Murphy. Soda fired with a crackle slip and sprayed glazes.

top left: Slipped wood fired with low fire decals by Gina Hutchings.
top right: Cut, carved, slipped, glazed and wood fired by Jay Strommen.
bottom left: Slipped, glazed, punctured, reduction fired, then sewn by Joanna Kramer.
bottom right: Cut, then applied stoneware "staples" and porcelain coil then soda fired by Shane Grimes.

The next series are porcelain hand built slab "landscape" vases by Joanna Kramer.
Below is her solo piece that is actually two porcelain vases that are sewn together (post firing, of course!).
Below is her solo piece that is actually two porcelain vases that are sewn together (post firing, of course!).

top left: Glazed and wood fired with low fire decals applied by Gina Hutchings.
top right: Slipped, glazed, cut and carved then wood fired by Jay Strommen.
bottom left: Slipped, glazed and soda fired by Emily Murphy.
bottom right: Slipped and carved with stoneware staples and porcelain coils attached and then soda fired by Shane Grimes.

top left: Slipped, glazed, wood fired with decals by Gina Hutchings.
top right: Slipped, punctured, glazed and reduction fired then sewn by Joanna Kramer.
bottom left: Lots of stoneware staples and porcelain coils added, then soda fired by Shane Grimes.
bottom right: Slipped, carved, glazed and then soda fired by Emily Murphy.

The next group is from Shane Grimes. Shane's pieces are thrown and altered. His solo piece has his trademark stoneware staples and incredibly thin porcelain spines/coils attached, then soda fired.

top right: Soda fired then a decal applied by Gina Hutchings (it's a very cool spider).
bottom left: Slipped, cut, punctured, glazed and reduction fired by Joanna Kramer, then sewn.
bottom right: Slipped, glazed and soda fired by Emily Murphy.

The Geisha series is by Gina Hutchings who is also the organizer of the show.
Her piece below is glaze and wood fired with a decal applied.

top left: Stoneware staples and porcelain coils attached then soda fired by Shane Grimes.
top right: Slipped, punctured, glazed, reduction fired then sewn by Joanna Kramer.
bottom left: Slipped, carved, glazed and wood fired by Jay Strommen.
bottom right: Slipped, glazed and soda fired by Emily Murphy.

The next group of photos are some close up detail images. Because of the lighting in the gallery, it was hard to get really good photos on opening night. I hope these detail images help you fill in the gaps. (click on images to make them bigger)


Why Soda Glaze? - by Maryke Henderson
Although there is more all the time, overall there is still very little written about soda (soda firing, soda glazing, vapor glazing, etc...). When I come across something that's written specifically about soda, I get really excited and I want to share my find with all of you.

I recently came across this great article on the Australian ceramics website Avicam: Why Soda Glaze? It's a lengthy excerpt from Maryke Henderson's Bachelor of Arts research report from Australian National University School of Art in 2005. It covers everything from "What is soda?" and the historical background of soda to technical information on soda introduction and it's corrosive effects on kilns. There are profiles of contemporary soda artists as well as a statement about Maryke's own work.
The photos that I have included of Maryke Henderson's work are from Avicam. They are elegant pieces that both intrigue me and make me very nervous. Enjoy the article and the beautiful images. When you're done reading Maryke's article, spend some time wandering around Avicam. It's filled with interesting things to read and some really great pots to look at.


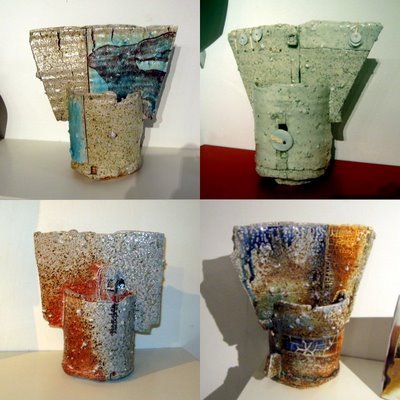
Unconventional Vases

And since I like things that are unconventional, I am doing a show this much that is just that...unconventional. Haus (a wonderful ceramics gallery in Chicago) has coordinated this show for Chicago Artist's Month (which is October). The tables at Anteprima, a fantastic Italian restaurant in Chicago's Andersonville neighborhood have been filled with my oval vases. The vases have been filled by Sunburst Flowers, another Andersonville neighborhood business. I love all the collaboration!
The above image is of one of the beautiful arrangements for the show. The below image is of some of my platters at the restaurant. When Anteprima was opening, I was commissioned to make these platters.

How to make a bat gripper
I went through a period of time early in my ceramics career where I was a tool minimalist. It's something that I think every potter should go through. I had 3 tools that I would use: a wire tool, a wooden knife tool, and a basic wooden rib. I was even flexible with what tool filled those 3 slots. I like the idea that it was really about how I moved the clay, not the tools or gadgets. And I also like the idea that wherever I was in the world, I would be able to throw a pot- regardless of the tools. This idea has also led me to using many different types of clay, and to throw on different types of wheels. It makes me a portable potter. So even though that's my philosophy on clay tools...
..I LOVE TOOLS! I know how to work with the fewest possible tools, but I really enjoy working with many tools. It can allow you to do something with greater ease, or achieve a new surface, or just make you happy because of its cleverness.
At some point over the last 5 or 6 years a little boom of new tools popped up, many as a side business from a potter who was making cool tools for themselves. I'm happy to be a potter during this period. I love trying out different things, and sometimes (many times) I get hooked on one. I am going to be sharing with you some tools that I really love, and some tools that I make myself in the tool section of this blog.
 I loved it for teaching when I was working on a wheel that had worn holes for bat pins to stop the wobble. I also loved it under the little square bats that tend to lift a little when making a tall piece in my studio. But it had a problem where it would start to erode over time (you can see that from the pictures). And then they stopped being made (the material was no longer manufactured). So I had to do something to fill my need of a new Bat Grabber and here is what I did...
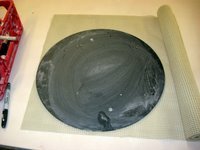

With a Sharpie, I used a bat to trace out the circle and to draw in the placement of the bat pin holes. I made both a 14" circle and a 12" circle. Just because.


Then you cut it out, including the holes.
To use it: dip it in some water and squeeze out the excess. Then stick it on your wheel head, and use a bat on top. Circular, square, plastic, wood or foam covered. They will all stay a little bit more secure with this do-it-yourself bat gripper.


 (Don't forget to make pots when you're not making tools...)
..I LOVE TOOLS! I know how to work with the fewest possible tools, but I really enjoy working with many tools. It can allow you to do something with greater ease, or achieve a new surface, or just make you happy because of its cleverness.
At some point over the last 5 or 6 years a little boom of new tools popped up, many as a side business from a potter who was making cool tools for themselves. I'm happy to be a potter during this period. I love trying out different things, and sometimes (many times) I get hooked on one. I am going to be sharing with you some tools that I really love, and some tools that I make myself in the tool section of this blog.
A tool that I really dug was the Bat Grabber.

I got a roll of rubbery shelf liner. The cheapest one I could find; but I think that any would work. You can probably use a rug pad too.


With a Sharpie, I used a bat to trace out the circle and to draw in the placement of the bat pin holes. I made both a 14" circle and a 12" circle. Just because.


Then you cut it out, including the holes.
To use it: dip it in some water and squeeze out the excess. Then stick it on your wheel head, and use a bat on top. Circular, square, plastic, wood or foam covered. They will all stay a little bit more secure with this do-it-yourself bat gripper.


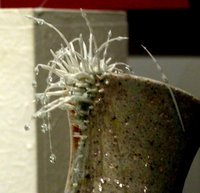
Ceramic pinhole cameras
Ceramic artist Steve Irvine has done something that many artists struggle with (including myself): bringing together two different passions. He has brought together clay and photography with his fantastic ceramic pinhole cameras...
 And this is an image from the above camera:
 He has more ceramic pinhole cameras on his website.
He also makes great pots (that don't double as a camera).

Here is one of his vessels that actually captures an image:


He also makes great pots (that don't double as a camera).

Clay Backdrop for Jewelry
The Sundance catalog/ website has used clay as a backdrop for their artisan made jewelry. Wet slabs, a dirty wooden rib, a kiln post are the displays for their most recent catalog.
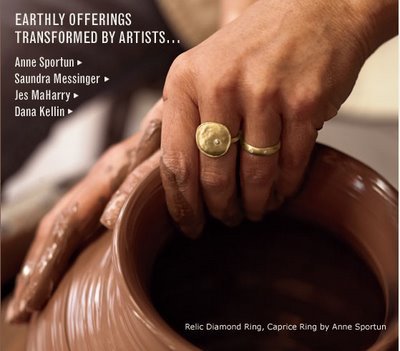
 "There is something about the hands of an artist. The painter's fingers almost permanently stained with pigment, the nimble hands of the weaver in constant motion, the poetic rhythms of the potter." - Robert Redford


8 Random Things
I was tagged with 8 random things by Pam McFadyen from Lurearts Ceramics.
The rules:
1. Let others know who tagged you.
2. Players start with 8 random facts about themselves.
3. Those who are tagged should post these rules and their 8 random facts.
4. Players should tag 8 other people and notify them they have been tagged.
Here I go with 8 random things about myself (in absolutely no particular order)...
1. I have an painted art car. The inside is decked out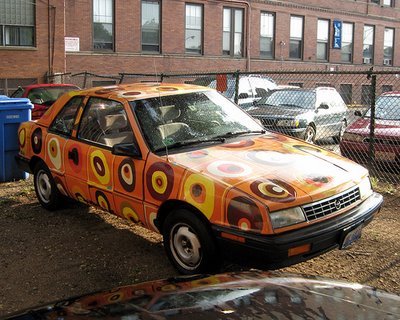 with fringe and all. A couple of years ago Ian and I decided to paint our car to cover up some chipping paint. The result has been lots of smiles and random conversations with strangers- something that should happen more often! The interior fringe was hunted down during a trip to Mexico. I like having a little something special inside the car- besides making me smile, it also reminds me that the outside is painted, and that's why people are looking at the car.
2. Chicago has been my home for the last 8+ years. We've lived in roughly the same area (northside- Lincoln Square/ Uptown/ Ravenswood/ Andersonville) the whole time we've been in Chicago. I run into people I know all the time when I'm out and about. It feels like a small town. You can walk just about anywhere you need to go. The same clerks work at the neighborhood grocery store since we've lived here. I go to the little neighborhood farmer's market every week. Two sites/ blogs I like about Chicago are: The Chicagoist and Gaper's Block.
3. I went to Earlham College where I majored in Art with a double focus in ceramics and metals (class of '99). It's where I met Ian and learned to make pots.
4. I am the hopelessly devoted aunt to 3 (soon to be 4) amazing nephews. Orion, Ayrie and Jonah. I am known to them as Emmy. The photo was taken by Ian last Christmas. They were inside the house and Ian was outside. We have decided that if they ever start a band together, that this will be their first album cover and they will be called the Formidable Murphy Boys.
5. I'm a customer service pro. Friends and family use me to help them work out tough customer service problems. I don't actually enjoy the process of being on hold, but I feel extremely satisfied when I can solve a problem. I have a bit of a love-hate relationship with this particular talent of mine. I've been enjoying the blog: The Consumerist lately.
6. I LOVE my label maker. Actually, I have 2 of them. One for my studio, one for home. You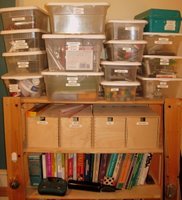 can see a small glimpse of what our office at home looks like from the picture. The label maker is actually sitting on the shelf in front of the books. It actually has it's own labeled bin, but it was out since I had just used it.
I could go on about my love of the label maker, but I think I'll just stop there.
7. I grew up in Keene, NH. I have family in the area, still. I get to visit several times a year. My dad, Jim Murphy, is a painter who is inspired by the beautiful landscape.
8.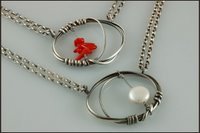 I love jewelry. Handmade beautifully designed jewelry. My favorite jeweler also happens to be a good friend: Sarah Chapman. I love her designs- they are completely original. Her craftsmanship is impeccable. And the pieces have this great ability to go from fitting perfectly with jeans and a t-shirt in the studio to dress up for a night on the town.
The rules:
1. Let others know who tagged you.
2. Players start with 8 random facts about themselves.
3. Those who are tagged should post these rules and their 8 random facts.
4. Players should tag 8 other people and notify them they have been tagged.
Here I go with 8 random things about myself (in absolutely no particular order)...
1. I have an painted art car. The inside is decked out

2. Chicago has been my home for the last 8+ years. We've lived in roughly the same area (northside- Lincoln Square/ Uptown/ Ravenswood/ Andersonville) the whole time we've been in Chicago. I run into people I know all the time when I'm out and about. It feels like a small town. You can walk just about anywhere you need to go. The same clerks work at the neighborhood grocery store since we've lived here. I go to the little neighborhood farmer's market every week. Two sites/ blogs I like about Chicago are: The Chicagoist and Gaper's Block.
3. I went to Earlham College where I majored in Art with a double focus in ceramics and metals (class of '99). It's where I met Ian and learned to make pots.
4. I am the hopelessly devoted aunt to 3 (soon to be 4) amazing nephews. Orion, Ayrie and Jonah. I am known to them as Emmy. The photo was taken by Ian last Christmas. They were inside the house and Ian was outside. We have decided that if they ever start a band together, that this will be their first album cover and they will be called the Formidable Murphy Boys.

5. I'm a customer service pro. Friends and family use me to help them work out tough customer service problems. I don't actually enjoy the process of being on hold, but I feel extremely satisfied when I can solve a problem. I have a bit of a love-hate relationship with this particular talent of mine. I've been enjoying the blog: The Consumerist lately.
6. I LOVE my label maker. Actually, I have 2 of them. One for my studio, one for home. You

I could go on about my love of the label maker, but I think I'll just stop there.
7. I grew up in Keene, NH. I have family in the area, still. I get to visit several times a year. My dad, Jim Murphy, is a painter who is inspired by the beautiful landscape.

8.

