Trimming splash pan
One of the things that I knew I wanted to build in my new studio was a nice big splash pan for my trimming wheel (I have a separate one that I use for throwing). I often use a large foam bat or a Giffen Grip, so a regular splash pan just doesn't work. Plus the clay trimmings can sort of fly all over the place, so I needed something with tall sides. Over the course of the studio construction, I've been brainstorming different designs. Mostly, I've been over thinking it and over designing it. Suddenly last week I had a moment when it hit me- and the solution was thesimplest design of all.
I always like having my trimming wheel in a corner. Since I don't clean up my trimmings every day, I like having it out of the way so I don't track the trimmings around the rest of the studio. So I already had 2 walls next to my wheel. Separating my two wheels is a wedging table. It's bolted to the wall and I decided to add some sides to the table to keep trimmings and wheel splatter from getting over all the stuff stored under the wedging table. So that gave me the 3rd side of my box.
So this is what I came up with:
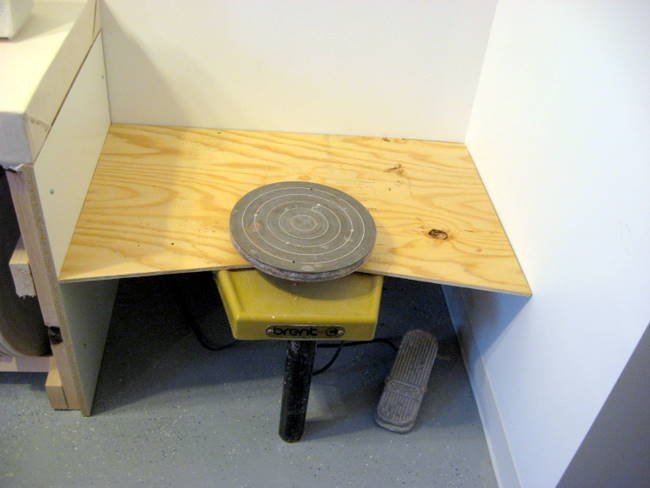
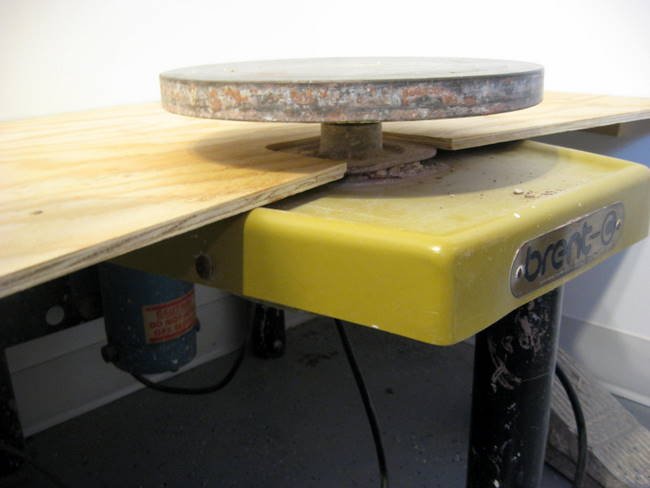
My trimming wheel is a Brent wheel that I picked up 2nd hand from a friend. Brent wheels have a metal plate under the wheel head. A normal splash pan fits under that metal plate. If you put the splash pan above the plate, you'll end up with a spinning splash pan. So I definitely wanted to avoid having anything above the plate, but with plywood, I couldn't fit it below, so I just went around the plate.
Here's a close-up of the plate and how the board fits around it.
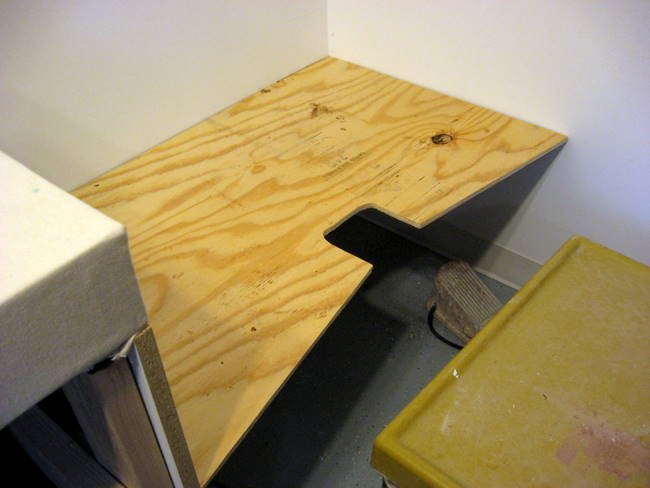
I wanted to be able to remove the "splash pan" for cleaning, or if I wanted to use the wheel to throw occasionally. So it sits on top of 2 strips of wood screwed into the wall and the wedging table.
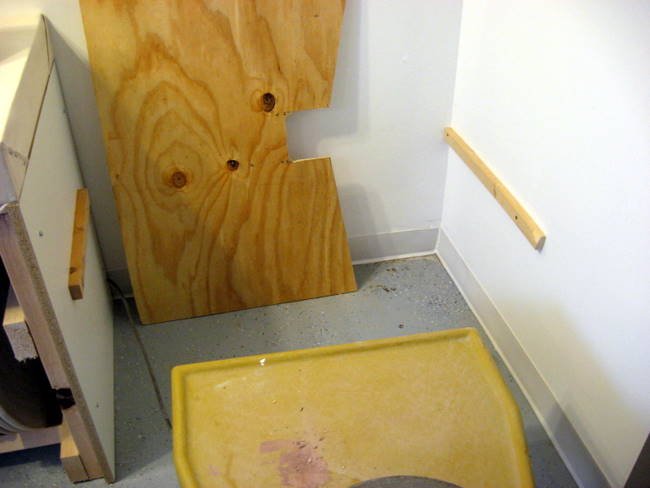
So there you have it. My super simple solution for my trimming splash pan. Of course, odds are you don't have the exact same space as me, but the idea is adaptable.
I would love to see other photos of homemade splash pans, or other studio solutions. Send me an email with a photo and description if you have something to share: emily (at) emilymurphy.com
Besides the new splash pan, it's been a busy week around the studio. The building out of it is just about finished.
I also installed a new clay trap under my studio sink. I'll be posting photos about that on the blog soon. My last work table is built and the casters for it arrived today.
Over on the Emily Murphy Pottery Facebook Fan Page, the conversation has been continuing between blog posts. I can't believe it took me so long to make a Facebook page, I'm having so much fun with it! It's been a great way to connect with people and I'm getting a ton of ideas for blog posts from it. Everyone wants more tool making tutorials!
I recently caught up with several months of pottery blog reading. My Google Reader was full of unread posts. Now that I'm caught up, I've been adding lots of new blogs to my blogroll. I'll be posting about that soon, but if you want to get a jump start, check out my updated list here. Let me know if there are any that I should add that I'm missing. My 2 main criteria are: it must be mostly about clay, and it must have real written content, not just posts that update Etsy, etc... My blogroll is connected to my Google Reader, so I read every blog on the list. So I have to have some sort of limits on it!
I'm heading over to Continental Clay right now to pick up someGrolleg Porcelain! It's (finally!!!!) time to start throwing! I can't wait!
I always like having my trimming wheel in a corner. Since I don't clean up my trimmings every day, I like having it out of the way so I don't track the trimmings around the rest of the studio. So I already had 2 walls next to my wheel. Separating my two wheels is a wedging table. It's bolted to the wall and I decided to add some sides to the table to keep trimmings and wheel splatter from getting over all the stuff stored under the wedging table. So that gave me the 3rd side of my box.
So this is what I came up with:

My trimming wheel is a Brent wheel that I picked up 2nd hand from a friend. Brent wheels have a metal plate under the wheel head. A normal splash pan fits under that metal plate. If you put the splash pan above the plate, you'll end up with a spinning splash pan. So I definitely wanted to avoid having anything above the plate, but with plywood, I couldn't fit it below, so I just went around the plate.

Here's a close-up of the plate and how the board fits around it.

I wanted to be able to remove the "splash pan" for cleaning, or if I wanted to use the wheel to throw occasionally. So it sits on top of 2 strips of wood screwed into the wall and the wedging table.

So there you have it. My super simple solution for my trimming splash pan. Of course, odds are you don't have the exact same space as me, but the idea is adaptable.
I would love to see other photos of homemade splash pans, or other studio solutions. Send me an email with a photo and description if you have something to share: emily (at) emilymurphy.com
________________________________
Besides the new splash pan, it's been a busy week around the studio. The building out of it is just about finished.
I also installed a new clay trap under my studio sink. I'll be posting photos about that on the blog soon. My last work table is built and the casters for it arrived today.
Over on the Emily Murphy Pottery Facebook Fan Page, the conversation has been continuing between blog posts. I can't believe it took me so long to make a Facebook page, I'm having so much fun with it! It's been a great way to connect with people and I'm getting a ton of ideas for blog posts from it. Everyone wants more tool making tutorials!
I recently caught up with several months of pottery blog reading. My Google Reader was full of unread posts. Now that I'm caught up, I've been adding lots of new blogs to my blogroll. I'll be posting about that soon, but if you want to get a jump start, check out my updated list here. Let me know if there are any that I should add that I'm missing. My 2 main criteria are: it must be mostly about clay, and it must have real written content, not just posts that update Etsy, etc... My blogroll is connected to my Google Reader, so I read every blog on the list. So I have to have some sort of limits on it!
I'm heading over to Continental Clay right now to pick up someGrolleg Porcelain! It's (finally!!!!) time to start throwing! I can't wait!
