a pottery studio tour: my sunny basement studio
My studio is really clean at the moment. So before I started making a mess again with throwing, trimming and glaze mixing, I thought I would snap some photos and share with you. I absolutely love looking at other potter's work spaces, and I know I am not the only one! I've been sharing some studio photos here and there on Facebook, but I realized it would be nice to have them all together.
And so our tour begins...
My studio is in our basement. But it really doesn't feel like it, it has lots of light and plenty of space. We bought our house 3 and a half years ago. It was a condemned duplex that was a foreclosure that had been empty for years – but the reason why we fell in love with it was the space... and also that it is a brick house. How could I resist a house made of clay. Even though we saw the house in the middle of a bitter Minnesota winter without any heat or lights, we somehow we saw the potential in it. And long story (very) short: we renovated the whole house and built my dream studio. Every pipe is new and 51 of the 54 windows (yes, you read that right!) were replaced. There was no surface untouched. The studio was the last space that was built out. And I'm still making changes here and there. After renting studio space for so many years, I had been planning my dream space in my head. And it is such a joy to be able to work in this space that is actually mine.
That was a slight side-track. Back to the tour. You have to walk past the laundry room and our pantry and then you'll find my studio door. Right inside of it is a wide hallway that I turned into a display area. As you might have seen in a recent post, my display just got a make-over. I still have some more to do on it, but you can get the idea. This hallway leads into what I call my "clean room."

The clean room has my display, my kiln, my desk, my photography set-up and packing/ shipping area as well as a sink.
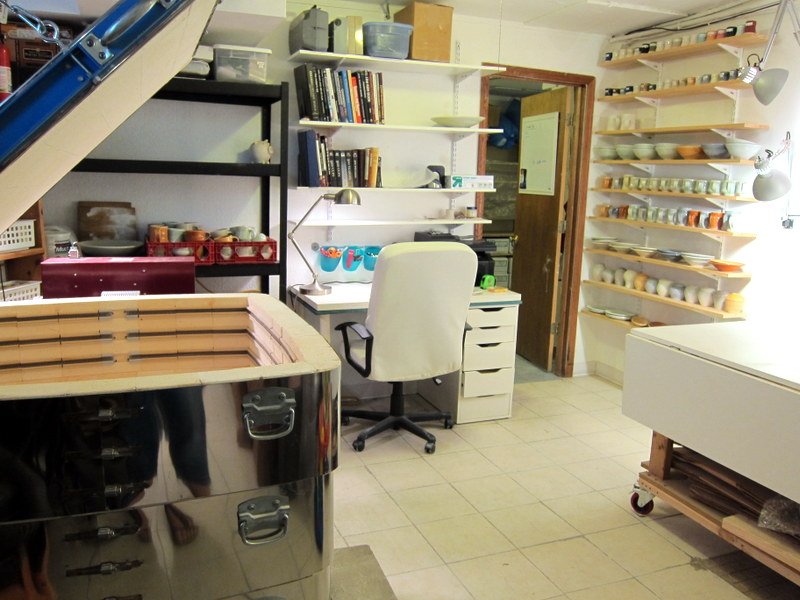
The kiln (an L&L which you can read more about here) came with 1 more ring on it, but when I was pregnant I couldn't load it so I took off a ring to make it a little shorter. It's still quite large. And now that I am working fewer hours than before (life with a 1 year old!), the slightly smaller kiln is great.
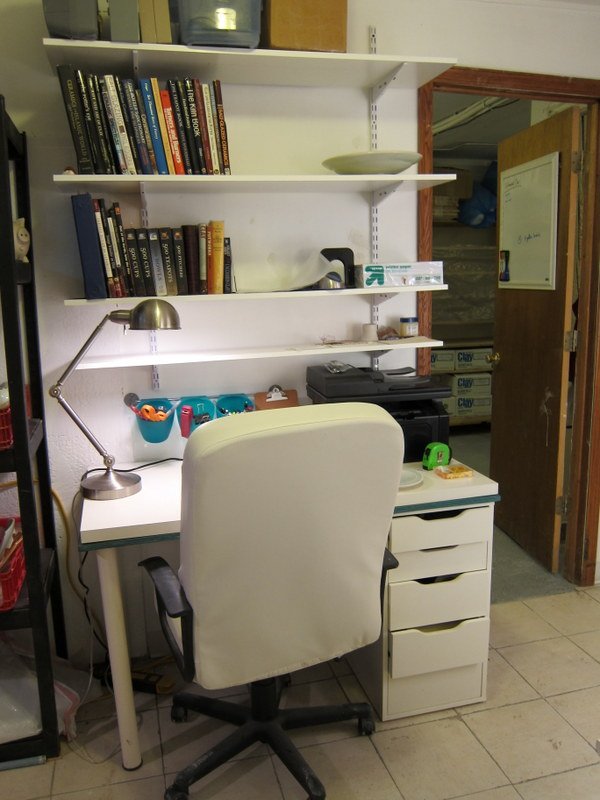
This weekend my husband helped me put up some new shelves in a couple of places in my studio, including above my desk. It's awesome to have this additional space. I recently got a laser printer to start printing some decals that will go on my pots (more on that in a future post!) and I finally got it out of the box this weekend so I can start printing!
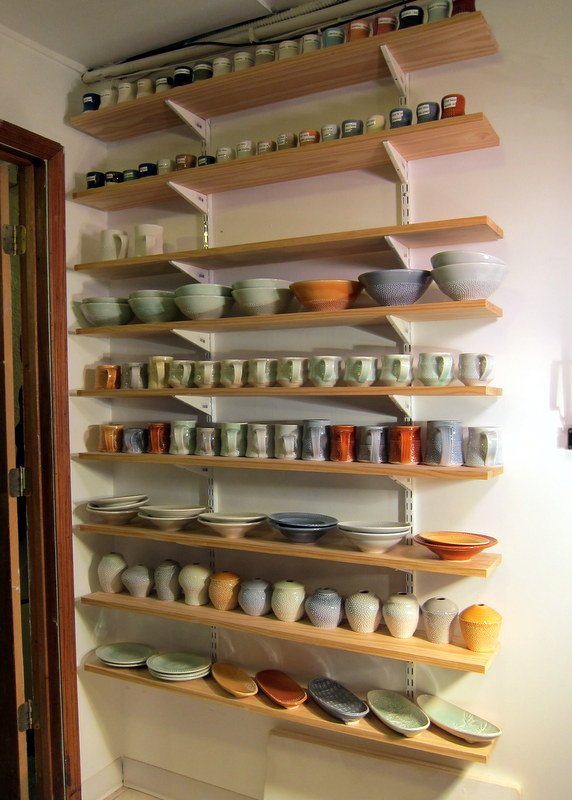
I usually refer to these shelves as "mug shelves." My glaze test tiles/ samples are on the top shelves. The rest are filled up with pots fresh out of this weekend's kiln!
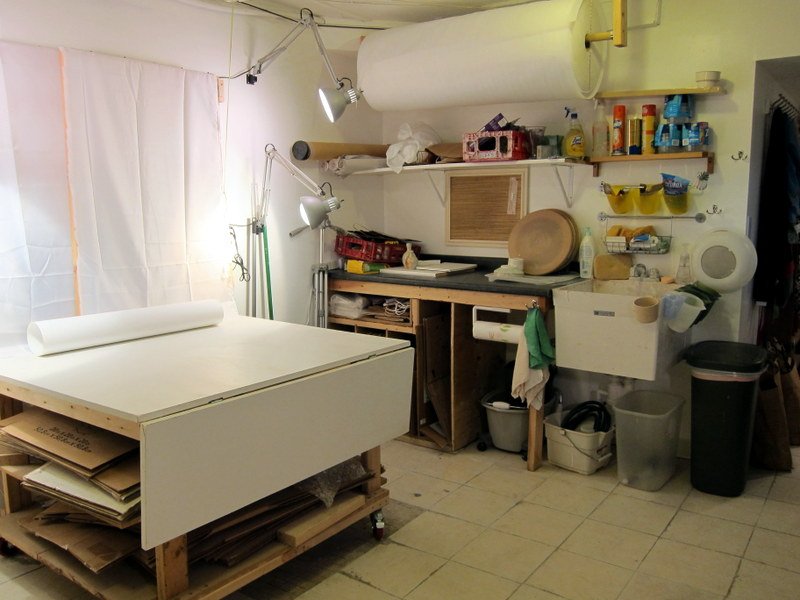
And this area is my photography area, packing and shipping area and, of course, the sink. The photography set-up folds flat against the wall and then opens up when I use it. The next photo shows it opened up. I'll write a more detailed post on the set-up soon. It's pretty great being able take photos so easily. When I was building the space the 2 things that I knew were easy to overlook or cut for lack of space was photography and packing and shipping. I tried really hard to incorporate good set-ups for this. I wish I had even more space for boxes and packing materials- but there were limits. I'm still trying to figure out ways to stash extra bags of peanuts and bubble wrap.

This is the photo set-up opened up. There are lots of adjustments that can be made depending on what's being photographed.
The next room (just past my desk) is the glaze room. It's where I store dry materials, mixed glazes and my homemade spray booth.

The countertop is nice and easy to clean when I make a mess when glazing or mixing up glazes. It was just stock countertop from Home Depot. I got it during a 20% off sale. All the shelves were built to fit my buckets. The buckets on the right usually are under the counter, but I'm in the middle of replenishing my glaze inventory after the last 2 firings.

This is my homemade spray booth. There is usually a filter over that opening, but I threw out the last one that was clogged up with glaze. I'm hoping that I can remember the details of things like the exhaust fan enough to share with you a bit of a tutorial on a DIY spray booth – it's been 2 years since it was built! It's not fancy – but I like it so much better than the commercial booth that I used to use (which had such a weak exhaust fan). And it was way cheaper to build than to buy!
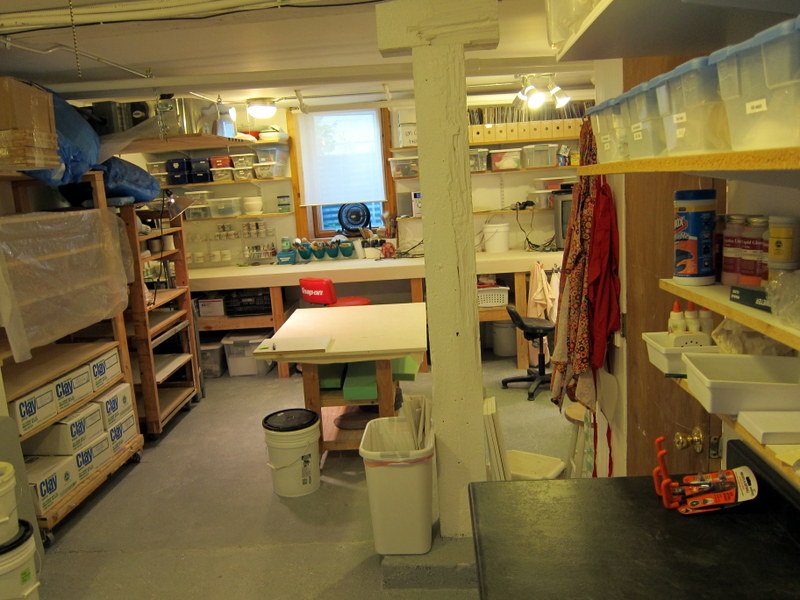
There used to be a wall that split this space into two separate rooms, but it's so much better opened up. Lots of light and great cross-ventilation. The other room is where I make pots. Throw, trim, decorate, hand-build...

If you look up on the left, that's the top ring for my kiln! It has a nice place to, literally, hang out until I decide that I want to go back to the bigger kiln. Below it is a ware cart. The canvas covered countertop is 14 feet long, if I remember correctly.
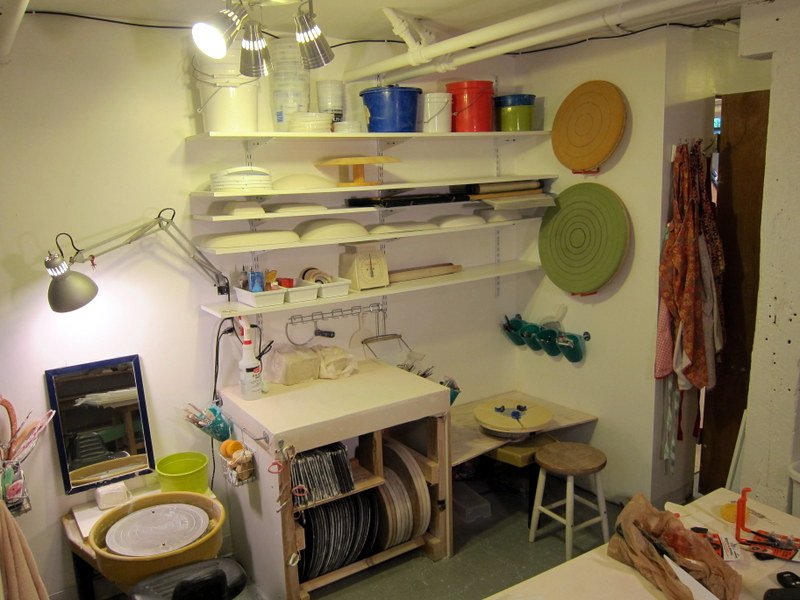
And this last space also got some sweet new shelves this weekend! On the left is my throwing wheel and on the right is my trimming wheel. It's great having separate spaces so I don't have to clean up when switching back and forth between throwing and trimming. I ended up being offered to buy a used Brent C from another potter for next to nothing. At the time I didn't even have space to use it, but I knew it was a deal that I couldn't pass up. So I bought it and stored it until I had space to have 2 wheels.
You can see the bat storage under the wedging table- I love how organized and accessible they are. And I just put up some hooks on the wall to store my foam trimming bats.
If you want to see how to make a foam bat, I have a tutorial on how-to make a foam bat here. And here I wrote about makingthe splash pan for my trimming wheel.
And that's my studio. Thanks for joining me on the tour! I feel so lucky to have this space. It's really a joy to work in. Having a studio at home has made it possible for me to work while I have a little one at home.
And so our tour begins...
My studio is in our basement. But it really doesn't feel like it, it has lots of light and plenty of space. We bought our house 3 and a half years ago. It was a condemned duplex that was a foreclosure that had been empty for years – but the reason why we fell in love with it was the space... and also that it is a brick house. How could I resist a house made of clay. Even though we saw the house in the middle of a bitter Minnesota winter without any heat or lights, we somehow we saw the potential in it. And long story (very) short: we renovated the whole house and built my dream studio. Every pipe is new and 51 of the 54 windows (yes, you read that right!) were replaced. There was no surface untouched. The studio was the last space that was built out. And I'm still making changes here and there. After renting studio space for so many years, I had been planning my dream space in my head. And it is such a joy to be able to work in this space that is actually mine.
That was a slight side-track. Back to the tour. You have to walk past the laundry room and our pantry and then you'll find my studio door. Right inside of it is a wide hallway that I turned into a display area. As you might have seen in a recent post, my display just got a make-over. I still have some more to do on it, but you can get the idea. This hallway leads into what I call my "clean room."

The clean room has my display, my kiln, my desk, my photography set-up and packing/ shipping area as well as a sink.

The kiln (an L&L which you can read more about here) came with 1 more ring on it, but when I was pregnant I couldn't load it so I took off a ring to make it a little shorter. It's still quite large. And now that I am working fewer hours than before (life with a 1 year old!), the slightly smaller kiln is great.

This weekend my husband helped me put up some new shelves in a couple of places in my studio, including above my desk. It's awesome to have this additional space. I recently got a laser printer to start printing some decals that will go on my pots (more on that in a future post!) and I finally got it out of the box this weekend so I can start printing!

I usually refer to these shelves as "mug shelves." My glaze test tiles/ samples are on the top shelves. The rest are filled up with pots fresh out of this weekend's kiln!

And this area is my photography area, packing and shipping area and, of course, the sink. The photography set-up folds flat against the wall and then opens up when I use it. The next photo shows it opened up. I'll write a more detailed post on the set-up soon. It's pretty great being able take photos so easily. When I was building the space the 2 things that I knew were easy to overlook or cut for lack of space was photography and packing and shipping. I tried really hard to incorporate good set-ups for this. I wish I had even more space for boxes and packing materials- but there were limits. I'm still trying to figure out ways to stash extra bags of peanuts and bubble wrap.

This is the photo set-up opened up. There are lots of adjustments that can be made depending on what's being photographed.
The next room (just past my desk) is the glaze room. It's where I store dry materials, mixed glazes and my homemade spray booth.

The countertop is nice and easy to clean when I make a mess when glazing or mixing up glazes. It was just stock countertop from Home Depot. I got it during a 20% off sale. All the shelves were built to fit my buckets. The buckets on the right usually are under the counter, but I'm in the middle of replenishing my glaze inventory after the last 2 firings.

This is my homemade spray booth. There is usually a filter over that opening, but I threw out the last one that was clogged up with glaze. I'm hoping that I can remember the details of things like the exhaust fan enough to share with you a bit of a tutorial on a DIY spray booth – it's been 2 years since it was built! It's not fancy – but I like it so much better than the commercial booth that I used to use (which had such a weak exhaust fan). And it was way cheaper to build than to buy!

There used to be a wall that split this space into two separate rooms, but it's so much better opened up. Lots of light and great cross-ventilation. The other room is where I make pots. Throw, trim, decorate, hand-build...

If you look up on the left, that's the top ring for my kiln! It has a nice place to, literally, hang out until I decide that I want to go back to the bigger kiln. Below it is a ware cart. The canvas covered countertop is 14 feet long, if I remember correctly.

And this last space also got some sweet new shelves this weekend! On the left is my throwing wheel and on the right is my trimming wheel. It's great having separate spaces so I don't have to clean up when switching back and forth between throwing and trimming. I ended up being offered to buy a used Brent C from another potter for next to nothing. At the time I didn't even have space to use it, but I knew it was a deal that I couldn't pass up. So I bought it and stored it until I had space to have 2 wheels.
You can see the bat storage under the wedging table- I love how organized and accessible they are. And I just put up some hooks on the wall to store my foam trimming bats.
If you want to see how to make a foam bat, I have a tutorial on how-to make a foam bat here. And here I wrote about makingthe splash pan for my trimming wheel.
And that's my studio. Thanks for joining me on the tour! I feel so lucky to have this space. It's really a joy to work in. Having a studio at home has made it possible for me to work while I have a little one at home.
